Woodland Fox Crochet Basket
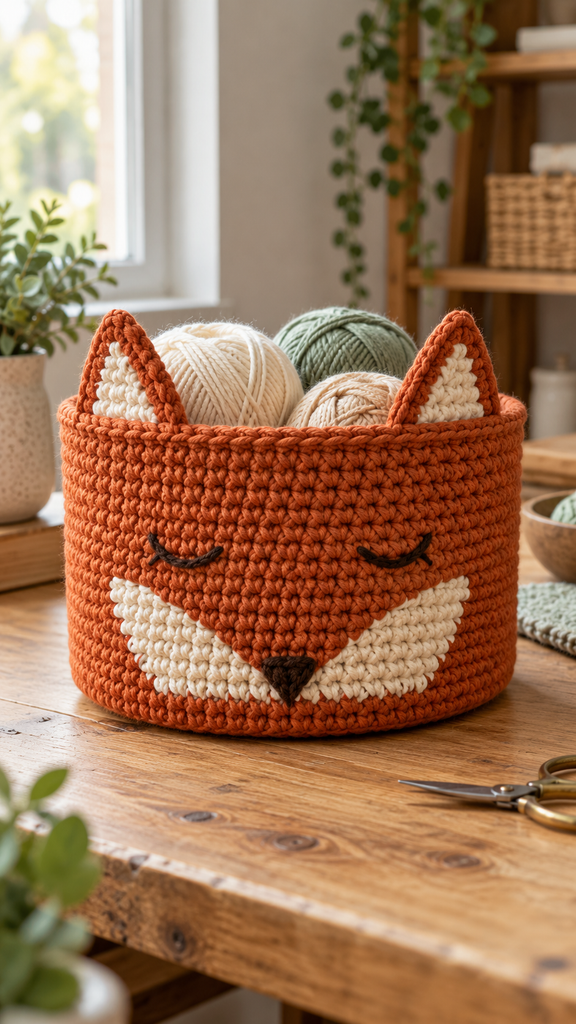
A handmade basket is useful on almost any craft table, and a small woodland face gives it an extra touch of character. This Woodland Fox Crochet Basket combines a rust-colored body, pointed ears, cream cheek patches, and sleepy embroidered eyes. It is designed to hold a few yarn balls, folded washcloths, or lightweight desk supplies.
The supplied Like a Fox! Blanket PDF inspired the woodland theme and warm orange palette. This project changes the format completely: a small open storage basket replaces the hooded blanket, with a circular base, upright single-crochet sides, new flat ear pieces, and an embroidered face. The blanket instructions, hood shaping, and source photographs are not reproduced.
Pattern status: The stitch arithmetic and shaping sequences have been checked, but this newly drafted pattern has not been physically crocheted or sample-tested. Dimensions, yarn quantities, and firmness are provisional. The photographs are AI-generated concept illustrations. Follow the written instructions for stitch counts and use a swatch to assess whether your fabric can support the basket shape.
A Practical Project With Woodland Charm
The basket begins with a flat circle worked in continuous rounds. One back-loop round creates a subtle turning line between the base and the walls. Straight rounds build the body, and a reverse single crochet finish adds a small cordlike edge around the opening.
The face is assembled after the body is complete. Two tapered cream patches suggest a fox’s pale cheeks, while a few embroidered stitches form the nose and eyes. The triangular ears are flat rather than stuffed, keeping the appearance simple and the opening accessible.
This is a decorative container for lightweight items. Its structure comes from dense crochet fabric, not wire or a rigid insert. The yarn and hook combination will determine how well the sides stand. If your practice fabric collapses, adjust that combination before making the full basket.
Project Details
| Feature | Planned specification |
|---|---|
| Project | Small open fox storage basket |
| Skill level | Confident beginner comfortable with increases and decreases |
| Terminology | US crochet terms |
| Base | 14 rounds, ending with 84 sc |
| Body | 18 upright rounds at 84 sc each |
| Approximate size | 19 cm / 7½ inches across; 12 cm / 4¾ inches tall, excluding ears |
| Details | Two ears, two cheek patches, embroidered eyes and nose |
| Main technique | Dense single crochet in continuous rounds |
Materials and Yarn Selection
- Firm, smooth bulky cotton or cotton-blend yarn: rust A, cream B, and a small amount of dark brown C for embroidery.
- A provisional allowance of about 200–250 m / 220–275 yd A, 30–40 m / 33–44 yd B, and a few meters of C. Actual use needs to be established from a sample.
- A 5 mm crochet hook as a starting point, with nearby sizes available for adjustment.
- A blunt tapestry needle, scissors, tape measure, and several removable stitch markers.
You can also experiment with two strands of a compatible lighter cotton held together, but do not assume the same gauge or yarn length will result. Swatch first. When using two strands, buy enough length for both strands throughout the project.
Choose a yarn that shows the stitch tops clearly. A soft fluffy yarn may create an appealing toy-like surface but give less support to the walls. Smooth cotton is also easier to embroider through and makes the contrast between the rust and cream pieces easy to see.
Keep the dark brown yarn reasonably close in thickness to the main yarn, or use a smaller strand for finer features. Test a few embroidery stitches on your swatch to see whether the lines remain visible without overwhelming the little face.
Abbreviations and Stitch Guide
- ch: chain.
- sc: single crochet.
- inc: work 2 sc in one stitch.
- sc2tog: single crochet two stitches together; decreases by one stitch.
- sc3tog: single crochet three stitches together; decreases by two stitches.
- BLO: back loop only.
- sl st: slip stitch.
- st / sts: stitch / stitches.
- RS / WS: right side / wrong side.
For sc2tog, insert the hook in the next stitch and draw up a loop, then repeat in the following stitch. Yarn over and pull through all three loops. For sc3tog, draw up a loop in each of the next three stitches, yarn over, and pull through all four loops.
Work the basket in continuous rounds without joining or turning. Move a marker into the first stitch of every new round. For the flat ears and cheek patches, turn after each row. Their turning ch 1 does not count as a stitch.
Reverse single crochet is also called crab stitch. Work ordinary single crochet stitches in the opposite direction to your normal crochet direction: right-handed crocheters usually work from left to right for this edging. If that technique feels uncomfortable, the pattern includes a plain single crochet alternative.
Gauge and Fabric Check
The planning gauge is approximately 14 sc and 16 rows per 10 cm / 4 inches in firm single crochet. This is a target, not a measured gauge from a completed sample. Basket firmness matters as much as matching a number.
Make a swatch at least 12 cm square, then wash and dry it as you intend to care for the basket. Measure the central area without stretching. Fold part of the dry swatch upward and assess whether it has enough body to suggest a standing wall.
If the stitches are loose or large gaps appear, try a smaller hook or a firmer yarn. If it is painful to insert the hook, loosen your tension or reassess the hook size. Aim for dense, workable fabric rather than extreme tightness.
An 84-stitch circumference at this gauge is about 60 cm, corresponding to approximately 19 cm in diameter. The finished size can change with your tension, base shape, edging, and contents. Measure the actual base before deciding whether it suits your intended storage space.
Crochet the Basket Body
Step 1: Begin the Flat Base
With rust A, make an adjustable ring.
Round 1: Work 6 sc into the ring. Pull the ring closed. 6 sts. Place a marker in the first stitch. Secure the starting tail through stitch bases on the WS after a few rounds so the center cannot loosen easily.
Round 2: Inc in every stitch around. 12 sts.
Round 3: (1 sc, inc) 6 times. 18 sts.
For Rounds 4–14, continue adding six stitches each round, following the table. The number in the middle column tells you how many ordinary sc come before each increase. Each listed repeat is worked six times around.
| Round | Repeat six times | Total sc |
|---|---|---|
| 4 | 2 sc, inc | 24 |
| 5 | 3 sc, inc | 30 |
| 6 | 4 sc, inc | 36 |
| 7 | 5 sc, inc | 42 |
| 8 | 6 sc, inc | 48 |
| 9 | 7 sc, inc | 54 |
| 10 | 8 sc, inc | 60 |
| 11 | 9 sc, inc | 66 |
| 12 | 10 sc, inc | 72 |
| 13 | 11 sc, inc | 78 |
| 14 | 12 sc, inc | 84 |
The repeated increase positions may give the base a softly hexagonal outline. This is acceptable for this simple construction. Smooth it gently into shape when blocking; do not try to hide a major ruffle or cup by stretching the fabric.
If the base is strongly cupped, recount the increases and check your gauge. If it waves, verify that you have not added extra stitches at the marker. Resolve any obvious shaping problem before beginning the walls, because those issues will affect the finished basket.
Step 2: Turn Up the Sides
Round 15: Sc BLO in all 84 stitches. 84 sts. This is the only back-loop round. The unused front loops form a small line around the base.
Rounds 16–32: Working through both loops again, sc in every stitch around. 84 sts per round. There are 18 wall rounds in total, including Round 15. Do not increase or decrease on the walls.
As the sides grow, keep the intended RS facing outward and gently encourage the fabric upward. A straight-sided basket should not need to be stretched into shape. Check the count every few rounds and keep your tension consistent with the base.
Step 3: Finish the Rim
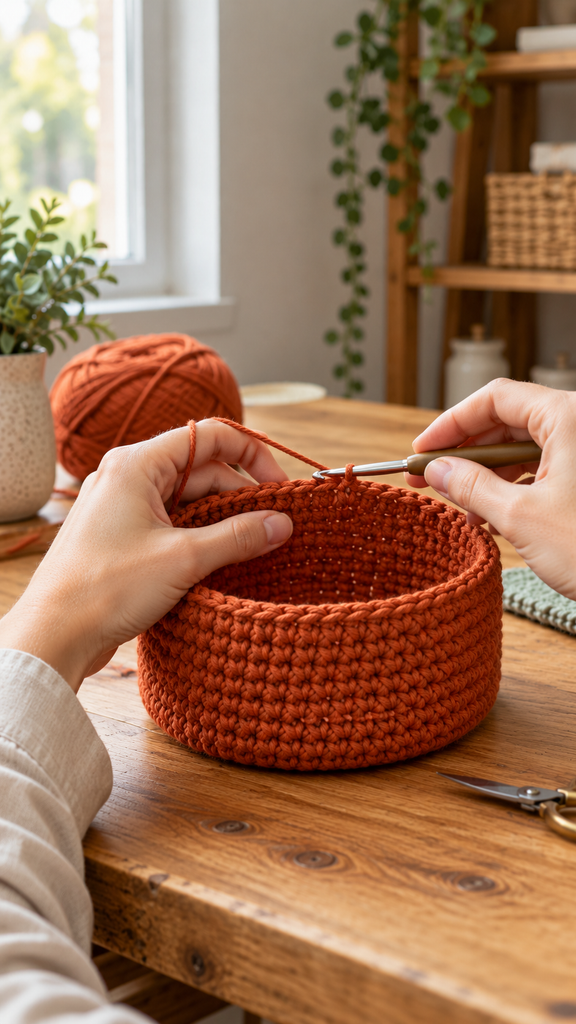
After Round 32, sl st in the next stitch to level the working position. This slip stitch is not an additional body stitch. Ch 1 and work one reverse sc into each of the 84 actual stitches of Round 32, traveling in the opposite direction. Join neatly to the first reverse sc and fasten off.
If you prefer a plain edge, omit the reverse sc: after Round 32, work one more continuous round of 84 ordinary sc, then sl st in the next stitch and fasten off. Choose one finish for the whole rim. The plain version will have a less cordlike appearance.
Weave in the rim tail on the inside without pulling the opening tight. Set the basket on a flat surface and assess the walls before attaching any decorations. Light shaping may help, but a very soft basket needs a firmer yarn or adjusted hook rather than more facial pieces.
Make Two Pointed Ears
Outer Ears: Make Two in Rust A
Row 1: Ch 10. Sc in the second chain from the hook and across. Turn. 9 sc.
Row 2: Ch 1, sc2tog, sc in the next 5 sts, sc2tog. Turn. 7 sc.
Row 3: Ch 1, sc across. Turn. 7 sc.
Row 4: Ch 1, sc2tog, sc in the next 3 sts, sc2tog. Turn. 5 sc.
Row 5: Ch 1, sc across. Turn. 5 sc.
Row 6: Ch 1, sc2tog, sc in the next st, sc2tog. Turn. 3 sc.
Row 7: Ch 1, sc across. Turn. 3 sc.
Row 8: Ch 1, sc3tog. 1 sc. Fasten off and weave the tip tail into the reverse. Leave or attach a separate long rust strand at the nine-stitch base for sewing the ear to the basket.
Inner Ears: Make Two in Cream B
Row 1: Ch 6. Sc in the second chain from the hook and across. Turn. 5 sc.
Row 2: Ch 1, sc2tog, sc in the next st, sc2tog. Turn. 3 sc.
Row 3: Ch 1, sc across. Turn. 3 sc.
Row 4: Ch 1, sc3tog. 1 sc. Fasten off, leaving a sewing tail.
Center an inner triangle on each outer ear, with both points facing upward. Sew around the cream patch with small stitches, leaving a visible rust margin. Keep the outer ear flat so it can stand without a heavy, gathered seam.
Crochet the Cream Cheek Patches
Make two in B. Each patch is a tapered diamond worked from one narrow end to the other. The broad middle can be tilted during assembly to suggest the pale sides of a fox’s muzzle.
Row 1: Ch 2. Sc in the second chain from the hook. Turn. 1 sc.
Row 2: Ch 1, work 3 sc in the single stitch. Turn. 3 sc.
Row 3: Ch 1, inc, 1 sc, inc. Turn. 5 sc.
Row 4: Ch 1, inc, 3 sc, inc. Turn. 7 sc.
Row 5: Ch 1, inc, 5 sc, inc. Turn. 9 sc.
Row 6: Ch 1, sc across. Turn. 9 sc.
Row 7: Ch 1, sc2tog, 5 sc, sc2tog. Turn. 7 sc.
Row 8: Ch 1, sc2tog, 3 sc, sc2tog. Turn. 5 sc.
Row 9: Ch 1, sc2tog, 1 sc, sc2tog. Turn. 3 sc.
Row 10: Ch 1, sc3tog. 1 sc. Fasten off, leaving a long sewing tail. Smooth both patches and compare their sizes before attaching them.
Arrange and Sew the Fox Face
Choose the front of the basket away from the round marker line if possible. Use removable markers to test the ear and cheek positions before sewing. The body has 84 stitches around; the front half spans about 42 stitches, giving a useful area for arranging the face.
Set the ear bases along the rim approximately 24 stitches apart, centered over your chosen front. Sew each nine-stitch base across a matching section of the upper wall, just below the finished rim. Add a second line of small securing stitches into the next wall round below. Keep the opening clear rather than folding the ears over it.
Place the cream diamonds diagonally on the upper-middle front, with their lower inward points approaching each other near the center. Leave room above them for the eyes and below the rim for the ears. Sew around each cream edge with small stitches, checking that the wall remains smooth.
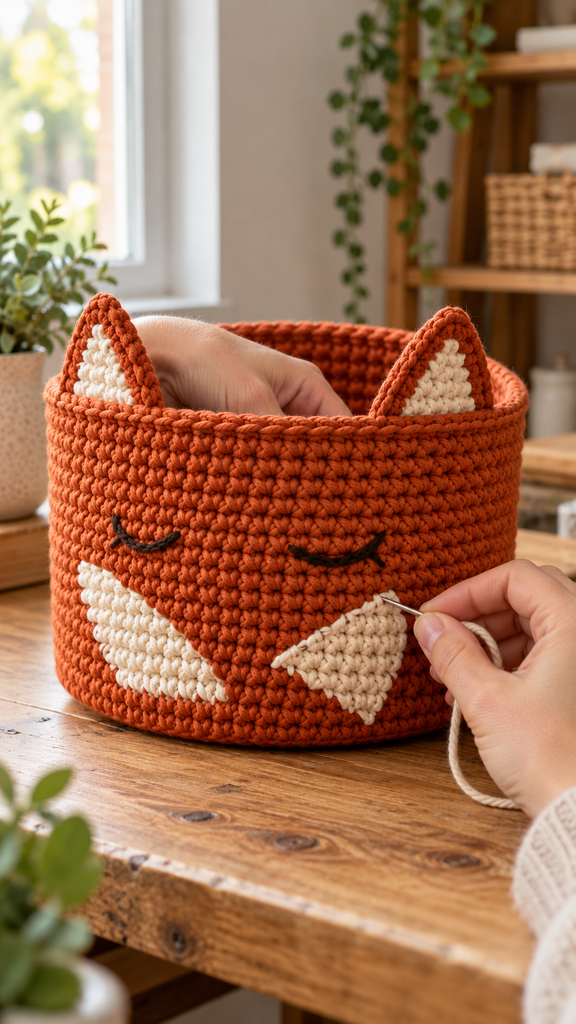
With C, embroider a small downward-pointing triangular nose where the inner cheek points meet. Outline a triangle about two stitches wide and fill it with a few short stitches. Add a tiny vertical stitch beneath it if desired.
Embroider one shallow curved closed eye above each cheek using short backstitches. Keep the expression simple and the stitches relaxed. Secure all ends on the inside through several stitch bases, changing direction before trimming. Remove every placement marker and inspect the inside for loose loops.
More Information: Use, Care, and Personalization
Use the basket for lightweight contents that sit below the ear tips. A few small yarn balls show the handmade texture without stretching the opening. Heavy tools or tightly packed supplies may cause the walls to lean or bulge, especially with softer yarn.
Follow the yarn label for washing and drying. Shape the damp basket gently over a clean container of a suitable size if the care instructions permit, then let it dry completely. Avoid stretching the opening around a container wider than the original basket.
For another woodland palette, try cinnamon rust, oatmeal cream, and espresso embroidery. The same construction can suggest a different animal if you change the ear shape and facial arrangement, but new pieces should be drafted and checked separately.
To change the basket size, adjust the base first and then maintain its final stitch count on the walls. Additional base rounds each add six stitches using the established sequence. A wider basket may need firmer yarn to remain upright; size changes require fresh estimates for yarn, height, and face placement.
Frequently Asked Questions
Is this suitable for a beginner?
It suits someone who knows single crochet and can count increases and decreases. Make one ear and one cheek patch as practice before starting assembly. The basket body itself uses a simple repeated stitch.
Why are my basket sides floppy?
The fabric may be too soft for the shape. Try a firmer cotton, a smaller hook, or a suitable doubled yarn after swatching. The facial pieces do not provide structural support, and the basket is intended for lightweight contents.
Do I join every round?
No. The base and body use continuous rounds with a movable marker. Only the final rim is joined. Joining every body round would change the appearance and could add accidental stitches.
Can I use plastic eyes?
This draft uses embroidered closed eyes, so no separate eye hardware is needed. The simple curved stitches also suit the sleepy expression and keep the face easy to customize.
What if the ears bend outward?
Check that the base is attached securely with two lines of stitches and that the cream patch has not gathered the outer ear. A firmer yarn may be needed. These ears are flat crochet pieces, so some natural flexibility is expected.
Are the pictures exact technical demonstrations?
They illustrate the intended appearance and general working stages. They are AI-generated concepts and may not show exact stitch counts or needle placement. Use the written instructions and your actual fabric for technical decisions.
Has this pattern been physically tested?
No. The arithmetic has been reviewed, but a complete crochet sample is still needed to confirm firmness, finished dimensions, yarn use, and the final placement of the decorations.