Sage Bow Crochet Pouch
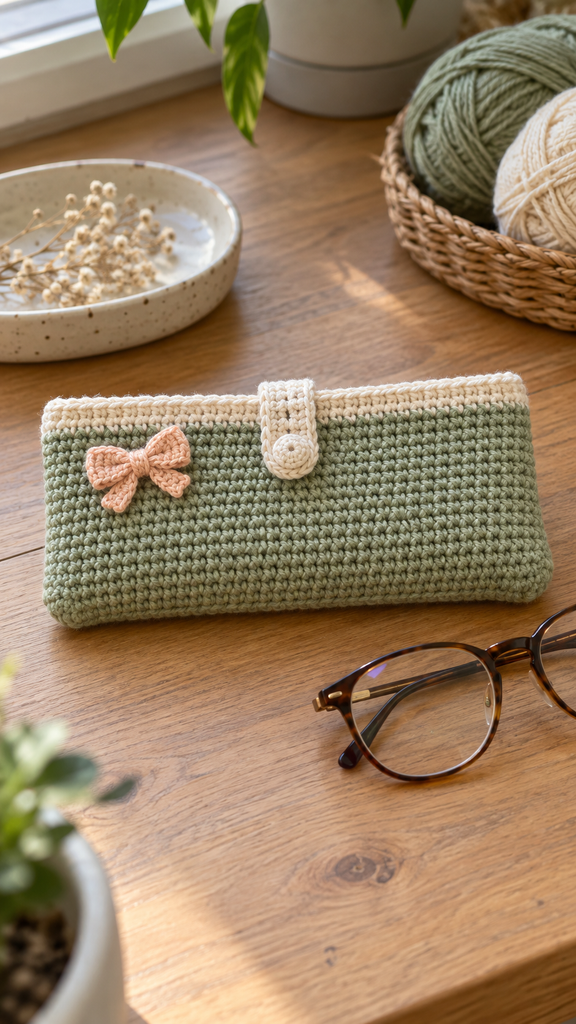
A small crochet pouch is a lovely way to turn a few colors of cotton into something useful. This Sage Bow Crochet Pouch pairs a simple green body with a cream opening, a narrow buttoned tab, and a pale peach bow. The horizontal shape is intended for lightweight everyday items such as a slim pair of glasses, crochet accessories, or small stationery supplies.
The supplied Mary Jane Baby Booties PDF by Tracie Barrett suggested the broad visual idea of contrasting colors and a little fastening strap. This version changes the project completely: a folded rectangular storage pouch replaces the wearable booties, with a new row-based construction, a buttonhole tab, and a separate bow. The reference’s sock, sole, shoe shaping, and assembly instructions are not used.
Pattern status: Stitch counts, the color schedule, and closure-tab arithmetic have been reviewed. This newly drafted pattern has not been physically crocheted or sample-tested. Measurements, yarn quantities, and closure fit are provisional. The photographs are AI-generated concept illustrations; follow the written instructions for technical details.
A Simple Rectangle With a Thoughtful Finish
The main panel is worked flat in single crochet, with cream rows at both ends and sage through the center. Folding the rectangle in half brings the cream sections together at the opening. Two short side seams form the pouch, leaving the long upper edges open.
A separate cream tab attaches to the back and folds over the opening to meet a small button on the front. The peach bow sits off to one side so it does not interfere with the closure. These details give the plain fabric a more finished appearance without requiring complicated shaping.
This is a soft storage pouch rather than a rigid protective case. Check that your intended contents fit comfortably and do not stretch the stitches or press against the button. For glasses, compare the finished interior with the actual folded frames before using it as their everyday home.
Project Overview
| Feature | Planned specification |
|---|---|
| Project | Horizontal crochet storage pouch |
| Skill level | Confident beginner |
| Terms | US crochet terminology |
| Main panel | 36 sc across and 40 rows long |
| Fold | Between Rows 20 and 21 |
| Finished exterior | Approximately 18 × 9 cm / 7 × 3½ inches before allowing for seam variation |
| Closure | Separate cream tab and small button |
| Decoration | One small peach crochet bow |
| Main technique | Single crochet in turned rows |
Materials and Color Choices
- Smooth DK cotton yarn in sage A, cream B, and pale peach C.
- A provisional allowance of 70–90 m / 77–98 yd sage, 25–35 m / 27–38 yd cream, and 8–12 m / 9–13 yd peach.
- A 3.5 mm crochet hook as a starting point, with nearby sizes available for adjustment.
- One smooth flat button approximately 10–12 mm across, plus matching sewing thread and a sewing needle.
- A blunt tapestry needle, scissors, tape measure, and removable stitch markers.
Choose colors from the same yarn range where possible. Compatible yarn thickness helps the cream sections lie neatly against the sage body. Smooth cotton also makes the buttonhole and side-seam stitches easier to identify.
The listed yarn quantities are planning allowances, not measured sample usage. Buy by length rather than assuming a particular ball size. A small leftover ball may be enough for the bow, but keep enough yarn available to remake the tab if the fit needs adjustment.
The concept images show a very small cream-colored closure. For the written draft, use the listed flat button and test it against the actual buttonhole. Its fit and smoothness matter more than matching the photographed appearance exactly.
Abbreviations and Stitch Notes
- ch: chain.
- sc: single crochet.
- sl st: slip stitch.
- st / sts: stitch / stitches.
- RS / WS: right side / wrong side.
The turning ch 1 does not count as a stitch. Work the first sc into the first actual stitch beneath that chain and the last sc into the final actual stitch at the opposite edge. Turn after each row unless the instructions say to fasten off.
Work through both top loops throughout. To change color, begin the final sc of the old color, draw up a loop, then use the new color for the yarn-over that pulls through the two loops on the hook. Make the next turning chain with the new color.
Leave tails long enough to weave through several stitch bases. Avoid carrying the cream yarn all the way through the sage section; cut it after the first color change and rejoin it for the final band.
Gauge and a Fit Check
The planning gauge is approximately 20 sc and 22 rows per 10 cm / 4 inches, measured after washing and drying. This is a target rather than a measured sample result. At that gauge, the unfolded panel is about 18 cm wide and 18 cm long.
Make a single-crochet swatch at least 12 cm square. Wash and dry it according to the yarn label, then measure a central area without stretching. If too many stitches fit into 10 cm, try a larger hook. If too few fit, try a smaller one.
Choose a fabric that bends comfortably while keeping a clear outline. Very loose stitches can snag small objects, while very tight stitches can make the panel difficult to fold and sew. Your swatch should help you judge both size and texture.
The side seams reduce the usable interior slightly. If a specific pair of glasses needs 18 cm of clear internal width, enlarge the panel rather than relying on the nominal exterior measurement. Measure the actual object and allow room for its thickness.
Crochet the Main Panel
Step 1: Begin the First Cream Band
With cream B, ch 37 loosely.
Row 1: Sc in the second chain from the hook and in each chain across. Turn. 36 sc.
Rows 2–4: Ch 1, sc in all 36 stitches. Turn. 36 sc per row. Change to sage A in the final pull-through of the last stitch of Row 4.
Count the stitches before continuing. Mark the first and last sc if the edges are difficult to see. A consistent 36-stitch row keeps both sides straight and helps the cream bands line up when the panel is folded.
Step 2: Work the Sage Body
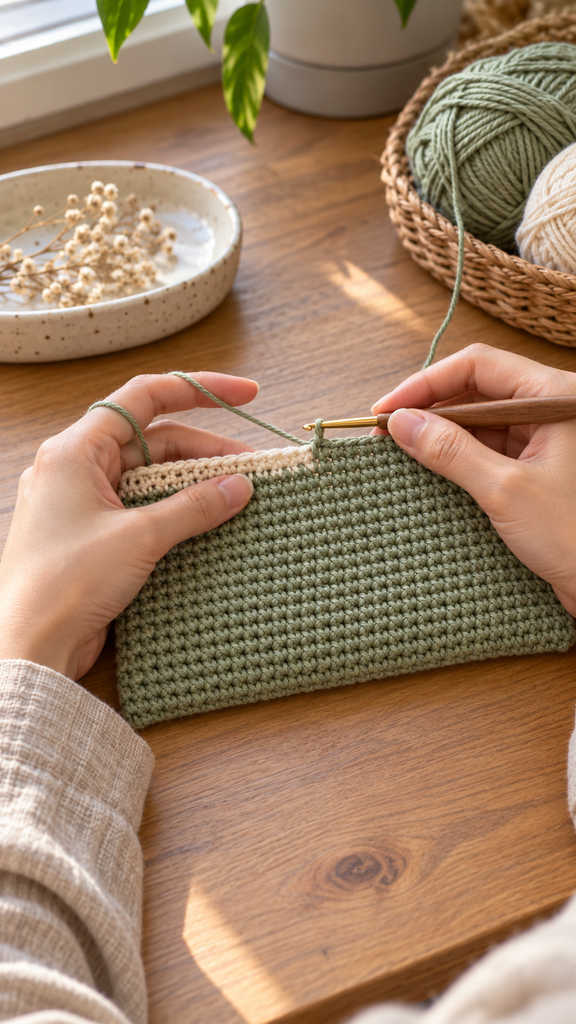
Rows 5–36: Ch 1, sc in each stitch across. Turn. 36 sc per row. There are 32 sage rows in this section.
Place a marker at each end of Row 20. These markers identify the fold between Rows 20 and 21. They also make it easier to check that each half of the panel contains the same number of rows.
Change to cream B in the last pull-through of the final stitch of Row 36. Check the stitch count again before starting the last band. Correct any missed or added edge stitch now, while the panel is still easy to lay flat.
Step 3: Finish the Second Cream Band
Rows 37–40: Ch 1, sc in each stitch across. Turn after Rows 37–39. 36 sc per row. Fasten off after Row 40.
The completed schedule is 4 cream rows, 32 sage rows, and 4 cream rows, totaling 40 rows. Weave in the color-change tails on the WS without gathering the fabric. Leave the fold markers in place.
Wash and block the panel using the method permitted by the yarn label. Shape it into an even rectangle and let it dry fully. Blocking should settle the fabric, not force a strongly uneven panel into the required dimensions.
Fold and Sew the Side Seams
Choose the preferred face as the RS. Fold the panel at the marked midpoint with the WS facing together. The foundation edge of Row 1 and the top edge of Row 40 should meet at the opening, with cream visible on both halves.
Align the row ends along one short side. Row 1 pairs with Row 40, Row 2 with Row 39, and so on, ending with Row 20 beside Row 21 at the fold. There are 20 corresponding row-end pairs per side.
With matching yarn and a blunt needle, whipstitch through secure strands of each pair. Use cream for the four cream pairs nearest the opening and sage for the remaining sixteen pairs. Keep the seam relaxed and avoid leaving large loose loops inside the pouch.
Repeat on the second side. Leave the entire long opening unsewn. Remove the fold markers, weave in the seam ends, and check the pouch with its intended contents before adding the closure.
Make the Cream Closure Tab
The tab is worked lengthwise, creating a narrow strip with a buttonhole near one end.
Row 1: With B, ch 14. Sc in the second chain from the hook and across. Turn. 13 sc.
Row 2: Ch 1, sc in the next 8 stitches, ch 3, skip the next 3 stitches, sc in the final 2 stitches. Turn. 10 sc and one ch-3 buttonhole.
Row 3: Ch 1, sc in the first 2 sc, work 3 sc into the ch-3 space, then sc in the remaining 8 sc. 13 sc. Fasten off, leaving a long sewing tail.
At the target gauge, the tab is approximately 6.5 cm long and about 1.5 cm wide. The hole sits near one end; attach the opposite solid end to the back of the pouch.
Test the button through the hole before sewing either piece in place. The button should pass with gentle pressure and remain held when released. If it slips through too easily or cannot pass, remake the tab with a suitable hole. Changing the chain and skipped-stitch count together preserves the number of stitch positions in the row.
Attach the Tab and Button
Mark the midpoint of each opening edge, between stitches 18 and 19. With the pouch’s back facing you, place about 1 cm of the tab’s solid end against the back exterior, centered below the cream opening.
Sew that overlap securely through several stitch bases, keeping the tab’s length perpendicular to the opening. Use a few lines of stitching to spread the load. The remaining tab should fold from the back over the opening and down the front.
Put the intended lightweight contents into the pouch and fold the tab over them. Use its buttonhole to mark the button position on the front; approximately 2–3 cm below the opening is a starting point, not a fixed measurement.
Sew on the button with matching sewing thread, catching several secure crochet strands without pulling a hole in the fabric. Fasten the tab and check the closure again. It should hold the opening comfortably without compressing the contents or pulling the back edge upward.
Crochet the Peach Bow
Row 1: With C, ch 13. Sc in the second chain from the hook and across. Turn. 12 sc.
Rows 2–4: Ch 1, sc in each stitch across. Turn after Rows 2–3. 12 sc per row. Fasten off, leaving a long tail.
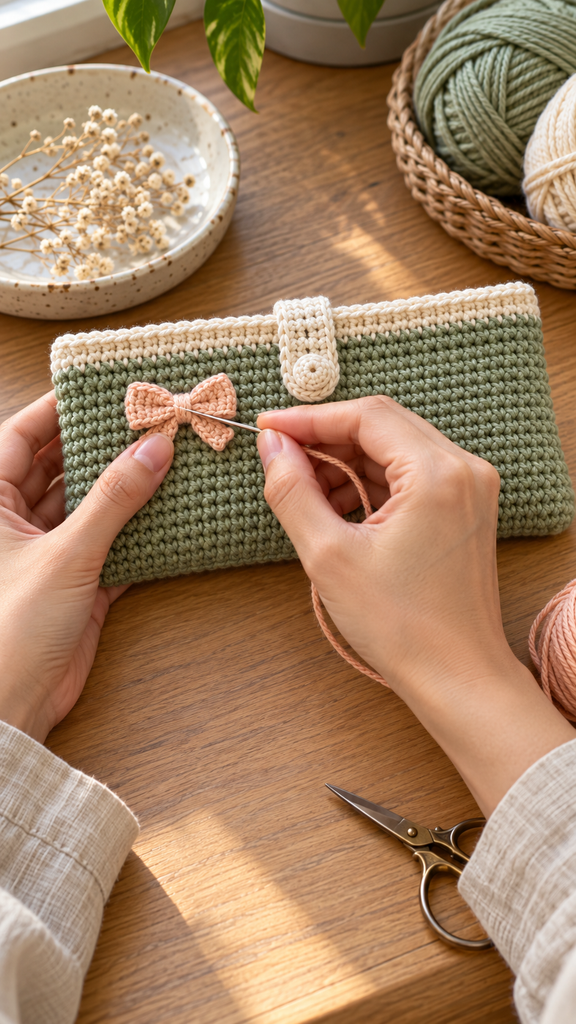
Pinch the center of the little rectangle to form two loops. Wrap the tail around that center several times, keeping the wraps close together. Secure the wrapping on the reverse with small stitches through the bow fabric.
Place the bow on the upper left of the front, leaving the central tab and button free. Sew through its wrapped center into several secure stitches of the pouch. Add a tiny hidden stitch beneath each loop if needed to stop the bow from rotating, while keeping the outer edges soft.
More Information: Care and Personalization
For a wider pouch, add stitches to the foundation and maintain that count on every row. This plain fabric has no stitch multiple to preserve. Estimate the new width from your washed swatch, then allow for the side seams and the thickness of the contents.
For a deeper pouch, add an equal number of sage rows to each half. The total row count should remain even so the cream bands meet. For example, adding four sage rows gives 44 rows overall and moves the fold between Rows 22 and 23.
A fabric lining is optional but is not included in this crochet draft. If you add one, size it to the actual finished interior, turn its seam allowances inward, and hand-sew it below the opening without restricting the crochet. Recheck the usable space afterward.
Follow the most restrictive care instructions among the yarn, button, and any lining. Reshape the pouch gently after washing and dry it fully before storing delicate contents. Inspect the closure stitching occasionally and repair it if it begins to loosen.
Frequently Asked Questions
Is this a suitable beginner project?
It suits someone who knows single crochet and can maintain a straight row. The main panel is repetitive, while the tab introduces a simple chain-space buttonhole. Practice the tab separately if this technique is new to you.
Why do the cream bands not line up?
Check that each band contains four rows and the panel contains forty rows overall. Fold between Rows 20 and 21. Uneven row counts or a misplaced fold can make one opening edge sit higher than the other.
Can I replace the button with a snap?
Yes, but the tab should then be made without a buttonhole. Work 13 sc on all three tab rows and position the snap after checking the fit with the intended contents. The attachment method depends on the chosen snap.
Will it fit every pair of glasses?
No. Compare the actual finished interior with the folded frames, including their thickness. The dimensions are estimates, and a soft crochet pouch does not provide the crush protection of a rigid glasses case.
Why is the buttonhole too loose?
Your chains may be larger than expected or the button may be too small. Test a smaller hole or a suitable larger button on the separate tab before attaching it. Avoid forcing a large button through a tight hole.
Are the photographs exact technical demonstrations?
They show the intended style and general working stages. They are AI-generated concepts and may not match exact counts or closure materials. Follow the written pattern, test the buttonhole, and use your actual measurements.
Has the pattern been physically tested?
No. The arithmetic has been reviewed, but a complete crochet sample is still needed to confirm size, yarn consumption, seam appearance, and closure fit.