Sleepy Bat Crochet Mug Rug
A small crochet project can bring just enough Halloween charm to a reading corner. This Sleepy Bat Crochet Mug Rug combines a flat charcoal circle with pointed wings, tiny ears, and cream embroidered eyes. A touch of lilac along the wings softens the dark yarn and gives the piece a gentle woodland feel.
The supplied Halloween Bat Earrings PDF by Pattie Wilkinson of PattieWack Designs provided the broad bat theme. That reference uses macramé knots, cut thread fringe, felt, and earring hoops. This project takes a different direction: a flat cotton crochet table accessory with a circular center and separately crocheted details. The earring construction, templates, and source photographs are not used.
Pattern status: The circle totals, wing shaping, and ear decreases have been checked mathematically. This newly drafted pattern has not been physically crocheted or sample-tested. Dimensions and yarn quantities are provisional. All three photographs are AI-generated concept illustrations; follow the written pattern for technical counts and placement.
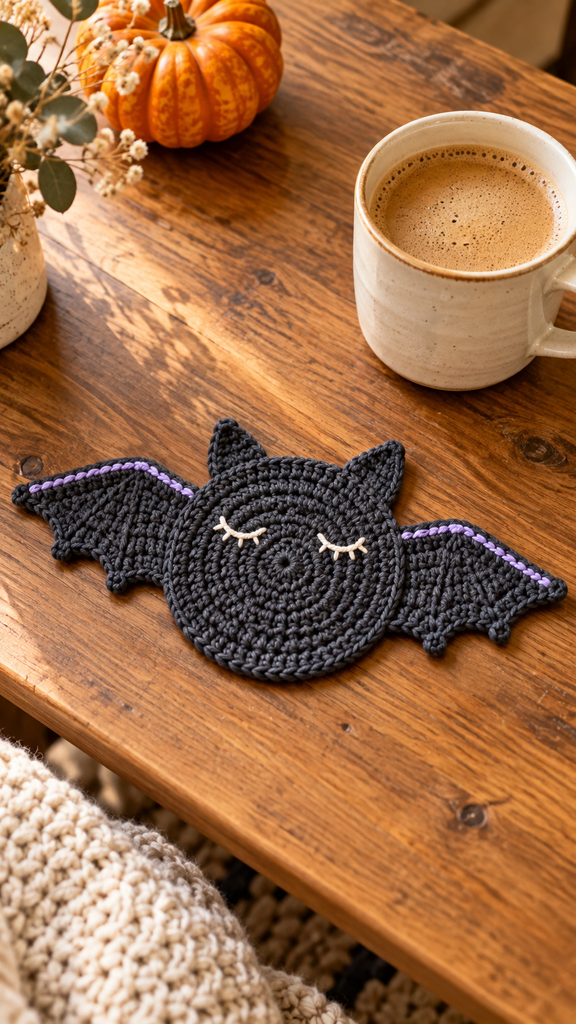
A Friendly Bat Made From Simple Shapes
The circular center provides the space for a mug, while the wings and ears extend beyond it as decoration. Each wing starts with a wide attachment edge and narrows to a point. Tiny picots along one sloping edge suggest the shape of a bat wing without requiring a complicated lace chart.
The mug rug is one layer throughout, with no stuffing, felt backing, or rigid insert. Its outline depends on firm but flexible cotton crochet and careful flat assembly. The little embroidered eyes add character when the piece is displayed without a cup.
Use a mug with a stable base that sits entirely within the circular center. Check the completed piece on your actual table before regular use. This draft is a decorative coaster, not a heat-rated trivet or a promise of waterproof surface protection.
Project Details
| Feature | Planned specification |
|---|---|
| Project | Flat bat-shaped decorative mug rug |
| Skill level | Confident beginner |
| Terms | US crochet terminology |
| Central disc | 10 rounds, ending with 60 sc |
| Approximate center diameter | 10–11 cm / 4–4¼ inches |
| Approximate wingspan | 20–22 cm / 8–8¾ inches, depending on blocking and placement |
| Separate pieces | Two tapered wings and two tiny ears |
| Decoration | Embroidered eyes and optional lilac wing accents |
Materials and Color Planning
- Smooth DK cotton yarn in charcoal A, with small amounts of cream B and soft lilac C.
- A provisional allowance of 70–100 m / 77–110 yd A and approximately 3–5 m / 3–5½ yd of each accent color.
- A 3.5 mm crochet hook as a starting point, plus nearby sizes for adjusting the fabric.
- A blunt tapestry needle, scissors, tape measure, and removable stitch markers.
- Blocking supplies suitable for your chosen yarn.
Choose cotton yarn with clear stitch definition so the wing edges and picots remain easy to identify. Very fuzzy yarn can blur the silhouette and make the small ears difficult to sew neatly. Keep the accent yarn similar in weight or slightly finer than the main yarn.
If charcoal stitches are difficult to see, use a medium-gray yarn for your first attempt. Good lighting and a contrasting marker help when counting the continuous rounds. The design also works in plum or deep sage, with cream eyes for contrast.
The yarn allowance is an estimate rather than measured sample consumption. A heavier yarn, larger hook, or extra edging will change both the quantity and the final size. Make one complete disc first if you need a more reliable estimate for a set.
Abbreviations and Stitch Notes
- ch: chain.
- sc: single crochet.
- inc: work 2 sc in the same stitch.
- sc2tog: single crochet two stitches together; decreases by one stitch.
- sc3tog: single crochet three stitches together; decreases by two stitches.
- sl st: slip stitch.
- st / sts: stitch / stitches.
- RS / WS: right side / wrong side.
For sc2tog, draw up a loop in each of the next two stitches, yarn over, and pull through all three loops. For sc3tog, draw up a loop in each of the next three stitches, yarn over, and pull through all four loops.
For a picot in this pattern, ch 3 and sl st in the first chain of those three chains. The picot is an addition to the edging and does not consume another wing row end.
The center uses continuous rounds without joining or turning. Mark the first sc of each round and move the marker upward as you work. The wings and ears use turned rows; their turning ch 1 never counts as a stitch.
Gauge and a Fabric Check
The planning gauge is approximately 18 sc and 20 rows per 10 cm / 4 inches in washed, dry single crochet. This is a target rather than a measured sample result. The fabric should lie flat and feel flexible without large gaps.
Make a swatch at least 12 cm square, then wash and dry it according to the yarn label. Measure the central area without stretching it. Try a different hook if necessary, but consider the density and drape as well as the stitch count.
At the target stitch gauge, a 60-stitch perimeter represents roughly 33 cm of circumference, corresponding to a circle about 10.6 cm across. Actual circular gauge can vary, so measure the finished disc rather than assuming it will match this estimate.
Check that the center accommodates your chosen mug’s base with some space to spare. If the cup overhangs the circle or rocks on the fabric, choose another cup or revise the project before using it.
Crochet the Circular Center
Step 1: Start the Disc
With charcoal A, make an adjustable ring.
Round 1: Work 6 sc into the ring. Pull it closed. 6 sc. Mark the first stitch and secure the starting tail through stitch bases on the WS after a few rounds.
Round 2: Inc in every stitch around. 12 sc.
Round 3: (1 sc, inc) 6 times. 18 sc.
Step 2: Continue the Increases
Work the repeats in the table six times per round. Each round adds six stitches. Do not add a joining slip stitch or a turning chain at the marker.
| Round | Repeat six times | Total sc |
|---|---|---|
| 4 | 2 sc, inc | 24 |
| 5 | 3 sc, inc | 30 |
| 6 | 4 sc, inc | 36 |
| 7 | 5 sc, inc | 42 |
| 8 | 6 sc, inc | 48 |
| 9 | 7 sc, inc | 54 |
| 10 | 8 sc, inc | 60 |
After Round 10, sl st in the next stitch and fasten off. This finishing slip stitch is not an extra perimeter stitch. Mark it if needed so it is not counted during assembly.
The aligned increases may leave a softly six-sided outline. Gentle blocking can soften that appearance. Pronounced ruffling or cupping needs a count and tension check before you attach the wings; do not rely on the decorations to flatten the disc.
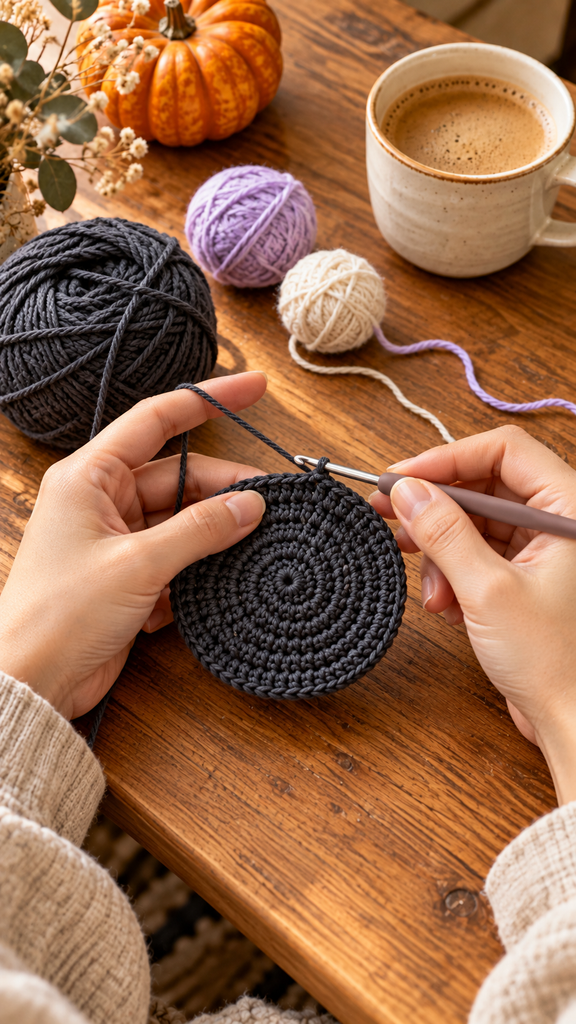
Crochet Two Tapered Wings
Each wing is worked from its broad attachment edge toward its outer tip. Make two identical pieces in A; their final orientation creates the left and right sides.
Row 1: Ch 12. Sc in the second chain from the hook and across. Turn. 11 sc. Leave a long starting tail for attachment.
Row 2: Ch 1, sc2tog, sc in the next 7 sts, sc2tog. Turn. 9 sc.
Row 3: Ch 1, sc across. Turn. 9 sc.
Row 4: Ch 1, sc2tog, sc in the next 5 sts, sc2tog. Turn. 7 sc.
Row 5: Ch 1, sc across. Turn. 7 sc.
Row 6: Ch 1, sc2tog, sc in the next 3 sts, sc2tog. Turn. 5 sc.
Row 7: Ch 1, sc across. Turn. 5 sc.
Row 8: Ch 1, sc2tog, sc in the next st, sc2tog. Turn. 3 sc.
Row 9: Ch 1, sc across. Turn. 3 sc.
Row 10: Ch 1, sc3tog. 1 sc. Fasten off and weave the tip tail into the reverse. Keep the long starting tail available for sewing.
The broad Row 1 edge will sit beside the circular center. The Row 10 point faces outward. Do not attach the wing yet; finish its lower decorative edge first.
Add the Picot Wing Edges
Lay both wings flat with their broad edges facing inward and their tips pointing away from each other. Choose the sloping edge that will face downward on each wing. Mark that edge so the picots end up as a mirrored pair.
With A, join at the lower corner of the broad Row 1 edge. Ch 1, then work one sc into a secure row-end strand for each of Rows 1–10 as you travel toward the tip. After the sc in the row ends of Rows 3, 6, and 9, make one picot.
You will have 10 edging sc and three picots along the chosen lower slope. After the last edging sc at Row 10, fasten off. Leave the upper slope and the broad attachment edge unbordered.
Repeat on the other wing’s chosen lower slope. Keep the edging relaxed. If it pulls the wing into a curve, remove it and adjust the tension rather than stretching the triangle aggressively.
For an optional color accent, use lilac C to embroider a short running-stitch line just inside each unbordered upper slope. Keep the stitches flat and relaxed. This accent suggests a wing outline without adding raised trim to the cup area.
Make Two Small Ears
With A, work the following three-row triangle twice.
Row 1: Ch 6. Sc in the second chain from the hook and across. Turn. 5 sc.
Row 2: Ch 1, sc2tog, sc in the next st, sc2tog. Turn. 3 sc.
Row 3: Ch 1, sc3tog. 1 sc. Fasten off and weave in the tip tail. Leave a separate or reserved strand at the five-stitch base for sewing.
Smooth both ears and compare their size. They should remain flat, with their narrow points visible above the circular body. Do not stuff or fold them into cones.
Block and Assemble the Bat
Block the disc, wings, and ears using a method permitted by the yarn label. Spread the picots gently and allow every piece to dry completely. Check the center on a flat table before proceeding.
Choose the disc’s preferred face as the RS. Position one broad wing edge against each side of the circle. The wing bases are straight while the disc edge is curved, so allow a small overlap rather than forcing a stitch-for-stitch match.
Place about 5 mm of each wing base beneath the disc edge and secure the pieces with removable markers. Keep the wing tips level or slightly raised and the picot slopes facing down. Adjust until both wings lie flat and look balanced.
Using the long starting tails, sew through the overlapped wing base and secure strands near the disc edge. Add a second line of small stitches if needed. Spread the attachment along the base; do not pull the disc inward to match the wing’s width.
Sew the two five-stitch ear bases beneath the upper edge of the disc, leaving a small gap between them. Keep the points facing up and the pieces flat. Remove all markers and check that no loose seam loops remain underneath.
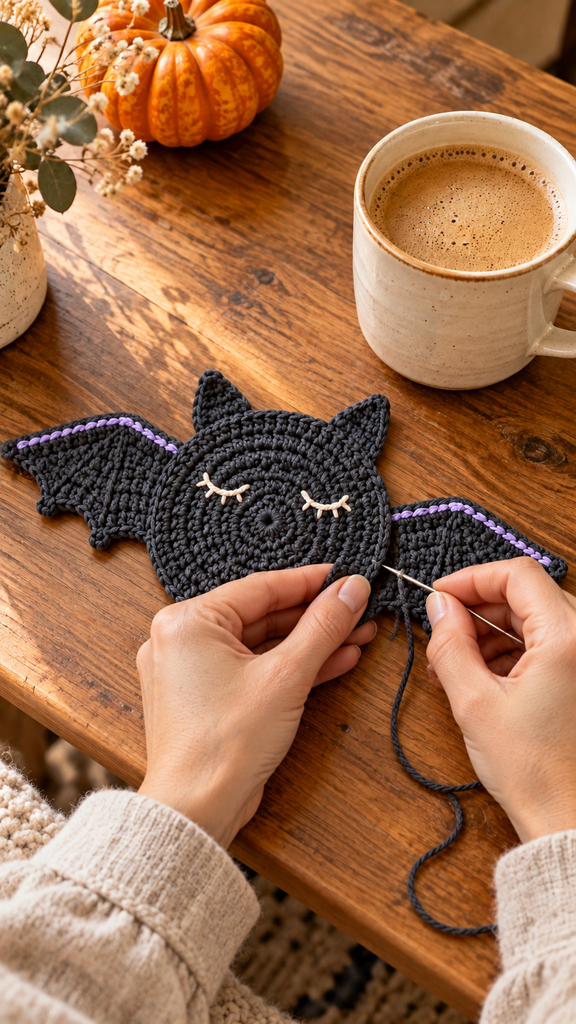
Embroider the Sleepy Face
With cream B, mark two eye positions on the upper third of the circle, spaced about 2–3 cm apart. Embroider each eye as a shallow curve using three or four short backstitches. A tiny upward stitch at the outer corner can suggest an eyelash if desired.
Keep the embroidery close to the surface and avoid bulky knots. Secure the tails on the reverse through several stitch bases, changing direction before trimming. The face should not pucker the disc or create a hard bump beneath a mug.
Set your chosen empty mug on the center and check for rocking. Keep seams, picots, and ears outside its footprint. If the embroidery or assembly creates an uneven surface, revise that area before using the piece under a drink.
More Information: Care and Variations
For a simpler version, omit the lilac accents and embroider only the eyes. A cream bat with charcoal details gives a softer Halloween palette, while plum and lilac create a slightly more colorful look.
To enlarge the center, continue the established six-increase sequence for additional rounds. Round 11 would be (9 sc, inc) six times for 66 sc. A larger circle changes the overall proportions, so check wing and ear placement on the actual piece rather than reusing fixed positions.
Follow the yarn label for washing. Reshape the bat while damp if the fiber permits, keeping the wings flat and the picots separated. Dry fully before placing it on furniture. Test colorfastness separately if the charcoal yarn might transfer when wet.
Store the mug rug flat so the ears and wing tips do not develop persistent folds. If making several for gifts, complete one full sample first to confirm the size, stability, and yarn consumption before repeating the pattern.
Frequently Asked Questions
Is this suitable for a beginner?
It suits someone who knows single crochet and is ready to practice increases, decreases, and simple sewing. Make one wing first to become familiar with the decrease sequence before starting the full project.
Why is the center becoming a bowl?
First check the totals: Round 10 should contain 60 actual sc. Missing increases or unusually tight tension can cause cupping. If the counts are correct, reassess your yarn and hook combination with a practice disc.
Why do both wings have picots on the same side?
The wings need to be arranged as mirror images before choosing the lower slopes. Lay them beside the disc, points outward, and mark the downward-facing edge of each one before edging.
Can I use acrylic yarn?
Changing fiber changes the fabric and its response to heat and washing. This draft is planned around cotton. If you substitute yarn, swatch it, follow its care guidance, and reassess how you intend to use the finished piece.
Can the bat be used as an appliqué instead?
The flat construction can suit a decorative background. Attach it with relaxed stitches and test the care compatibility of both materials. That version would omit the mug-stability check and use a different final sewing layout.
Are the photographs exact technical demonstrations?
They illustrate the intended style and general working stages. They are AI-generated concepts and may not show exact counts or needle placement. Follow the written pattern and your actual fabric for construction details.
Has this pattern been physically tested?
No. The arithmetic has been reviewed, but a complete crochet sample is still needed to confirm flatness, proportions, yarn use, and stability under the intended mug.