Winter in Vermont Knit Mittens Pattern

There is something extra special about pulling on a pair of mittens you knitted yourself.
Maybe it is the warmth of the chunky yarn, the satisfaction of seeing every little colorwork motif come together, or simply knowing that something so practical started as a few balls of yarn and four knitting needles.
These Winter in Vermont Knit Mittens have exactly that cozy handmade feeling.
The design combines a deep folded ribbed cuff with traditional-looking stranded colorwork in warm brown, caramel, oatmeal, and white. The finished mittens have a wonderfully rustic winter appearance that feels perfect for snowy walks, cold mornings, handmade gifts, or simply keeping beside your favorite winter coat.
The pattern is rated intermediate, and it is worked in the round using double-pointed needles. You will begin with a long K2, P2 ribbed cuff, switch to larger needles for the colorwork section, create an opening for the thumb, shape the top of the mitten with decreases, and finally return to knit the thumb.
The original pattern is designed in one adult size to fit approximately a 7½-inch (19 cm) palm. Its gauge is 17 stitches and 21 rows over 4 inches (10 cm) in stocking stitch using the larger needles. PAK0115-030385M
If you have been wanting to try a beautiful stranded knitting project that is small enough to feel manageable but detailed enough to keep things interesting, this is a lovely winter project to work through.
About the Winter in Vermont Knit Mittens
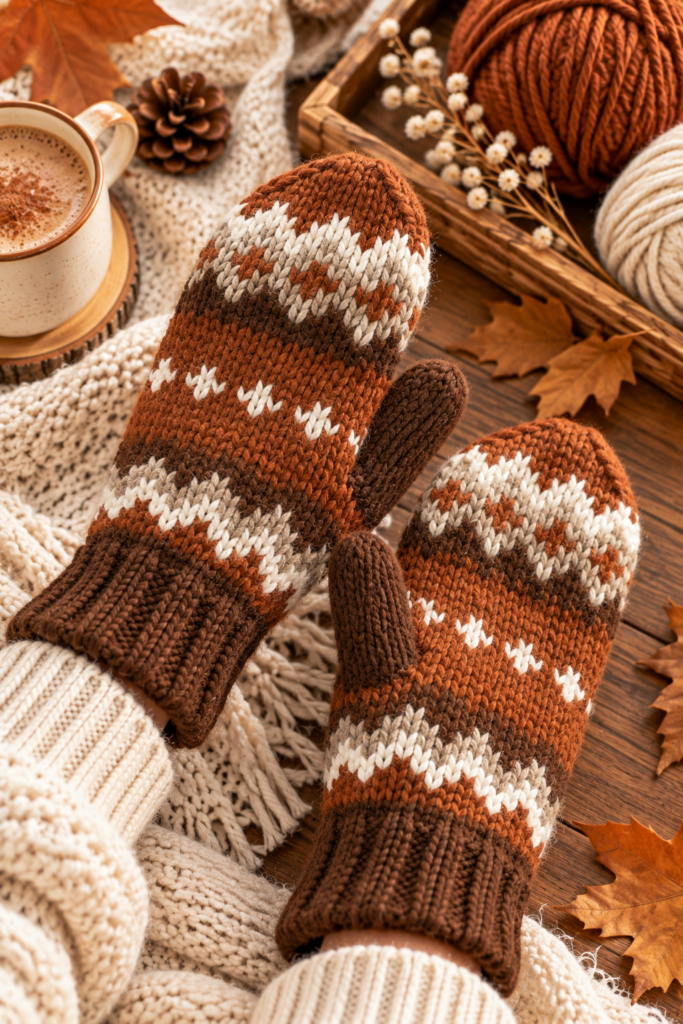
These mittens are worked from the cuff upward in the round.
The first section is a generous ribbed cuff. Once the cuff reaches the required length, you change to larger needles and begin following a stranded colorwork chart.
The right and left mittens use separate charts because the thumb openings need to sit on opposite sides.
The charts on page 2 show the complete color placement, including the geometric bands, small contrasting motifs across the center, and the shaping at the top of each mitten.
Once the knitting is complete, the long cuff is folded inward and sewn into position, creating the thick, cozy cuff visible in the finished photographs.
Pattern at a Glance
Project: Winter colorwork mittens
Skill Level: Intermediate
Size: Adult, one size
Palm Fit: Approximately 7½” / 19 cm
Yarn Weight: Bulky / Weight 5
Construction: Knitted in the round
Needles: Double-pointed needles
Techniques: Knit, purl, stranded colorwork, decreases, thumb opening, picking up stitches, grafting and finishing
Why These Knitted Mittens Are So Beautiful
The colorwork is what immediately caught my eye.
Instead of using one repeating motif across the entire mitten, the design combines several decorative bands.
Near the cuff is a broad cream-and-brown geometric section. Farther up, smaller light-colored motifs appear against the warm background. Another multicolor band decorates the upper portion before the decreases create the rounded mitten top.
The photographs in the PDF show how beautifully the earthy colors work together.
The palette feels warm without being overly bright, which gives the mittens a classic handmade winter look.
Materials You Will Need
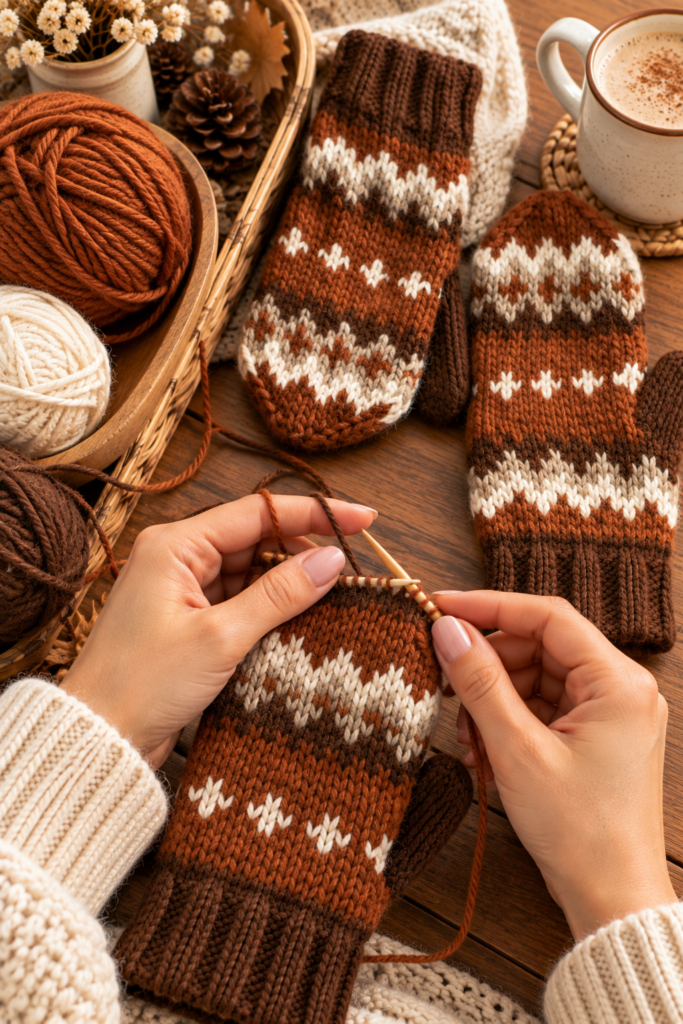
The original pattern combines two Patons yarns.
Patons Alpaca Blend
The yarn specifications are:
3.5 oz / 100 g
155 yd / 142 m per ball
You will need:
Contrast A – Sable (01004): 1 ball
Contrast B – Toffee (01012): 1 ball
Contrast C – Oats (01003): 1 ball
Patons Shetland Chunky
The fourth color is:
Contrast D – White (78006): 1 ball
This yarn contains approximately:
3.5 oz / 100 g
143 yd / 131 m
Knitting Needles and Notions
You will also need:
- Set of 4 U.S. 8 / 5 mm double-pointed needles
- Set of 4 U.S. 9 / 5.5 mm double-pointed needles
- Stitch marker
- Stitch holder
- Yarn needle
You can adjust the needle size if necessary to obtain the correct gauge.
These materials and yarn quantities are specified directly in the pattern. PAK0115-030385M
Knitting Abbreviations
Before starting, familiarize yourself with the abbreviations used throughout the instructions.
Approx – Approximately
Beg – Beginning
Decs – Decreases
K – Knit
K2tog – Knit the next 2 stitches together
P – Purl
Pat – Pattern
PM – Place marker
Rep – Repeat
Rnd/Rnds – Round/Rounds
Ssk – Slip the next 2 stitches knitwise one at a time, return them to the left needle, then knit them together through their back loops
St/Sts – Stitch/Stitches
Tog – Together
WS – Wrong side
Understanding the Gauge
The pattern gauge is:
17 stitches and 21 rows = 4″ / 10 cm
This measurement is taken in stocking stitch using the larger needles.
Gauge is particularly important for mittens.
Unlike a scarf or blanket, mittens need to fit the hand comfortably. If your stitches are too tight, the mitten may become too narrow. If they are too loose, the finished mitten can become oversized.
Make a gauge swatch before beginning and adjust your needle size if necessary.
Important Colorwork Notes
These mittens use stranded colorwork, so more than one yarn color may be involved within the same round.
When working from the chart, carry the yarn that is not currently being used loosely across the wrong side of the work.
However, don’t carry an unused yarn across more than 5 stitches without securing it.
If the yarn must travel over more than five stitches, weave it over and under the color currently being used.
The colors should not be twisted around one another.
This helps manage the floats while keeping the fabric comfortable and flexible. PAK0115-030385M
Keep Your Floats Relaxed
This is one of the most important parts of stranded mitten knitting.
If you pull the unused yarn too tightly behind the work, your beautiful colorwork may pucker.
Spread the stitches naturally across the right needle before changing colors.
The float should comfortably span the stitches without pulling them together.
How to Knit the Right Mitten
We will begin with the right mitten.
Cast On the Cuff
Using your set of 4 smaller needles and Contrast A, cast on:
36 stitches
Divide the stitches evenly across three needles:
12 stitches – 12 stitches – 12 stitches
Place a marker on the first stitch to identify the beginning of the round.
Knit the Ribbed Cuff
Round 1
Repeat:
K2, P2
around the entire round.
Continue repeating this K2, P2 ribbing until the cuff measures:
4″ / 10 cm
This creates the long ribbed section that will eventually be folded toward the inside of the mitten.
Begin the Colorwork
Change to your set of larger needles.
Now begin working the colorwork according to Chart I.
Work:
Rounds 1–14 of Chart I
Read every chart round:
from right to left.
The chart on page 2 provides the complete color placement.
The chart key identifies:
- Contrast A
- Contrast B
- Contrast C
- Contrast D
- K2tog or ssk decrease symbols
Take your time here.
Rather than trying to memorize an entire colorwork round, work across the chart one small section at a time.
Create the Right Thumb Opening
After the first 14 chart rounds, it is time to create the thumb opening.
Thumb Opening – Round 1
Continue working in the established pattern across:
23 stitches
Slip the last 5 stitches onto a stitch holder.
Continue working in pattern to the end of the round.
Thumb Opening – Round 2
Work in pattern across:
18 stitches
Turn.
Cast on:
5 stitches
Turn again.
Continue working in pattern to the end of the round.
You should now have:
36 stitches
The five newly cast-on stitches bridge the space above the stitches held for the thumb.
Continue the Right Mitten
Continue following Chart I through the remainder of the chart.
After Round 31, pay careful attention to the shaping.
The pattern specifies 4-stitch decreases on every round after Round 31.
Continue until:
8 stitches remain.
With Contrast B, graft the two sets of four remaining stitches together.
This closes the top of the mitten neatly.
How to Knit the Thumb
Now return to those five stitches waiting on your stitch holder.
Using Contrast A and the larger needles:
Knit the 5 stitches from the stitch holder.
Then pick up and knit:
5 stitches at the base of the thumb opening
You now have:
10 stitches
Divide them across three needles as:
3 – 3 – 4
Join to work in the round.
Place a marker on the first stitch.
Knit the Thumb
Knit:
14 rounds even
There are no increases or decreases during these rounds.
Shape the Thumb Tip
On the next round:
K2tog 5 times
You now have:
5 stitches remaining
Break the yarn, leaving enough length to finish securely.
Thread the yarn end through the five remaining stitches.
Pull gently to close the opening and fasten securely.
The right mitten is now essentially complete.
How to Knit the Left Mitten
The left mitten begins exactly like the right.
Using Contrast A and the smaller double-pointed needles:
Cast on 36 stitches.
Divide them evenly:
12 – 12 – 12
Work K2, P2 ribbing for:
4″ / 10 cm
Then change to the larger needles.
This time, however, follow:
Chart II
rather than Chart I.
Work the first 14 rounds, reading each chart round from right to left.
Create the Left Thumb Opening
The thumb placement is different because we need the thumb on the opposite side.
Thumb Opening – Round 1
Work in pattern across:
18 stitches
Slip the last:
5 stitches
onto a stitch holder.
Continue in pattern to the end of the round.
Thumb Opening – Round 2
Work in pattern across:
13 stitches
Turn.
Cast on:
5 stitches
Turn again.
Continue in pattern to the end of the round.
You should again have:
36 stitches
Complete the Left Mitten
From this point, continue as instructed for the right mitten.
Follow Chart II through its remaining rounds.
After Round 31, work the indicated four-stitch decreases on every round until eight stitches remain.
Finish the top using the same method as the right mitten.
Then make the thumb using the same 10-stitch construction:
- Knit 5 held stitches
- Pick up and knit 5 stitches
- Divide 3, 3, 4
- Join in the round
- Knit 14 rounds
- K2tog five times
- Thread the yarn through the remaining five stitches
The source gives these right- and left-thumb placements separately, which is important because they are not interchangeable. PAK0115-030385M
Understanding the Colorwork Charts
The two charts on page 2 are essential parts of this knitting pattern.
Chart I is used for the right mitten.
Chart II is used for the left mitten.
Both are read from right to left because the mittens are knitted in rounds.
The charts visually show exactly where Contrasts A, B, C, and D should appear.
They also show the decreases toward the top of the mittens.
You will notice that the charts become narrower above Round 31. This corresponds to the decreases that shape the top of the hand.
The thumb locations are also indicated around the center section of the charts.
Because the left and right thumbs need opposite placement, make sure you are following the correct chart for the mitten currently on your needles.
How to Finish the Mittens
Once both mittens and thumbs are complete, weave in your loose yarn ends carefully.
Then finish the cuffs.
Fold each cuff in half toward the wrong side of the mitten.
Using your yarn needle, sew the folded cuff into position on the inside.
The photograph on page 2 shows the finished effect.
This creates a thick, substantial cuff that gives the mittens their cozy winter appearance. The original finishing instruction specifically calls for folding the cuff in half toward the wrong side and sewing it to the inside. PAK0115-030385M
Tips for Beautiful Stranded Knit Mittens
Check Your Gauge Before Starting
With a fitted project, gauge makes a real difference.
Don’t assume the recommended needle size automatically gives you the correct dimensions.
Don’t Pull Your Floats Too Tight
Your unused color should travel comfortably across the wrong side.
Tight floats can make the colorwork pucker and reduce the stretch of the mitten.
Keep Track of the Beginning of the Round
Use your stitch marker consistently.
Colorwork charts become much easier to follow when you always know exactly where the round begins.
Follow the Correct Chart
Remember:
Right mitten = Chart I
Left mitten = Chart II
The colorwork may look similar, but the thumb placement differs.
Secure Long Floats
If an unused yarn color needs to travel across more than five stitches, secure the float according to the pattern instructions instead of leaving a very long strand inside the mitten.
Try the Mitten On During Construction
When practical, carefully check the developing fit.
This can help you notice a tension issue before finishing the entire mitten.
Frequently Asked Questions
Are the Winter in Vermont Mittens beginner-friendly?
The pattern is rated intermediate.
You should ideally already know how to knit and purl, work in the round using double-pointed needles, decrease stitches, pick up stitches, and read a colorwork chart.
What size are these mittens?
The pattern provides one adult size designed to fit approximately a:
7½” / 19 cm palm.
What yarn weight do I need?
The pattern is designed for Bulky / Weight 5 yarn.
What needles do I need?
You will need two sets of four double-pointed needles:
U.S. 8 / 5 mm
and
U.S. 9 / 5.5 mm
You can change needle size if necessary to obtain gauge.
What is the knitting gauge?
The gauge is:
17 stitches and 21 rows = 4″ / 10 cm
in stocking stitch using the larger needles.
How many stitches do I cast on?
Cast on:
36 stitches
for each mitten.
Divide them evenly across three needles with 12 stitches on each.
How long should I make the ribbed cuff?
Continue the K2, P2 ribbing until it measures:
4″ / 10 cm
The cuff is eventually folded inward and sewn in place.
How many stitches are used for the thumb?
Five stitches are placed onto a stitch holder.
When you return to make the thumb, knit those five held stitches and pick up five additional stitches at the base.
That gives you:
10 thumb stitches.
How long is the thumb?
Knit the thumb evenly for:
14 rounds
before working the final decrease round.
Why are there two colorwork charts?
The right and left mittens need different thumb positions.
Chart I corresponds to the right mitten, while Chart II corresponds to the left.
Which direction do I read the charts?
Read each round:
from right to left.
What happens after Round 31?
Continue following the chart while working the indicated 4-stitch decreases on every round.
The shaping continues until eight stitches remain.
Final Thoughts
There is something especially satisfying about finishing a pair of colorwork mittens.
At the beginning, you have four balls of yarn, a handful of double-pointed needles, and 36 little stitches arranged in a circle.
Then the ribbing starts growing.
You switch needles, add another color, and suddenly the first little geometric shapes begin appearing.
Round after round, the pattern becomes more recognizable. The thumb opening appears. The mitten starts narrowing toward the fingertips. Then you return to those waiting stitches and watch a tiny thumb grow from the side.
Finally, you fold that long ribbed cuff inward, weave in the last yarn tail, and put the mitten on.
And then you get to make its matching partner.
I especially love the earthy palette of this design. The rich browns, warm Toffee, soft Oats, and crisp White create exactly the kind of cozy handmade look I associate with cold winter mornings and snowy weekends.
Take your time with the charts, keep those floats relaxed, and don’t rush the finishing.
The beauty of colorwork knitting comes from watching all those tiny individual stitches slowly become one complete design.
When both mittens are finished, you will have something that isn’t simply warm and practical—it is something you made yourself, one round at a time.
Happy knitting!