Hazel the Amigurumi Woodland Mouse
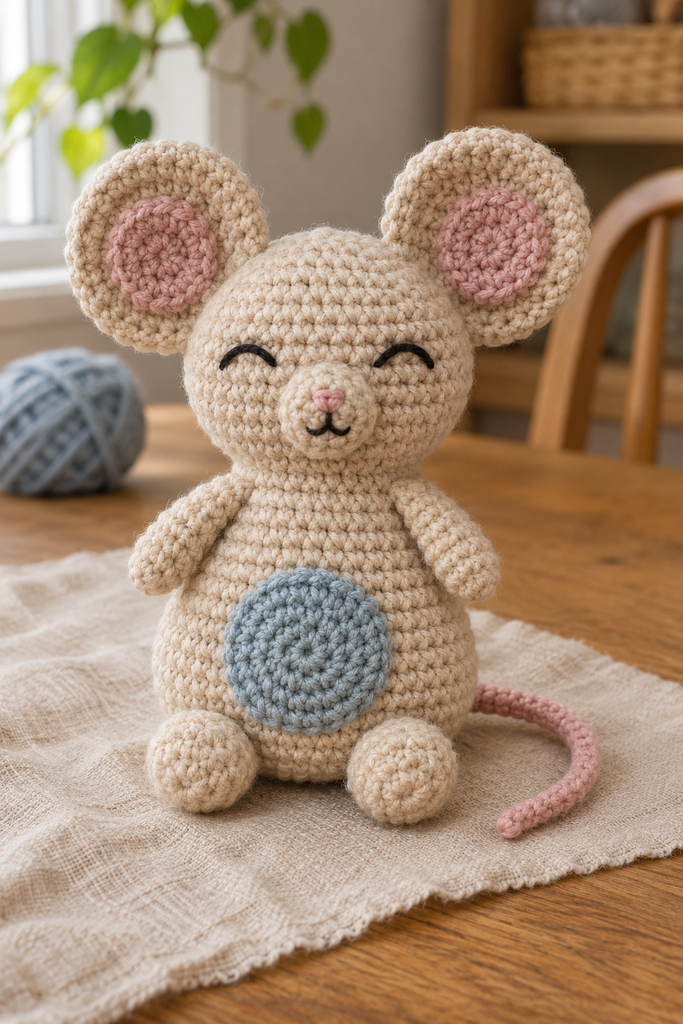
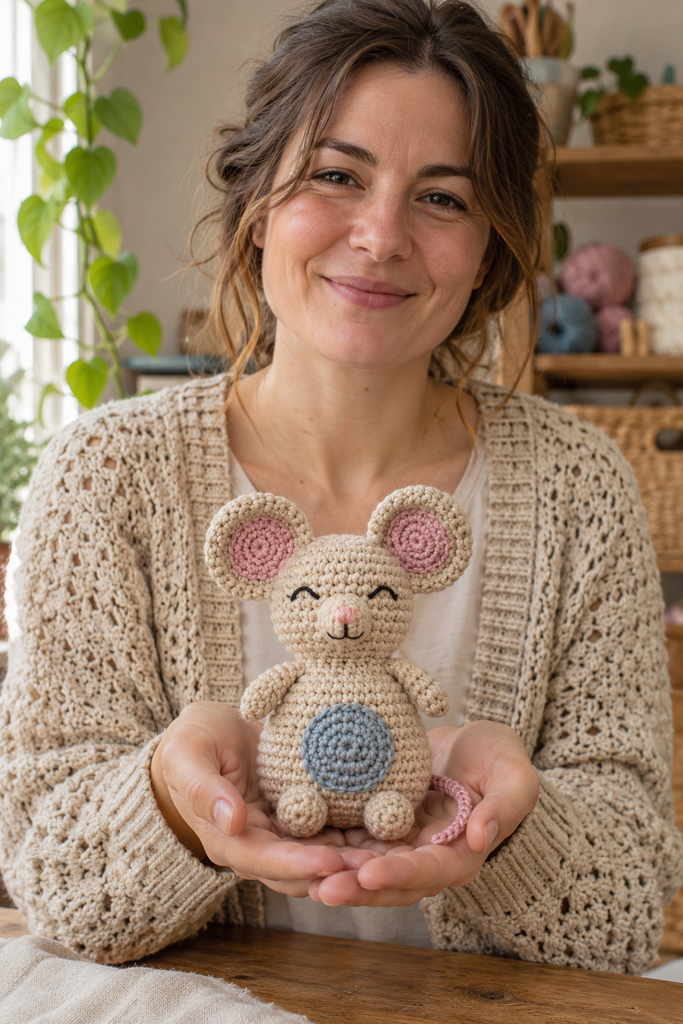
Hazel is a small seated crochet mouse with an oatmeal coat, round pink-centered ears, a dusty-blue belly, and a soft pink tail. The sleepy face uses short embroidery stitches, and the paws are deliberately simple. Its character comes from the rounded proportions and careful placement of the smaller pieces.
The body and head are worked continuously in one piece. You add two ears with separate inner circles, a muzzle, two arms, two feet, a belly patch, and a thin tail afterward. The parts are small enough to work on individually, and pinning them together gives you a chance to adjust the expression before sewing.
The supplied Square Hare to Crochet suggested the general mood of a small handmade animal. Hazel changes the species, silhouette, colors, shaping, appendages, and assembly. A mouse with round ears and a long tail replaces the rectangular hare construction. The reference’s instructions and photographs are not reproduced.
Pattern status: The stitch arithmetic has been reviewed, but this draft has not been physically crocheted or tested. Dimensions, yarn quantities, attachment positions, ear posture, and seated balance are estimates. All four images are AI-generated concepts rather than photographs of a sample made from these instructions. Use the written counts and assess a physical sample before describing the pattern as tested.
Project Overview
The intended finished height is approximately 13–16 cm including the ears, using DK cotton yarn and a 3 mm hook. This is an untested estimate. A starting gauge of about 22 single crochet stitches and 25 rounds per 10 cm should give a compact fabric, but yarn thickness, tension, and stuffing will affect the result.
Hazel suits a confident beginner who can crochet in spiral rounds, increase, decrease, and sew small pieces. The four-stitch tail is the most fiddly component because the opening is narrow. The face and round ear placement deserve a little extra time during assembly.
Make a small filled sample if you are uncertain about the yarn. The fabric should hide stuffing without requiring strained, overly tight stitches. If gaps appear with light filling, change the hook or yarn before making the main piece.
Materials
- DK cotton yarn in oatmeal beige, approximately 100–140 m.
- Dusty-pink DK cotton yarn, approximately 25–40 m for the inner ears, tail, and nose embroidery.
- Dusty-blue DK cotton yarn, approximately 10–20 m for the belly.
- Black embroidery thread or thin black yarn for the eyes and mouth.
- A 3 mm crochet hook, or a size that gives dense, comfortable stitches.
- Suitable fiberfill, a blunt tapestry needle, scissors, removable stitch markers, and temporary assembly pins.
These yarn quantities include a margin for sewing but are not measured sample requirements. Use yarns of similar thickness so the inner ears and belly remain in proportion. Split the pink yarn into fewer strands if you want a more delicate embroidered nose.
This draft does not establish suitability for babies or young children. Loose stuffing, detached pieces, and long appendages can be hazardous. Choose materials for the intended recipient and assess the finished object, including the tail and every seam. The written version uses embroidered eyes rather than plastic hardware.
Abbreviations and Working Notes
US crochet terminology is used throughout.
| Term | Meaning |
|---|---|
| MR | Magic ring |
| sc | Single crochet |
| inc | Work 2 sc into the same stitch |
| dec | Decrease 2 stitches into 1 |
| st / sts | Stitch / stitches |
| R | Round |
| (instructions) × number | Repeat the bracketed sequence the stated number of times |
Work in continuous spiral rounds. Do not join rounds or add turning chains. Move a marker into the first stitch as you begin each new round. The number after the instruction is the total stitch count after completing that round.
For an invisible decrease, insert the hook under the front loop of each of the next two stitches. Yarn over and draw through those front loops, then yarn over and draw through the remaining two loops. A standard single crochet decrease also works, though it may be more visible.
When an opening is flattened, its stitches form pairs across two layers. A six-stitch opening closes with a row of three sc through both layers; a twelve-stitch opening closes with six sc. These are short closing rows, not additional rounds around the opening.
Pattern: Continuous Body and Head
Begin at the bottom with oatmeal yarn.
Build the Rounded Torso
- R1: 6 sc into an MR. Tighten the center. 6 sts.
- R2: Inc in every stitch. 12 sts.
- R3: (1 sc, inc) × 6. 18 sts.
- R4: (2 sc, inc) × 6. 24 sts.
- R5: (3 sc, inc) × 6. 30 sts.
- R6: (4 sc, inc) × 6. 36 sts.
- R7–R11: Sc in every stitch for five rounds. 36 sts each round.
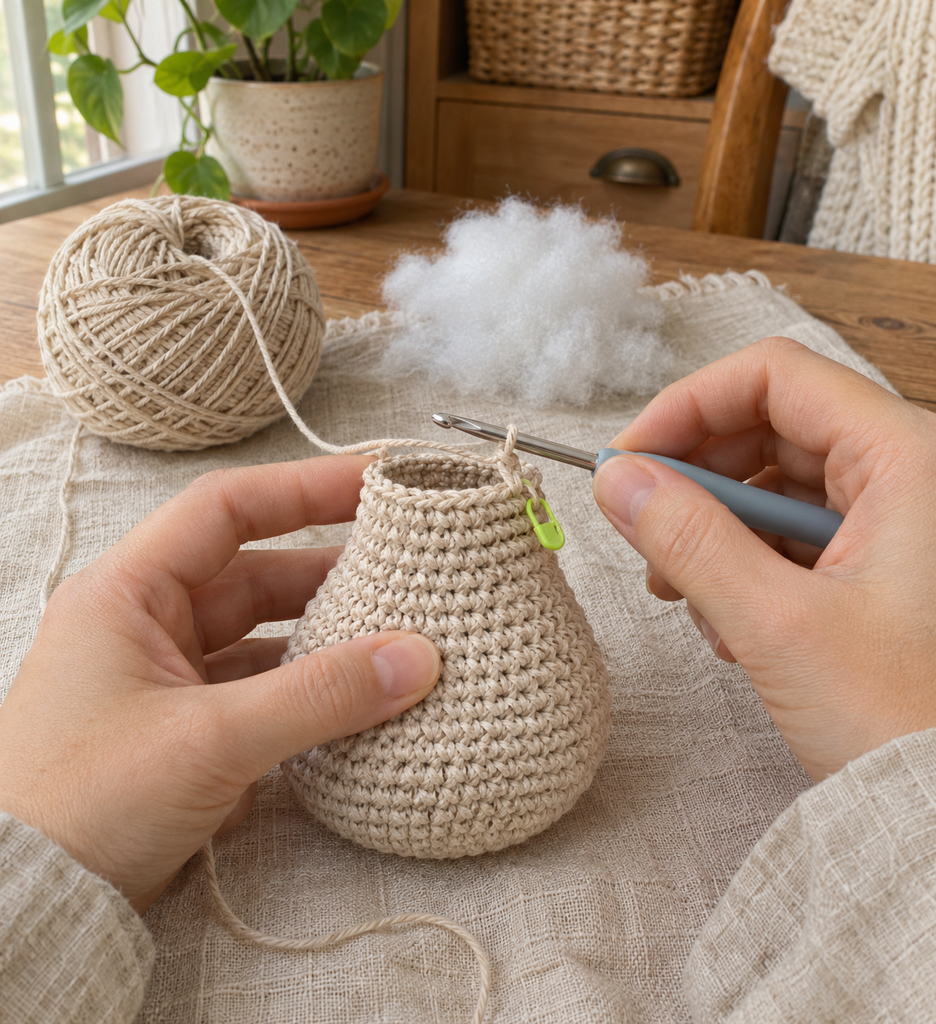
Keep the right side of the fabric facing outward and secure the starting tail inside. The piece now resembles a deep rounded cup. Count the opening before starting the shoulders.
Narrow the Shoulders
- R12: (4 sc, dec) × 6. 30 sts.
- R13: (3 sc, dec) × 6. 24 sts.
- R14: (2 sc, dec) × 6. 18 sts.
- R15: Sc in every stitch. 18 sts.
Add filling in small tufts through the neck opening. Shape the base into a softly rounded seat and distribute filling evenly through the sides. Avoid packing one hard lump beneath the neck.
Expand the Head
Continue with the same oatmeal yarn; do not fasten off at the neck.
- R16: (2 sc, inc) × 6. 24 sts.
- R17: (3 sc, inc) × 6. 30 sts.
- R18–R23: Sc in every stitch for six rounds. 30 sts each round.
Choose a smooth front and mark it independently of the round marker. Spiral rounds can drift, so the original marker is not a fixed center line.
Leave the crown open while preparing the muzzle and eyes. Add just enough temporary filling to see the head shape, keeping room for the embroidery needle. The head grows upward from the neck: the higher round numbers are nearer the crown.
Pattern: Small Oatmeal Muzzle
With oatmeal yarn:
- R1: 6 sc into an MR. 6 sts.
- R2: Inc in every stitch. 12 sts.
- R3: Sc in every stitch. 12 sts.
Fasten off with a 30 cm sewing tail. Gently flatten the shallow cup. Add only a thin wisp of filling if you want a raised muzzle; it should not become a separate ball.
Embroider a tiny dusty-pink nose near the upper center of the patch with two or three short stitches. Below it, add a short black vertical stitch and two small angled stitches for the mouth. Secure the embroidery ends on the back of the patch.
Pin the muzzle centrally on the lower front of the head, centered roughly around R20. Check that its edges stay on existing fabric and leave room for the eyes above. Sew the entire perimeter to sound head loops, adding the thin filling before closing the final gap if you chose to use it.
Embroider two closed black eye arches around R22, one on either side above the muzzle. Each can span about two stitches. Inspect their angle and spacing from straight ahead before securing the ends inside the still-open head.
Close the Crown
Return to the main oatmeal piece.
- R24: (3 sc, dec) × 6. 24 sts.
- R25: (2 sc, dec) × 6. 18 sts.
- R26: (1 sc, dec) × 6. 12 sts.
Finish filling the head through the remaining opening. Support the neck evenly so the head does not fold forward. Check that the facial stitches remain relaxed and the cheeks are smooth.
- R27: Dec × 6. 6 sts.
Fasten off with a 20 cm tail. Thread through the front loops of the last six stitches, pull the crown closed, and secure it. Bury the end inside the head.
Pattern: Round Outer Ears, Make Two
With oatmeal yarn, begin at the outer top of each ear.
- R1: 6 sc into an MR. 6 sts.
- R2: Inc in every stitch. 12 sts.
- R3: (1 sc, inc) × 6. 18 sts.
- R4–R5: Sc in every stitch for two rounds. 18 sts each round.
- R6: (1 sc, dec) × 6. 12 sts.
Leave the ears unstuffed. Flatten the opening into six pairs and work a closing row of 6 sc through both layers. Fasten off with a 40 cm tail.
Gently press each ear into a round flattened shape. Keep both ears similar in width and do not stretch their closed bases. The generated images may show more circular edges than your yarn produces; the written piece is a soft flattened pouch.
Pattern: Pink Inner Ears, Make Two
With dusty-pink yarn:
- R1: 6 sc into an MR. 6 sts.
- R2: Inc in every stitch. 12 sts.
Fasten off with a 25 cm tail. These are small flat discs with no filling. Center one on the front of each oatmeal ear, leaving an oatmeal border visible.
Sew all around the pink disc using small stitches that catch the front surface of the outer ear. Avoid sewing through the entire back layer whenever possible. Secure the ends between the layers and keep the outer-ear attachment tail available.
Pattern: Short Arms, Make Two
With oatmeal yarn, begin at the rounded paw end.
- R1: 6 sc into an MR. 6 sts.
- R2: (1 sc, inc) × 3. 9 sts.
- R3–R6: Sc in every stitch for four rounds. 9 sts each round.
- R7: (1 sc, dec) × 3. 6 sts.
Place a very small tuft of filling in the rounded paw if desired, keeping the upper arm empty. Flatten the opening and work a closing row of 3 sc through both layers. Fasten off with a 30 cm sewing tail.
Pattern: Rounded Feet, Make Two
With oatmeal yarn:
- R1: 6 sc into an MR. 6 sts.
- R2: Inc in every stitch. 12 sts.
- R3–R4: Sc in every stitch for two rounds. 12 sts each round.
Add a small amount of filling, shaping a rounded paw.
- R5: Dec × 6. 6 sts.
Fasten off with a 35 cm tail. Thread through the front loops of the remaining six stitches and close. Keep the tail outside for sewing. Compare both feet before attaching them; equal stuffing helps the pose look balanced.
Pattern: Dusty-Blue Belly
With dusty-blue yarn:
- R1: 6 sc into an MR. 6 sts.
- R2: Inc in every stitch. 12 sts.
- R3: (1 sc, inc) × 6. 18 sts.
- R4: (2 sc, inc) × 6. 24 sts.
- R5: Sc in every stitch. 24 sts.
Fasten off with a 40 cm sewing tail. Do not stuff. The last plain round can produce a shallow cup; let it follow the body curve rather than forcing it into a rigid flat disc.
Pattern: Soft Pink Tail
With dusty-pink yarn:
- R1: 4 sc into an MR. 4 sts.
- R2–R16: Sc in every stitch for fifteen rounds. 4 sts each round.
Do not stuff the tail. Flatten the four-stitch opening into two pairs and work a closing row of 2 sc through both layers. Fasten off with a 35 cm tail.
This narrow tube is fiddly, so mark the first stitch carefully and count often. Keep it soft enough to curve beside the body. Do not insert wire or pull it into a tight loop. Its length is approximately 6 cm at the suggested round gauge, but this estimate has not been measured on a sample.
Assembly: Give Hazel a Seated Pose
There are twelve crochet pieces: one joined body and head, one muzzle, two outer ears, two inner ears, two arms, two feet, one belly, and one tail. The inner circles and muzzle may already be sewn in place.
Attach the Ears
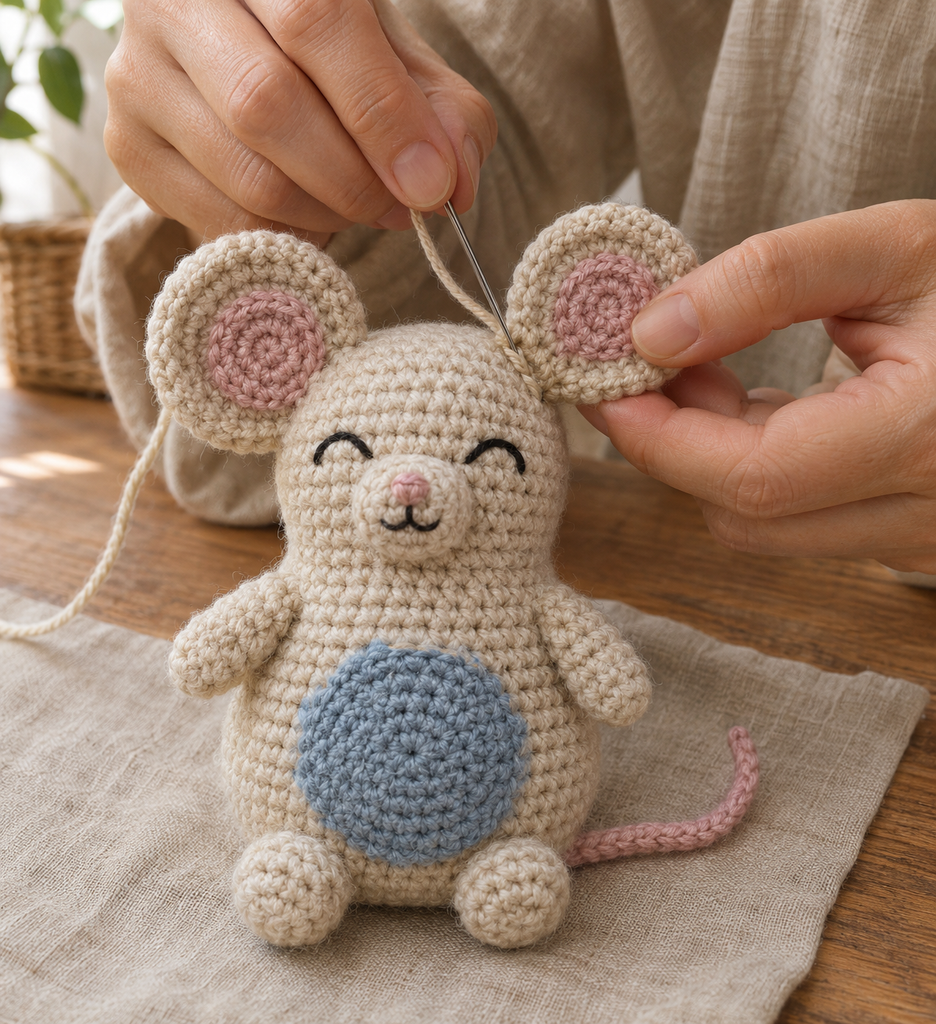
Pin the round ears to the upper left and right sides of the crown, approximately across head R24–R26. Turn the pink centers forward and leave a visible gap between the ears. Check their height and angle from the front and above.
Sew each six-stitch flattened base onto sound head loops. Pass back across the base to reinforce it and add a few small stitches behind the attachment if needed to support the angle. Avoid pulling hard enough to dent the crown.
Attach the Belly, Arms, and Feet
Center the blue patch on the lower front of the torso, approximately across body R5–R11. Pin several points around the perimeter before sewing. Attach the entire 24-stitch edge to sound surface loops across the body’s curved fabric. This is an applique seam; the patch edge does not match a single body round one to one.
Keep the patch unstuffed and the sewing tension relaxed so it settles against the torso. Bury the end after checking that the blue circle is centered beneath the face.
Pin the arms at the upper body sides around R12–R14, with the rounded paws pointing down and slightly forward. Sew each three-stitch closed base securely, then reinforce behind the base with a few small stitches.
Position the feet at the lower front around R3–R5, with their closed ends against the body and their rounded ends projecting forward. Leave a small gap between them. Sew around each closed end and catch adjacent underside fabric to reduce swiveling.
Set Hazel on a level surface before completing these seams. Adjust both feet together if needed. Sitting balance is not guaranteed by this untested draft; use discreet support for display if the rounded body leans.
Attach the Tail
Place the tail’s closed two-stitch base at the lower back around body R3–R6. Sew the base and a few adjacent side loops to create a broader attachment than a single thread point.
Let the tail curve loosely along one side. If you want it to stay in place, add one discreet pink tack between the tail and the lower back fabric. Avoid creating a closed loop. Keep the free tip visible and secure all ends inside the body.
Remove every pin, marker, and temporary thread. Check Hazel by touch and sight, gently tugging each attachment and reworking any loose seam.
More Information: Finishing and Variations
Keep the Neck Supported
The head and body are connected by crochet fabric, but the neck still needs even filling. Add small tufts before closing the crown and inspect the head from the side. Overfilled cheeks combined with an empty neck can make the head lean forward.
Smooth the Ear Layers
Use light sewing tension when attaching the inner circles. Tight stitches can pucker the oatmeal border. Pin the pink disc at several points, then sew around gradually, checking that the outer ear keeps its rounded outline.
Change the Palette
Soft gray, warm cream, or light taupe can replace oatmeal. Keep enough contrast between the outer ears and pink centers to show their shape. A sage or lavender belly gives another gentle variation without changing stitch counts when the yarns have similar thickness.
Longer ears or a heavier head change the balance. Treat those adjustments as experiments, making a physical sample before relying on the original placement guides.
Care for the Finished Mouse
Follow the care directions for both yarn and filling. Where those materials permit, gentle spot cleaning and thorough air drying can help protect the face and ear shape. Do not store the toy while damp. Check the seams and tail after cleaning or frequent handling.
Frequently Asked Questions
Is Hazel suitable for a beginner?
A confident beginner can work the main shapes after practicing spiral rounds and decreases. The narrow tail and layered ears require patience. Make one arm first if you want a smaller practice piece before starting the torso.
Why are the head and body worked together?
Continuous construction removes a separate head seam and creates a small defined neck. The head still needs support from filling, so joining the fabric does not automatically prevent wobbling.
Can I leave off the tail?
Yes. It is sewn on after the rest of the body is finished, so omitting it does not change any other stitch counts. Check the finished silhouette and balance on your actual sample.
Why do the ears fold backward?
The ears are soft and unstuffed. Yarn firmness, attachment angle, and base reinforcement affect their posture. Re-pin the bases and add small supporting stitches behind them if needed. The generated images do not prove a particular ear position.
Can I use chenille or velvet yarn?
Those yarns change the scale, fabric behavior, and visibility of sewing stitches. The listed DK quantities and size estimate will not transfer directly. Make a sample and reassess the tiny muzzle and tail before adapting the full project.
Is this a physically tested pattern?
No. The stitch arithmetic and closing-row counts have been reviewed, but no finished prototype has been made. Yarn use, size, proportions, ear placement, tail behavior, and sitting balance still require practical validation before the draft is described as tested.