Sunshine Citrus Crochet Pillow
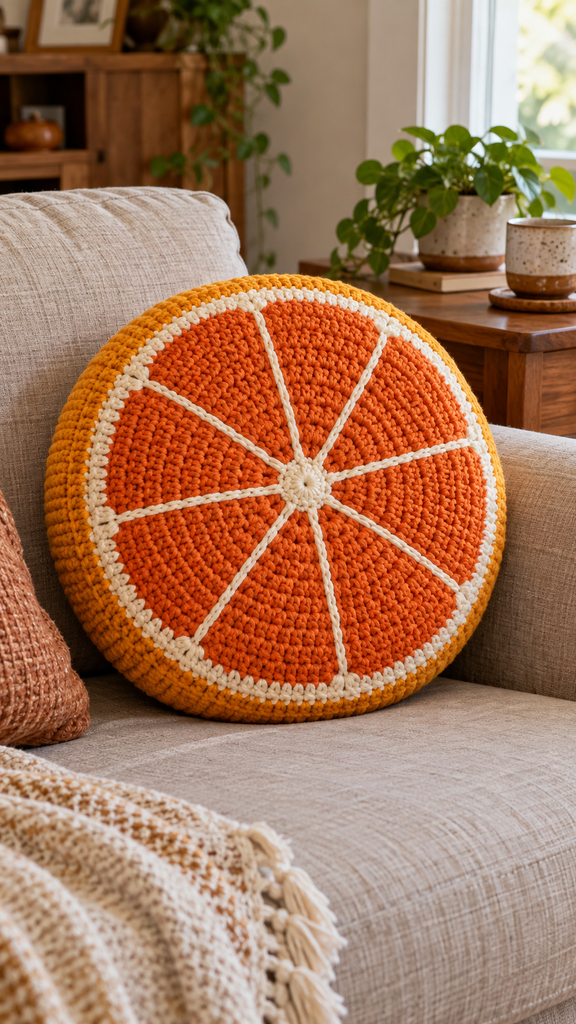
A small handmade cushion can bring a welcome splash of color to a quiet corner. This Sunshine Citrus Crochet Pillow pairs warm orange yarn with cream embroidery and a golden rind, turning a simple round shape into a playful orange slice. It is a decorative accent for a reading chair, craft room, or relaxed living room.
The supplied Pizza Party Crochet Snuggle Sack PDF suggested the broad idea of food-inspired comfort. This project takes that idea in a new direction: a round stuffed cushion rather than a wearable triangular sack, with two single-crochet discs and embroidered citrus divisions. The reference’s shaping, folded crust, pepperoni, and mushroom pieces are not used. The instructions below are newly drafted for this different project.
Pattern status: The round totals and joining calculations have been checked mathematically, but these instructions have not been physically crocheted or sample-tested. Finished dimensions, stuffing quantity, and yarn requirements are provisional. All three images are AI-generated concept illustrations; follow the written instructions for counts and construction.
Why This Little Citrus Cushion Works
The main fabric is plain single crochet. Increases spread around each disc build the shape, while staggered placement helps soften the six-sided outline that can develop when increases stack in the same places. The front changes color near its outer edge to suggest white pith and golden peel.
Eight embroidered lines create the citrus segments after the front has been crocheted. They are surface decoration, not seams or separate wedges. This keeps the construction approachable and avoids a large collection of pieces to assemble. The back is a solid golden orange circle.
The cushion closes with a visible single-crochet seam worked through both discs. A modest amount of filling gives it a soft, rounded profile. It is intended as a decorative cushion, so there is no need to pack it tightly enough to support sitting or standing.
Project Overview
| Detail | Planned specification |
|---|---|
| Project | Round orange-slice decorative cushion |
| Skill level | Confident beginner with basic embroidery experience |
| Terms | US crochet terminology |
| Construction | Two matching discs, surface embroidery, stuffed edge join |
| Disc size | 24 rounds; 144 stitches at the outside edge |
| Finished diameter | Approximately 35 cm / 14 inches, subject to gauge and filling |
| Planned thickness | About 6–8 cm / 2½–3 inches after filling |
| Main technique | Single crochet in continuous rounds |
Materials and Color Planning
- Smooth bulky-weight yarn in burnt orange A, warm cream B, and golden orange C.
- A provisional budget of 400–500 m / 440–550 yd total: approximately 180–220 m A, 40–60 m B, and 180–220 m C. These are estimates rather than measured sample requirements.
- A 5.5 mm crochet hook as a starting point, with nearby sizes available for adjusting the fabric.
- Approximately 200–350 g of polyester fiberfill as a starting allowance; stop when the cushion feels softly filled.
- Eight removable stitch markers, a blunt tapestry needle, scissors, and a tape measure.
Choose all three colors from a compatible yarn range so their thickness and care requirements match. Smooth plied yarn makes the single crochet and embroidery easier to see. Very fuzzy chenille can hide the stitch tops and make it difficult to secure embroidered lines neatly.
If you prefer a softer palette, use peach for the front and muted apricot for the rind. A lemon version can use butter yellow, cream, and deeper golden yellow without changing the counts. The clearest citrus effect comes from a visible contrast between the fruit-colored center and the cream divisions.
Abbreviations and Working Notes
- ch: chain.
- sc: single crochet.
- inc: work 2 sc in the same stitch; one stitch is added.
- sl st: slip stitch.
- st / sts: stitch / stitches.
- rnd: round.
- RS / WS: right side / wrong side.
Work through both top loops unless instructed otherwise. The discs use continuous rounds: do not join or turn after each round. Place a marker in the first sc and move it up at the start of every new round. The marker identifies the round boundary, even when the increase positions are staggered.
Repeated instructions in parentheses are worked the stated number of times. A joining slip stitch is not included in any disc count. When changing colors, make the final yarn-over of the preceding stitch with the new color, then continue with the new strand.
Check Your Fabric Before Starting
Aim for approximately 13 sc and 14 rows per 10 cm / 4 inches in a washed, dry single-crochet swatch. This is a planning gauge, not a measured result from a completed sample. Round gauge and individual tension can change the final diameter, so also measure the actual discs as you work.
For a swatch, ch 21. Sc in the second chain from the hook and in every chain across for 20 sc. On following rows, ch 1, turn, and sc in all 20 stitches. The ch 1 does not count. Work enough rows to measure a central area away from the edges, then wash and dry according to the yarn label.
The fabric should bend comfortably while remaining dense enough to conceal the filling. If large gaps remain between stitches, try a smaller hook or a yarn better suited to a cushion. If the fabric feels rigid, increase the hook size slightly and reassess the density.
A 144-stitch edge at 13 stitches per 10 cm represents roughly 111 cm of circumference, or about 35 cm in diameter before stuffing. That is an estimate: measure your front disc rather than forcing it to match the number. Make the back with the same yarn weight, hook, and tension.
Crochet the Front Disc
Step 1: Begin the Orange Center
With burnt orange A, make an adjustable ring.
Round 1: Work 6 sc into the ring. Pull the ring closed. 6 sts. Secure the starting tail on the WS after a few rounds so the center cannot loosen easily.
Round 2: Inc in each stitch around. 12 sts.
The remaining rounds each add six stitches. The increase positions alternate between an ordinary repeat and a split repeat to help distribute them around the circle.
Step 2: Use the Two Increase Formulas
For any round numbered R from 3 through 24, let K = R minus 2. K is the number of ordinary sc between increases.
Odd-numbered rounds: Work (sc in the next K stitches, inc in the next stitch) 6 times.
Even-numbered rounds from Round 4 onward: Sc in the next K/2 stitches, inc in the next stitch; work (sc in the next K stitches, inc in the next stitch) 5 times; sc in the final K/2 stitches. K is always even on these rounds, so there are no half-stitch instructions.
For example, Round 3 is (1 sc, inc) 6 times, giving 18 stitches. Round 4 is 1 sc, inc, (2 sc, inc) 5 times, 1 sc, giving 24 stitches. Round 5 is (3 sc, inc) 6 times, giving 30 stitches. The split round begins and ends with half of the usual plain-stitch section; it still contains exactly six increases.
Use the table to track your round number and expected total. Count at the end of each round before moving the marker. Do not add an extra stitch at the marker or join with a slip stitch between rounds.
| Round | Color on front | Stitches after round |
|---|---|---|
| 1 | A | 6 |
| 2 | A | 12 |
| 3 | A | 18 |
| 4 | A | 24 |
| 5 | A | 30 |
| 6 | A | 36 |
| 7 | A | 42 |
| 8 | A | 48 |
| 9 | A | 54 |
| 10 | A | 60 |
| 11 | A | 66 |
| 12 | A | 72 |
| 13 | A | 78 |
| 14 | A | 84 |
| 15 | A | 90 |
| 16 | A | 96 |
| 17 | A | 102 |
| 18 | A | 108 |
| 19 | A | 114 |
| 20 | A | 120 |
| 21 | A | 126 |
| 22 | B | 132 |
| 23 | C | 138 |
| 24 | C | 144 |
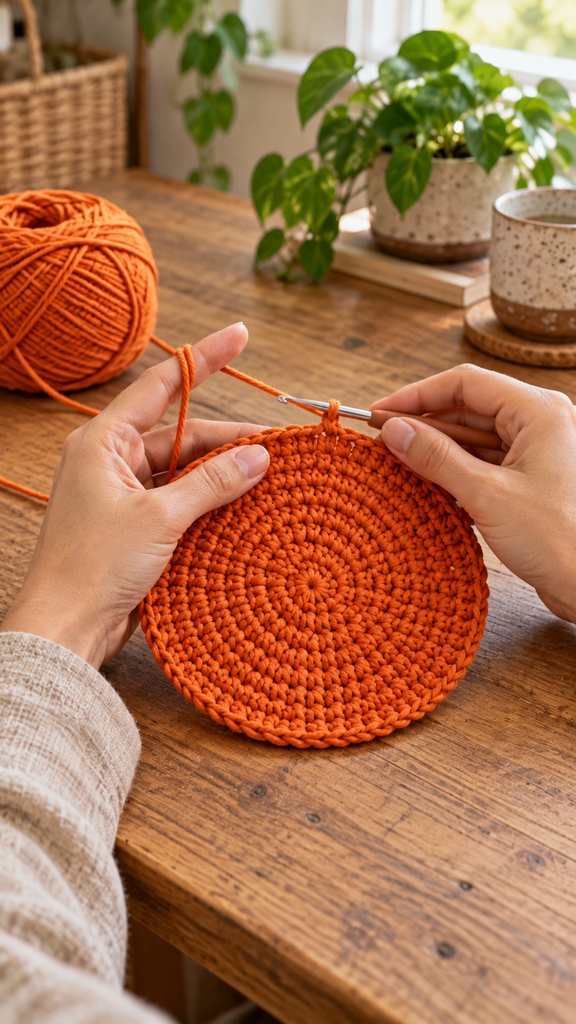
Step 3: Add the Pith and Rind
Work through Round 21 in A. Change to cream B in the last pull-through of the final stitch of Round 21, leaving tails long enough to weave in securely.
Round 22, cream B: K is 20. Work 10 sc, inc, (20 sc, inc) 5 times, then 10 sc. 132 sts. This single cream round becomes the pith ring.
Change to golden orange C in the final pull-through of Round 22.
Round 23, C: (21 sc, inc) 6 times. 138 sts.
Round 24, C: 11 sc, inc, (22 sc, inc) 5 times, 11 sc. 144 sts. Make a finishing sl st in the next stitch, fasten off, and mark that slip stitch so it is not mistaken for an extra sc during assembly. Weave in the color-change tails on the WS.
Lay the disc flat. A slight angular outline can be softened during blocking, but a pronounced bowl or ruffle needs attention before assembly. Recount the latest rounds and review your tension rather than adding unplanned increases to only one disc.
Make the Matching Back
With golden orange C, repeat Rounds 1–24 using the same increase formulas and stitch totals. There are no color changes on the back. Finish with a sl st in the next stitch and fasten off, marking the finishing slip stitch as on the front.
Place the two discs together and compare their diameters. They should align without one stretching significantly to match the other. If their sizes differ, check gauge and round counts before joining. Lightly block both pieces using the yarn manufacturer’s recommended method and let them dry fully.
Embroider Eight Citrus Segments
Embroider the front before stuffing so you can reach its reverse side. On the cream Round 22, place eight markers at stitch positions 1, 17, 34, 50, 67, 83, 100, and 116, counted from the round’s first stitch. These positions divide 132 stitches into alternating intervals of 16 and 17, producing approximately equal wedges.
With cream B and a blunt needle, outline a small central circle around the first round using short backstitches. Secure the yarn on the WS through nearby stitch bases without tightening the adjustable ring excessively.
From the edge of this small circle, embroider a radial line toward the first marked position on the pith ring. Use short, relaxed backstitches through the surface fabric, each spanning roughly one or two crochet stitches. Stop at the inner edge of the cream ring. Repeat for all eight marked positions.
Keep the disc flat as you work and check it after every line. The embroidery should rest on the fabric, not cinch it into pleats. Avoid one long floating strand from center to edge; short anchored stitches are easier to keep tidy. If a line pulls, loosen or redo it before continuing.
Weave in the embroidery ends securely on the WS. Remove the eight placement markers and check that the front still matches the back. Slight differences between the hand-stitched lines suit the handmade appearance, but deep puckering is a sign that the embroidery is too tight.
Join and Fill the Cushion
Place the discs WS together, with the embroidered front facing you. Align their 144 outer sc stitches, ignoring the marked finishing slip stitches. Put temporary alignment markers through both layers at four evenly spaced points, 36 stitches apart.
Join C through the first corresponding pair of sc. Ch 1; this chain does not count. Work 1 sc through both layers of that pair, then continue with 1 sc through each corresponding pair around. Keep the seam relaxed so it does not draw in the outer edge.
After 108 joining sc, leave the remaining 36 pairs open temporarily. Add small tufts of fiberfill, spreading them through the middle and toward the outer edge. Fill lightly at first, then adjust until the pillow has an even, softly rounded profile. Keep fiberfill away from the active joining stitches.
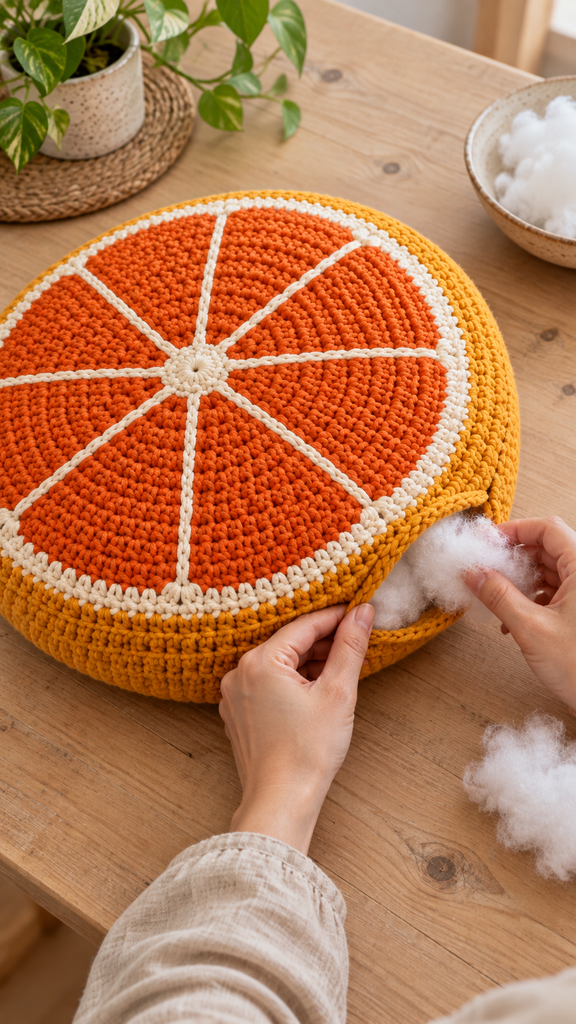
Continue crocheting the remaining 36 joining sc through the paired edge stitches. You now have 144 joining sc in total. Sl st to the first joining sc, fasten off, and bury the tail securely inside the seam. Remove all temporary markers.
Massage the filling gently to even out any lumps. A little central loft is expected, but overstuffing can stretch the crochet openings and make the fruit divisions look distorted. The intended effect is a soft accent cushion with a recognizable round citrus face.
More Information: Styling, Care, and Variations
Pair the orange cushion with oatmeal, pale wood, dusty pink, or sage textiles. One citrus accent can stand out against a plain chair without requiring a matching fruit theme throughout the room. Display the embroidered face forward and use the solid golden back when you want a quieter look.
Follow the most restrictive care instructions among the yarn and filling labels. A stuffed cushion can take longer to dry than a flat crochet piece. Support its weight during washing and drying, reshape gently, and make sure the filling dries completely before use or storage.
For another size, retain matching front and back stitch counts and recalculate the placement of the pith ring, rind, and embroidery. Adding rounds changes the yarn requirement and diameter. Simply switching to thinner yarn will also make a smaller cushion, but a new swatch is still needed to assess filling coverage.
Frequently Asked Questions
Can a beginner make this cushion?
It suits someone comfortable with single crochet, increases, and counting rounds. Practice the split increase formula on a small disc first. The embroidery uses simple backstitches, but patience helps keep the lines relaxed.
Why is my circle becoming a hexagon?
Increases naturally create six expansion areas. Staggering the even rounds reduces repeated stacking, though slight angles can remain. Check that you are using the split formula on even rounds rather than placing every increase directly above the previous one.
What if the disc curls into a bowl?
First confirm the count: Round R should contain 6 × R stitches. Missing increases or tight tension can cause cupping. If the counts are correct but the fabric still will not lie flat, reassess your yarn and hook combination with a smaller practice circle.
Can I use a ready-made pillow insert?
A flexible round insert may work if it fits your actual discs comfortably. This draft assumes loose fiberfill and a permanently crocheted closure. An insert requiring a zipper or removable opening would need a revised joining method.
Should I embroider through both layers?
No. Embroider only the front disc before assembly. Stitching through the stuffed cushion would create unwanted indentations and make it harder to keep the citrus lines flat.
Are the photographs exact stitch demonstrations?
They show the intended design and general working stages. They are AI-generated concepts and may not reproduce exact stitch counts or needle placement. Use the written counts and your actual fabric to guide construction.
Is this a tested pattern?
No physical sample has been made from these instructions. The numerical checks support the shaping plan, but a crochet test is still needed to confirm flatness, yarn use, finished dimensions, and appearance after filling.