Soft Shell Crochet Scarf
A long crochet scarf is a useful place to enjoy a rhythmic stitch and a few colors you love. This Soft Shell Crochet Scarf combines small fan-shaped motifs with broad sections of sage, cream, and dusty rose. A little fringe finishes both ends and adds movement to the otherwise simple rectangle.
The supplied Go-To Crochet Shawl PDF suggested the broad idea of an airy crocheted accessory. This project changes the shape, stitch construction, color arrangement, and finishing: a narrow rectangular scarf replaces the triangular shawl, with ordinary double-crochet shells instead of the reference’s treble and front-post pattern. The original instructions, chart, and photograph are not reproduced.
Pattern status: Foundation counts, shell placement, and the color schedule have been reviewed mathematically. This newly drafted pattern has not been physically crocheted, blocked, or fit-tested. Dimensions and yarn quantities are planning estimates. All three photographs are AI-generated concept illustrations; use the written instructions for exact stitch placement.
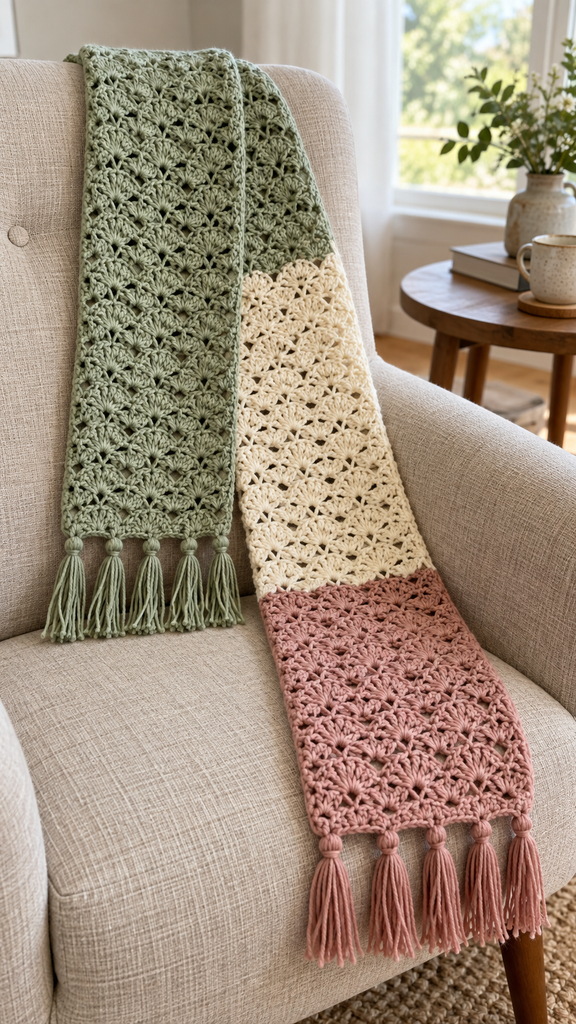
An Easy Rhythm With a Soft Drape
The scarf is worked back and forth across its narrow width. One row places seven full shells between single-crochet anchors. The next row offsets the pattern, with six full shells between two smaller end groups. This two-row arrangement creates the repeating fan texture while keeping the same number of stitch positions across.
The three color sections each contain sixty pattern rows. Changing color at a row end keeps the transitions straightforward. There are no separate motifs to join, and the fringe is attached only after the scarf has been washed, shaped, and measured.
This is a good project for someone comfortable with single and double crochet who wants to practice reading the previous row. Once the fans and anchors become familiar, the written counts remain useful checkpoints at every color change.
Project Details
| Feature | Planned specification |
|---|---|
| Project | Rectangular shell-stitch scarf |
| Skill level | Confident beginner |
| Terms | US crochet terminology |
| Foundation | 43 sc, made from a chain of 44 |
| Repeat | Two pattern rows across 43 stitch positions |
| Main body | 180 pattern rows plus one foundation row |
| Planned body size | Approximately 21 × 150 cm / 8¼ × 59 inches at the target gauge |
| Fringe | Five groups at each end, approximately 10 cm long |
| Colors | Sage A, cream B, dusty rose C |
Materials and Yarn Choices
- Smooth light DK yarn in sage A, cream B, and dusty rose C.
- A provisional total budget of approximately 550–700 m / 600–765 yd, divided roughly equally among the three colors, with extra allowance in A and C for fringe.
- A 4 mm crochet hook as a starting point, plus nearby sizes for adjusting gauge and drape.
- A blunt tapestry needle, scissors, tape measure, and removable stitch markers.
- A piece of cardboard approximately 11 cm wide for cutting fringe strands.
Choose compatible colors from the same yarn range where possible. A smooth wool blend, acrylic blend, or another soft yarn can show the shells clearly. Check how the yarn feels against the neck before buying enough for the full scarf.
The yarn allowance is an estimate, not a measured result. Your swatch will give a better indication of consumption, especially if the fiber or thickness differs from light DK. Keep the yarn labels so the finished scarf can be cared for correctly.
Avoid judging drape from a tiny unwashed sample. A fabric that feels slightly firm on the hook may relax after washing, while another yarn may retain its stiffness. The practice section below is worth completing before the long color bands.
Abbreviations and Stitch Notes
- ch: chain.
- sc: single crochet.
- dc: double crochet.
- st / sts: stitch / stitches.
- shell: work 5 dc into one stitch.
- half-shell: an end group of 3 dc, including a counted starting chain where specified.
The ch 1 at the start of a full-shell row does not count as a stitch. The ch 3 at the start of an offset row does count as the first dc. This difference matters at the ends: the next full-shell row finishes by working into the top of that counted ch 3.
Work into both top loops of each stitch. The shells are placed into single-crochet anchors, while the new anchors are placed into the middle, third dc of the previous full shells. No stitches are worked around posts or into large chain arches.
To change colors, begin the last dc of the old color and work until two loops remain on the hook. Use the new color for the final yarn-over and pull-through. Turn and make the next row’s turning chain with the new color.
Make a Shell-Stitch Swatch
The planning gauge is approximately seven full-shell repeats across 21 cm, and twelve pattern rows per 10 cm, measured after washing and drying. These are target measurements rather than a completed sample result.
For a small trial, ch 20 and work 19 sc across the foundation. Follow the full-shell row using three repeats instead of seven. On the offset row, use two interior shell repeats instead of six. Work at least twelve pattern rows, then wash and dry according to the yarn label.
Measure the width without stretching the shell openings. If the fabric feels stiff, try a larger hook. If it feels too loose or the fans lose their shape, try a smaller one. Choose the drape first, then recalculate the dimensions if your preferred fabric differs from the planning gauge.
Use the washed swatch to estimate length. At twelve pattern rows per 10 cm, 180 pattern rows give about 150 cm before fringe. If your row gauge differs, the same row count will produce a different length. Check the actual scarf at each color transition.
Crochet the Scarf
Step 1: Work the Foundation
With sage A, ch 44 loosely.
Row 1: Sc in the second chain from the hook and in each chain across. Turn. 43 sc.
Count the row before continuing. If the foundation feels much tighter than the stitches above it, remake it with looser tension or use a slightly larger hook for the chain only. Return to the chosen working hook afterward.
Step 2: Make a Full-Shell Row
Row 2: Ch 1, sc in the first stitch. Work (skip the next 2 stitches, 5 dc in the next stitch, skip the next 2 stitches, sc in the next stitch) 7 times. Turn.
You now have seven full shells and eight sc anchors, totaling 43 stitches: 35 dc plus 8 sc. The final anchor is worked into the last foundation sc.
The row uses one starting stitch plus seven groups of six underlying stitches. Each five-dc shell belongs in one stitch. Do not spread its five dc across five different foundation stitches.
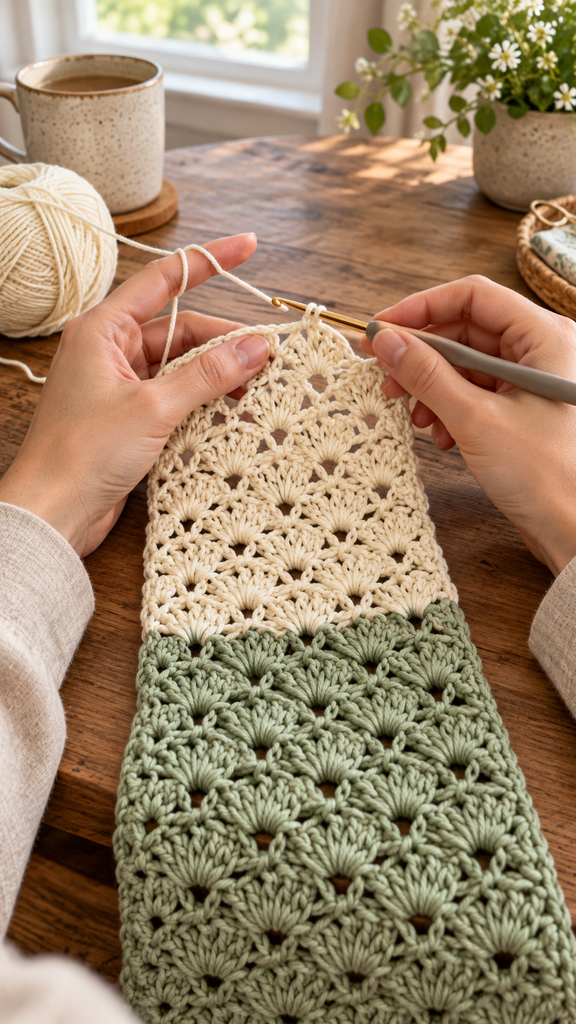
Step 3: Offset the Shells
Row 3: Ch 3, counting as the first dc, then work 2 dc in the first sc anchor. Work (skip the next 2 dc, sc in the next dc, skip the next 2 dc, 5 dc in the next sc anchor) 6 times. Then skip the next 2 dc, sc in the next dc, skip the next 2 dc, and work 3 dc in the last sc anchor. Turn.
The row contains six full shells, two three-dc end groups, and seven sc anchors. The counted ch 3 is part of the first three-dc group. The total remains 43 stitch positions: 30 dc in full shells, 6 dc at the ends, and 7 sc.
The sc anchors sit in the third dc of each previous shell. If the fans seem to drift sideways, check that you have not anchored into the second or fourth dc instead.
Step 4: Repeat the Two Rows
Row 4: Repeat Row 2 across the stitch positions of Row 3. The first sc goes into the first actual dc. Each new shell goes into a previous sc anchor. The final sc goes into the top of the counted ch 3 at the far end.
Row 5: Repeat Row 3.
Continue alternating the full-shell and offset rows through Row 181. Even-numbered rows are full-shell rows; odd-numbered rows from Row 3 onward are offset rows. Do not add stitches at the turning chains.
Place a marker in the top of each counted ch 3 if you find it difficult to locate later. Check both ends every few rows. A missed turning-chain anchor can make the scarf narrow gradually even when the middle fans appear correct.
Follow the Three-Color Schedule
The foundation is in sage and is separate from the 180 pattern rows. Each colored pattern section contains sixty rows, or thirty complete two-row repeats.
| Rows | Color | Pattern rows |
|---|---|---|
| 1 | Sage A | Foundation only |
| 2–61 | Sage A | 60 |
| 62–121 | Cream B | 60 |
| 122–181 | Dusty rose C | 60 |
Change to cream in the final pull-through of the last dc of Row 61. Change to rose in the same way at the end of Row 121. Both transitions follow offset rows, so the next color begins with a full-shell row.
Cut the unused color after each change, leaving a tail approximately 15–20 cm long. Weave the tails through matching-color stitch bases on the reverse, changing direction without pulling the fabric tight.
After Row 181, fasten off. One end begins with the foundation and the other ends with offset shell groups; this draft keeps that small difference rather than adding a separate end border. The fringe provides a consistent finishing detail at both ends.
Wash, Block, and Measure
Wash the scarf using the method recommended for your yarn. Support its weight while wet, then lay it flat and shape it into a long rectangle. Keep the sides parallel and open the shell spaces gently without pulling them into oversized holes.
Let the scarf dry completely before adding fringe. Measure the body length and compare the three color sections. Minor variations can reflect natural changes in tension, but a large difference is worth investigating before the final trim.
If you want a different length, adjust the number of complete two-row repeats in each color section. Keeping the same number of repeats per section preserves the balanced color layout. Every section should finish on an offset row before the next color begins.
Add Five Fringe Groups to Each End
Cut 30 strands of sage and 30 strands of dusty rose, each approximately 22 cm long. Each fringe group uses six strands folded in half, making five groups per end.
At the sage end, mark five attachment positions across the foundation edge: near stitches 1, 11, 22, 33, and 43. Keep the outer groups just inside the corners so the edge does not twist.
At the rose end, distribute five groups visually to match the spacing at the sage end. Attach through secure stitch bases below the outer edge rather than through a single loose turning-chain strand. Avoid gathering several shell stitches together.
For each group, fold six strands in half. Insert the hook through the attachment point, draw the folded loops through, then pull all twelve loose ends through the loops. Tighten gently and evenly. Repeat for all ten groups.
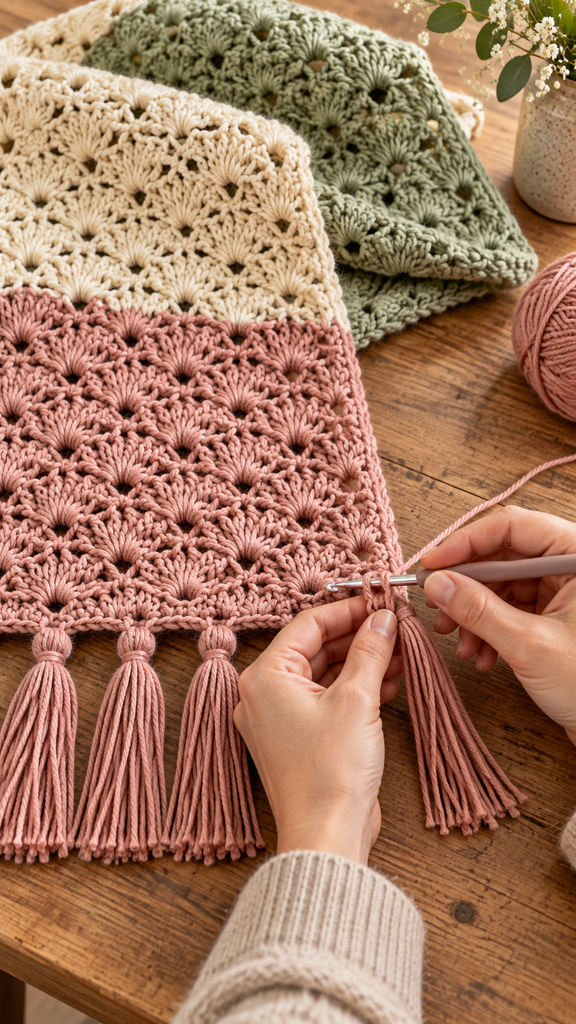
Lay the scarf flat, smooth the fringe without stretching, and trim to approximately 10 cm below each knot. The knot consumes some of the folded length, so trim only after checking the actual strands. Do not cut the scarf’s woven-in yarn tails by mistake.
More Information: Width, Styling, and Care
To change the width while preserving the repeat, use 6N + 1 foundation sc, where N is the number of full shells in a full-shell row. Chain 6N + 2 to begin. For example, five shells need ch 32 and 31 foundation sc; nine shells need ch 56 and 55 sc.
On the offset row, work one fewer interior full-shell repeat than the number of full shells in the preceding row. Keep the two three-dc end groups and the final center-shell anchor. Make a short trial before committing to a resized scarf.
Wear the scarf loosely draped so the broad color sections remain visible, or wrap it once with the ends hanging at different lengths. The small shell openings make the color transitions part of the texture rather than solid blocks.
Follow the yarn label for washing and drying. Untangle the fringe before washing and dry the scarf flat so its weight does not stretch the lace. Store loosely folded, with the fringe resting freely rather than knotted around the body.
Frequently Asked Questions
Is this an easy scarf pattern?
It suits someone who knows single and double crochet and can identify stitch tops. The two-row repeat becomes easier once you recognize the middle dc of each shell and the sc anchors between fans.
Does the turning chain count?
The ch 1 on full-shell rows does not count. The ch 3 on offset rows counts as the first dc. Mark its top so you can work the final sc into it on the next row.
Why is my scarf getting narrower?
Check the end stitches first. Missing the counted turning-chain top or omitting one of the three dc at an offset-row end can reduce the width. Count 43 stitch positions before continuing.
Can I make it in one color?
Yes. Work the same rows without the two color changes and make both sets of fringe in the chosen color. Gauge and yarn consumption still need to be checked from a swatch.
Can I omit the fringe?
Yes. Weave in the ends neatly and leave the two short ends as worked. They have slightly different outlines, so assess them on the blocked scarf before deciding whether you want a separately drafted border.
Are the photographs exact stitch tutorials?
They illustrate the intended style and general working stages. They are AI-generated concepts and may not reproduce exact fan counts or hook placement. Follow the written repeat and your actual stitch tops.
Has the pattern been physically tested?
No. The arithmetic has been reviewed, but a complete sample is still needed to confirm drape, gauge, yarn use, final dimensions, and the end finishing.