Sleepy Lavender Dragon Crochet Bookmark
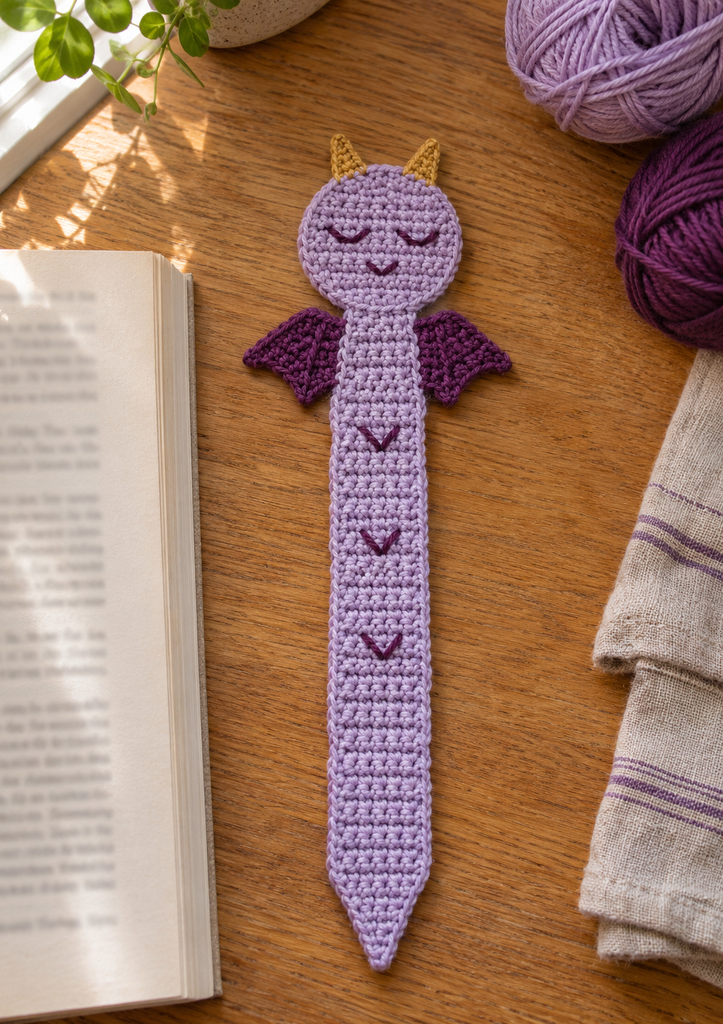
A handmade bookmark can make an ordinary reading break feel more personal. This sleepy dragon has a lavender face, little plum wings, and two golden horns, with a long tapered strip that rests between the pages. Closed embroidered eyes give it a quiet expression, while three tiny V-shaped scales keep the body simple.
The starting inspiration was a stuffed baby dragon. This project takes the dragon theme in a different direction: a flat reading accessory made from small crochet pieces. There is no rounded plush body, stuffing, separate legs, or sculpted snout. A narrow strip provides the practical bookmark, and the face and wings decorate the part you can leave above the pages.
Before you begin: this is a newly drafted, untested pattern. The stitch arithmetic has been checked, but no physical sample has been crocheted. Measurements, yarn amounts, flatness, and use in a book need checking in your own sample. All three images are AI-generated design concepts, not photographs of a tested bookmark.
A Dragon Design That Stays Flat
The bookmark begins at the pointed tail and grows into a seven-stitch strip. A small circular head overlaps its upper end. Two flat triangles form the wings, and two smaller triangles become the horns. Everything is made in single crochet and sewn together without stuffing.
The lavender and plum palette gives the design a softer appearance than a bright green dragon. Golden horns add a little contrast, while the face uses embroidery rather than separate eyes or buttons. Keep all the sewing relaxed and tidy so that the pieces lie against one another without bulky knots.
When using the bookmark, leave the head and wings above the top edge of the pages and place the narrow strip inside. This keeps the thicker joins outside the book. Close it gently rather than pressing the decoration into a tightly shut binding.
Project Details
| Detail | Draft specification |
|---|---|
| Skill level | Confident beginner comfortable sewing small crochet pieces |
| Terminology | US crochet terms |
| Construction | Flat strip, circular head, two triangular wings, two horns |
| Intended total length | Approximately 22–23 cm including horns |
| Intended wingspan | Approximately 8–9 cm |
| Head diameter | Approximately 4–4.5 cm |
| Main strip width | Approximately 3.2 cm |
| Pattern status | Arithmetic checked; not physically crocheted or tested |
Materials and Yarn Choices
- Smooth sport-weight cotton in lavender: approximately 15–20 g.
- Matching plum cotton: approximately 5–10 g for wings and embroidery.
- A small scrap of muted gold cotton for the horns.
- A 2.5 mm crochet hook, or a size that gives close, flexible stitches.
- Tapestry needle, scissors, measuring tape, and removable stitch markers.
Use the same yarn thickness for every piece. Smooth cotton helps the small shapes hold their outline and makes the stitches easy to count. Avoid plush chenille for the first version: it changes the scale and thickness substantially, making the result less suitable for slipping between pages.
The quantities are estimates rather than measured consumption. Short sewing tails and embroidery use little yarn, but it is helpful to keep a little extra in each color. Check colorfastness on a separate damp swatch before placing the finished piece near paper.
Gauge and Calculated Size
The provisional gauge is 22 single crochet stitches and 24 rows per 10 cm. Measure a relaxed swatch rather than stretching it. Choose a fabric that stays close and flat without feeling rigid.
At this gauge, the seven-stitch strip is approximately 3.2 cm wide. Its 42 rows are approximately 17.5 cm long. The 30-stitch outer round of the head gives a circumference of about 13.6 cm, or a diameter around 4.3 cm. Some of the head overlaps the strip, and the horns add height above it.
These are planning calculations, not sample measurements. Your actual size depends on tension, shaping, and blocking. If the head curls strongly or the wings twist, check the counts and fabric before sewing them onto the strip.
Abbreviations and Pattern Notes
| Abbreviation | Meaning |
|---|---|
| ch | Chain |
| sc | Single crochet |
| sl st | Slip stitch |
| inc | Work 2 sc into one stitch |
| sc2tog | Single crochet 2 stitches together |
| sc3tog | Single crochet 3 stitches together |
| st / sts | Stitch / stitches |
| rnd | Round |
To sc2tog, pull up a loop in each of the next two stitches, then yarn over and pull through all three loops. To sc3tog, pull up one loop in each of the next three stitches, then yarn over and pull through all four loops.
For the pieces worked in rows, ch 1 and turn before each new row. That turning chain does not count as a stitch. Work through both loops throughout. The head is worked in continuous rounds; move a marker into the first stitch of each round without joining or turning.
The Crochet Pattern
Part 1: Make the Tapered Tail and Bookmark Strip
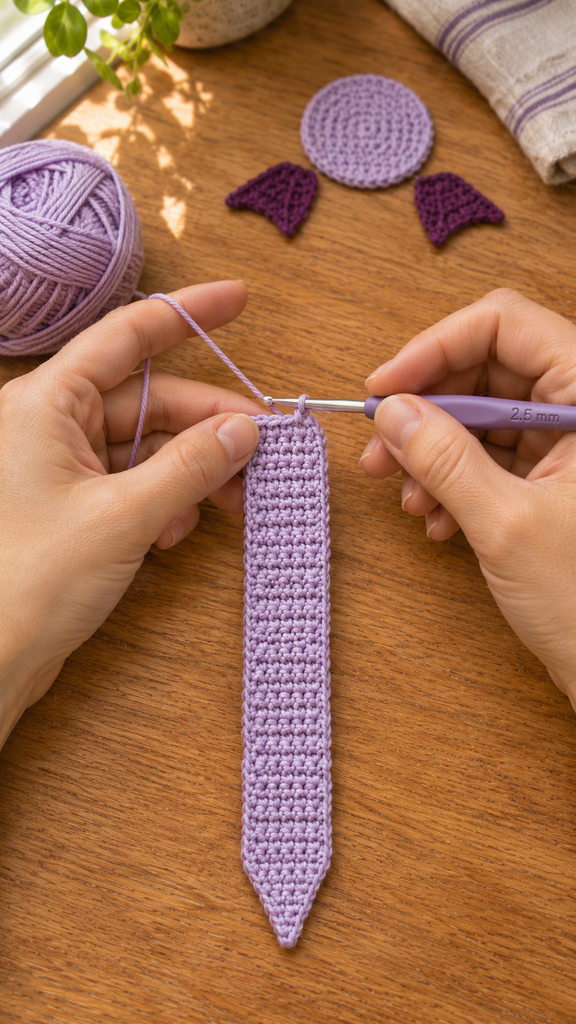
With lavender, ch 2.
Row 1: Sc in the second chain from the hook. 1 st.
Row 2: Ch 1, turn. Work 3 sc into the only stitch. 3 sts.
Row 3: Ch 1, turn. Sc in every stitch. 3 sts.
Row 4: Ch 1, turn. Inc in the first stitch, sc in the next stitch, inc in the last stitch. 5 sts.
Row 5: Ch 1, turn. Sc in every stitch. 5 sts.
Row 6: Ch 1, turn. Inc in the first stitch, sc in the next 3 stitches, inc in the last stitch. 7 sts.
Rows 7–42: Ch 1, turn. Sc in every stitch. 7 sts in each row. Work 36 rows in this straight section. Fasten off, leaving a sewing tail at the upper end.
The single-stitch beginning is the tail tip, and Row 42 is the top of the strip. Mark the top so that it does not get confused with the point when arranging the other pieces. The sides remain unedged to keep this part narrow and thin.
Check the strip against a book you expect to use. Its straight section should lie comfortably between the pages without being stretched. For a shorter version, remove plain seven-stitch rows; for a longer version, add them. Any change near the top also changes the row numbers used later for wing placement.
Part 2: Crochet the Flat Circular Head
With lavender, make a magic ring.
Round 1: Work 6 sc into the ring. Close the center and mark the first stitch. 6 sts.
Round 2: Inc in every stitch. 12 sts.
Round 3: Repeat (sc in the next stitch, inc in the next stitch) 6 times. 18 sts.
Round 4: Repeat (sc in the next 2 stitches, inc in the next stitch) 6 times. 24 sts.
Round 5: Repeat (sc in the next 3 stitches, inc in the next stitch) 6 times. 30 sts. Sl st into the next stitch to finish. Fasten off, leaving a long sewing tail. The finishing slip stitch is not an additional stitch in the round count.
This is one flat circle, not the beginning of a ball. Do not add straight rounds or stuffing. Secure the ring tail on the back without a bulky knot, and smooth the circle gently before adding the face.
Part 3: Make Two Plum Wings
With plum, ch 8.
Row 1: Sc in the second chain from the hook and in every remaining chain. 7 sts.
Row 2: Ch 1, turn. Sc in every stitch. 7 sts.
Row 3: Ch 1, turn. Sc2tog, sc in the next 3 stitches, sc2tog. 5 sts.
Row 4: Ch 1, turn. Sc in every stitch. 5 sts.
Row 5: Ch 1, turn. Sc2tog, sc in the next stitch, sc2tog. 3 sts.
Row 6: Ch 1, turn. Sc in every stitch. 3 sts.
Row 7: Ch 1, turn. Sc3tog. 1 st. Fasten off and weave in the tip tail. Make a second wing the same way.
The seven-stitch foundation edge is the attachment edge; the final single stitch is the outward-pointing tip. Leave or add a length of plum yarn at the foundation edge for sewing. These are simple triangular wings with no stuffed branches or separate membranes.
Part 4: Crochet Two Golden Horns
With gold, ch 2.
Row 1: Sc in the second chain from the hook. 1 st.
Row 2: Ch 1, turn. Sc in the only stitch. 1 st.
Row 3: Ch 1, turn. Work 3 sc into the only stitch. 3 sts.
Row 4: Ch 1, turn. Sc in every stitch. 3 sts. Fasten off, leaving a sewing tail. Make another horn.
The narrow starting end points upward, and the three-stitch final row is the base. Keep the horns flat. A slight difference between their angles is fine, but use matching yarn and tension so their sizes stay close.
Part 5: Embroider the Sleepy Face
Choose the front of the head and mark its top and bottom. With plum, sew two shallow curved lines for closed eyes, one on each side of the center, leaving approximately 1 cm between their inner ends. Use several short stitches rather than one long loose strand.
Below the eyes, add a tiny curved smile. Keep it simple enough to read at this scale. Bring the tails through stitches on the back and secure them without thick knots. The face stays flat, with no separate snout, buttons, or plastic eyes.
Part 6: Assemble the Dragon
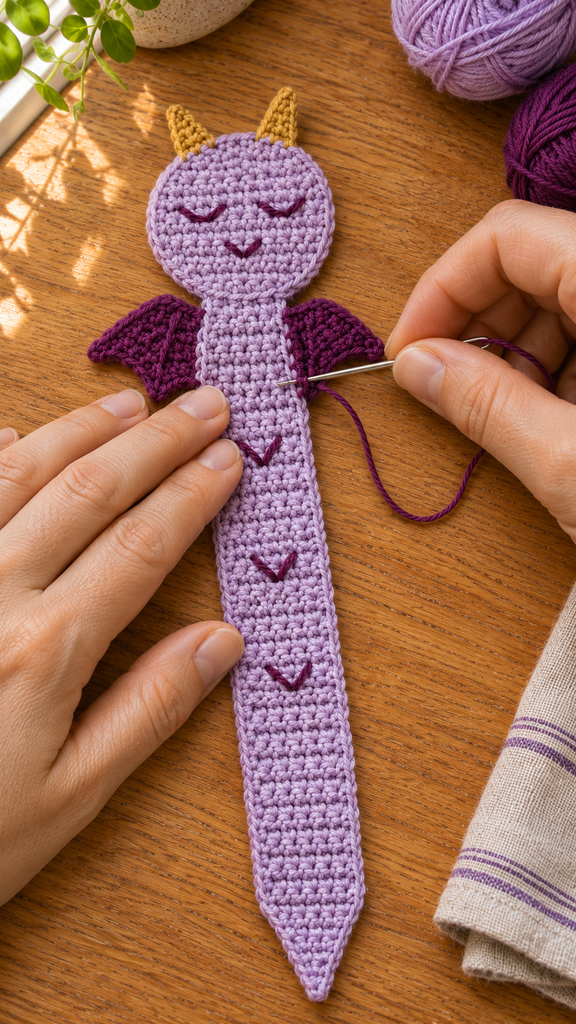
Lay the lavender strip face up with the pointed tail at the bottom. Position the head over its upper end, overlapping approximately Rows 41–42, or about 0.7–1 cm. Sew the lower part of the head to the overlapped strip with small lavender stitches. Keep the head centered and do not gather either piece.
Place one horn behind each upper side of the head, around the ten-o’clock and two-o’clock positions. Overlap each three-stitch base slightly behind the circle and sew it securely. Leave the pointed ends free above the outline.
Place the wide foundation edge of each wing beside the strip around Rows 33–40, just below the head. Overlap the foundation edge behind the strip by one stitch width. Sew along that attachment edge, keeping the outer tips free and pointing away from the body. Check both wings together before fastening the tails.
With plum, embroider a small V-shaped scale at the center of Rows 16, 22, and 28. Each V uses two short diagonal stitches. These marks decorate the strip without adding a separate raised belly panel.
More Information: Flatness, Length, and Finishing
Keep the Joins Thin
The head, horns, and wings overlap only where they attach. Do not sew a second backing layer over the entire bookmark. Run sewing tails through nearby matching stitches and reverse direction to secure them, keeping the back as smooth as possible.
After each join, set the piece on the table. If it curls or bunches at a seam, loosen that section before moving on. Pulling the sewing yarn tight can shorten one side of a flat piece and create a twist that blocking will not reliably solve.
Shape the Pieces Gently
If the yarn permits wet blocking, follow its care instructions. Smooth the strip straight, arrange the wing tips, and allow the bookmark to dry completely. Do not put damp yarn between book pages to flatten it.
For the first use, try it in an ordinary paperback with the decorated top above the pages. If the strip feels too thick for your preferred book, use finer yarn and a matching hook for the next sample, then recalculate the expected size.
Make It Suit Your Books
The easiest size change is the length of the straight seven-stitch section. To keep the head and wings together at the top, count wing placement backward from the final row rather than preserving the original row numbers. The reference wing attachment occupies the eight-row area ending two rows below the strip’s top.
Try dusty blue with navy wings, sage with forest green, or cream with muted rust details. Choose colors that remain distinct enough for the wing outlines and embroidery to show, while using yarns of matching thickness.
Give It as a Small Handmade Gift
Lay the fully dry bookmark on a plain card so the pointed strip does not fold during wrapping. It pairs easily with a paperback or reading journal. Include the yarn’s care instructions and avoid tightening a ribbon around the wings or horns.
Frequently Asked Questions
Is this the same dragon as the reference PDF?
No. The reference is a stuffed baby dragon. This draft makes a flat bookmark with a narrow strip, circular face, simple triangular wings, two flat horns, and embroidered features. Its construction, proportions, palette, and function are different.
Is the pattern suitable for beginners?
It suits a confident beginner who can count rows, increase, decrease, and sew small pieces. The long strip is repetitive. Take extra care with the tiny horn stitches and place all the pieces before beginning assembly.
Does the bookmark need stuffing?
No. Every part remains flat. Stuffing would add thickness and change both the appearance and the way the bookmark sits in a book. The head is a single circle rather than a closed three-dimensional shape.
Can I use thicker yarn?
You can make a larger decorative version, but it will be thicker and may be less comfortable between pages. The written measurements will change. For a reading bookmark, begin with smooth sport-weight cotton and evaluate the actual fabric.
How do I keep the wings from bending inside the book?
Leave the head and wings above the page edge, with only the long strip inside. This also keeps the joins out of the binding. Store the bookmark flat rather than folding the wings underneath it.
Has this pattern been physically tested?
No. The strip shaping, 42-row total, head increases, wing decreases, and horn counts have been checked mathematically. Finished flatness, dimensions, yarn use, and practical performance still need a crocheted sample. Treat the images as styling concepts and follow the written draft for construction.