Rose and Cream Crochet Wrist Warmers
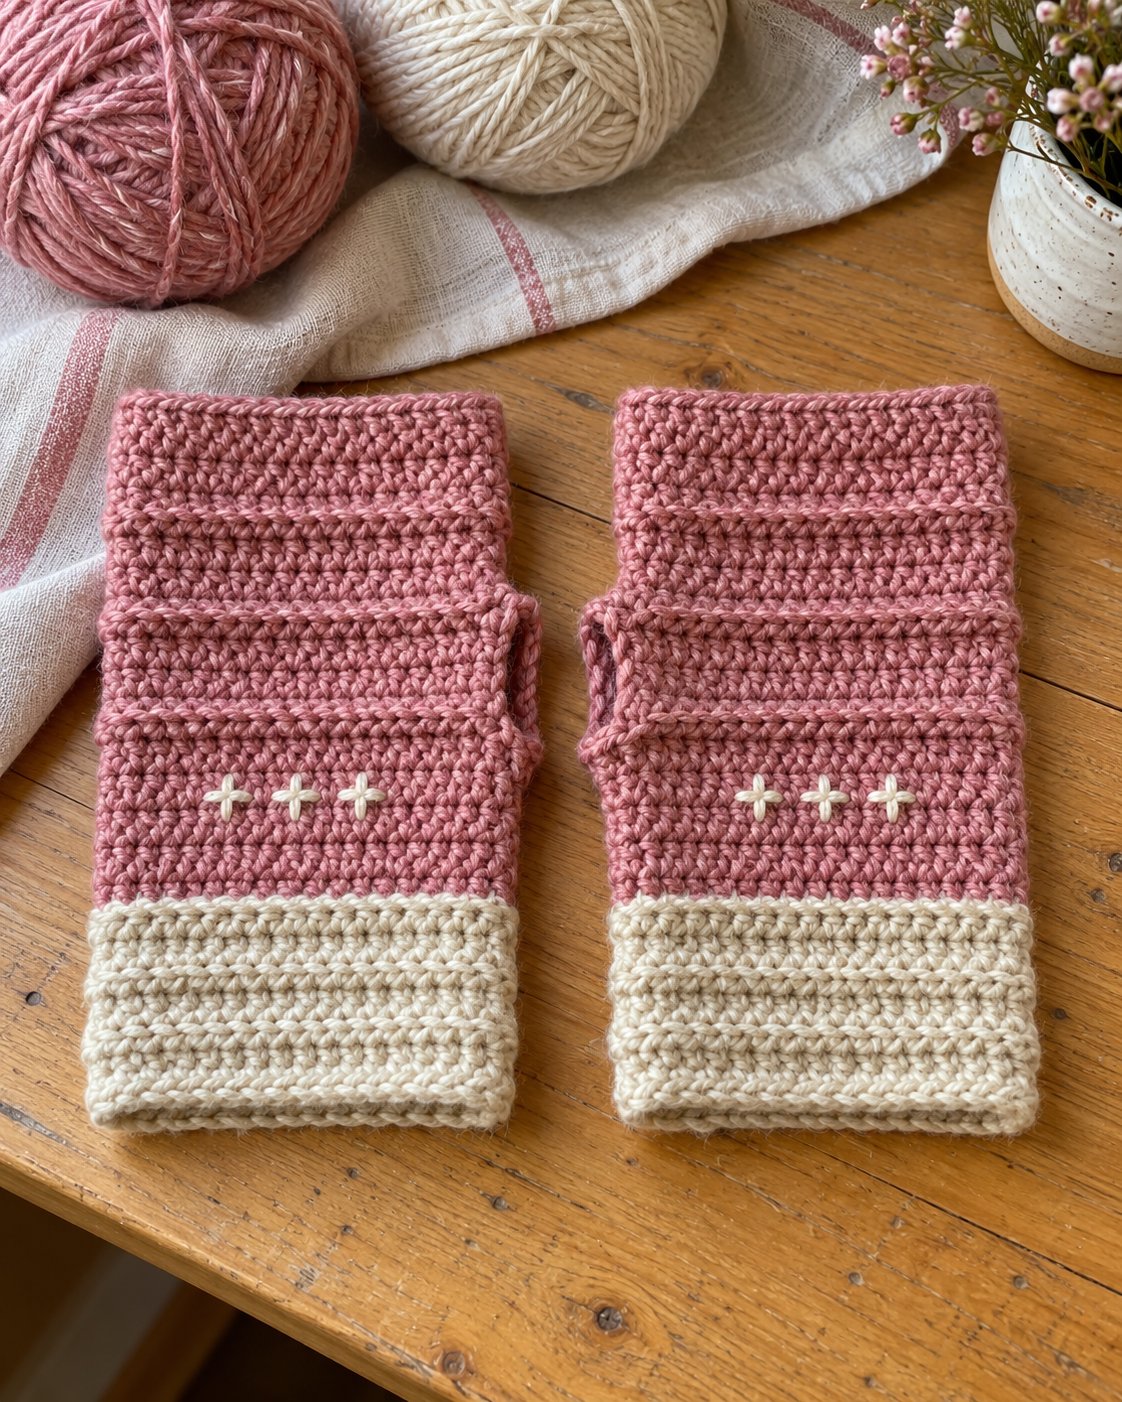
There is something comforting about a small crochet project that becomes useful as soon as the ends are woven in. These rose and cream wrist warmers are designed as a soft extra layer for cool days, with open fingers, a relaxed wrist band, and a simple opening for each thumb. Three little embroidered crosses give the backs a quiet handmade detail.
The seasonal starting point is a pair of knitted fingerless gloves, but this version changes the technique and construction. Instead of working on double-pointed needles and shaping a thumb gusset, you crochet two flat rectangles and sew each into a tube, leaving part of the side seam open. The dusty rose body, cream band, raised lines, and surface embroidery give the pair a different look.
Pattern status: this is a newly drafted, untested crochet pattern. Stitch counts, row totals, and seam sections have been checked, but no physical sample has been made. Fit, gauge, yarn consumption, and movement around the thumb still need checking in a real sample. All three images are AI-generated concept illustrations, not photographs of tested mitts.
What Makes These Mitts Different?
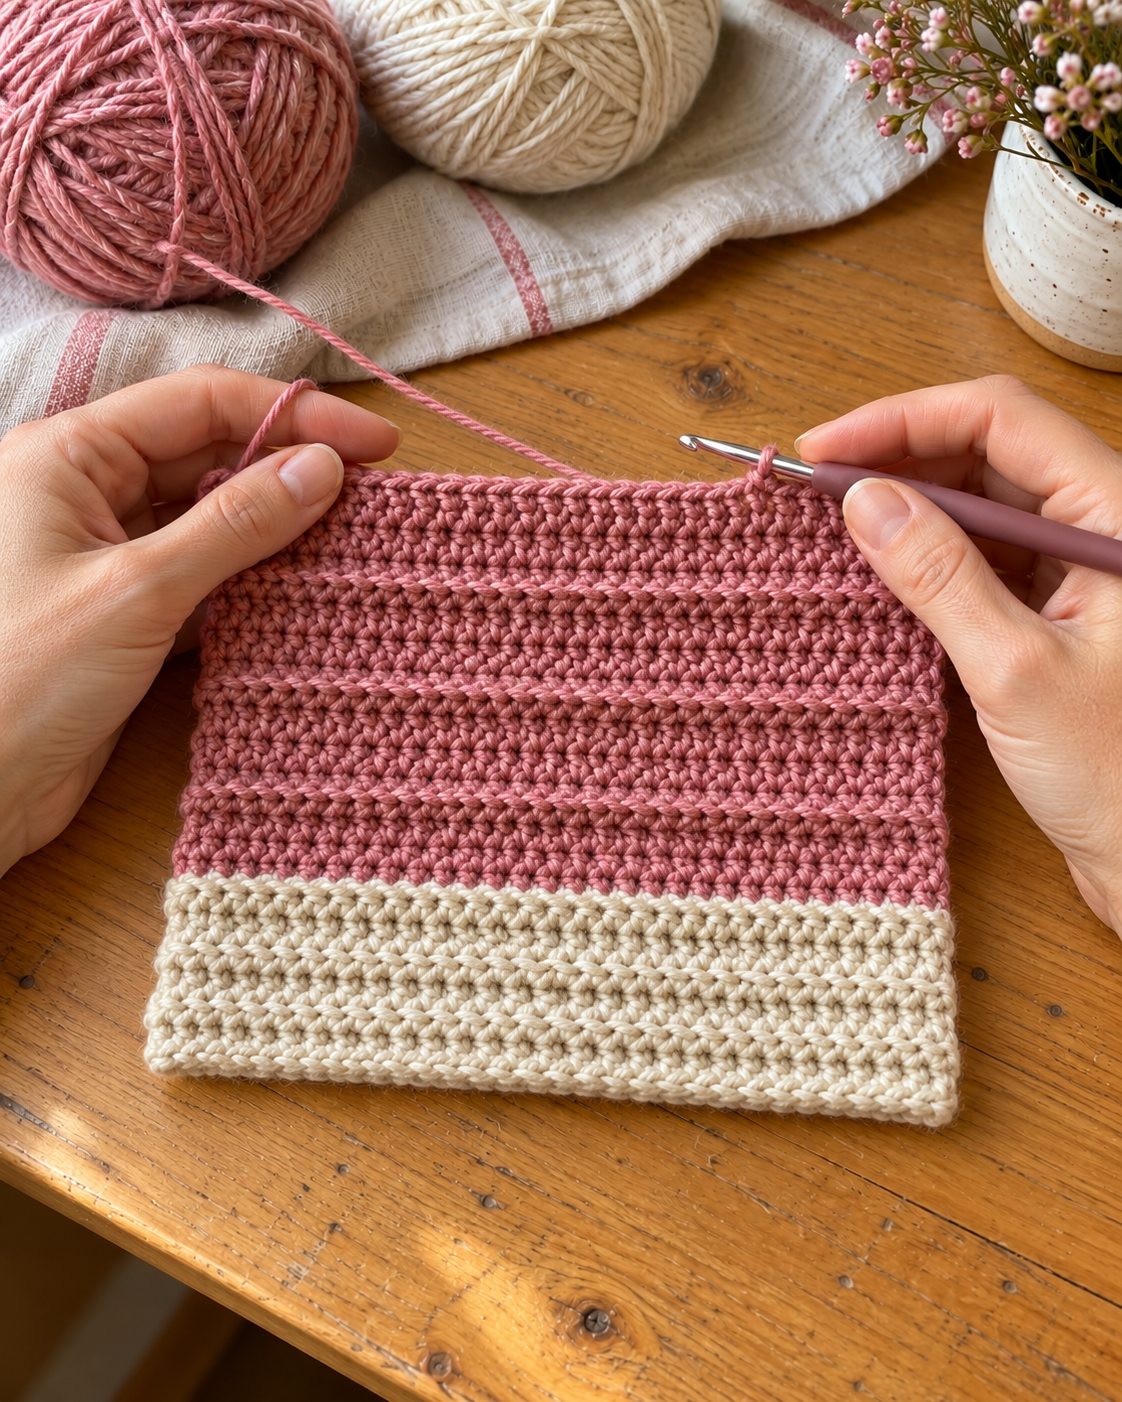
Each mitt begins at the wrist edge and grows upward in short rows that travel around the eventual hand circumference. The first six rows form a cream band. Sixteen rose rows follow, including three back-loop rows that leave low horizontal ridges on the surface.
The two side edges are then joined in sections. A short unsewn area becomes the thumb opening, while the top remains open for the fingers. There is no separate thumb tube, no shaping around individual fingers, and no complicated finishing seam.
The wrist band has the same stitch count as the body, giving a relaxed fit rather than a tightly fitted cuff. Make a gauge swatch and measure your hand before choosing the width. These are adaptable rectangles, not a claim that one size will fit every adult hand.
Project Details
| Detail | Draft specification |
|---|---|
| Skill level | Confident beginner |
| Terms | US crochet terminology |
| Construction | Two flat panels, each seamed into a tube |
| Reference panel | 32 stitches across and 22 rows tall |
| Calculated circumference | Approximately 18.8 cm before seaming |
| Calculated length | Approximately 15.7 cm |
| Thumb opening | Six unsewn row ends on each side, approximately 4.3 cm tall |
| Main colors | Dusty rose and oatmeal cream |
| Pattern status | Arithmetic checked; not physically crocheted or tested |
Materials and Yarn Choices
- Soft DK or light worsted yarn in dusty rose: approximately 45–60 g for the pair.
- Matching cream yarn: approximately 20–30 g for the bands and embroidery.
- A 4 mm crochet hook, adjusted for gauge and a flexible fabric.
- Tapestry needle, scissors, measuring tape, and removable stitch markers.
Use the same yarn family for both colors. A smooth wool blend or soft acrylic makes the stitches easier to identify and lets you judge the fabric’s stretch. A rigid cotton or bulky chenille will behave differently and should not be substituted without swatching and recalculating the measurements.
The quantities are provisional rather than measured sample consumption. Keep extra yarn if you plan to make longer mitts or a larger circumference. Check that the yarn feels comfortable against the wrist and that both colors have compatible washing instructions.
Gauge and Choosing Your Width
The provisional gauge is 17 half double crochet stitches and 14 rows per 10 cm in the body fabric. Measure a swatch after letting it relax. The back-loop rows may alter its stretch slightly, so include a few in the swatch rather than checking only plain stitches.
At this gauge, 32 stitches measure about 18.8 cm across. That width becomes the circumference when the sides are sewn together; the laid-flat finished tube will be roughly half as wide. Twenty-two rows suggest a total length of about 15.7 cm, with the cream band occupying approximately 4.3 cm.
Measure around the widest part of your palm below the fingers, excluding the thumb. For a first version, aim for a relaxed panel width around that measurement or up to 0.5 cm larger. Do not rely on substantial stretching to make the draft fit. Check that the intended width also passes comfortably over your hand.
To change the stitch count, multiply your target circumference in centimeters by 1.7 and round to a whole stitch. Add one chain for the starting chain. For example, a 20 cm panel needs approximately 34 hdc and a starting chain of 35. Keep that chosen stitch count throughout every row.
Abbreviations and Working Notes
| Abbreviation | Meaning |
|---|---|
| ch | Chain |
| hdc | Half double crochet |
| BLO | Back loop only |
| st / sts | Stitch / stitches |
| RS | Right side, the chosen outward face |
For hdc, yarn over, insert the hook into the stitch, yarn over and pull up a loop, then yarn over and pull through all three loops. For BLO, insert under only the loop farther from you along the top of the stitch.
Chain 1 and turn before each new row. The turning chain does not count as a stitch. Work the first hdc into the first actual stitch, and finish in the last actual stitch. Mark both row ends if you tend to gain or lose stitches.
Make two panels with the same gauge and row count. Unless you deliberately change the width for one hand, the written panels are identical. Mirrored embroidery placement creates a left and right pair after the seam position is established.
The Crochet Pattern
Step 1: Crochet the Cream Wrist Band
With cream, ch 33 for the reference size, or your chosen stitch count plus one chain.
Row 1: Hdc in the second chain from the hook and in every remaining chain. 32 sts, or your chosen count.
Rows 2–6: Ch 1, turn. Hdc BLO in every stitch across. 32 sts in each row.
You have six cream rows altogether. The unused front loops create low horizontal lines in the band. This is a textured wrist section rather than the tightly fitted vertical ribbing found on many knitted gloves.
On the last hdc of Row 6, stop before the final pull-through. Drop cream, yarn over with dusty rose, and pull through all three loops. Leave tails long enough to weave securely later.
Step 2: Work the Rose Body
Rows 7–9: Ch 1, turn. With rose, hdc through both loops in every stitch. 32 sts each row.
Row 10: Ch 1, turn. Hdc BLO in every stitch. 32 sts.
Rows 11–13: Ch 1, turn. Hdc through both loops in every stitch. 32 sts each row.
Row 14: Ch 1, turn. Hdc BLO in every stitch. 32 sts.
Rows 15–17: Ch 1, turn. Hdc through both loops in every stitch. 32 sts each row.
Row 18: Ch 1, turn. Hdc BLO in every stitch. 32 sts.
Rows 19–22: Ch 1, turn. Hdc through both loops in every stitch. 32 sts each row. Fasten off, leaving a long rose tail for sewing the upper seam.
The rose section contains 16 rows. Its ridge rows are 10, 14, and 18, spaced four rows apart. Lay the panel flat without stretching and compare it with your swatch calculations before making the second panel.
Step 3: Mark the Seam Sections
Count upward from the cream foundation edge. Place markers on both side edges to identify three sections: Rows 1–12 for the lower seam, Rows 13–18 for the thumb opening, and Rows 19–22 for the upper seam.
The lower seam covers twelve row ends, the opening six, and the upper seam four. Together they account for all 22 rows. Mark matching boundaries on both edges so you do not accidentally sew one extra row on only one side.
Before sewing permanently, fold the panel into a tube and temporarily connect those sections with removable markers. Try it gently on the hand. The cream edge belongs at the wrist, the four-row upper seam sits above the thumb, and the top edge should finish below the fingers.
Step 4: Check the Thumb Opening
The reference opening is approximately 4.3 cm high at the provisional row gauge. Hand proportions vary, so check whether the thumb moves comfortably and whether the fabric pulls across the palm.
If the opening needs to move, shift its boundaries before sewing and record the new row numbers. If it needs to be taller, leave an additional row end open at one or both ends, taking space from the adjacent seam. Keep enough upper seam to hold the tube together above the thumb.
If the whole panel is too narrow, changing the opening alone will not solve the fit. Adjust the stitch count and remake the panel. A comfortable circumference is the starting point for a usable thumb slot.
Step 5: Sew the Side Seam
Choose the face you prefer as the outside. Fold the panel with the outward faces together so the matching side edges meet and the inside faces remain visible.
Using cream, whipstitch the matching row ends for Rows 1–6. Continue the lower seam across Rows 7–12 with rose. Use small, even stitches that catch corresponding row ends without pulling them into a hard cord. Secure and weave the tails into matching colors.
Leave Rows 13–18 completely unsewn. With the long rose tail, join the matching row ends for Rows 19–22. Secure the top and bottom of each sewn section with an extra careful pass, then weave in the tail. Do not stitch across the top finger opening or bottom wrist opening.
Turn the mitt right side out. Make the second mitt the same way, using any fit adjustments you recorded for the first. Test both before adding embroidery.
Step 6: Place the Cream Crosses
Put both mitts on briefly and locate the center back of each hand. Mark that position, then take the mitts off. Arrange them as a left and right pair so the thumb slots face inward toward one another when the backs are facing up.
With cream yarn, embroider three small plus-shaped crosses in a short horizontal line across the marked back area, around Rows 11–12. Each cross can be about 6–8 mm wide. Use one short horizontal stitch crossed by one short vertical stitch, keeping the fabric relaxed.
Work through only the back-hand layer. Place your fingers or a small smooth card inside the tube to help keep the needle from catching the opposite layer. Avoid long tight floats behind the embroidery, which can reduce the available stretch.

More Information and Finishing Tips
Keep the Seams Flexible
A seam that feels firm on the table can become uncomfortable when the hand moves. After sewing a short section, spread the fabric gently and check that it still has some give. If the seam puckers or creates a ridge against the skin, loosen the stitches before securing the tail.
The edges of the thumb slot remain unfinished in this draft. That keeps the opening simple and avoids tightening it with an added border. If you later add edging, test it on one mitt first because extra stitches can change the opening’s shape and fit.
Adjust the Length With a Plan
For longer wrist coverage, add cream rows at the beginning of the project. Every row added before the rose section also shifts the later seam boundaries upward by one row. For example, two extra cream rows change the original opening from Rows 13–18 to Rows 15–20.
For more finger coverage, add plain rose rows after the final ridge and extend the upper seam accordingly. Keep the top edge clear of the finger joints if that is the comfortable length for your hand. Record the final sequence so the second mitt matches.
Choose Another Palette
Sage with oatmeal gives the same design a quieter look. Try rust with cream for autumn, charcoal with pale gray for everyday wear, or a single color with matching embroidery for a subtler finish. Keep the yarn thickness consistent across the pair.
If you omit the embroidery, the three rose ridge rows still provide texture. Make the first sample simple and check its comfort before adding more decoration.
Care for the Finished Pair
Follow the yarn label when washing. Gently reshape both mitts to matching dimensions and dry flat. Avoid stretching the thumb slots while damp, and keep the embroidery relaxed rather than pulling the crosses into perfectly square shapes.
After wearing, check the seam ends near the thumb openings. Those points receive more movement than the plain fabric, so secure a loose tail before the opening starts to extend into a sewn section.
Frequently Asked Questions
Is this the same pattern as the knitted gloves?
No. This version uses flat crochet panels, a seamed thumb slot, horizontal ridges, a relaxed contrast band, and embroidered details. It does not reproduce the knitted thumb gusset, separate thumb section, or the source instructions and photographs.
Can a beginner make these mitts?
They suit a confident beginner who can work half double crochet, identify the back loop, and sew matching row ends. The most important steps are measuring the panel and marking the seam sections accurately.
Are the left and right mitts different?
The panels and seam instructions are identical. The difference comes from how the mitts sit on the hands and where you place the embroidery. Mark the back of each hand while trying them on so the crosses appear in the correct place on both.
Why is there no separate thumb tube?
The side opening provides a simpler construction and leaves the thumb mostly uncovered. A fitted thumb tube would require another set of stitches and fit decisions. Keep the first version as written before developing that adaptation.
What if the wrist feels loose?
The cream band intentionally has the same stitch count as the body. A fitted cuff would need separate shaping or a different construction. Avoid reducing the entire panel merely to tighten the wrist if that would make the hand section too narrow.
Has this pattern been physically tested?
No. The 22-row total, 16 rose rows, ridge spacing, and twelve/six/four seam split have been checked mathematically. Gauge, comfort, yarn use, and practical fit still require a real sample. Use the images as design concepts and the written draft for construction.