Princess Jasmine Amigurumi

Some characters barely need an introduction, and Princess Jasmine is one of them — the turquoise crop top and harem pants, the long dark braid, the gold tassel earrings. The Princess Jasmine Amigurumi, designed by aliskotoys, brings all of that unmistakable style into a small crocheted doll, right down to a jeweled headband and a beautifully detailed braided hairstyle.
As the pattern’s introduction describes it, this is “an easy to make amigurumi,” though the designer is quick to point out one exception: “her hair is designed in some detail.” To help with that trickier section, the construction is also explained through an accompanying two-part video tutorial, so if the written instructions for the curls ever feel ambiguous, you have a visual reference to fall back on. The designer notes they chose “a color that is very close to the original,” giving this doll an authentic, screen-accurate palette.
Below is the complete pattern, reorganized with clear headings for every component — Hands, Hair, Legs, Body, and Head — along with the full materials list, abbreviations, and a set of tips and frequently asked questions to guide you through the trickier sections.
About This Pattern
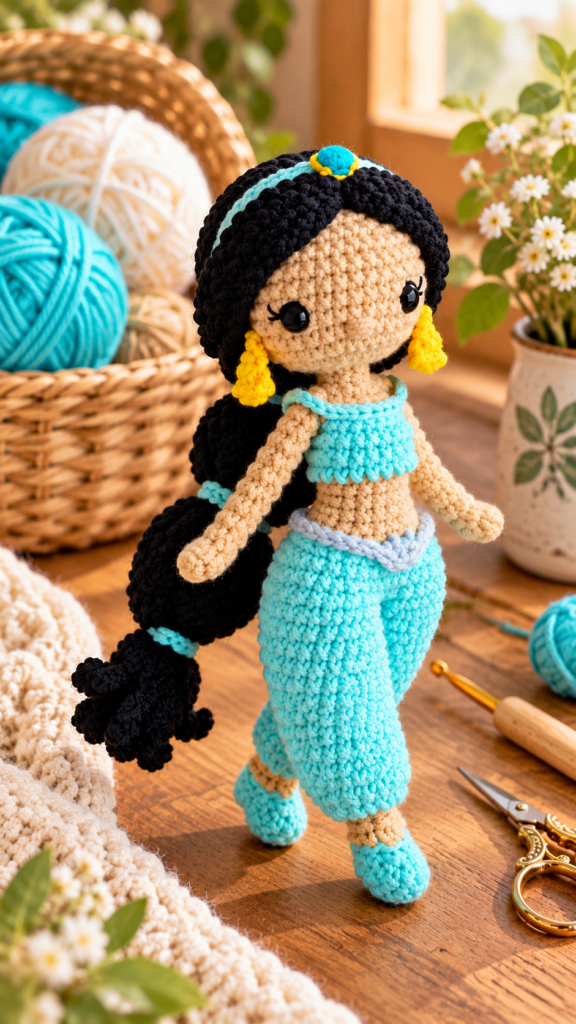
Designer: aliskotoys
Materials
- Markers
- Scissors
- Filler (stuffing)
- Eyes
- Yarn
Abbreviations
| Abbreviation | Meaning |
|---|---|
| MR | Amigurumi magic ring |
| sc | Single crochet |
| inc | Increase |
| dec | Decrease |
| tr | Triple crochet / treble crochet |
| st | Stitch |
| dc | Double crochet |
| hdc | Half double crochet |
| slst | Slip stitch |
| ch | Chain |
| ..in | Make an increase into the same stitch as many times as the number given in front of “inc” (for example, “3inc” or “4inc”) |
| FLO | Crochet into front loops only |
| BLO | Crochet into back loops only |
Crocheting the Hands (Make 2)
- Row 1: 6 sc in MR.
- Rows 2–12: 6 sc (11 rows).
Crochet both sides of the hand together with 2 sc, then chain. Cut the yarn, leaving a long end for sewing the hand onto the arm later.
Crocheting the Hair
The hair begins as a small crocheted cap and is then finished with four long, coiled curl sections that give Jasmine her signature braid-like ponytail.
- Row 1: 6 sc in MR.
- Row 2: 6 inc (12).
- Row 3: (1 sc, inc) repeat 6 times (18).
- Row 4: (2 sc, inc) repeat 6 times (24).
- Row 5: (3 sc, inc) repeat 6 times (30).
- Row 6: (4 sc, inc) repeat 6 times (36).
- Rows 7–10: 36 sc (4 rows).
The Curls
- First curl: Chain 85. Starting in the 2nd loop from the hook, work 84 sc, then slip stitch into the loop of the base from which you began crocheting the chain.
- Second curl: Chain 85. Starting in the 2nd loop from the hook, work 84 sc, then slip stitch into the loop of the base from which you began crocheting the chain.
- Third curl: Chain 85. Starting in the 2nd loop from the hook, work 84 sc, then slip stitch into the next loop. (See the accompanying video for more detail on this placement.)
- Fourth curl: Chain 85. Starting in the 2nd loop from the hook, work 84 sc, then slip stitch into the loop of the base from which you began crocheting the chain (again, see the video for more detail). Slip stitch, then cut the yarn, leaving a fairly long tip of yarn for sewing on the finished wig and curls.
Crocheting the Legs (Make 2)
Start in the shoe color.
- Row 1: 6 sc in MR.
- Row 2: 6 inc (12).
- Row 3: 12 sc.
- Row 4: 3 sc, 3 dec, 3 sc (9).
Change the yarn to the body color.
- Row 5: BLO, 9 sc.
- Row 6: 9 sc.
Change the yarn to the color of the panties/harem pants.
- Row 7: 9 inc.
- Rows 8–10: 18 sc (3 rows).
- Row 11: (1 sc, dec) repeat 6 times (12).
- Row 12: (1 sc, inc) repeat 6 times (18).
- Rows 13–16: 18 sc (4 rows).
On the first leg, work a slip stitch and cut the yarn. On the second leg, crochet an additional 6 sc, and do not cut the yarn — you’ll continue directly from here into the body.
Note: Stuff all the details as you crochet, rather than waiting until each piece is fully complete.
Crocheting the Body
Continuing directly from the second leg:
- Row 1: From the leg, crochet 2 chains, then connect to the first leg: 18 sc across the first leg, 2 sc across the chains, 18 sc across the second leg (40). Place a marker here to track the beginning of each round going forward.
- Rows 2–3: 40 sc (2 rows).
- Row 4: Work one decrease on each side (a total of two decreases worked around the circle) (38).
- Row 5: Work one decrease at the back and one at the front (again, two decreases total around the circle) (36).
- Row 6: (4 sc, dec) repeat 6 times (30).
Change the yarn to the body (skin) color.
- Row 7: BLO, 30 sc.
- Row 8: (3 sc, dec) repeat 6 times (24).
- Rows 9–11: 24 sc (3 rows).
Change the yarn to the color of the clothing.
- Rows 12–15: 24 sc (4 rows).
Change the yarn back to the body color. Do not cut the yarn from the clothing color — instead, carry it forward out of the way as you continue (see the video for a demonstration of this technique).
- Row 16: BLO, (2 sc, dec) repeat 6 times (18).
- Row 17: (1 sc, dec) repeat 6 times (12).
- Row 18: 12 sc.
Crocheting the Head
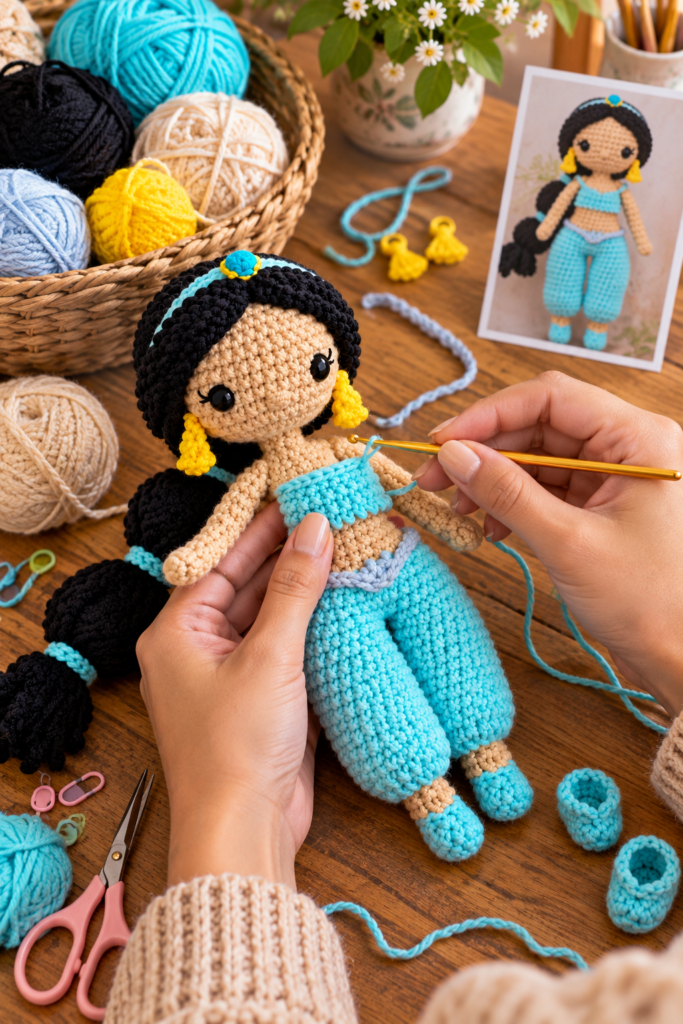
The head is crocheted directly from the body, continuing with the same yarn already in use.
- Row 19: 12 inc (24).
- Row 20: (2 sc, inc) repeat 8 times (32).
- Row 21: (7 sc, inc) repeat 4 times (36).
- Rows 22–27: 36 sc (6 rows).
Insert the eyes between Rows 23 and 24, spacing them 8 sc apart.
- Row 28: (4 sc, dec) repeat 6 times (30).
- Row 29: (3 sc, dec) repeat 6 times (24).
- Row 30: (2 sc, dec) repeat 6 times (18).
- Row 31: (1 sc, dec) repeat 6 times (12).
- Row 32: 6 dec (6).
Tighten the hole closed to finish the head.
Note: See the accompanying video for the remaining design details of the doll, including the finishing touches on the hair, headband, and clothing accents shown in the photos.
Watching the Companion Videos
This pattern is supported by a two-part video tutorial that walks through the trickier construction details in real time — particularly useful for the hair curls and the technique of carrying the clothing-color yarn forward through the body:
- Video Part 1: available via the designer’s linked tutorial
- Video Part 2: available via the designer’s linked tutorial
If any written instruction feels ambiguous, especially around the four hair curls or the color-carrying technique in the body, referring to these videos alongside the written pattern should clear things up.
Tips for Crocheting the Princess Jasmine Amigurumi
- Watch the videos before starting the hair. Since the designer specifically notes to “see the video for more details” at three separate points during the curl instructions, it’s worth watching that section before you begin, rather than only referring back to it if you get stuck partway through a curl.
- Keep your row marker moving on the body. Because the body is worked continuously from the legs into the head with numerous color changes and decrease rounds along the way, placing a marker at the start of Row 1 of the body (as instructed) and moving it up each round will help you stay oriented through the many transitions.
- Don’t cut the clothing-color yarn early. The pattern specifically instructs you to carry the clothing yarn forward rather than cutting it when you switch back to the body color in Row 16 — this saves you from having to rejoin that color later for any additional clothing details.
- Stuff as you go, not all at once. The pattern notes to stuff all the details while crocheting them, rather than leaving stuffing for the very end. This is especially important for the legs and body, since it’s much easier to distribute fill evenly through a smaller opening than to try to stuff a nearly finished piece.
- Space the eyes carefully. Inserting the eyes between Rows 23 and 24, spaced 8 sc apart, gives Jasmine her wide-eyed, doll-like expression — take a moment to check the spacing from both sides before securing the backing washers, since asymmetrical eye placement is very noticeable on a finished face.
Frequently Asked Questions
Who designed this pattern? The Princess Jasmine Amigurumi was designed by aliskotoys and shared as a free pattern, along with a two-part video tutorial.
Is this pattern beginner-friendly? The pattern’s own introduction describes it as easy to make overall, with the one exception being the hair, which the designer notes “is designed in some detail.” The rest of the doll relies on standard amigurumi techniques like magic ring, single crochet, increases, and decreases.
Why does this pattern include a video tutorial? Because the hair curls and a specific yarn-carrying technique in the body are difficult to describe fully in text alone, the designer created a two-part video to demonstrate those sections visually, supplementing the written instructions.
How is the hair actually constructed? The hair starts as a small crocheted cap (Rows 1–10), and then four separate curl sections are worked as long chains of 85 stitches, single crocheted back along themselves, and slip-stitched into specific points on the base cap to create the long, coiled ponytail effect.
What does it mean to “throw the yarn forward” in the body section? This refers to carrying an unused color’s yarn along inside the work rather than cutting it, so it’s ready to pick back up later without needing to rejoin a new strand. The pattern specifically notes to do this with the clothing-color yarn in Row 16 of the body, and recommends watching the video for a clear demonstration of the technique.
Where are the safety eyes placed? The eyes are inserted between Rows 23 and 24 of the head, spaced 8 sc apart.
Do I need to stuff the doll all at once at the end? No — the pattern specifically instructs you to stuff each piece as you crochet it, rather than waiting until the very end, which helps achieve a more even, well-filled shape throughout.
Can I substitute different yarn colors than the original Jasmine palette? Absolutely. While the designer chose colors close to the character’s traditional turquoise-and-gold look, the same construction and stitch counts would work with any color palette if you wanted to make an original-character doll using this same base pattern.
A Princess Worth the Extra Detail
Between the carefully coiled hair curls, the color-blocked harem pants and crop top, and the small stitched-on gold tassel earrings shown in the reference photos, this Princess Jasmine amigurumi captures a surprising amount of character detail in doll form. The written pattern covers every stitch of the body, legs, hands, and head, while the companion videos fill in the trickier visual details — together giving you everything you need to bring this beloved princess to life in yarn.
For more free amigurumi and crochet patterns like this one, be sure to check out Lovelycraft.com.