Plum and Cream Crochet Ear Warmer and Keyhole Scarf
A matching winter set does not have to mean a full hat and a long scarf. This plum and cream pair combines a soft ear warmer with a shorter scarf that closes by passing one end through a slit. It gives you two useful accessories with a shared color palette, a gently ribbed texture, and a practical way to keep the scarf in place.
The starting inspiration was a men’s knitted hat-and-scarf set. This project changes the pieces themselves, the stitch structure, the proportions, and the way the scarf is worn. The ear warmer has no crown shaping, while the scarf has a split section that forms its keyhole. Both are worked flat in half double crochet.
Pattern status: this is a new, untested crochet draft. Stitch arithmetic, section totals, and keyhole construction have been checked, but no physical sample has been crocheted. Fit, stretch, yarn consumption, and finished drape need checking in a real sample. All four images are AI-generated concepts, including the woman wearing the intended design; they are not photographs of a tested set.
What Makes This Set Different?
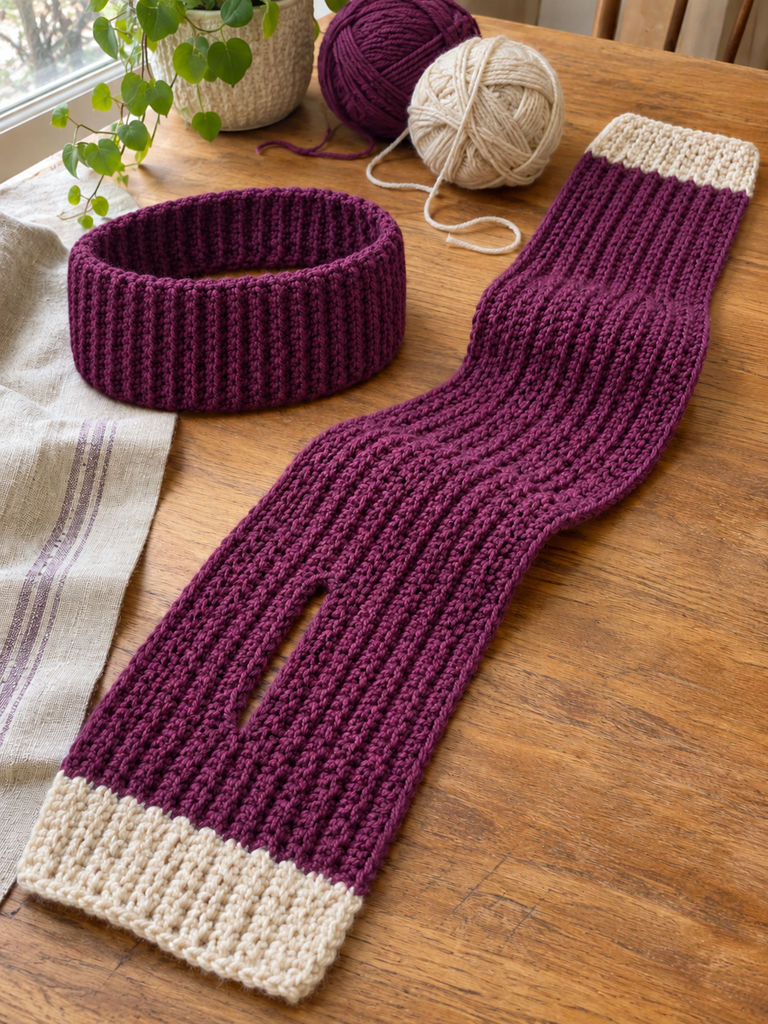
The ear warmer is a solid plum rectangle joined into a simple ring. Its texture adds detail without a twisted front or a separate decoration. The short rows run across its height, and the repeated rows build the circumference.
The scarf has cream blocks at both tips. Between them, the plum fabric includes a narrow lengthwise opening. You divide the stitches into two equal sections for several rows, then work across both sections again. The result is a slit rather than a large chain-space hole.
Wear the scarf around the back of the neck and pass the longer end through the opening at the other end. The two tips can hang at different heights. Check the loop and neck fit comfortably instead of pulling the fabric tight to imitate an illustration.
Project Details
| Detail | Draft specification |
|---|---|
| Skill level | Confident beginner |
| Terminology | US crochet terms |
| Main stitch | Half double crochet in the back loop only |
| Ear warmer reference | 14 stitches across, 62 rows long |
| Ear warmer flat size | About 8.2 cm wide by 51.7 cm long before seaming |
| Scarf reference | 28 stitches across, 114 rows long |
| Scarf flat size | About 16.5 cm wide by 95 cm long |
| Keyhole | Two 14-stitch sections worked separately over 8 rows |
| Status | Arithmetic checked; no physical sample made |
Materials and Yarn Choices
- Soft worsted yarn in plum: approximately 200–250 g for the set.
- The same yarn in oatmeal cream: approximately 40–60 g.
- A 5 mm crochet hook, adjusted for gauge and a flexible fabric.
- Tapestry needle, scissors, measuring tape, and several removable stitch markers.
Choose a smooth, soft wool blend or acrylic that feels comfortable around the ears and neck. Match the yarn thickness in both colors. A very stiff cotton may make the scarf difficult to pull through its slit, while an extremely fuzzy yarn can hide the row ends used for the split section.
The yarn amounts are provisional estimates, not measured sample consumption. Check your yarn’s meterage as well as its weight, and allow extra if you plan to lengthen the scarf. Keep both colors’ care requirements compatible.
Gauge and Fit Planning
The provisional gauge is 17 half double crochet stitches and 12 rows per 10 cm, measured in relaxed back-loop fabric. Make a swatch larger than the measurement area and let it settle before measuring. Do not pull the ridges apart to reach the target.
At this gauge, 14 stitches make an ear warmer about 8.2 cm high. Sixty-two rows give approximately 51.7 cm before the seam. Compare that length with your head measurement and the stretch of your actual swatch. A modest amount of stretch can help the band stay in place, but a swatch that does not recover after stretching needs a different fit plan.
For the scarf, 28 stitches give approximately 16.5 cm of width, and 114 rows give 95 cm of length. Each eight-row cream end is approximately 6.7 cm long. The eight-row slit has a calculated length of about 6.7 cm, but its useful opening depends on how readily your fabric bends and slides.
Abbreviations and Working Notes
| Abbreviation | Meaning |
|---|---|
| ch | Chain |
| hdc | Half double crochet |
| BLO | Back loop only |
| st / sts | Stitch / stitches |
| RS | Right side, the chosen outward face |
For hdc, yarn over, insert the hook, yarn over and pull up a loop, then yarn over and pull through all three loops. For BLO, insert under only the loop farther from you along the top of the stitch.
Chain 1 and turn before every new row unless a fresh-yarn instruction says otherwise. The turning chain does not count as a stitch. Work into the first actual stitch beside it and finish in the last actual stitch at the far edge.
All rows after the foundation row use BLO. Mark the row ends and keep a written tally, especially around the scarf’s split section. Change colors on the last pull-through of the preceding row’s final hdc, then work the next row in the new color.
Part One: The Crochet Ear Warmer
Begin the Plum Band
With plum, ch 15.
Row 1: Hdc in the second chain from the hook and in every remaining chain. 14 sts.
Rows 2–62: Ch 1, turn. Hdc BLO in every stitch. 14 sts each row. Work 61 rows after Row 1, giving 62 rows in total. Fasten off with a sewing tail.
The complete band is solid plum. Its cream-free surface lets the scarf’s contrasting tips stand out, while the shared ribbed texture links the two pieces. The short ends will form the back seam.
Check the Circumference and Sew
Wrap the relaxed strip around your head, covering the ears as you intend to wear it. Temporarily hold the short ends together with removable markers. It should stay in place comfortably, without relying on a hard stretch across the forehead.
If it needs a different length, add or remove plum rows before fastening off. For the neatest matching texture, change the count by two rows at a time. Record the new total and check the fit again before sewing.
With the chosen outside faces together, align the two 14-stitch short ends. Whipstitch them with plum, matching each position without tightening the seam into a cord. Turn right side out and weave in the tails. There is no twist in the join.
Part Two: The Keyhole Scarf
Make the First Cream Tip
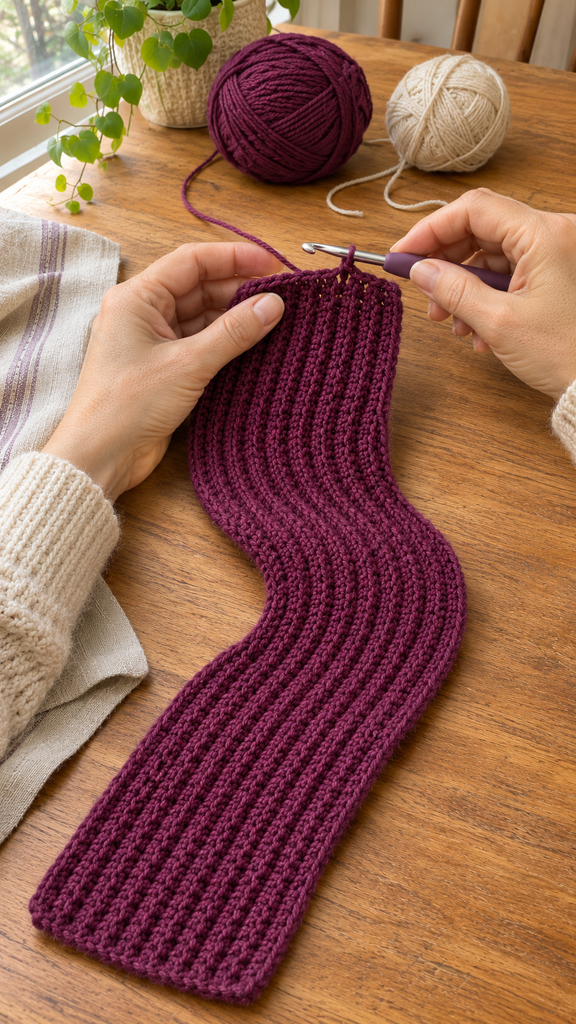
With cream, ch 29.
Row 1: Hdc in the second chain from the hook and in every remaining chain. 28 sts.
Rows 2–8: Ch 1, turn. Hdc BLO in every stitch. 28 sts each row.
Rows 9–16: With plum, ch 1, turn and hdc BLO across. 28 sts each row.
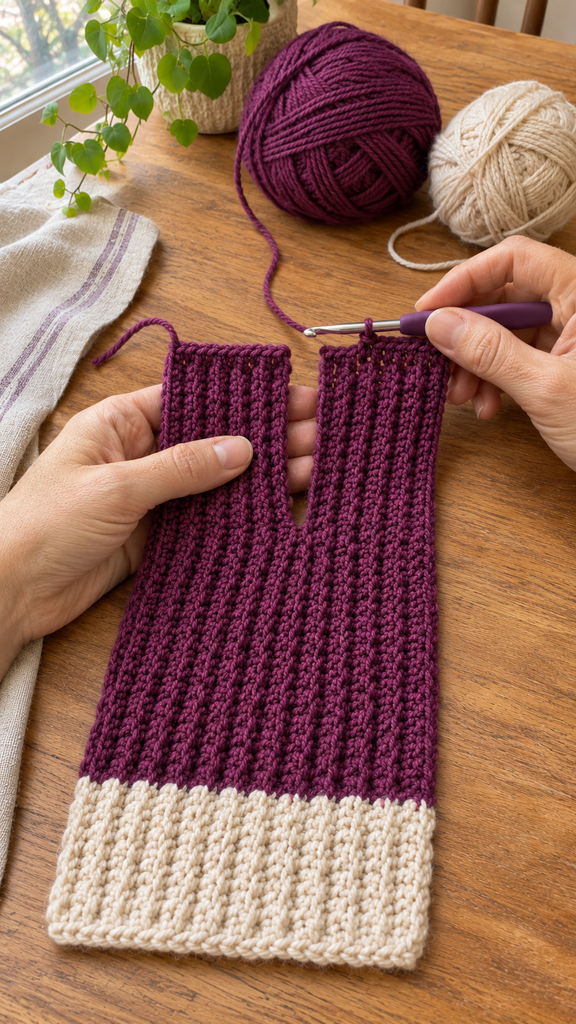
You now have a 16-row rectangle. The next eight row levels are worked as two separate 14-stitch sections. Neither half receives extra chains across the slit.
Work the First Half of the Keyhole
Row 17, first half: Ch 1, turn. Hdc BLO in the first 14 stitches only. Leave the remaining 14 stitches of Row 16 unworked. 14 sts.
Rows 18–24, first half: Ch 1, turn. Hdc BLO in all 14 stitches of this narrow section. 14 sts each row. Fasten off after Row 24.
This section forms one side of the opening. Its inner edge will remain unsewn. Do not join it to the unworked stitches with a chain or carry the yarn across the gap.
Work the Second Half
Return the scarf to the orientation it had at the start of Row 17. Locate the 14 unworked stitches of Row 16. Join fresh plum yarn at the first of those stitches, next to the completed half. Ch 1, which does not count as a stitch.
Row 17, second half: Hdc BLO in each of the 14 unworked stitches of Row 16. 14 sts.
Rows 18–24, second half: Ch 1, turn. Hdc BLO across these 14 stitches. 14 sts each row. Fasten off after Row 24.
Both halves now have eight rows above Row 16 and finish at the same height. Lay them beside one another without twisting either strip. Their unjoined inner edges form the lengthwise slit. The two sets of stitches across their upper edges are the two halves of Row 24.
Rejoin the Full Width
Row 25: With the two halves aligned, join fresh plum yarn at an outside edge of the combined Row 24 top. Ch 1. Hdc BLO across all 14 stitches of the first half, then directly across all 14 stitches of the second half. 28 sts. Do not add a chain between them.
Count the stitches before turning. The two central stitches are adjacent again, closing the upper end of the slit. Only the eight-row opening below remains split; you have not sewn its edges together.
Rows 26–106: Ch 1, turn. With plum, hdc BLO in every stitch. 28 sts each row. Work 81 rows in this section.
Rows 107–114: With cream, ch 1, turn and hdc BLO across. 28 sts each row. Fasten off and weave in the ends.
The scarf contains eight cream rows at each end and 98 plum row levels between them. During the slit section, each level has two separate 14-stitch halves; it still represents one level along the length.
Check the Keyhole Before Final Finishing
Pass the opposite cream tip through the slit gently. The tip should fold and slide through without a hard pull. If the opening is too short for your yarn’s thickness, unpick and lengthen both split halves by the same number of rows before rejoining.
To keep the overall scarf length unchanged after that adjustment, remove the same number of full-width plum rows later in the long section. Keep both cream tips at eight rows. Check the closure around the neck before weaving away all the ends.
How to Wear the Finished Set
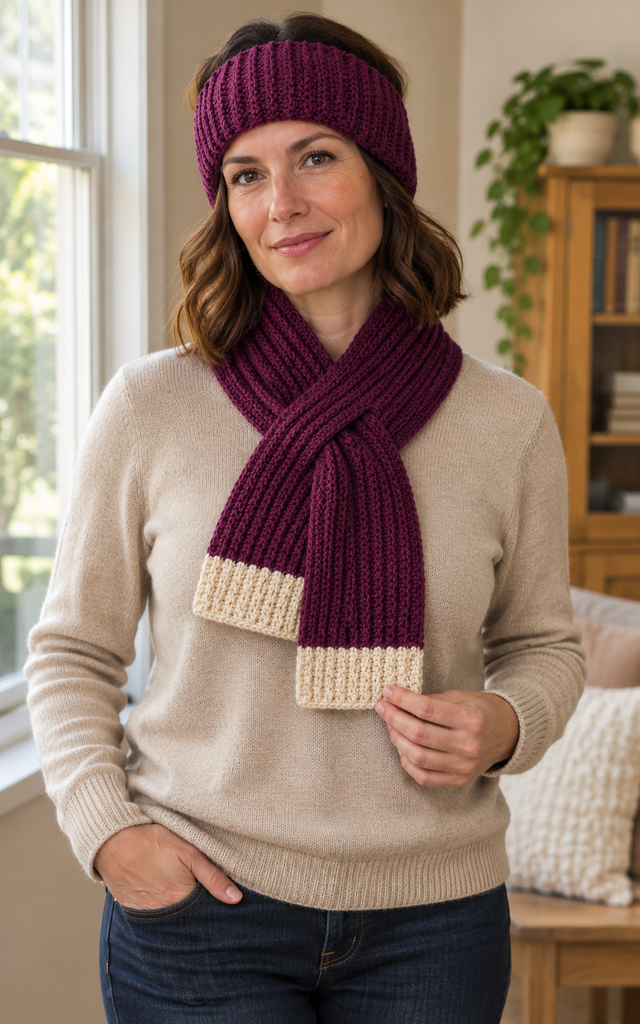
Position the ear warmer’s seam at the back and smooth the band over the ears. Bring the scarf around the back of the neck with the slit end at the front, then pass the opposite tip through. Let the fabric sit loosely and arrange the cream tips naturally.
The model image illustrates the intended styling. Actual placement and drape depend on your measurements, gauge, and yarn, so use it as a visual idea rather than evidence of a tested fit. Adjust the finished sample for comfort before wearing it regularly.
More Information: Adjustments and Care
Change the Length Without Losing the Details
For a longer scarf, add full-width plum rows after the slit has been rejoined and before the final cream tip. Every twelve extra rows add approximately 10 cm at the provisional row gauge. For a shorter scarf, remove rows from that same section and check that it still wraps comfortably and reaches through the opening.
Changing the width affects the keyhole halves. Keep an even total stitch count, divide it equally, and test whether the opposite end can pass through the opening. A wider scarf may also need a longer slit, so evaluate those two changes together.
Keep the Fabric Flexible
Do not tighten the last stitches of the narrow split sections. Their inner edges need enough give for the tip to slide through. Secure the split-section tails along nearby matching stitches, avoiding thick knots at the slit ends.
Follow the yarn’s care label if blocking. Dry the pieces at their relaxed dimensions rather than stretching them to match the calculations. The scarf should bend easily, and the ear warmer should recover after a gentle stretch.
Try Another Color Pairing
Dusty blue and oatmeal make a quieter version, while rust and warm beige give the set an autumn feel. The solid ear warmer and contrasting scarf tips make a coordinated pair without requiring identical construction. Use yarns with similar fiber content and thickness in both colors.
Frequently Asked Questions
Is this the same set as the PDF?
No. The reference is a knitted hat and long scarf. This draft uses crochet to create an ear warmer and a shorter keyhole scarf, with a different palette, texture, proportions, and closure. The source instructions and photographs are not reproduced.
Can a beginner make the set?
It suits a confident beginner who can identify the back loop and keep track of rows. The ear warmer is straightforward. Practice the split-and-rejoin method on a small swatch before committing to the scarf if that construction is new to you.
Does the ear warmer have a twisted front?
No. Its short ends meet in a flat seam at the back. The plain plum band continues evenly around the head, with its seam positioned at the back.
Why is fresh yarn used for Row 25?
The two narrow sections can finish with their working yarn at different positions. Fastening off both halves and rejoining at an outside edge makes it clear how to work across all 28 stitches without an unwanted strand or extra chain across the opening.
What if the scarf will not pass through the slit?
Check the opening before completing all finishing. The actual fabric may need a longer split section than the calculated reference. Extend both halves equally and adjust the later plain rows if you want to preserve the total length.
Has this pattern been physically tested?
No. The ear warmer totals, scarf color sections, 14-plus-14 split, and 28-stitch rejoin have been checked mathematically. Fit, stretch, drape, yarn use, and the keyhole’s performance still need a real crocheted sample. All four images are AI-generated concepts.