One Piece Luffy Amigurumi
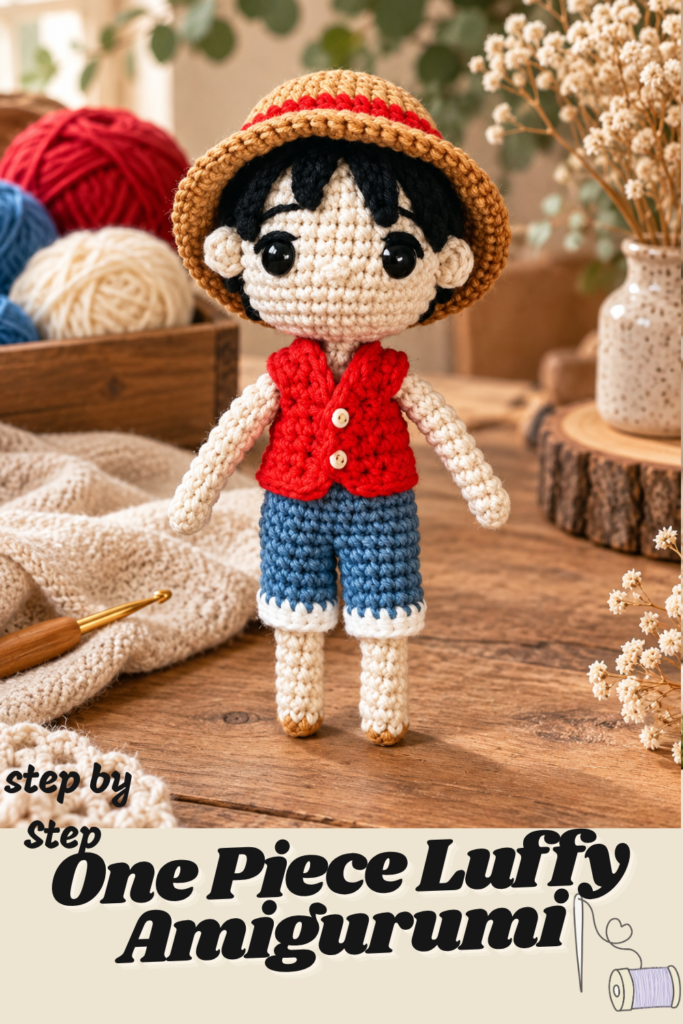
Few anime characters are as instantly recognizable as Monkey D. Luffy — the straw hat, the red vest, the wide, fearless grin. The One Piece Luffy Amigurumi, designed by nix.amigurumi, translates that unmistakable silhouette into a small, huggable crochet doll, complete with a rolled-cuff pair of trousers, a two-button vest, spiky black hair, and of course, that signature straw hat.
As the pattern’s introduction notes, this is “a great original gift idea for your children or your anime-loving friends,” and thanks to detailed, step-by-step construction, it’s approachable even though it involves quite a few separate components — legs, a joined lower body, trousers, a head, arms, ears, a vest, hair, and a hat, all worked individually and then assembled. If you’re a fan of One Piece, or you know someone who is, this doll is a genuinely satisfying project to work through piece by piece.
Below is the complete pattern, reorganized with clear headings for every component, along with the full materials list, abbreviations, and a set of tips and frequently asked questions to guide you through the assembly.
About This Pattern
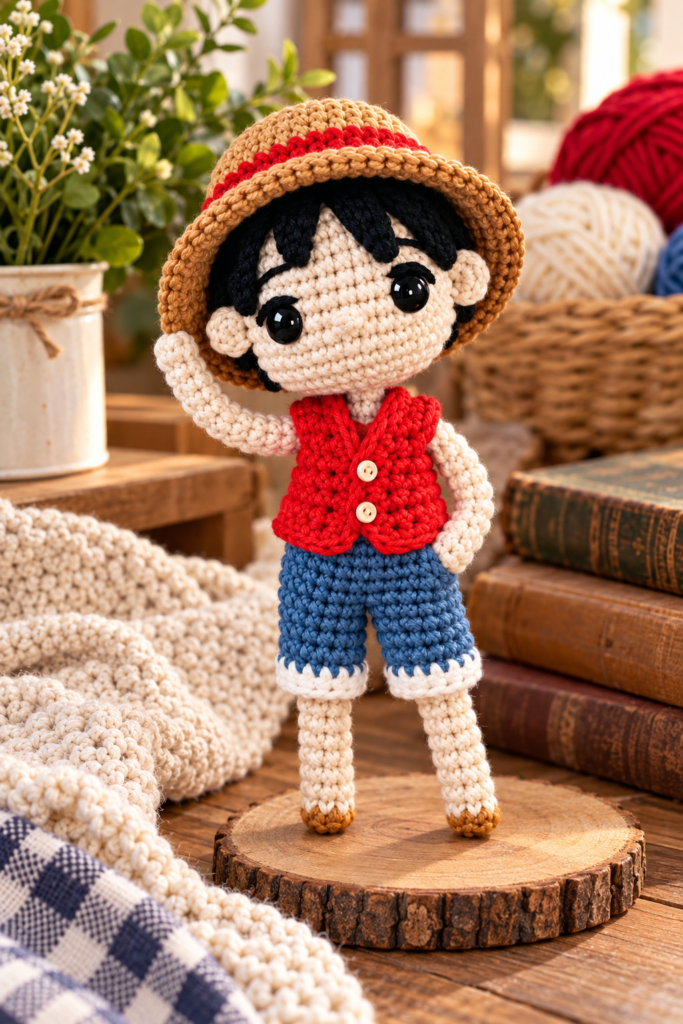
Designer: nix.amigurumi
Abbreviations
| Abbreviation | Meaning |
|---|---|
| Sc | Single crochet |
| Inc | Increase of single crochet |
| Dec | Decrease of single crochet |
| Hdc | Half double crochet |
| Hdc-dec | Half double crochet decrease |
| Dc | Double crochet |
| Slst | Slip stitch |
Materials and Tips
- Yarn colors: beige for skin, blue, white, black, red, and light brown
- Two hooks: crochet the legs, body, head, and arms with a hook 0.25mm smaller than the one used for the clothes and hair
- 9mm security eyes
- 2 small yellow buttons
- Yarn needle and scissors
- Optional: hot glue for attaching the hair
- A stitch marker for counting rows — place the marker at the beginning of each round; a purchased marker, a scrap of contrasting thread, or a small safety pin all work
- Fiberfill stuffing
Crocheting the Legs (Make 2)
Start with the beige color for the skin. Crochet in a continuous spiral.
- Rnd 1: 6 sc in a magic ring (6).
- Rnd 2: 5 sc, 1 inc (7).
- Rnd 3–7: 7 sc (7).
- Rnd 8: 6 sc, 1 inc (8).
- Rnd 9–10: 8 sc (8).
- Rnd 11: 7 sc, 1 inc (9).
- Rnd 12–13: 9 sc (9).
Cut the thread and fasten off the first leg. On the second leg, do not cut the thread — you’ll continue directly into joining the two legs together.
Joining the Legs
Change to blue.
- Rnd 14: 2 sc, chain 3, join to the first leg with 1 sc, 8 sc across the first leg, 3 sc across the chains, 7 sc across the second leg (24).
- Rnd 15: 24 sc.
- Rnd 16: 24 sc, then make 5 additional sc and move the marker. Continue counting rounds from this new point onward.
- Rnd 17: 4 sc, 1 dec, 10 sc, 1 dec, 6 sc (22).
Change to beige.
- Rnd 18: working in the back loop only, 1 dec, 3 sc, 1 dec, 4 sc, 1 dec, 3 sc, 1 dec, 4 sc (18).
- Rnd 19–22: 18 sc (18).
- Rnd 23: 3 sc, 1 dec, 8 sc, 1 dec, 3 sc (16).
- Rnd 24: (2 sc, 1 dec) x4 (12).
- Rnd 25: 6 dec (6).
- Rnd 26–27: 6 sc (6).
At this point, set the body aside — you’ll crochet the trousers next, using the front loops left open back at Round 17, and return to the head afterward.
Crocheting the Trousers
Start with blue, crocheting in a spiral. You’ll be working into the front loops left on Round 17 of the joined body. With the feet facing up, insert your hook into the first front loop of Round 17.
- Rnd 1: 5 sc, 1 inc, 10 sc, 1 inc, 5 sc (24).
- Rnd 2–4: 24 sc (24).
Now you’ll crochet the two trouser legs separately, starting with the right leg.
Right Trouser Leg
- Rnd 5: 12 sc, chain 3.
- Rnd 6: Join with 1 sc into the first stitch made on Row 1, 11 sc, and 3 sc across the chains (15).
- Rnd 7–8: 15 sc.
- Rnd 9: 15 sc, then make 2 additional sc and move the marker. Continue counting rounds from this new point onward.
Change to white.
- Rnd 6 (white cuff): 13 hdc, 1 hdc-dec (14).
Left Trouser Leg
Insert the hook into the next stitch of Row 5 to begin the left leg, then repeat the entire right trouser leg pattern exactly as written above.
Crocheting the Head
Continue directly from Round 28 of the joined body.
- Rnd 28: 6 inc (12).
- Rnd 29: 12 inc (24).
- Rnd 30: (3 sc, 1 inc) x6 (30).
- Rnd 31: 2 sc, 1 inc, (2 sc, 1 inc) x5, 2 sc (36).
- Rnd 32–40: 36 sc (36).
Place the security eyes between Rounds 35 and 36.
- Rnd 41: 2 sc, 1 dec, (4 sc, 1 dec) x5, 2 sc (30).
- Rnd 42: (3 sc, 1 dec) x6 (24).
- Rnd 43: 1 sc, 1 dec, (2 sc, 1 dec) x5, 1 sc (18).
- Rnd 44: (1 sc, 1 dec) x6 (12).
- Rnd 45: 6 dec (6).
Crocheting the Arms (Make 2)
Start with beige, crocheting in a spiral.
- Rnd 1: 6 sc in a magic ring (6).
- Rnd 2–10: 6 sc (6).
- Rnd 11: 3 slst, 3 hdc.
Crocheting the Ears (Make 2)
- Rnd 1: 5 sc in a magic ring.
Pull the magic ring until the piece forms a “D” shape. Cut the thread, leaving a long tail for sewing later.
Crocheting the Vest
Use a hook 0.25mm to 0.5mm larger than the one used for the body pieces, or simply crochet more loosely — this looser gauge helps the vest fit comfortably over the body without being too tight. At the end of each row, chain 1 and turn the work. Start with red.
- Rnd 1: chain 16, starting on the 2nd chain from the hook, (1 sc, 1 inc) x7, 1 sc (22).
- Rnd 2: 2 sc, chain 3, skip 5 stitches, 8 sc, chain 3, skip 5 sc, 2 sc (18).
- Rnd 3–5: 18 sc (18).
- Rnd 6: 4 sc, 1 inc, 8 sc, 1 inc, 4 sc (20).
Cut the yarn. Now you’ll work a border round all the way around the vest.
Insert the hook at the side seam. Start by working one side with 6 sc, one stitch for each row. For the neck area, skip the first stitch, work 12 sc, and skip the last stitch. Continue on to the next side, working 2 sc, 2 chains, skip 1 stitch, 1 sc, 2 chains, skip 1 stitch, and 1 sc. Finally, work the bottom edge: 1 inc, 18 sc, 1 inc. Fasten off.
Crocheting the Hair
Start with black, crocheting in a spiral. Use the larger hook (0.25mm to 0.5mm bigger) and crochet more loosely, just as with the vest.
- Rnd 1: 6 sc in a magic ring (6).
- Rnd 2: 6 inc (12).
Now you’ll work a series of individual strands directly off of Round 2, each one chained out and then worked back along itself before being joined back to the base:
- Strand 1: chain 12, starting on the 2nd chain from the hook: 1 slst, 1 sc, 2 hdc, 4 dc, 2 hdc, 1 sc, then join with a slst to the first stitch of Round 2 (11).
- Strands 2–7: chain 14, starting on the 2nd chain from the hook: 1 slst, 1 sc, 2 hdc, 6 hdc, 2 hdc, 1 sc, then join with a slst to the next stitch of Round 2 (13). Repeat this strand 6 times total.
- Strand 8: chain 12, starting on the 2nd chain from the hook: 1 slst, 1 sc, 2 hdc, 4 dc, 2 hdc, 1 sc, then join with a slst to the first stitch of Round 2 (11).
- Strand 9: chain 8, starting on the 2nd chain from the hook: 1 slst, 1 sc, 4 hdc, 1 sc, then join with a slst to the next stitch of Round 2 (7).
- Strand 10: chain 6, starting on the 2nd chain from the hook: 1 slst, 1 sc, 2 hdc, 1 sc, then join with a slst to the next stitch of Round 2 (5).
- Strand 11: chain 7, starting on the 2nd chain from the hook: 1 slst, 1 sc, 3 hdc, 1 sc, then join with a slst to the next stitch of Round 2 (6).
- Strand 12: chain 8, starting on the 2nd chain from the hook: 1 slst, 1 sc, 4 hdc, 1 sc, then join with a slst to the next stitch of Round 2 (7).
Together, these twelve individually chained strands are what create Luffy’s spiky, textured hair, rather than a single crocheted cap shape.
Crocheting the Hat
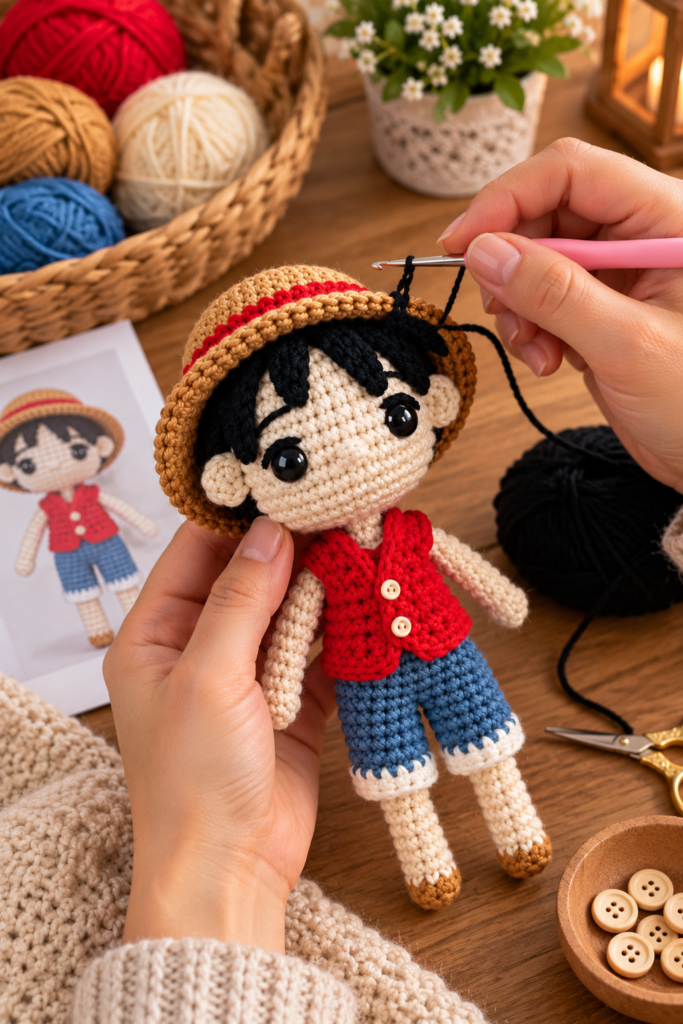
Start with light brown, crocheting in a spiral.
- Rnd 1: 8 sc in a magic ring (8).
- Rnd 2: 8 inc (16).
- Rnd 3: (1 sc, 1 inc) x8 (24).
- Rnd 4: 1 sc, 1 inc, (2 sc, 1 inc) x7, 1 sc (32).
- Rnd 5: 32 sc (32).
- Rnd 6: (3 sc, 1 inc) x8 (40).
- Rnd 7–9: 40 sc (40).
Change to red.
- Rnd 10: 40 sc (40).
- Rnd 11: 9 sc, 1 inc, 20 sc, 1 inc, 9 sc (42).
Change back to light brown.
- Rnd 12: working in the front loop only, 3 sc, 1 inc, (6 sc, 1 inc) x5, 3 sc (48).
- Rnd 13: (7 sc, 1 inc) x6 (54).
- Rnd 14: 4 sc, 1 inc, (8 sc, 1 inc) x6, 4 sc (60).
- Rnd 15: 60 sc (60).
Fasten off.
Assembling the Doll
Once all the individual pieces are complete, it’s time to bring Luffy together:
- Sew the eye details in place (if not already secured as security eyes during the head shaping).
- Sew the nose.
- Sew the ears in place, positioned 3 stitches apart from the eyes, attaching them between Rounds 35 and 36 of the head.
- Sew or glue the hair onto the head. Place Strands 1 and 8 behind each ear. Place Strands 2 through 7 between them, spanning the top of the head. Strands 9, 10, 11, and 12 become the bangs at the front.
- Place the finished hat on his head.
Once every piece is sewn into place, your amigurumi character is ready.
Tips for Crocheting the Luffy Amigurumi
- Use two different hook sizes deliberately. The pattern specifically calls for a slightly smaller hook for the legs, body, head, and arms, and a slightly larger hook (or looser tension) for the vest and hair. This size difference is what allows the clothing and hair to fit comfortably over the firmer, more tightly stitched body underneath.
- Move your stitch marker exactly where instructed. Because several sections (the leg-joining round and the right trouser leg) include a specific instruction to add a few extra stitches and then move the marker to a new starting point, it’s worth double-checking your round count against the pattern each time this happens, since it’s easy to lose track otherwise.
- Place the security eyes before finishing the head. The pattern specifically calls for inserting the eyes between Rounds 35 and 36, while there’s still an opening large enough to access the inside of the head for the backing washers — trying to add them after the head is fully closed and stuffed is much more difficult.
- Take your time with the hair strands. With twelve individually worked strands of varying lengths, it helps to lay them out loosely on the head first (per the assembly instructions) before sewing or gluing anything permanently, so you can adjust the part and fringe placement to your liking.
- Work the vest and trouser cuffs in a genuinely looser gauge. Since the pattern notes to use a larger hook “or crochet more loosely” for the vest, don’t skip this adjustment — a vest worked at the same tight gauge as the body will likely be too snug to fit over the torso once stuffed.
Frequently Asked Questions
Who designed this pattern? The One Piece Luffy Amigurumi was designed by nix.amigurumi and shared as a free pattern.
What yarn colors do I need? You’ll need beige (for the skin), blue (for the trousers), white (for the trouser cuffs), black (for the hair), red (for the vest and hat trim), and light brown (for the straw hat).
Why does the pattern call for two different hook sizes? Using a slightly smaller hook for the legs, body, head, and arms creates a tighter, firmer fabric that holds stuffing well, while a slightly larger hook (or simply looser tension) for the vest and hair keeps those pieces soft and roomy enough to layer over the body comfortably.
How is the hair attached — is it one piece or several? The hair is made of twelve individually crocheted strands, each chained out to a different length and worked back with slip stitches, half double crochet, and double crochet, then joined onto a small crocheted base (Rounds 1–2). The strands are then arranged and sewn or glued into place during assembly.
Do I need security eyes, or can I embroider them instead? The pattern specifies 9mm security eyes, which are inserted between Rounds 35 and 36 of the head while it’s still open enough to attach the backing washer from the inside. If you prefer, embroidered eyes could be substituted, though the finished look and durability may differ slightly from the designer’s original.
How are the legs and trousers connected to the rest of the body? The two legs are crocheted separately and then joined together in Round 14 using a chain to bridge the gap between them, forming the base of the torso. The trousers are worked afterward directly into the front loops left open at Round 17 of that joined piece.
Is this pattern suitable for beginners? While the individual stitches used (single crochet, increases, decreases, half double crochet, double crochet, and slip stitch) are all fairly standard, the sheer number of separate pieces, color changes, and precise round-counting instructions make this a project better suited to someone who already has some amigurumi experience.
Can I make this pattern in different colors for a different character? Since the core construction — legs, joined body, trousers, head, arms, ears, vest, hair, and hat — is fairly universal to this doll style, you could experiment with different colorways, though the specific proportions and details (like the straw hat shape) are designed around Luffy’s particular look.
A Pirate Worth Setting Sail With
Between the carefully shaped straw hat, the individually chained hair strands, and the two-button vest, this Luffy amigurumi captures an enormous amount of character in a small handmade package. It’s a project that takes real patience — piece by piece, color by color — but the payoff is a doll instantly recognizable to any One Piece fan, whether he ends up on a bookshelf, in a child’s toy basket, or wrapped up as a gift for someone who’d sail the Grand Line for a character this well-loved.
For more free amigurumi and crochet patterns like this one, be sure to check out Lovelycraft.com.