Free Pig Crochet Pattern

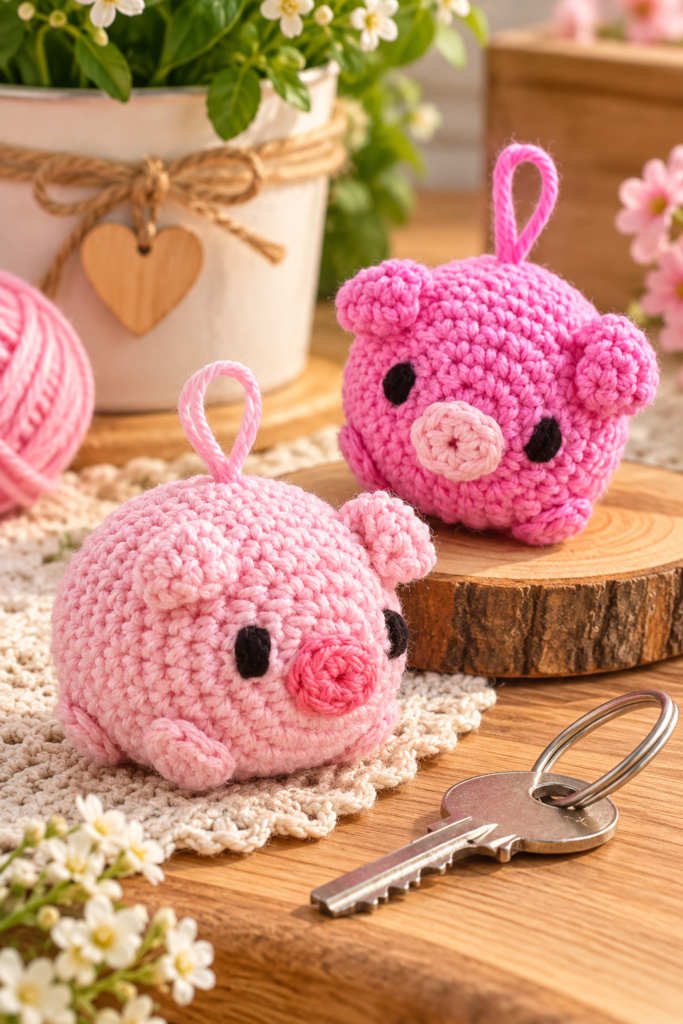
Some amigurumi projects are a weekend commitment. This one isn’t. The Mini Pig Keychain Amigurumi, a free pattern from DIY Fluffies (mariskavos.nl), is a small, single-piece pig that comes together in about an hour — small enough to use up leftover yarn, and quick enough to make as a last-minute gift.
As the pattern’s introduction puts it, “it is a great pattern for left over yarn, because it is so small,” and the designer notes a particular fondness for keychain amigurumi in general: “they just take a little bit of time to create a very cute gift.” The sample shown was made in sport-weight cotton yarn for a compact 6 cm pig, but the same pattern scales up beautifully with a thicker yarn — swap in plush chenille yarn and a larger hook, and you get a noticeably bigger, extra-huggable version instead. A full companion video walks through every step on YouTube, so if any part of the written pattern feels unclear, there’s a visual reference to fall back on.
Below is the complete pattern, reorganized with clear headings for every component — Body (which becomes the head), Ears, Snout, Legs, and Tail — along with the full materials list for all three suggested yarn weights, supplies, and a set of tips and frequently asked questions.
About This Pattern
Source: DIY Fluffies (mariskavos.nl)
If you’re new to crochet, the designer recommends checking their basic stitches tutorial before starting, to get comfortable with the fundamentals of amigurumi crochet.
Materials
These are the materials used in the original pattern. Feel free to substitute other yarns — if you want a larger or smaller pig, simply use a thicker or thinner yarn paired with a matching hook size.
Cotton Version — 6 cm / 2 inch
- Pink: Catania cotton, color 246
- Dark pink: Catania cotton, color 225
- Black: Catania cotton, color 110
- Synthetic poly filling
- Crochet hook size B/1 (2.5mm)
Velvet Bulky Version — 10 cm / 4 inch
- Pink durable velvet yarn
- Dark pink durable velvet yarn
- Black durable velvet yarn
- Synthetic poly filling
- Crochet hook size E/4 (3.5mm)
Chenille Super Bulky Version — 12 cm / 5 inch
- Pink chenille yarn
- Dark pink chenille yarn
- Black chenille yarn
- Synthetic poly filling
- Crochet hook size H/8 (5.0mm)
If you’d like to source a chenille yarn similar to the one used here, the designer suggests searching for a comparable option on YarnSub.
Supplies
- Scissors
- Tapestry needles with a blunt point, size 16 or 17
- Pins
Crocheting the Body (and Head)
This pig is worked as a single continuous piece — there’s no separate head to attach later. The body simply narrows and closes at the top to form the head, all in one uninterrupted sequence of rounds. Use pink yarn throughout.
- Rnd 1: Start with 6 sc in a magic ring (6).
- Rnd 2: inc 6 times (12).
Mark the beginning of Round 3 with a scrap piece of yarn if you haven’t already, so you can count your stitches accurately as the rounds progress.
- Rnd 3: (sc, inc in next st) repeat 6 times (18).
- Rnd 4: (sc in next 2 st, inc in next st) repeat 6 times (24).
- Rnd 5: (sc in next 7 st, inc in next st) repeat 3 times (27).
- Rnd 6–13: sc in all 27 st (27).
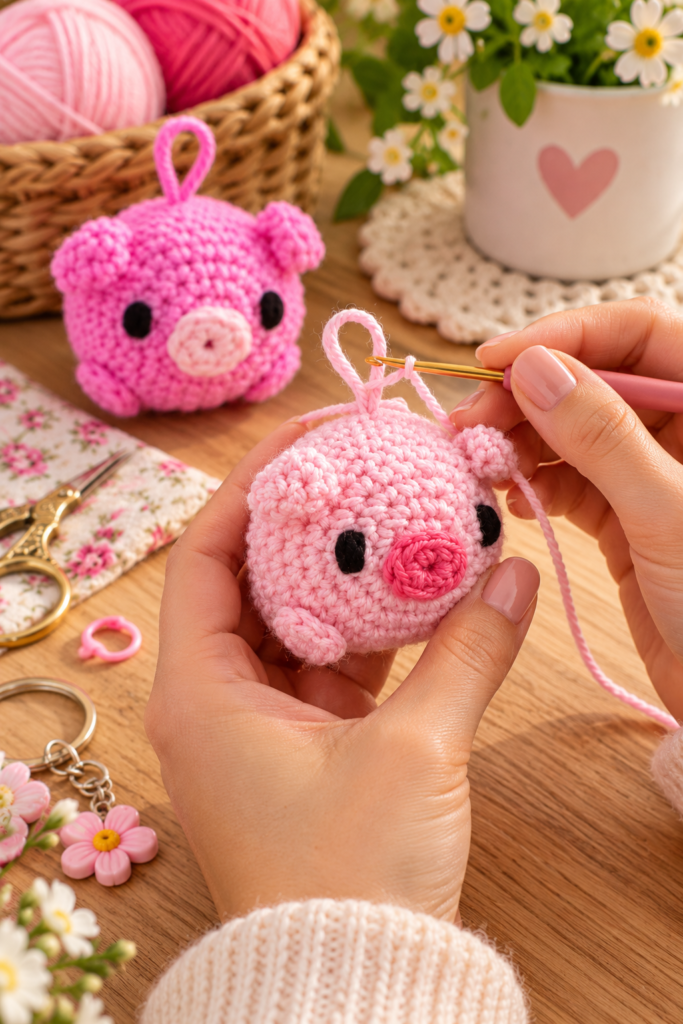
Optional keychain loop: if you’d like to turn this pig into an actual keychain, sew two strands of folded yarn into the top of the body between Rows 9 and 10, securing the loop on the inside of the body before continuing.
Embroidering the eyes: add the eyes onto the body between Rows 3 and 4, positioned at the 5th and 14th stitch. If you’d like guidance on sewing the eyes accurately, the designer’s companion video for this pattern is a helpful visual reference.
- Rnd 14: (sc in next 7 st, dec) repeat 3 times (24).
- Rnd 15: (sc in next 2 st, dec) repeat 6 times (18).
Stuff the head with filling at this point.
- Rnd 16: (sc in next st, dec) repeat 6 times (12).
- Rnd 17: dec 6 times (6).
Finish the head by taking the last strand of yarn and sewing it through the front loops of every crochet stitch made in the last round. Pull the yarn tight to close the hole completely. Stick your needle under the hole and weave in the yarn end to hide it.
Crocheting the Ears (Make 2)
Use pink yarn.
- Rnd 1: Start with 4 sc in a magic ring (4).
- Rnd 2: (sc, inc in next st) repeat 2 times (6).
- Rnd 3–4: sc in all 6 st (6).
Fasten off, leaving a long tail for sewing. Flatten each ear before attaching.
Sew Round 4 of each ear onto Round 7 of the body, leaving 6 stitches of space between the two ears. Fold the ears and sew the tips down onto the body for a natural, slightly curled shape.
Crocheting the Snout
Use dark pink yarn.
- Rnd 1: Start with 6 sc in a magic ring (6).
Fasten off, leaving a long tail for sewing. Sew the snout onto the face, positioned over Rounds 1 and 2 of the body.
Crocheting the Legs (Make 4)
Use pink yarn.
- Rnd 1: Start with 6 sc in a magic ring (6).
Fasten off, leaving a long tail for sewing.
Sew the legs onto the bottom of the body, leaving 4 stitches between the two front legs and 4 stitches between the two hind legs, with 4 rows of space between the front legs and the hind legs.
Crocheting the Tail
Use pink yarn.
Chain 8.
- Row 1: Starting in the 2nd chain from the hook, slip stitch in the next 7 st (7).
Fasten off, leaving a long piece of yarn for sewing. Twist the tail between your fingers to create a natural curl.
Sew the finished tail onto the top of the body, positioned between Rounds 15 and 16.
Finishing
Now your pig is done! Once the ears, snout, legs, and curled tail are all attached, your mini pig keychain amigurumi is ready to clip onto a bag, a set of keys, or simply sit on a shelf as a tiny plush.
Tips for Crocheting the Mini Pig Keychain
- Mark Round 3 before you forget. Since the pattern specifically recommends placing a stitch marker at the start of Round 3, do this right away — losing track of where each round begins on such a small, fast-growing piece makes accurate counting much harder later on.
- Watch the companion video for eye placement. Embroidering the eyes accurately (between Rows 3–4, at the 5th and 14th stitch) is one of the trickiest visual judgment calls in the whole pattern, and the designer’s linked video specifically addresses this step if the written coordinates feel hard to visualize.
- Decide on the keychain loop before you pass Round 10. Since the optional loop is sewn in between Rows 9 and 10 during construction rather than added afterward, make your decision about whether you want a keychain or a standalone plush before you crochet past that point.
- Match your hook size to your chosen yarn weight. Because this pattern is specifically designed to scale — from a 6 cm cotton version up to a 12 cm chenille version — using the correct paired hook size (2.5mm, 3.5mm, or 5.0mm) for whichever yarn weight you choose will keep your gauge, and therefore your finished size, predictable.
- Twist the tail firmly before sewing it down. The pattern calls for twisting the tail between your fingers to form a curl; doing this while the yarn still has some twist memory (right after finishing the row) will give you a tighter, more defined curl than trying to twist it after it’s already relaxed.
Frequently Asked Questions
Where does this pattern come from? This is a free pattern from DIY Fluffies (mariskavos.nl), which also offers a full companion video on YouTube walking through every step of construction.
How long does this project take to make? The pattern describes it as a project you can complete in about an hour, making it one of the quicker amigurumi patterns available — ideal for a last-minute handmade gift.
Can I make a bigger version of this pig? Yes. The pattern is specifically designed to scale: the cotton version with a 2.5mm hook makes a 6 cm pig, a bulkier velvet yarn with a 3.5mm hook makes a 10 cm pig, and a super bulky chenille yarn with a 5.0mm hook makes a 12 cm pig, all using the exact same stitch instructions.
Is the head a separate piece I need to sew on? No — the body and head are worked as one single continuous piece from start to finish, with the shaping simply narrowing at the top to form the head. There’s no separate head piece to attach.
How do I turn this pig into an actual keychain? During Round 9–10 of the body, sew two strands of folded yarn into the top of the piece and secure the loop on the inside of the body before continuing with the remaining rounds. This creates the loop you’ll see in the finished photos, ready to attach a keyring.
Where exactly do the eyes go? The eyes are embroidered directly onto the body between Rows 3 and 4, positioned at the 5th and 14th stitch of that section.
How many legs does this pig have, and how are they spaced? The pig has 4 legs total (2 front, 2 hind), each made from a simple 6-stitch magic ring circle. They’re sewn onto the bottom of the body with 4 stitches of space between the front legs, 4 stitches between the hind legs, and 4 rows of space separating the front legs from the hind legs.
What creates the curled tail? The tail starts as a short chained-and-slip-stitched strip, which is then twisted by hand between your fingers to form a natural curl before being sewn onto the body between Rounds 15 and 16.
A Tiny Pig With Big Gift Potential
Between its quick one-hour construction, scalable sizing across three different yarn weights, and the option to add a keychain loop, this mini pig amigurumi is the kind of pattern you’ll likely find yourself returning to again and again — for a birthday favor, a stocking stuffer, or simply an excuse to use up that last little bit of pink yarn in your stash. Simple, fast, and undeniably cute, it’s proof that a great amigurumi doesn’t need to take all weekend to make.
There are many more free amigurumi patterns available on the DIY Fluffies website, all well suited to beginners who want to learn how to crochet cute plush toys.