Free Mouse Crochet Pattern

Not every amigurumi needs a long list of separately crocheted parts. Molly the Mouse, a free pattern from DIY Fluffies (mariskavos.nl), proves that a genuinely charming plushie can come together from just a body, two simple ears, and a short chained tail — all in under an hour. It’s described as “an easy free mouse crochet pattern for beginners,” and with such a short materials list, it’s another great candidate for using up leftover yarn from your stash.
Like the designer’s other keychain-style amigurumi, this pattern is intentionally scalable: “you can use any yarn to crochet Molly the Mouse,” the introduction notes, with the smaller sample made in sport-weight cotton yarn and a larger version crocheted in plush Super Bulky chenille yarn, both from the exact same set of instructions. As the pattern puts it, “this stuffed animal Amigurumi pattern is suitable for any yarn!”
Below is the complete pattern, reorganized with clear headings for the Body, Ears, and Tail, along with the full materials list for both suggested yarn weights, supplies, abbreviations, and a set of tips and frequently asked questions.
About This Pattern
Source: DIY Fluffies (mariskavos.nl)
A full companion video walks through every step of crocheting this mini mouse keychain amigurumi on YouTube — a helpful resource if any part of the written pattern needs a visual demonstration. If you’d prefer an ad-free PDF download, or simply want to support the designer directly, the pattern is also available for purchase through their Etsy shop; the free version continues below regardless.
If you’re new to crocheting, the designer recommends their beginner-friendly basic stitches tutorial, complete with instructional videos covering everything needed to make your own amigurumi stuffed animal.
Materials
These are the materials used in the original pattern. Feel free to substitute other materials, and if you’d like a larger or smaller version of Molly, simply use a thicker or thinner yarn and a matching crochet hook.
Cotton Sport Weight Version — 5 cm / 2 inch
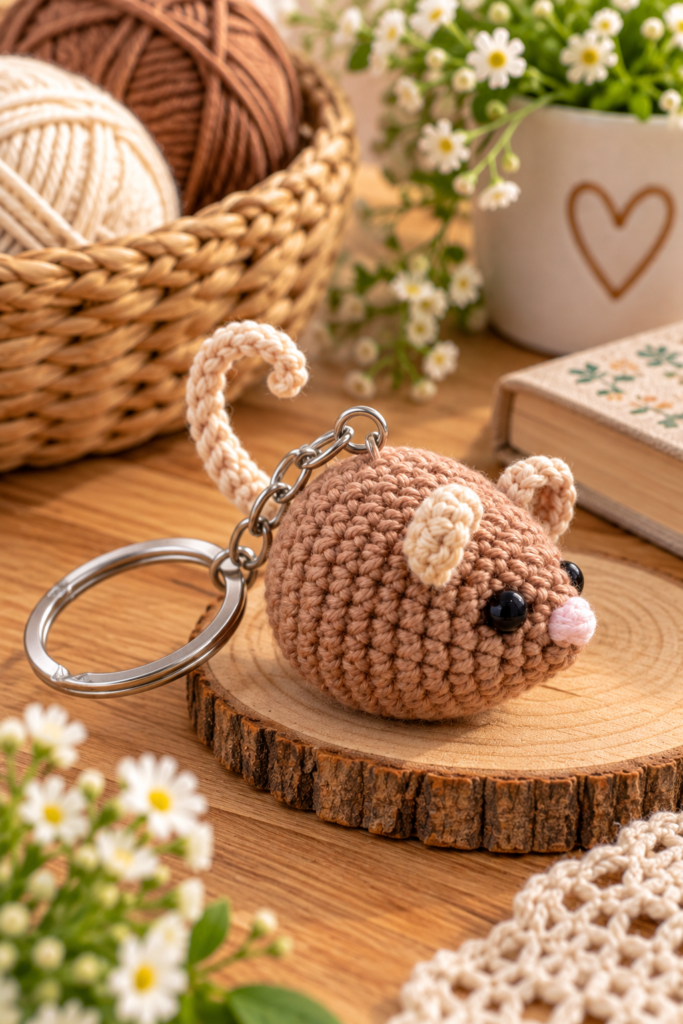
- Brown: Yarn and Colors Must Have cotton, color 127
- Beige: Yarn and Colors Must Have cotton, color 111
- Pink: Yarn and Colors Must Have cotton, color 045
- Synthetic poly filling
- Crochet hook size 2.5mm
- 1 pair safety eyes, 6mm
Chenille Super Bulky Version — 11 cm / 5 inch
- Brown, beige, and pink chenille yarn
- Synthetic poly filling
- Crochet hook size 5.0mm
- 1 pair safety eyes, 14mm
If you’d like to find a chenille yarn similar to the one used here, the designer suggests searching for a comparable option on YarnSub.
Supplies
- Scissors
- Tapestry needles with a blunt point, size 16 or 17
- Pins
Tip: if you’re using blanket yarn instead of the materials listed above, the designer recommends switching to an 8mm crochet hook.
Abbreviations
All abbreviations are explained in more detail in the designer’s basic stitches tutorial.
| Abbreviation | Meaning |
|---|---|
| Rnd | Round |
| st | Stitch |
| sc | Single crochet |
| sl st | Slip stitch |
| dec | Decrease |
| inc | Increase |
Tip: before starting, beginners should remember that a full video tutorial is available showing every step of making Molly the Mouse.
Crocheting the Body
Use brown yarn.
- Rnd 1: Start with 6 sc in a magic ring (6).
- Rnd 2: (sc, inc in next st) repeat 3 times (9).
- Rnd 3: (sc in next 2 st, inc in next st) repeat 3 times (12).
- Rnd 4: (sc, inc in next st) repeat 6 times (18).
- Rnd 5: sc in all 18 st (18).
- Rnd 6: (sc in next 2 st, inc in next st) repeat 6 times (24).
- Rnd 7–8: sc in all 24 st (24).
- Rnd 9: (sc in next 3 st, inc in next st) repeat 6 times (30).
- Rnd 10–12: sc in all 30 st (30).
Attach the safety eyes between Rounds 3 and 4, spaced with an interval of 4 stitches between them.
Embroider a nose onto the mouse between Rounds 1 and 2; the nose should be two stitches wide, matching the placement shown in the pattern’s reference photos.
- Rnd 13: (sc in next 3 st, dec) repeat 6 times (24).
- Rnd 14: (sc in next 2 st, dec) repeat 6 times (18).
- Rnd 15: (sc in next st, dec) repeat 6 times (12).
Put stuffing into the body at this point.
- Rnd 16: dec 6 times (6).
Fasten off, leaving a yarn tail. Using your yarn needle, weave the tail through the front loop of each remaining stitch and pull it tight to close the opening completely.
Crocheting the Ears (Make 2)
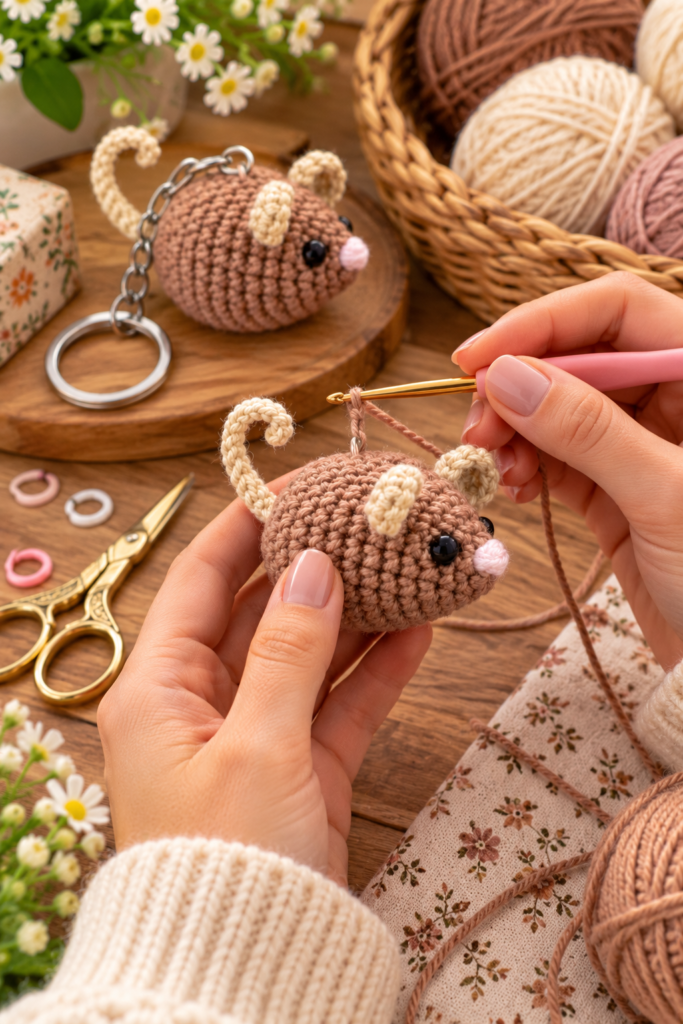
Use beige yarn.
- Rnd 1: Start with 6 sc in a magic ring (6).
- Rnd 2: inc in the next 4 stitches, skip the next st, slip stitch in the next st (8).
Sew the side of each ear with the slip stitch onto the head of the mouse, positioned on Round 7, with 5 stitches of space between the two ears, matching the placement shown in the reference photos.
Crocheting the Tail
Use beige yarn.
Chain 12.
- Row 1: Starting in the 2nd chain from the hook, slip stitch in the next 11 st (11).
Fasten off. Sew the finished tail onto the back of the mouse, positioned just above Round 16.
Finishing
Now your little mouse is done! If you’d like to turn Molly into a keychain, simply attach a keychain clasp with a jump ring to the top of the finished mouse.
Tips for Crocheting Molly the Mouse
- Match your safety eye size to your yarn weight. The pattern specifies 6mm eyes for the cotton sport-weight version and larger 14mm eyes for the chenille Super Bulky version — using the wrong scale of eye for your chosen yarn weight can throw off the mouse’s proportions noticeably.
- Attach the safety eyes before you get too far into the body. Since they’re placed between Rounds 3 and 4, right near the very start of the piece, it’s much easier to insert and secure the backing washers while the opening is still large, rather than trying to reach inside a nearly finished head.
- Space the nose carefully. Embroidering the nose between Rounds 1 and 2, at two stitches wide, happens on a very small, tightly curved part of the body — working slowly here, and checking your placement against the reference photos, will help keep the finished face looking proportional.
- Don’t skip the stuffing step before Round 16. The pattern specifically calls for stuffing the body just before the final decrease round, while there’s still enough of an opening to distribute fill evenly — waiting until after Round 16 makes it much harder to stuff evenly through the small remaining hole.
- Consider the blanket yarn hook-size tip if substituting. If you’re using blanket yarn instead of cotton or chenille, switching to an 8mm hook (as the designer suggests) will help you avoid a too-tight, hard-to-work fabric.
Frequently Asked Questions
Where does this pattern come from? Molly the Mouse is a free pattern from DIY Fluffies (mariskavos.nl), with a companion video tutorial on YouTube and a paid, ad-free PDF version available through the designer’s Etsy shop for those who’d like to support the creator directly.
How long does this project take? The pattern describes Molly as a mouse “that you can make in less than an hour,” making it one of the quicker amigurumi projects available.
Can I make a bigger version of Molly? Yes. The cotton sport-weight version with a 2.5mm hook and 6mm safety eyes produces a 5 cm mouse, while a Super Bulky chenille version with a 5.0mm hook and 14mm safety eyes produces an 11 cm mouse, both from the same written pattern.
How many pieces does this pattern have? Just three: the body (which includes the head, worked as one continuous piece), two identical ears, and a short chained tail.
Where exactly do the safety eyes go? The safety eyes are attached between Rounds 3 and 4 of the body, spaced 4 stitches apart from each other.
How is the nose made? The nose is embroidered (not crocheted) directly onto the body between Rounds 1 and 2, worked two stitches wide.
How are the ears attached? Each ear is a small 8-stitch piece with a slip stitch worked into one side during Round 2. That slip-stitch side is sewn onto Round 7 of the head, with 5 stitches of space left between the two ears.
Can I turn this mouse into a keychain? Yes — the pattern specifically notes that you can attach a keychain clasp with a jump ring to the top of the finished mouse to convert it into a wearable accessory.
A Mouse Worth Making in an Afternoon
Between its short ingredient list, quick construction time, and scalability across two very different yarn weights, Molly the Mouse is the kind of pattern that rewards you almost immediately — a genuinely finished, adorable little plushie without a long weekend commitment. Whether she ends up as a keychain, a desk companion, or a quick handmade gift, Molly proves that a great amigurumi doesn’t need a long list of components to have real charm.
There are many more free amigurumi patterns available on the DIY Fluffies blog for anyone who enjoyed crocheting Molly and wants to try something new next.