Easy Crochet Christmas Plaid Throw Pattern
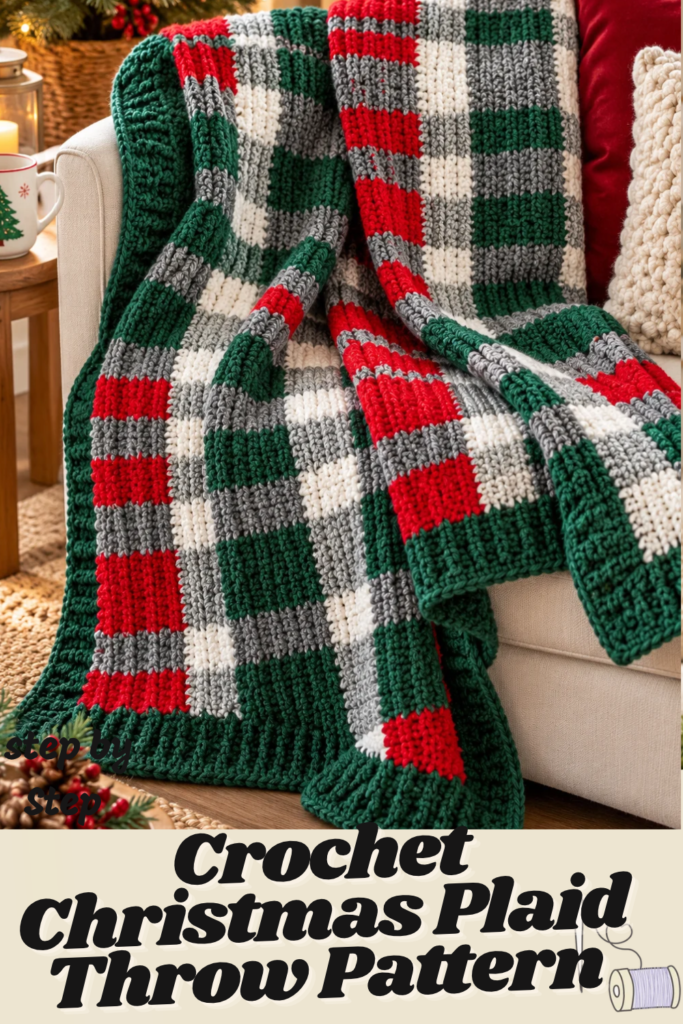
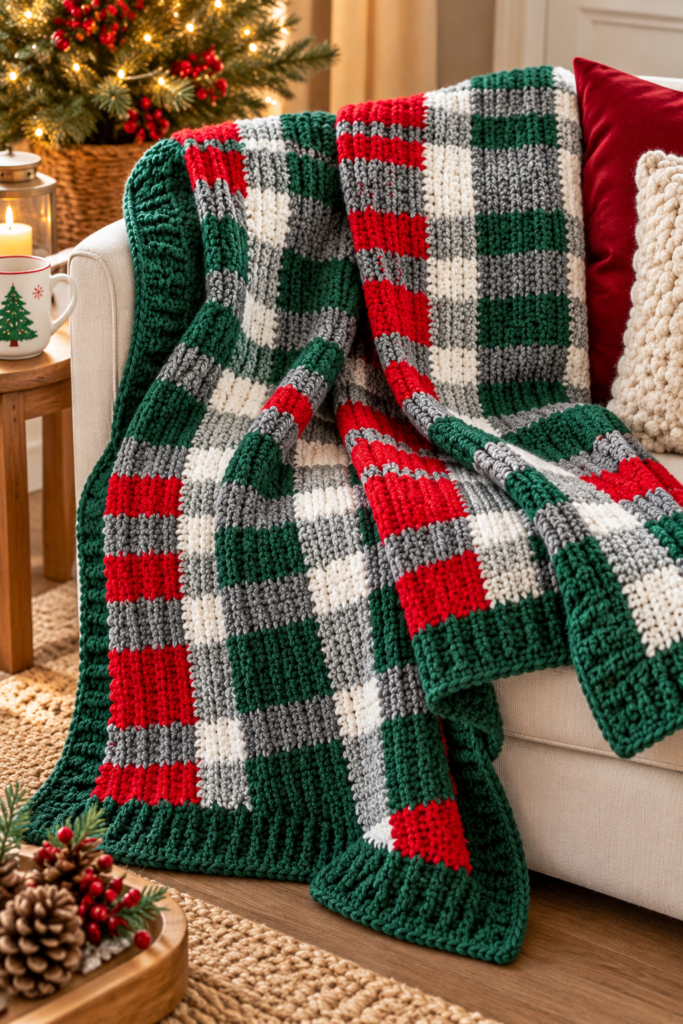
There is something especially comforting about a handmade crochet blanket during the Christmas season. Picture a cozy living room with twinkling Christmas lights, a warm cup of hot chocolate on the coffee table, and a beautiful red-and-green plaid throw draped over the sofa. It is the kind of simple holiday detail that instantly makes a home feel warmer and more welcoming.
If you love classic Christmas decorations and relaxing crochet projects, this Patons Crochet Christmas Plaid Throw is a wonderful project to try.
Featuring rich evergreen green, bright cardinal red, soft white, and two complementary shades of gray, this blanket combines traditional Christmas colors with a clean, modern plaid design. The finished result looks like a cozy woven holiday blanket, but it is actually made with simple half double crochet stitches and carefully planned color changes.
One of the most attractive features is the textured green ribbed border, which frames the plaid pattern beautifully and gives the blanket a polished, handmade finish.
The original pattern comes from Daisy Farm Crafts and Yarnspirations, uses Patons Canadiana yarn, and is rated Easy. It creates a generously sized throw measuring approximately 40 × 60 inches, making it perfect for a sofa, reading chair, or the foot of a bed.
PAT-DFC-00043-M.pdf
Although the plaid design looks intricate, the actual crochet construction is surprisingly approachable. Once you understand how to carry yarn and switch colors within a row, the repeating pattern becomes much easier to follow.
In this guide, we’ll explore the materials, crochet stitches, plaid color sequence, step-by-step construction, ribbed border, finishing details, and helpful tips for making your own beautiful Christmas plaid blanket.
About the Patons Crochet Christmas Plaid Throw
The Patons Christmas Plaid Throw is a colorful crochet blanket built from repeating rectangular blocks of color.
Unlike plaid patterns that require weaving separate chains through a mesh foundation, this design creates the plaid effect directly through crochet color changes.
The entire blanket body is worked in half double crochet.
The vertical plaid sections are formed by changing yarn colors at specific stitch intervals, while the horizontal bands are created by repeating groups of rows in different color combinations.
The result is a structured plaid design with bold red and green sections separated by white and gray accents.
The photograph on page 1 shows the finished blanket draped over a light-colored sofa beside a decorative Christmas pillow. Its rich green border gives the design a beautiful frame.
A second photograph shows the blanket in progress, with colorful yarn and a crochet hook resting nearby.
The pattern also includes a detailed colorwork graph on page 3, created with Stitch Fiddle, to help you follow the placement of each color block.
Crochet Christmas Plaid Throw Pattern at a Glance
| Project detail | Information |
|---|---|
| Pattern | Patons Crochet Christmas Plaid Throw |
| Source | Daisy Farm Crafts / Yarnspirations |
| Skill level | Easy |
| Finished size | 40 × 60 inches |
| Yarn | Patons Canadiana |
| Yarn weight | Medium 4 |
| Hook size | 5 mm / U.S. H |
| Main stitch | Half double crochet |
| Border stitches | HDC, DC, FPDC, BPDC, SC |
| Starting chain | 145 |
| Pattern repeat | Multiple of 20 + 24, plus 1 turning chain |
| Border | 6 rounds |
| Construction | Flat rows with carried colorwork |
Materials You’ll Need
The original pattern uses Patons Canadiana, a 100% acrylic yarn.
Each skein contains approximately:
100 g / 3.5 oz
and
187 meters / 205 yards.
The original color palette includes five shades.
Yarn Colors and Quantities
| Yarn color | Number of skeins |
|---|---|
| Ivy | 5 |
| White | 3 |
| Cardinal | 3 |
| Pale Gray Mix | 3 |
| Medium Gray Mix | 3 |
You’ll also need a 5 mm / U.S. H crochet hook, tapestry needle, and scissors.
These are the exact yarn quantities and basic supplies specified in the original PDF.
PAT-DFC-00043-M.pdf
Why These Colors Work So Beautifully
The color palette is one of the reasons this blanket feels so festive.
Ivy creates the deep evergreen sections and matching border.
Cardinal provides the classic Christmas red.
White brightens the design and creates crisp separation between the darker colors.
Pale Gray Mix adds soft neutral sections, while Medium Gray Mix provides stronger contrast around the red blocks.
Together, these five shades create a plaid pattern that feels traditional without becoming overly busy.
Crochet Stitches You’ll Need to Know
The main blanket uses half double crochet, while the border introduces several additional stitches.
Half Double Crochet (HDC)
Half double crochet is the foundation of the plaid design.
To make an HDC:
- Yarn over.
- Insert your hook into the indicated stitch.
- Yarn over and pull up a loop.
- Yarn over and pull through all three loops on your hook.
This creates a stitch that is taller than single crochet but shorter than double crochet.
Its relatively compact texture works nicely for colorwork because it allows the colored blocks to appear clearly.
Front Post Double Crochet (FPDC)
Front post double crochet is used to create the raised sections of the ribbed border.
Yarn over and insert your hook from front to back around the post of the next double crochet.
Complete the double crochet as usual.
The stitch projects toward the front of the fabric.
Back Post Double Crochet (BPDC)
Back post double crochet creates the recessed sections of the border.
Insert your hook from back to front around the post of the next double crochet.
Complete the stitch normally.
Alternating FPDC and BPDC creates the ribbed texture used around the finished blanket.
PAT-DFC-00043-M.pdf
Understanding the Plaid Colorwork
Before beginning the blanket, it helps to understand how the color changes work.
Each row contains repeating groups of stitches in two colors.
For example, the first four rows alternate Pale Gray Mix and White.
The next nine rows alternate Cardinal and Medium Gray Mix.
Later rows introduce Ivy in place of Cardinal.
These combinations create the large plaid blocks visible in the finished blanket.
The important thing is that you change yarn colors within the row rather than cutting the yarn after every color block.
The original pattern recommends carrying yarn through the work and switching colors during the final step of the half double crochet stitch.
This helps keep the transitions neat and reduces the number of loose ends.
How to Carry Yarn When Crocheting Plaid
Yarn carrying is one of the most useful techniques you’ll learn from this project.
When you reach a color change, begin the last half double crochet stitch using your current color.
Before completing the stitch, pull through with the new color.
This means the next stitch begins cleanly in the new shade.
The original instructions recommend keeping one yarn color toward the front of the work and the other toward the back.
They also suggest gently tugging the carried yarn before using it again.
This helps prevent loose strands and uneven tension.
Avoid pulling too tightly, though, because that can make the blanket pucker.
How to Crochet the Christmas Plaid Blanket
The blanket begins with a foundation chain worked in Pale Gray Mix.
Step 1: Crochet the Foundation Chain
Using Pale Gray Mix:
Chain 145.
This creates the starting width for the 40 × 60-inch throw.
The original pattern also provides a formula for changing the blanket’s size:
Any multiple of 20 + 24, plus 1 additional chain for turning.
For example, a different starting chain can be calculated by choosing a multiple of 20, adding 24, and then adding one turning chain.
Keep in mind that changing the foundation width will also change the placement and number of plaid repeats.
Step 2: Crochet Rows 1–4
Begin Row 1 in the second chain from your hook.
Work in half double crochet, changing colors according to the following sequence.
- 4 HDC in Pale Gray Mix
- 4 HDC in White
- Repeat the main section of 8 Pale Gray Mix, 4 White, 4 Pale Gray Mix, and 4 White
- Continue until the final 16 stitches
- Finish with 8 Pale Gray Mix, 4 White, and 4 Pale Gray Mix
Chain 1 and turn.
Repeat the same color arrangement for Rows 2, 3, and 4.
This creates the first narrow gray-and-white plaid band.
At the end of Row 4, complete the final HDC by pulling through with Cardinal.
Cut the White and Pale Gray Mix yarns, leaving tails for weaving in later.
The source directs crocheters to consult the color graph for the exact stitch placement.
PAT-DFC-00043-M.pdf
Step 3: Crochet Rows 5–13
Now begin the bold red-and-gray section.
Use Cardinal and Medium Gray Mix.
Follow this color sequence:
- 4 HDC in Cardinal
- 4 HDC in Medium Gray Mix
- Repeat the main section of 8 Cardinal, 4 Medium Gray Mix, 4 Cardinal, and 4 Medium Gray Mix
- Continue until the final 16 stitches
- Finish with 8 Cardinal, 4 Medium Gray Mix, and 4 Cardinal
Chain 1 and turn.
Repeat this arrangement through Row 13.
These nine rows create a broad red plaid band with gray vertical accents.
At the end of Row 13, switch to Pale Gray Mix during the final step of the last HDC.
Cut Cardinal and Medium Gray Mix, leaving yarn tails for finishing.
Step 4: Crochet Rows 14–17
Repeat the instructions for Rows 1–4.
Use Pale Gray Mix and White.
This creates another narrow neutral band between the bold red and green sections.
The repeated gray-and-white stripes help give the blanket its traditional plaid appearance.
Step 5: Crochet Rows 18–26
Repeat the instructions for Rows 5–13, but substitute Ivy for Cardinal.
Use Ivy and Medium Gray Mix.
Follow the same stitch arrangement as the red section.
This creates a rich green plaid band.
The dark green provides a beautiful contrast against the red sections while keeping the overall color palette coordinated.
Step 6: Continue the Plaid Pattern
Repeat the established 26-row graph sequence until the blanket reaches your desired length.
For the original throw, aim for approximately 60 inches, allowing for the finished border.
The source specifically instructs you to end the blanket with the Rows 1–4 color arrangement.
Fasten off and weave in the yarn ends.
The PDF does not specify one fixed total row count for the completed blanket body. Instead, it directs you to continue the graph until the desired length is reached.
PAT-DFC-00043-M.pdf
Understanding the Crochet Plaid Graph
The colorwork graph on page 3 is an important part of the original pattern.
It shows the repeating plaid blocks using a grid of colored squares.
Each square represents a stitch position within the colorwork design.
The graph uses red, green, white, light gray, and medium gray blocks to illustrate the color placement.
The instructions explain that:
Odd-numbered rows are read from right to left.
Even-numbered rows are read from left to right.
This is important because the blanket is worked back and forth.
As you turn your work, the reading direction changes.
The graph is especially useful for checking where the narrow gray stripes fall within the larger red and green sections.
If you are new to crochet colorwork, keeping the graph beside you while crocheting can help prevent mistakes.
How to Crochet the Ribbed Border
Once the main blanket is complete, it’s time to add the beautiful Ivy border.
The original pattern uses six rounds.
This border gives the blanket a more substantial edge and helps frame the colorful plaid design.
Border Round 1 – Half Double Crochet Foundation
Using Ivy, join the yarn at the upper-left corner.
Chain 1.
Work one HDC into the same stitch as the join.
Along the sides, work approximately 3 HDC for every 2 rows.
At each corner, work 3 HDC.
Across the top and bottom edges, work one HDC into each stitch.
When you return to the starting corner, work the remaining 2 HDC into the same corner space.
Join with a slip stitch into the first HDC.
Chain 1 and turn.
This round creates a foundation for the textured ribbing.
Border Round 2 – Double Crochet
Work one double crochet into each HDC.
At every corner, work:
DC, chain 2, DC
into the second HDC of the corner group.
Continue around the blanket.
Join with a slip stitch into the first double crochet.
Chain 1 and turn.
Border Round 3 – Begin the Ribbed Texture
Alternate front post double crochet and back post double crochet around the double crochet stitches from the previous round.
At each corner chain-2 space, work:
DC, chain 2, DC.
Continue around the blanket.
Join with a slip stitch into the first FPDC.
Chain 1 and turn.
This round begins creating the raised ribbed appearance.
Border Rounds 4 and 5
Repeat Round 3.
Continue alternating FPDC and BPDC.
Work the same corner combination into each chain-2 space.
As the rounds build, the border develops a thicker, more textured appearance.
Border Round 6 – Final Single Crochet Edge
Work one single crochet into each double crochet around the blanket.
At every corner, work a single crochet around the chain-2 space.
Join with a slip stitch into the first single crochet.
Fasten off.
Weave in all remaining yarn ends.
Your ribbed border is complete.
PAT-DFC-00043-M.pdf
Why the Ribbed Border Makes Such a Difference
The main blanket features strong rectangular blocks of color.
Without a border, the plaid design would still be attractive, but the edges might feel less defined.
The Ivy border creates a consistent frame around the entire project.
Its raised texture also contrasts nicely with the flatter half double crochet fabric.
The photograph on page 1 shows how the dark green border helps contain the colorful plaid pattern and gives the finished throw a polished appearance.
Tips for Making Your Christmas Plaid Throw Look Beautiful
Keep Your Color Changes Neat
Always switch to the next color during the final yarn-over step of the previous HDC.
This creates cleaner transitions between the color blocks.
Avoid Pulling Carried Yarn Too Tight
The carried yarn should lie comfortably within the fabric.
If it is pulled too tightly, the blanket may develop puckered areas.
Follow the Graph Carefully
The color placement changes depending on whether you are working an odd or even row.
Use the graph’s reading directions to avoid reversing the plaid design accidentally.
Count Your Stitches
The starting chain is 145.
After beginning in the second chain, you should maintain the correct number of working stitches across the blanket.
Keep Your Border Tension Even
When working along the sides, distribute the HDC stitches evenly.
Too many stitches may cause the border to ripple, while too few can make it pull inward.
Weave in Ends Securely
Because this blanket uses frequent color changes between row groups, you’ll have several yarn tails to secure.
Use a tapestry needle and weave them neatly into matching-colored sections.
Creative Ways to Style Your Crochet Christmas Plaid Throw
The finished blanket works beautifully as both a practical throw and a decorative Christmas accessory.
Drape it casually over a neutral sofa to introduce a festive color palette.
Fold it across the end of a bed for a cozy winter bedroom.
Place it over a reading chair beside a small Christmas tree.
You could also display it in a woven basket with other soft blankets and pillows.
The combination of Cardinal red, Ivy green, white, and gray works particularly well with traditional Christmas decorations, wooden furniture, evergreen garlands, and warm holiday lighting.
Frequently Asked Questions
Is the Patons Crochet Christmas Plaid Throw beginner-friendly?
Yes. The original pattern is rated Easy.
However, some experience with color changes and carrying yarn will make the project easier.
How big is the finished blanket?
The finished throw measures approximately 40 × 60 inches.
What yarn does the pattern use?
It uses Patons Canadiana, a 100% acrylic yarn.
How many yarn colors are needed?
Five: Ivy, White, Cardinal, Pale Gray Mix, and Medium Gray Mix.
How much yarn do I need?
The original pattern specifies 5 skeins of Ivy and 3 skeins each of the other four colors.
What crochet hook size should I use?
Use a 5 mm / U.S. H crochet hook.
What is the main stitch?
The blanket body is worked in half double crochet.
How many chains do I start with?
Begin with chain 145.
Can I change the blanket size?
Yes. The source provides a foundation-chain formula of a multiple of 20 plus 24, plus one turning chain.
How do I create the plaid pattern?
The plaid is formed by changing yarn colors at specific stitch intervals and repeating different color combinations across groups of rows.
Do I need to weave vertical chains through the blanket?
No. Unlike some woven plaid crochet designs, this pattern creates its color blocks directly through HDC colorwork.
How many rows are in the repeating plaid sequence?
The pattern describes a 26-row sequence that is repeated until the blanket reaches the desired length.
How many border rounds are needed?
The border contains six rounds.
What creates the ribbed border?
Alternating front post and back post double crochet stitches creates the raised texture.
Can I use different colors?
Yes. You can adapt the palette while keeping the same color-block arrangement.
Is there a video tutorial?
Yes. The original PDF includes a video tutorial from Daisy Farm Crafts:
Watch the Crochet Christmas Plaid Throw Video Tutorial
Can You Make This Blanket in Other Color Combinations?
Although the original design uses Christmas colors, the plaid construction can be adapted for other seasons.
For a cozy autumn throw, consider rust, mustard, cream, brown, and forest green.
For a farmhouse-style blanket, try ivory, taupe, charcoal, beige, and soft gray.
A winter-inspired version could combine navy, icy blue, white, and silver-gray.
These are creative adaptations rather than instructions from the original PDF, but they use the same general colorwork concept.
Why This Is a Lovely Handmade Christmas Gift
A crochet blanket is one of those gifts that feels especially personal.
It takes time, patience, and care to complete.
The finished result is something the recipient can actually use, whether they’re relaxing on the sofa, reading a book, or enjoying a quiet winter evening.
The traditional plaid design also makes this throw feel timeless.
Rather than featuring a specific Christmas character or novelty motif, it relies on familiar holiday colors and a classic textile pattern.
That means it can remain part of someone’s winter decorating collection for years.
Final Thoughts
The Patons Crochet Christmas Plaid Throw is a beautiful example of how simple crochet stitches can create an impressive holiday project.
The blanket begins with a foundation chain of 145 stitches.
From there, rows of half double crochet gradually build a colorful plaid design using Cardinal red, Ivy green, white, and two shades of gray.
Carefully planned color changes create the repeating rectangular blocks.
The Stitch Fiddle graph helps guide the placement of each shade, while the yarn-carrying technique keeps the colorwork manageable.
Once the blanket reaches the desired length, a six-round Ivy border adds a beautiful finishing touch.
The alternating front post and back post double crochet stitches create a textured frame that complements the smooth plaid fabric.
The finished result is a cozy 40 × 60-inch throw that looks wonderful draped across a sofa, folded at the end of a bed, or wrapped around your shoulders on a chilly evening.
Whether you’re making it for your own holiday home or creating a thoughtful handmade gift, this Christmas plaid blanket combines classic seasonal style with satisfying crochet techniques.
And because the original pattern is rated Easy, it’s a lovely opportunity to practice colorwork while creating something both beautiful and useful.
Happy crocheting, and Merry Christmas!