Crochet Baby Loafers Pattern
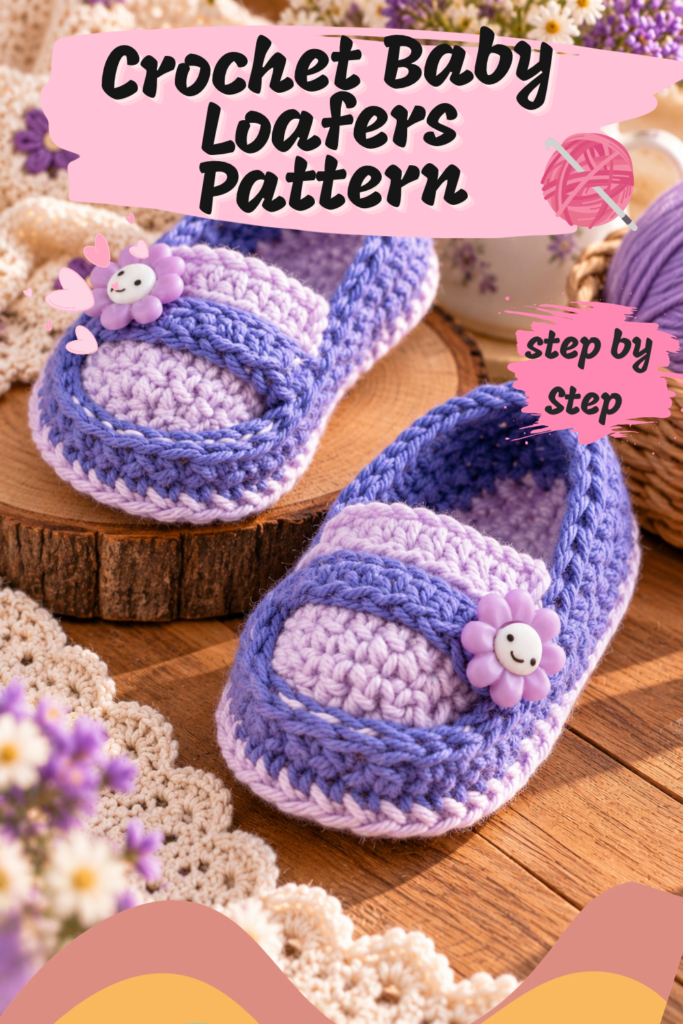
There is something incredibly sweet about making tiny baby shoes by hand.
They are small enough to sit in the palm of your hand, quick enough to feel satisfying without becoming an enormous project, and somehow every little detail—from the rounded toe to the miniature button—makes them almost impossible not to admire once they are finished.
These crochet baby loafers are especially adorable.
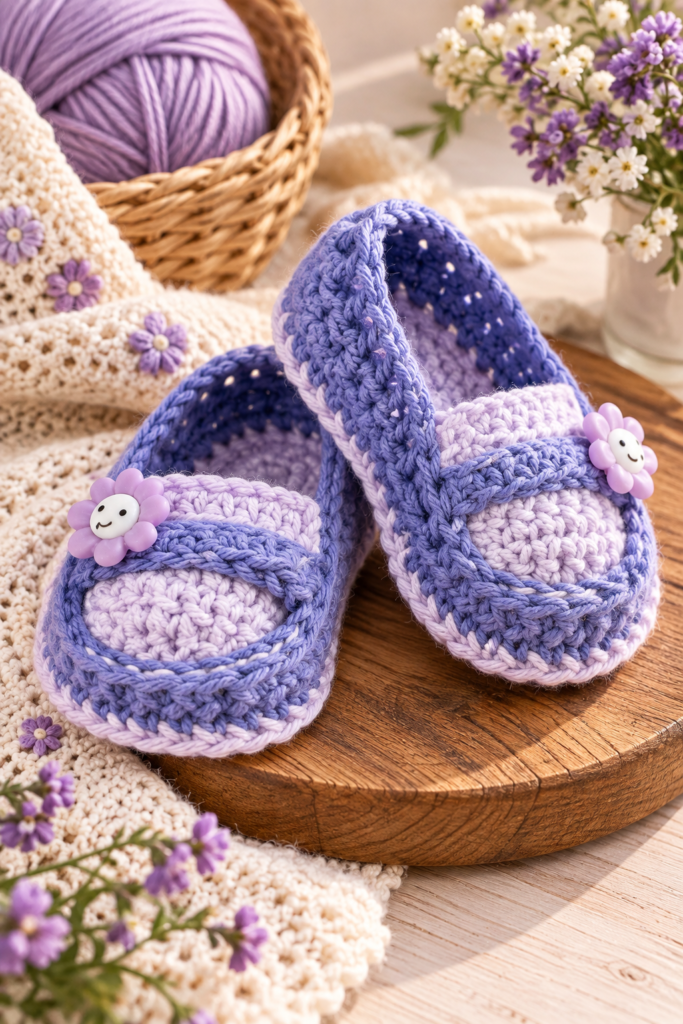
Instead of looking like basic crochet booties, they have the shape and details of tiny classic loafers. A structured oval sole forms the base, contrasting crochet creates the sides, a separate toe inset gives the front its distinctive shape, and a little band with a decorative button completes the loafer-inspired design.
The pattern is rated easy and is designed to fit an infant approximately 0–3 months old. The finished sole measures about 3¼ inches (8.5 cm). ALC0206-031665M
Two color combinations are shown in the original pattern: a soft lavender and amethyst version and a modern silver and crayon-blue version. The photographs on pages 1 and 3 make it easy to see how dramatically the same little shoe can change simply by switching colors and buttons.
If you’re looking for a beautiful handmade baby gift or simply want a small crochet project with a little more character than a traditional bootie, these tiny loafers are such a lovely choice.
About These Crochet Baby Loafers
The construction of these loafers is surprisingly clever.
Each shoe begins at the sole and is worked upward.
The sole and sides are crocheted in joined rounds, while the little toe inset is created separately by working back and forth in rows.
Once the inset is finished, it is crocheted directly onto the body of the loafer.
A separate band is then made and sewn over the toe area before a decorative button is added.
The result is a tiny shoe that has much more structure and visual detail than you might expect from such a small crochet project.
The source pattern specifies that all rounds are joined with a slip stitch to the first stitch and that the beginning chain 2 does not count as a stitch. ALC0206-031665M
Crochet Baby Loafers at a Glance
Skill Level: Easy
Size: Infant 0–3 months
Finished Sole: Approximately 3¼” / 8.5 cm
Yarn Weight: Fine / Weight 2
Hook: U.S. D/3 / 3.25 mm
Construction: Sole upward
Number to Make: 2 loafers
Main Techniques: Single crochet, half double crochet, double crochet, decreases, joined rounds, slip stitches and simple seaming
Why I Love This Baby Loafer Design
I love crochet baby booties, but these feel a little different.
The separate toe inset gives them a recognizable loafer silhouette, and the little strap across the front adds just enough detail without making the shoes overly complicated.
The contrasting colors also help define the construction.
On page 1, Version 1 combines pale lavender with deeper purple, while Version 2 uses soft silver with bright blue.
Page 3 gives an even clearer view of both finished designs, including the textured soles, raised edges, toe inset, front band, and decorative buttons.
They would make such a sweet handmade baby shower gift.
Materials You’ll Need
The original pattern uses Aunt Lydia’s Baby Shower, a Fine / Weight 2 yarn supplied in approximately:
170 yd / 155 m
skeins.
You will need one ball of each of two contrasting colors.
Version 1 – Lavender and Purple
Contrast A: Lavender Bliss (3620) – 1 ball
Contrast B: Amethyst (3740) – 1 ball
Version 2 – Silver and Blue
Contrast A: Silver (0435) – 1 ball
Contrast B: Crayon Blue (4160) – 1 ball
You will also need:
- U.S. D/3 / 3.25 mm crochet hook
- 2 decorative buttons for each pair of loafers
- Stitch marker
- Yarn needle
The pattern notes that you can change your crochet hook size if necessary to obtain the correct gauge. ALC0206-031665M
Crochet Gauge
The required gauge is:
22 single crochet stitches and 24 rows = 4″ / 10 cm
Gauge matters here because baby shoes need to fit much more precisely than something like a scarf or dishcloth.
If your crochet is significantly looser, the loafers will become larger.
If your tension is much tighter, the shoes may end up too small.
Take the time to check your gauge before beginning.
Crochet Abbreviations
This pattern uses the following abbreviations:
Approx – Approximately
Beg – Beginning
Ch – Chain
Dc – Double crochet
Hdc – Half double crochet
Hdc2tog – Half double crochet 2 together
PM – Place marker
Rem – Remaining
Rnd/Rnds – Round/Rounds
RS – Right side
Sc – Single crochet
Sc2tog – Single crochet 2 together
Sl st – Slip stitch
Sp/Sps – Space/Spaces
St/Sts – Stitch/Stitches
Tog – Together
Yoh – Yarn over hook
How to Make a Single Crochet Decrease
The pattern uses sc2tog while shaping the toe.
Draw up a loop in each of the next two single crochet stitches.
Yarn over.
Pull through all three loops on your hook.
Two stitches have now become one.
How to Make a Half Double Crochet Decrease
For hdc2tog:
Yarn over and draw up a loop in the next stitch.
Repeat this in the following stitch.
Yarn over again.
Pull through all five loops on your hook.
This decrease is later used to shape the heel opening.
How to Change Colors
When changing from one yarn color to another, don’t complete the final stitch entirely in the old color.
Work until there are 2 loops remaining on your hook.
Bring in the new color.
Draw the new color through those final two loops.
Continue crocheting with the new yarn.
This creates a cleaner transition between colors.
How to Crochet the Baby Loafers
You will make 2 identical loafers.
Begin with Contrast A.
Crochet the Sole
Foundation Chain
Chain:
16
The sole is crocheted around both sides of this foundation chain.
This creates the oval base of the loafer.
Sole Round 1
Work:
1 hdc into the 3rd chain from your hook.
Work 1 hdc into every chain until the final chain.
Work:
3 hdc into the last chain.
Do not turn.
Instead, rotate your work so you can crochet into the remaining loops along the opposite side of the foundation chain.
Work:
1 hdc into each of the next 11 chains.
Then work 1 hdc into the next chain—the same foundation chain that contains your first hdc.
Join with a slip stitch to the top of the first hdc.
You should have:
28 hdc
Sole Round 2
Chain 1.
Work:
2 sc in the same space as the slip stitch.
Work:
2 sc in the next stitch.
Then:
1 sc in each of the next 6 stitches
1 hdc in each of the next 5 stitches
2 hdc in each of the next 3 stitches
1 hdc in each of the next 5 stitches
1 sc in each of the next 6 stitches
Finish with:
2 sc in the last stitch
Join with a slip stitch into the first sc.
You should now have:
34 stitches
Sole Round 3
Chain 2.
Remember that the beginning chain does not count as a stitch.
Work:
2 hdc in the same space as the slip stitch
2 hdc in each of the next 3 stitches
1 hdc in each of the next 5 stitches
1 dc in each of the next 7 stitches
2 dc in each of the next 5 stitches
1 dc in each of the next 7 stitches
1 hdc in each of the next 5 stitches
Finish with:
2 hdc in the final stitch
Join with a slip stitch to the top of the first hdc.
You should have:
44 stitches
Fasten off.
The pattern makes an important note here:
The wider end of the sole is the toe, while the narrower end is the heel. ALC0206-031665M
Crochet the Sides of the Loafer
Now switch to Contrast B.
The first round uses a special welt stitch that creates the distinctive raised edge visible around the sole in the finished photographs.
Side Round 1 – Welt Stitch
Join Contrast B with a slip stitch into the back loop of the first stitch.
Chain 1.
To make the welt stitch:
Insert your hook into the back loop of the same space as your joining slip stitch.
Then insert the hook through the horizontal loop on the wrong side approximately:
¼–½” / 6–13 mm below
Yarn over and draw through.
Yarn over and draw through two loops twice.
Continue working one welt stitch into each stitch around.
Join with a slip stitch into the first stitch.
You should still have:
44 stitches
Mark the Toe
Find the center 22 stitches at the wider toe end.
Place a marker in:
- The first of those 22 stitches
- The last of those 22 stitches
These markers help position the decreases that shape the front of the shoe.
Side Round 2
Chain 2.
Work:
1 hdc in every stitch until the first marker.
Then work:
1 sc in each of the next 7 stitches
Sc2tog 4 times
1 sc in each of the next 7 stitches
Continue with:
1 hdc in every stitch to the end of the round
Join with a slip stitch to the top of the first hdc.
You should now have:
40 stitches
Fasten off.
The original construction and exact shaping for these two side rounds are given on page 2. ALC0206-031665M
Crochet the Toe Inset
The toe inset is made separately using Contrast A.
Chain:
10
Toe Inset Row 1
Beginning in the third chain from your hook:
Work 1 hdc in each chain to the end.
You should have:
8 hdc
Turn.
Row 2
Chain 1.
Slip stitch into each hdc across.
Turn.
This row creates the decorative dash-like ridge visible across the top of the finished loafer.
Row 3
Chain 1.
Work 1 sc into each slip stitch across.
Turn.
Row 4
Chain 1.
Work:
2 sc into the first stitch
1 sc into each of the next 6 stitches
2 sc into the last stitch
Turn.
You now have:
10 sc
Rows 5 and 6
Chain 1.
Work 1 sc in each stitch across.
Turn.
Rows 7–9
Chain 1.
Sc2tog.
Work 1 sc in every stitch until the final two stitches.
Sc2tog.
Turn.
Repeat this shaping through Row 9.
At the end of the final row, you should have:
4 stitches
Fasten off.
How to Attach the Toe Inset
This is one of the most important stages because the inset creates the recognizable loafer shape.
With the right side facing you, look at Row 2 of your toe inset.
The slip stitches should resemble little horizontal:
“dashes.”
Place the toe inset right side up.
Position the four stitches from the final row so they line up with the four decreases at the toe of the loafer.
Then align the ends of the inset’s second row—the slip-stitch row—with the first and last single crochet stitches from the last loafer round.
You will now crochet the inset to the shoe.
Working through both thicknesses, begin in the row below the inset’s second row.
Yarn over and draw Contrast A through both stitches.
Leave a long yarn tail so you can weave it in later.
Then repeatedly:
Insert your hook through the end of the next inset row and through the next loafer stitch.
Yarn over.
Draw through both stitches and through the loop already on your hook.
Continue around the toe edge until you reach just below the opposite end of Row 2.
Fasten off.
The source gives this alignment carefully because the final four inset stitches must correspond to the four toe decreases. ALC0206-031665M
Trim and Strengthen the Loafer Opening
Next we shape and strengthen the opening around the baby’s foot.
Find the six stitches centered over the heel.
Place a marker on either side of those six stitches.
Opening Row 1
With the right side facing you, join Contrast B with a slip stitch into the same loafer stitch where the final toe-inset joining stitch was made.
Make sure you’re positioned to work toward the heel.
Work:
1 hdc in every stitch until the first heel marker
Then:
Hdc2tog 3 times
Continue:
1 hdc in every stitch until you reach the toe inset
Slip stitch into the same space as the last toe-inset joining stitch.
Turn.
Opening Row 2
You will now work from inside the loafer.
Slip stitch firmly into every hdc across.
This firm row strengthens the upper edge of the shoe opening.
Fasten off.
Crochet the Loafer Bands
Make 2 bands, one for each shoe.
Use Contrast B.
The original instructions specifically recommend leaving a long yarn tail at both the beginning and end because those tails are used when sewing the band to the loafer.
Chain:
11
Band Row 1
With the right side facing:
Work 1 hdc in the third chain from your hook.
Continue with 1 hdc in each chain across.
Turn.
You should have:
9 hdc
Band Row 2
Chain 1.
Slip stitch into every hdc across.
Fasten off.
Leave the yarn tails intact.
How to Assemble and Finish the Baby Loafers
Now comes the stage that gives these tiny shoes their classic loafer appearance.
Place each band across the corresponding toe inset with the right side of the band facing upward.
Position the slip-stitch row of the band along the top.
It should sit just below the slip-stitch row on the toe inset.
Use the photographs on page 3 as your placement guide.
The band stretches horizontally across the toe, while the decorative button sits at one end.
Using the long yarn tails still attached to the band, sew each end securely to the loafer.
Then sew:
1 decorative button to one end of each band.
Weave in all remaining yarn ends. ALC0206-031665M
Your tiny crochet loafers are finished!
Tips for Making Beautiful Crochet Baby Loafers
Make Sure You Know Which End Is the Toe
Once the sole is complete, identify the wider and narrower ends immediately.
Remember:
Wide = toe
Narrow = heel
Use Your Stitch Markers
The markers aren’t optional little details if you want accurate shaping.
They help you center both the toe decreases and heel decreases.
Don’t Skip the Welt Stitch
The welt stitch creates the raised transition between the sole and upper.
It is one of the details that makes these shoes look more structured.
Check the Toe Inset Before Attaching It
Make sure the little “dash” texture created by the slip-stitch row is facing outward.
The pattern specifically uses this feature to orient the inset correctly.
Keep Both Shoes Consistent
Because you’re making a pair, try to use similar tension for both loafers.
If possible, make each section on both shoes before moving to the next major stage.
For example, make both soles, then both side sections, then both toe insets.
This can help keep your tension and construction consistent.
Frequently Asked Questions
Are these crochet baby loafers beginner-friendly?
The source rates the project easy.
However, it helps to already understand basic crochet stitches, joined rounds, decreases, slip stitches, and simple seaming.
The toe-inset attachment requires a little attention, but the instructions become much easier once you understand how the pieces align.
What age are these baby loafers for?
They are designed to fit approximately:
0–3 months.
How long is the finished sole?
Approximately:
3¼” / 8.5 cm
What crochet hook size do I need?
The pattern recommends:
U.S. D/3 / 3.25 mm
or whatever hook size allows you to achieve the correct gauge.
What is the gauge?
The gauge is:
22 sc and 24 rows = 4″ / 10 cm
What yarn weight should I use?
The pattern uses Fine / Weight 2 yarn.
How many loafers do I crochet?
Make:
2
to create one pair.
Are the soles and sides made separately?
No.
Each loafer begins with the sole and is worked upward.
The sole and sides are worked in joined rounds.
The toe inset is the separately crocheted piece.
Why is the toe inset made separately?
The separate inset helps create the characteristic loafer-style front and allows the decorative horizontal band to sit neatly across the top.
How do I know which side of the toe inset is the right side?
With the right side facing you, the slip stitches from Row 2 look like small horizontal dashes.
How many decorative buttons do I need?
You need:
2 buttons for one pair
because one button is sewn onto the band of each loafer.
Can I make the shoes in other colors?
Yes.
The PDF itself demonstrates two very different palettes.
Version 1 uses Lavender Bliss and Amethyst, while Version 2 uses Silver and Crayon Blue.
You can use these as inspiration for your own two-color combination, provided your substitute yarn produces the correct gauge.
Final Thoughts
I think tiny crochet projects sometimes have the most personality.
You begin with a chain of only 16 stitches, and for a little while it doesn’t look much like a shoe at all.
Then the sole becomes wider.
The contrasting welt creates an edge.
The sides rise.
You add that separately crocheted toe inset, strengthen the opening, and suddenly the shape starts looking unmistakably like a miniature loafer.
But the final detail is what really makes me smile.
You place that tiny crochet band across the toe and sew on an equally tiny decorative button.
Suddenly, what started as a handful of stitches looks like a real little shoe.
Make the lavender-and-amethyst pair for a soft, playful look, try the silver-and-blue combination shown in the second version, or choose your own two favorite coordinating shades.
Whether you’re making them for a baby shower, a newborn gift, a photo outfit, or simply because tiny crochet shoes are almost impossible to resist, these loafers are a sweet project that packs a surprising amount of detail into just a few inches.
Take your time with the toe shaping, keep your stitch markers in place, and make sure your second shoe matches the tension of your first.
When you’re finished, you’ll have a tiny handmade pair that’s just as lovely to give as it is to make.
Happy crocheting!