Crochet a Little Sleepy Monkey
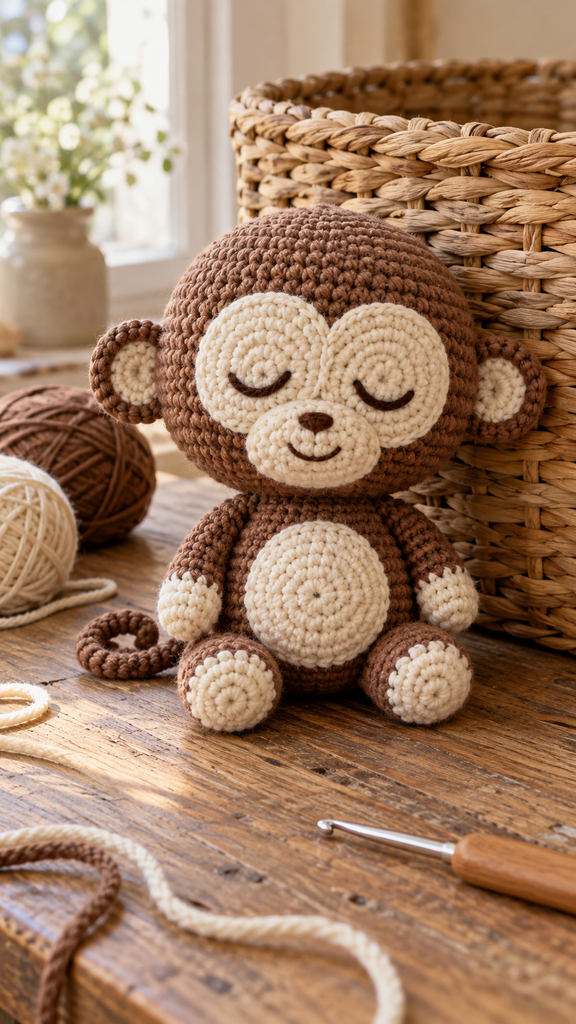
A round little face, soft cream paws, and a curled tail make this crochet monkey an especially charming shelf companion. Its sleepy expression feels gentle and playful, while the warm walnut-and-cream palette gives the stitches a lovely handmade character. It is a satisfying project for anyone who enjoys bringing small crocheted animals to life.
This monkey is designed with a larger round head, a compact body, and short limbs. The cream face patches are sewn on separately, which lets you crochet the main head in one color. A flat spiral tail adds personality without making another long stuffed tube.
The supplied PDF inspired the monkey theme. This newly drafted version changes the proportions, stitch counts, face construction, eyes, limbs, and tail. Its counts have been checked mathematically, but it has not been physically crocheted or tested. All photographs are AI-generated concept illustrations; follow the written directions rather than treating the generated stitches as exact diagrams.
Meet Your Little Sleepy Monkey
Two cream circles create the eye patches, and a small oval muzzle overlaps their lower edges. Embroidered closed eyes and a simple smile give the monkey its sleepy expression. Cream hand and toe tips connect the facial details with the little belly patch.
The head and body are made separately and joined through matching neck openings. Most of the pieces use single crochet in continuous rounds. The tail is worked along a chain with increases in every chain, encouraging the strip to curl naturally.
This design suits someone who already understands basic amigurumi shaping and wants to practice neat assembly. It involves several small seams, so take your time positioning the features before sewing them permanently.
Project Details
| Detail | Guide |
|---|---|
| Skill level | Intermediate, mainly for small pieces and assembly |
| Terminology | US crochet terms |
| Construction | Separate head, body, face pieces, ears, limbs, and flat tail |
| Size target | Approximately 14–17 cm / 5½–6¾ inches tall |
| Head maximum | 42 single crochet stitches |
| Body maximum | 30 single crochet stitches |
| Neck join | 18 head stitches matched to 18 body stitches |
| Hook starting point | 3 mm with smooth DK cotton |
| Pattern status | Newly drafted; count-checked, not physically tested |
The height is a planning target rather than a measured result from a completed sample. A working gauge around 24 sc and 26 rounds per 10 cm can guide the yarn choice, but stuffing and assembly also affect the finished dimensions.
Materials and Supplies
- Walnut-brown DK cotton: allow approximately 100–140 metres.
- Warm cream DK cotton: approximately 30–45 metres.
- A small amount of dark-brown yarn for the embroidered eyes, nose, and smile.
- A 3 mm crochet hook, adjusted to make a firm but workable fabric.
- Polyester craft stuffing, a blunt yarn needle, scissors, and removable stitch markers.
- Optional contrasting basting thread for temporarily positioning pieces.
These yarn amounts are estimates, not tested consumption. Choose similar yarn thicknesses for the brown and cream pieces. Smooth cotton makes the small stitches easier to identify and keeps the face appliques from becoming overly bulky.
Check the Fabric Before Starting
Make a small single-crochet sample. Bend it gently and check whether large gaps appear. If stuffing would show through, try a slightly smaller hook. If the fabric is so tight that inserting the hook is difficult, try a larger one.
Avoid overstuffing to force a larger result. A rounded piece should hold its shape while the stitches remain relaxed enough to work comfortably.
Abbreviations and Helpful Notes
| Abbreviation | Meaning |
|---|---|
| MR | Magic ring |
| ch | Chain |
| sc | Single crochet |
| sl st | Slip stitch |
| inc | Work 2 sc in the same stitch |
| dec | Decrease 2 stitches into 1 sc |
| rnd | Round |
| st / sts | Stitch / stitches |
Continuous Rounds
Work the stuffed pieces in a spiral without joining each numbered round. Place a marker in the first stitch and move it at the start of each new round. A phrase such as “(3 sc, inc) × 6” means repeat three single crochets and an increase six times.
Use an invisible decrease if you know it, or work a regular sc2tog. For the invisible version, pick up the front loop of each of the next two stitches, pull yarn through both front loops, then complete a single crochet.
Leave approximately 25–35 cm sewing tails on the pieces that will be attached. Secure magic-ring starting tails before stuffing. Counts do not include joining slip stitches where a join is specifically requested.
Crochet the Head
A Round Walnut Head
With walnut:
- Rnd 1: 6 sc in an MR. 6 sts.
- Rnd 2: Inc in every stitch. 12 sts.
- Rnd 3: (1 sc, inc) × 6. 18 sts.
- Rnd 4: (2 sc, inc) × 6. 24 sts.
- Rnd 5: (3 sc, inc) × 6. 30 sts.
- Rnd 6: (4 sc, inc) × 6. 36 sts.
- Rnd 7: (5 sc, inc) × 6. 42 sts.
- Rnds 8–13: Sc in every stitch. 42 sts per round.
- Rnd 14: (5 sc, dec) × 6. 36 sts.
- Rnd 15: (4 sc, dec) × 6. 30 sts.
- Rnd 16: (3 sc, dec) × 6. 24 sts.
- Rnd 17: (2 sc, dec) × 6. 18 sts.
Fasten off with a sewing tail, leaving the neck opening unclosed. Add stuffing in small amounts, distributing it evenly. The magic-ring center is the crown; the 18-stitch opening sits beneath the head.
The cream face pieces are added later. Keeping the head entirely walnut avoids repeated color changes within the sphere and lets you adjust the facial placement independently.
Crochet the Compact Body
A Short Pear-Shaped Torso
With walnut:
- Rnd 1: 6 sc in an MR. 6 sts.
- Rnd 2: Inc in every stitch. 12 sts.
- Rnd 3: (1 sc, inc) × 6. 18 sts.
- Rnd 4: (2 sc, inc) × 6. 24 sts.
- Rnd 5: (3 sc, inc) × 6. 30 sts.
- Rnds 6–10: Sc in every stitch. 30 sts per round.
- Rnd 11: (3 sc, dec) × 6. 24 sts.
- Rnds 12–13: Sc in every stitch. 24 sts per round.
- Rnd 14: (2 sc, dec) × 6. 18 sts.
- Rnd 15: Sc in every stitch. 18 sts.
Fasten off and leave the top opening unclosed. Stuff the lower portion to support its rounded shape, then add a little filling near the neck. The head and body now have matching 18-stitch openings.
Make the Cream Face and Belly Pieces
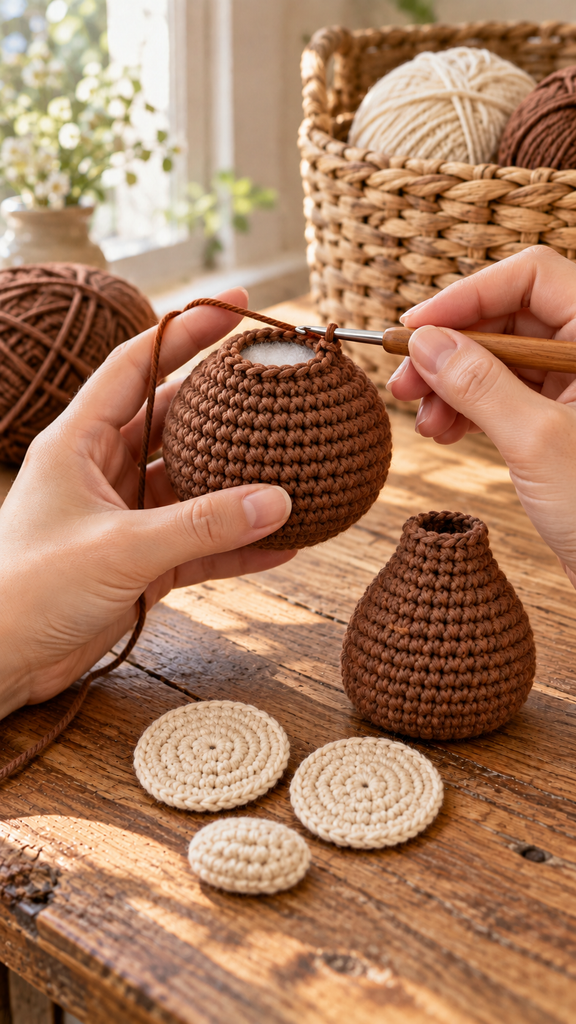
Round Eye Patches and Belly: Make Three
With cream:
- Rnd 1: 6 sc in an MR. 6 sts.
- Rnd 2: Inc in every stitch. 12 sts.
- Rnd 3: (1 sc, inc) × 6. 18 sts.
Join with a sl st to the first sc and fasten off with a sewing tail. Keep these circles flat and unstuffed. Two become the eye patches, and one becomes the belly accent.
Small Oval Muzzle
With cream, chain 6. Work around both sides of the foundation chain.
Rnd 1: Sc in the second chain from the hook, sc in the next three chains, and work 3 sc in the last chain. Along the opposite side, sc in the next three chain positions and work 2 sc in the final position, which shares the first worked chain. 12 sts.
Rnd 2: Inc in the first stitch, sc in the next three stitches, inc in each of the next three stitches, sc in the next three stitches, and inc in each of the last two stitches. 18 sts.
Rnd 3: Sc in every stitch. 18 sts. Fasten off with a sewing tail.
This shallow oval cup sits below the eye patches. Add only a pinch of stuffing when attaching it so the muzzle projects gently rather than becoming a large snout.
Crochet the Ears
Two Walnut Outer Ears
With walnut, work 6 sc in an MR for Round 1. Increase in every stitch for Round 2: 12 sts. Work 12 sc in each of Rounds 3 and 4.
Leave the ears unstuffed. Flatten the opening into two layers of six stitches and work 6 sc through both layers to close. Fasten off with a sewing tail. The closing line is separate from the numbered rounds.
For each cream inner ear, work 6 sc in an MR, join with a sl st, and fasten off. Sew one cream circle to the front of each outer ear, avoiding the closing edge. These ears will sit at the sides of the head rather than on its crown.
Crochet the Short Arms and Feet
Arms With Cream Hand Tips: Make Two
Begin with cream:
- Rnd 1: 6 sc in an MR. 6 sts.
- Rnd 2: Sc in every stitch. 6 sts. Change to walnut on the final stitch.
- Rnds 3–8, walnut: Sc in every stitch. 6 sts per round.
To change color, use walnut for the final yarn-over of the last cream sc. Add a tiny amount of stuffing to the hand only, leaving the upper arm flexible.
Flatten the six-stitch opening into two layers of three. Work 3 sc through both layers to close, then fasten off with a sewing tail.
Rounded Feet With Cream Toe Tips: Make Two
Begin with cream:
- Rnd 1: 6 sc in an MR. 6 sts.
- Rnd 2: Inc in every stitch. 12 sts.
- Rnd 3: Sc in every stitch. 12 sts. Change to walnut on the final stitch.
- Rnd 4, walnut: Sc in every stitch. 12 sts.
- Rnd 5: (2 sc, dec) × 3. 9 sts.
- Rnd 6: Sc in every stitch. 9 sts.
Fasten off with a sewing tail. Lightly stuff the cream ends, leaving the nine-stitch openings accessible for attachment. The toes face forward when the monkey is seated.
Crochet the Flat Curly Tail
An Increased Strip Instead of a Stuffed Tube
With walnut, chain 31, leaving a long starting tail.
Work 2 sc in the second chain from the hook and 2 sc in each remaining chain. 60 sc worked into 30 chain positions. Fasten off and weave in the ending tail.
The extra stitches encourage the strip to spiral. Coil it gently with your fingers, keeping the foundation-chain edge on the inside of the curve. The exact curl depends on tension; it may form a loose spiral or a tighter corkscrew.
Do not stuff the tail or add wire. Keep the starting tail for sewing. If needed, use one loose walnut stitch between adjacent turns to hold a preferred curl, without flattening the whole strip.
Assemble the Sleepy Monkey
Arrange and Sew the Face
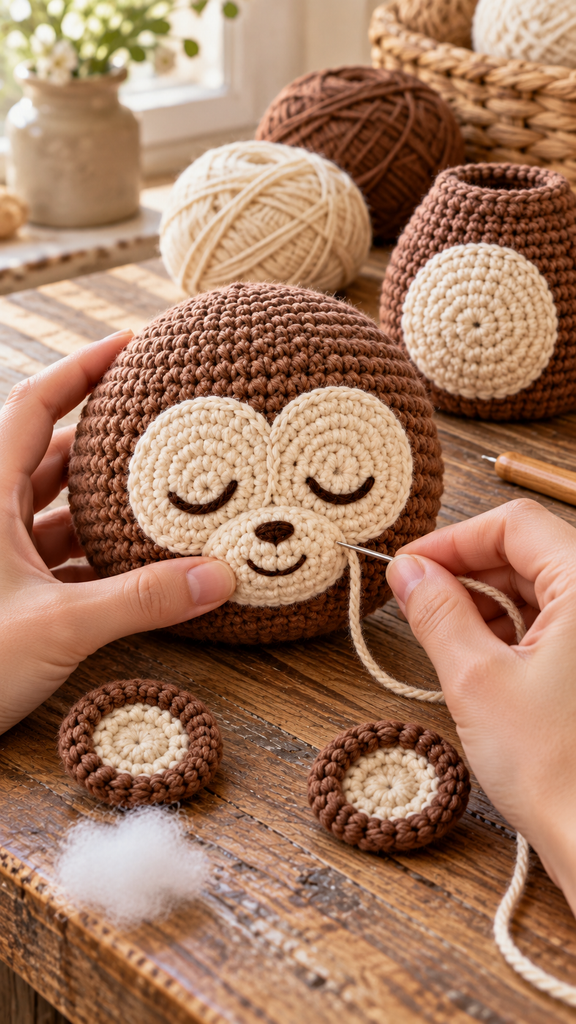
Mark the head’s front temporarily. Position the two cream circles side by side, approximately over Head Rounds 7–12, letting their inner edges overlap slightly. Adjust to the actual sphere so the pair forms a balanced eye area.
Sew each circle flat around its perimeter with cream yarn. Place the oval muzzle horizontally below them, overlapping their lower edges around Rounds 11–15. Sew its rim, add a pinch of stuffing, and close the final section.
Embroider a closed dark-brown crescent eye on each cream circle using short stitches. Add a tiny horizontal oval nose near the upper center of the muzzle and a gentle curved smile below it. Keep the embroidery light and bury the ends inside the head.
Join the Head and Body
Match the 18 head-opening stitches to the 18 body-opening stitches. Baste a few points to check that the face looks forward. Sew around the matching positions, adding a little stuffing at the neck before closing the last section.
Keep the seam snug without drawing it into a narrow puckered ring. Secure and bury the tail. The larger head should sit above the compact body rather than leaning far forward.
Add the Ears, Belly, Limbs, and Tail
Attach the ear closing edges at the sides of the head, roughly around Rounds 8–11. Keep their cream centers facing forward. Sew the belly circle flat to the body front, approximately over Rounds 5–10.
Attach the arm closing edges near Body Rounds 12–14, one on each side, allowing the cream hands to rest beside the belly. Sew the feet through their open rims near the lower front, around Rounds 2–4, with both cream toes pointing outward and forward.
Sew the narrow starting end of the tail to the lower back near Body Rounds 3–5. Let its curl rest beside or behind the monkey. Check the seated balance before securing the final limb tails; stability depends on stuffing and attachment angles, so use display support if necessary.
Remove temporary basting thread and markers, inspect each seam, and bury all remaining yarn ends.
Color Variations and Finishing Tips
Try warm chestnut with oatmeal face patches, or a softer taupe with ivory accents. Keep the eyes darker than the cream patches so the sleepy expression remains easy to see.
If a face circle wrinkles, loosen its attachment stitches before adding more sewing. If the head has a flat area, redistribute stuffing rather than overfilling it. If one foot sits higher, move its seam while the sewing tail is still accessible.
Changing only colors keeps the written counts intact. Altering the head or torso circumference needs a new neck calculation; the 18-to-18 join applies specifically to this draft.
Care and Display
Follow the care instructions for both yarn and stuffing. Support the shape while drying and let the interior dry fully before storing. Check attached pieces and embroidery after handling or cleaning.
This pattern describes a decorative amigurumi and does not make an age-tested toy claim. Display it on a shelf, in a craft basket, or beside another handmade animal, with support if your version does not sit independently.
Frequently Asked Questions
Can a beginner make this monkey?
It is manageable for someone who already knows magic rings, continuous rounds, increases, and decreases. The tiny arm tubes and several sewing stages make it more involved than a basic amigurumi ball.
Do I need to change colors inside the head?
No. The head is entirely walnut, and the cream face patches are made separately. This makes the crochet simpler while leaving facial placement adjustable during assembly.
Can I use plush yarn?
You can experiment, but the result will be larger and the tiny pieces harder to see. Check the proportions and fabric before making a full set. Treat a different yarn weight as a new variation rather than expecting the stated height.
Is the tail supposed to be stuffed?
No. It is a flat increased strip that curls naturally. Two single crochets are worked into each of thirty chain positions, producing sixty stitches.
Why do the neck openings remain unclosed?
Their matching eighteen-stitch edges create a direct seam. Closing both pieces first would require a different attachment method. Stuff before joining, then finish the neck filling during the seam.
Is this the same monkey as the supplied PDF?
No. This new version uses a smaller compact silhouette, separate face appliques, short cream-tipped limbs, embroidered eyes, and a flat spiral tail. Its written counts are checked, but physical testing is still needed before calling it a tested pattern.