Crochet a Little Lion Face Pillow
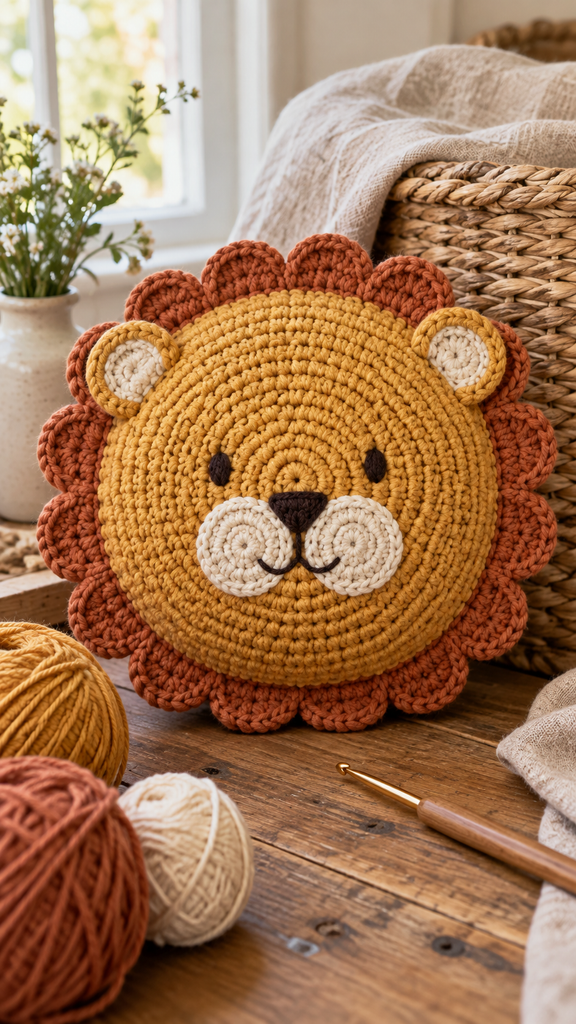
Some crochet projects make you smile before you even finish the first piece. This little lion face pillow brings together warm honey cotton, a terracotta mane, and a sweet embroidered expression. Its round shape looks charming tucked into a craft-room basket, propped on a reading shelf, or included in a handmade gift display.
The pillow is built from two circular panels rather than a full animal body. You decorate the front while it is still flat, join the panels with a little stuffing between them, and crochet a soft scalloped mane around the edge. Two small ears and a pair of cream cheek circles finish the character.
The supplied lion amigurumi PDF inspired the theme, but this is a newly drafted design with a different purpose, silhouette, construction, face, and mane. Its stitch counts have been checked mathematically; it has not been physically crocheted or tested. The photographs are AI-generated concept illustrations. Use the written instructions for counts and placement, since generated stitches may differ from the actual pattern.
A New Way to Crochet a Friendly Little Lion
This project turns the lion into a compact decorative face cushion. There are no legs, arms, body, or tail. The circular panels are worked in continuous single-crochet rounds, while the mane is a separate edging worked onto their joining seam.
The contrast between the smooth honey center and the terracotta scallops gives the piece its personality. Embroidered eyes keep all facial details soft, and two cream cheek circles create a different muzzle from the single snout in the reference design.
You can complete the small parts between working on the larger circles. That makes the project easy to organize: panels first, face and ears next, then stuffing and the final mane.
Project Details and Size
| Detail | Guide |
|---|---|
| Skill level | Confident beginner with basic amigurumi and sewing experience |
| Terminology | US crochet terms |
| Main construction | Two round panels joined around their edges |
| Panel stitch count | 96 sc at the end of Round 16 |
| Mane | 16 scallops worked over a 96-stitch joining round |
| Size target | Approximately 18–21 cm across the mane; ears add height |
| Thickness target | Approximately 3–4 cm, adjusted by stuffing |
| Hook starting point | 3.5 mm with smooth medium-weight cotton |
| Pattern status | New draft; count-checked, not physically tested |
The measurements are intended targets rather than results from a tested sample. At approximately 20 sc per 10 cm, a 96-stitch perimeter measures roughly 48 cm, corresponding to a circle around 15 cm wide before the mane. Crochet geometry, tension, seaming, and stuffing can change the actual dimensions.
Materials and Supplies
- Honey-gold medium-weight cotton: allow approximately 150–200 metres for both panels and ears.
- Terracotta cotton: approximately 35–50 metres for the joining round and mane.
- Cream cotton: approximately 10–20 metres for cheeks and inner ears.
- A small amount of dark-brown yarn for embroidery.
- A 3.5 mm crochet hook, adjusted to suit the fabric.
- Polyester craft stuffing, a blunt yarn needle, scissors, and a measuring tape.
- Removable stitch markers and optional temporary basting thread.
These yarn amounts are planning estimates, not measured consumption. Use similar yarn thicknesses for all crocheted parts. If the terracotta yarn is much thicker than the honey yarn, the edging can pull or overpower the center.
Check the Fabric Before You Begin
Make a small single-crochet sample and check that the stitches contain stuffing without becoming stiff. A working gauge around 20 sc and 22 rows per 10 cm is a useful starting point, but the important check is how the circular panel behaves.
Lay it flat after every few rounds. A slight ripple can sometimes relax when gently shaped. Strong ruffling or cupping usually deserves a count and tension check before continuing. Do not add extra increases casually, because the 16-scallop mane depends on a final perimeter of 96 stitches.
Abbreviations and Pattern Notes
| Abbreviation | Meaning |
|---|---|
| MR | Magic ring |
| ch | Chain |
| sc | Single crochet |
| hdc | Half double crochet |
| dc | Double crochet |
| sl st | Slip stitch |
| inc | Work 2 sc in the same stitch |
| dec | Decrease 2 stitches into 1 sc |
| rnd | Round |
| st / sts | Stitch / stitches |
Continuous Rounds and Markers
Work the panels and outer ears in a spiral without joining the numbered rounds. Place a marker in the first stitch and move it at each new round. The cream circles and the terracotta edging are joined where instructed.
An instruction such as “(3 sc, inc) × 6” means repeat three single crochets followed by an increase six times. Counts at the end of each round do not include joining slip stitches or starting chains.
Leave approximately 25–35 cm sewing tails on the cheeks and ears. Secure magic-ring tails before covering them with stuffing or another piece.
Crochet the Two Circular Panels
Make the Front Panel in Honey
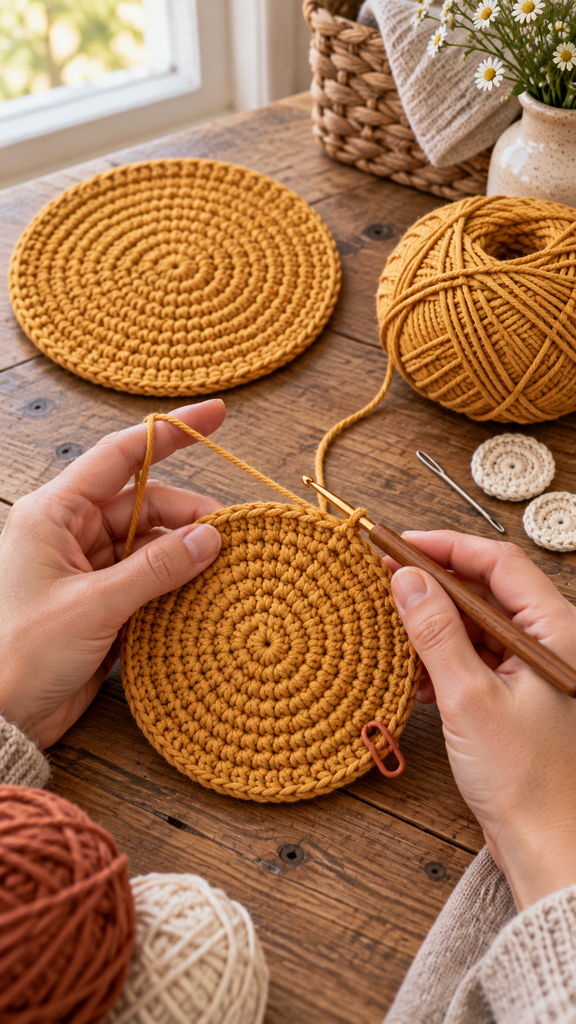
- Rnd 1: 6 sc in an MR. 6 sts.
- Rnd 2: Inc in every stitch. 12 sts.
- Rnd 3: (1 sc, inc) × 6. 18 sts.
- Rnd 4: (2 sc, inc) × 6. 24 sts.
- Rnd 5: (3 sc, inc) × 6. 30 sts.
- Rnd 6: (4 sc, inc) × 6. 36 sts.
- Rnd 7: (5 sc, inc) × 6. 42 sts.
- Rnd 8: (6 sc, inc) × 6. 48 sts.
- Rnd 9: (7 sc, inc) × 6. 54 sts.
- Rnd 10: (8 sc, inc) × 6. 60 sts.
- Rnd 11: (9 sc, inc) × 6. 66 sts.
- Rnd 12: (10 sc, inc) × 6. 72 sts.
- Rnd 13: (11 sc, inc) × 6. 78 sts.
- Rnd 14: (12 sc, inc) × 6. 84 sts.
- Rnd 15: (13 sc, inc) × 6. 90 sts.
- Rnd 16: (14 sc, inc) × 6. 96 sts.
Fasten off. Preserve a marker at the final round’s first stitch to help align the panels later. This straightforward increase sequence can produce a gently hexagonal outline before finishing; the soft filling and scalloped edging will influence its final appearance.
Make the Back Panel
Repeat Rounds 1–16 in honey to make an identical second panel. You should now have two pieces with 96 stitches around each edge. Compare them before decorating or joining: their diameters should be close, and both should lie reasonably flat.
Weave in the starting and finishing tails on the wrong sides. If gentle blocking is appropriate for your yarn, shape both pieces consistently and let them dry completely before assembly.
Crochet the Cream Cheeks and Inner Ears
Cream Circles: Make Four
Two circles become the cheek patches, and two become the inner ears.
With cream, work 6 sc in an MR for Round 1. For Round 2, increase in every stitch: 12 sc. Join with a sl st to the first sc. Fasten off with a sewing tail.
Keep all four circles flat and unstuffed. Choose two matching circles for the cheeks and set the other pair aside for the ears. Their exact size depends on the yarn, so check how they look on your honey panel before sewing.
Crochet the Outer Ears
Honey Ears: Make Two
- Rnd 1: 6 sc in an MR. 6 sts.
- Rnd 2: Inc in every stitch. 12 sts.
- Rnd 3: (1 sc, inc) × 6. 18 sts.
- Rnds 4–5: Sc in every stitch. 18 sts per round.
- Rnd 6: (1 sc, dec) × 6. 12 sts.
Fasten off with a sewing tail. Do not stuff. Flatten each little cup and sew one cream circle to its front, keeping the bottom opening accessible. Pinch the open base gently to give the ear a rounded shape.
Set the finished ears aside until the mane is complete. Attaching them afterward keeps the edging round uninterrupted and makes it easier to place them symmetrically.
Decorate the Lion Face While the Panel Is Flat
Arrange the Cream Cheeks
Choose the neater side of the front panel as the right side and mark the top temporarily. Place the two cream circles side by side just below the center, with their inner edges touching. Keep them comfortably inside the outer panel edge.
At the target panel size, the cheek pair should occupy only the central portion of the face. Use a little basting thread to hold them in place, then sew around their perimeters with cream yarn. Catch the front panel without tightening it into a pucker.
Embroider the Eyes, Nose, and Smile
With dark-brown yarn, embroider two small vertical oval eyes above the cheeks. Start with approximately 1 cm of height and place them about 4 cm apart, then adjust to suit the actual panel size. Use short satin stitches rather than a bulky mound of yarn.
Make a small downward-pointing triangular nose at the upper meeting point of the cheeks. Fill it with short stitches. From the nose, add a short vertical line, then two gentle curved smile arms extending over the cream circles.
Keep reverse-side threads short and weave the embroidery ends securely into nearby stitches. Check the expression from a little distance before finishing the tails; slight adjustments can make the face look friendlier or sleepier.
Join and Stuff the Pillow
Align the Panels
Place the panels wrong sides together, with the decorated face outward. Match their 96 edge stitches. Use markers at four approximately equal points around the circumference to keep the circles aligned while joining.
With terracotta, join yarn through a matching pair of edge stitches. Chain one; this does not count as a stitch. Work one sc through both panels at every paired stitch position.
Add a Soft Layer of Filling
After approximately 72 joining stitches, pause with about one quarter of the perimeter still open. Insert small pieces of stuffing and distribute them evenly between the panels. Aim for a gently padded cushion rather than a tightly packed sphere.
Continue the joining round, adding a little more filling if necessary before the opening closes. Finish with 96 sc total, then join with a sl st to the first joining sc. Keep the terracotta yarn attached for the mane.
The joining seam should remain relaxed. If it pulls inward sharply, check whether you missed a paired stitch or worked much more tightly than you did on the panels. Avoid adding stuffing so firmly that the face pieces distort.
Crochet the Scalloped Mane
One Scallop Over Six Seam Stitches
Starting in the first of the 96 terracotta joining stitches, repeat this sequence 16 times:
- Sl st in the next stitch.
- Sc in the next stitch.
- Hdc in the next stitch.
- Work 3 dc in the next stitch.
- Hdc in the next stitch.
- Sc in the next stitch.
Every repeat consumes exactly six stitches of the joining round. Sixteen repeats therefore use all 96 base stitches. Each repeat produces eight worked stitches when its initial slip stitch is included.
At the end, join with a sl st to the first slip stitch of the first scallop. Fasten off and weave in the terracotta tail. Do not work additional scallops into the joining slip stitch from the previous round.
Smooth the mane gently with your fingers. The shallow shells should form a soft ring around the honey face. Their final shape will depend on yarn thickness and tension; they may appear more rounded or more angular than the concept image.
Attach the Ears and Finish
Position the ears near the upper-left and upper-right portions of the face, approximately at ten and two o’clock. Keep their cream centers facing forward and their bases partly overlapping the honey panel edge.
Sew each ear’s open base to the honey fabric immediately inside the mane. Catch the front and back panel edges where practical for a secure attachment, while avoiding stitches through the free outer tips of the scallops.
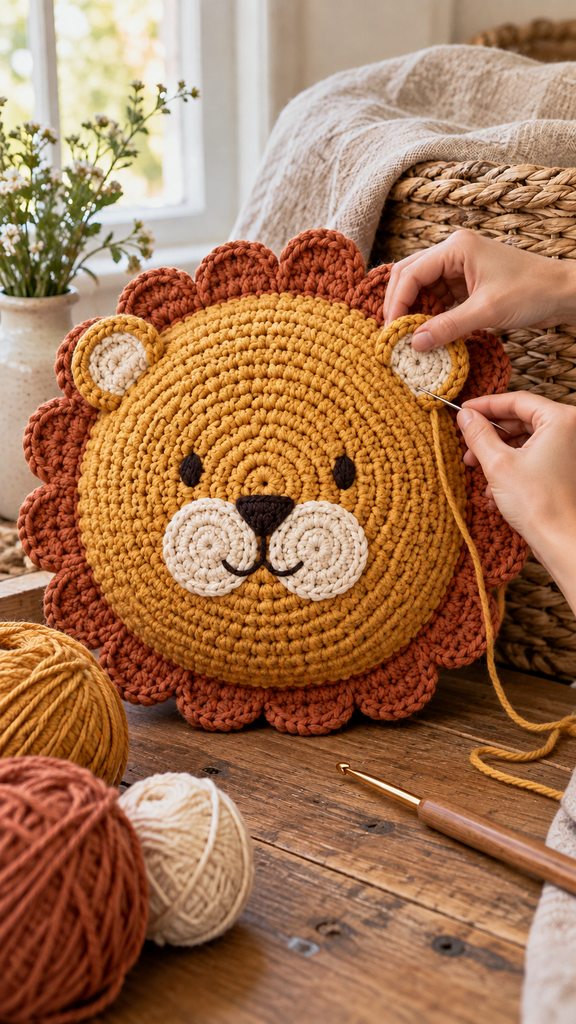
Adjust the two ears before securing the last tails. They should rise above the face without folding the mane inward. Remove temporary markers and basting threads, inspect the embroidery, and bury every remaining yarn end.
Color Variations and Display Ideas
Try a sandy-beige face with a cinnamon mane, or a golden-mustard face with a warm-brown mane. Keep the cream cheeks for contrast. A monochrome version can look lovely too, especially with slightly darker embroidered features.
Display the mini cushion against a basket, on a shelf, or alongside other handmade animal faces. It is a small decorative piece, not a full-size sofa cushion. For a larger version, calculate a new panel perimeter and keep the final joining count divisible by six so the scallop sequence still fits evenly.
Care and Troubleshooting
Follow the care instructions for both yarn and stuffing. Support the pillow’s shape while drying, and let the center dry completely before putting it away. Check sewn ears and embroidered details after cleaning.
If the mane gathers, your edging tension may be tighter than the seam. If the face bulges too much, remove some stuffing before closing the last section. If the cheeks shift the expression, unpick their seams and reposition them while the front is still accessible. Working slowly at those stages is easier than correcting the finished pillow.
Frequently Asked Questions
Can a beginner make this lion pillow?
It suits a beginner who is comfortable with magic rings, continuous rounds, increases, and counting stitches. The mane also uses half double and double crochet. Practice one scallop on a separate swatch if those stitches are new.
Do I need to crochet a body or tail?
No. This new design is a round lion face pillow. Its only separate attachments are the cream circles and two ears, followed by embroidered facial details.
Can I use acrylic instead of cotton?
Yes, provided you like the fabric it creates and it contains the stuffing. The drape and finished size may change. Use the same general yarn thickness throughout and follow the yarn’s care instructions.
Why does the joining round need 96 stitches?
It matches the final stitch count of each panel and provides sixteen groups of six for the mane. A different final panel count needs a new scallop calculation. Do not count the joining slip stitch as an extra base stitch.
Can I make this into a large cushion?
You can develop a larger variation, but it needs new size, yarn, and filling estimates. Continue increasing the panels consistently and keep the final stitch count divisible by six. This draft covers only the small version.
Is this the same lion as the supplied pattern?
No. The reference is a seated lion amigurumi with a body, limbs, tail, and looped mane. This version is a two-panel face cushion with a scalloped mane and different muzzle construction. Its written counts are checked, but physical testing is still needed.