Crochet a Little Holly Christmas Stocking
A small handmade stocking can make even a simple gift feel thoughtful. This crochet version pairs warm rust-red cotton with a cream fold-over cuff and a little holly decoration. Three pointed green leaves and three tiny cranberry circles add festive detail without needing a large embroidery chart.
The stocking is made from two flat pieces. You begin at the bottom of the foot, shape the toe, then continue over part of the width to create the leg. After joining the panels, you crochet around the opening, fold the cuff, and add a short hanging loop.
The supplied PDF inspired the Christmas-stocking theme. This newly drafted version changes the size, construction, heel and toe shaping, cuff, and decoration. Its stitch counts have been checked mathematically, but it has not been physically crocheted or tested. The photographs are AI-generated concept illustrations; use the written instructions for counts and placement rather than treating the pictured stitches as exact diagrams.
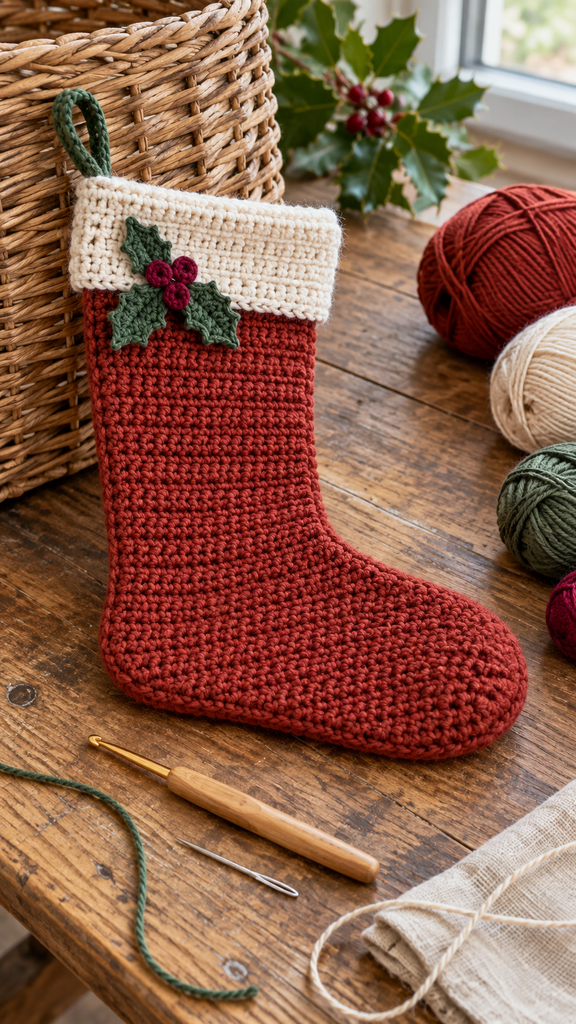
A Small Stocking With a Different Construction
This version is a decorative mini stocking for a few lightweight gifts or a seasonal display. It is not a wearable sock. Its two-panel construction creates a simple stocking silhouette without a separate heel flap, turned heel, or shaped tubular toe.
The panels use single crochet in rows, and the cuff is worked in joined rounds after assembly. The holly pieces are crocheted separately and sewn to the front. There is no snowman, Santa, tree chart, or cross-stitch panel to reproduce.
Smooth cotton makes the little details easy to see. The finished stocking remains soft, with a visible handmade seam and a gently shaped foot rather than the precise fit of a knitted or crocheted sock.
Project Details and Size
| Detail | Guide |
|---|---|
| Skill level | Confident beginner with basic shaping and sewing |
| Terminology | US crochet terms |
| Main construction | Two matching flat panels joined around their outer edges |
| Body height | 40 rows from the bottom foundation to the opening |
| Widest foot row | 26 sc |
| Leg width | 14 sc per panel |
| Opening count | 28 sc around both panel tops |
| Intended size | Approximately 20 cm tall with a 13 cm foot and 7 cm leg width |
| Gauge target | 20 sc and 22 rows per 10 cm / 4 inches |
| Pattern status | New draft; count-checked, not physically tested |
These dimensions are calculated targets, not measurements from a completed sample. Forty rows give about 18.2 cm before the cuff. Nine cuff rounds give about 4 cm unfolded, adding roughly 2 cm of visible height when folded in half. Seams, tension, and shaping can alter the result.
Materials and Supplies
- Rust-red medium-weight cotton: allow approximately 90–120 metres for the two body panels and sewing.
- Cream cotton: approximately 20–30 metres for the cuff.
- Forest-green cotton: approximately 15–25 metres for the leaves and hanging loop.
- A small amount of dark cranberry cotton for three berry circles.
- A 3.5 mm crochet hook as a starting point, adjusted to meet your gauge.
- A blunt yarn needle, scissors, measuring tape, and removable markers.
- Optional matching sewing thread for tidying the appliques.
Yarn amounts are estimates rather than measured consumption. Keep the yarn thickness similar across the body, cuff, and leaves. A very heavy cream yarn can draw attention away from the small stocking or change the opening’s fit.
Check Your Gauge
Chain 25 and work 24 sc across the first row. Continue for 26 rows, chaining one and turning between rows. Measure the central fabric without stretching it, aiming for 20 stitches and 22 rows in 10 cm.
Choose a fabric that contains your intended small gifts without looking overly stiff. Changing the hook to make a denser fabric can also change the finished size, so measure rather than relying only on the suggested hook.
Abbreviations and Pattern Notes
| Abbreviation | Meaning |
|---|---|
| ch | Chain |
| sc | Single crochet |
| sl st | Slip stitch |
| inc | Work 2 sc in the same stitch |
| dec | Decrease 2 stitches into 1 sc |
| MR | Magic ring |
| st / sts | Stitch / stitches |
| rnd | Round |
Turning Chains and Decreases
The turning chain does not count as a stitch. Work the first sc into the first actual stitch after turning and finish in the last actual stitch.
For a decrease, draw up a loop in each of the next two stitches, then yarn over and pull through all three loops. It consumes two stitches and produces one. Count after each shaping row so the later leg and cuff instructions remain consistent.
Orienting the Stocking
The leg grows from the first fourteen stitches of Row 11. That side becomes the heel side; the ten unworked stitches extend toward the toe. Do not fasten off or move to the other end when beginning the leg.
The plain panels can be used with either face outward. Choose their visible sides when stacking the matching silhouettes for assembly, rather than assigning a fixed right side at the beginning.
Crochet the Two Stocking Panels
Begin Along the Bottom of the Foot
With rust red, chain 23.
Row 1: Sc in the second chain from the hook and in each remaining chain. 22 sc.
Row 2: Ch 1, turn. Inc in the first stitch, sc in the next 20 stitches, and inc in the last stitch. 24 sc.
Row 3: Ch 1, turn. Inc, sc in the next 22 stitches, inc. 26 sc.
Rows 4–8: Ch 1, turn. Sc in every stitch. 26 sc per row.
These early increases soften both lower corners. The next two rows shorten the toe-side edge before the leg begins.
Shape the Upper Toe Edge
Row 9: Ch 1, turn. Sc in the first 24 stitches, dec over the final two stitches. 25 sc.
Row 10: Ch 1, turn. Dec over the first two stitches, then sc in the remaining 23 stitches. 24 sc.
The decrease at the end of Row 9 and the beginning of Row 10 occur on the same physical side of the foot. This gives the toe a gentler upper corner while leaving the heel side available for the leg.
Continue Up the Leg
Row 11: Ch 1, turn. Sc in the first 14 stitches only. 14 sc. Leave the remaining ten stitches of Row 10 unworked. The next row will return across these fourteen stitches.
Rows 12–40: Ch 1, turn. Sc in every stitch across the leg. 14 sc per row. Fasten off.
Make a second panel with the same instructions. Lay both silhouettes flat and compare the foot widths, leg heights, and opening edges. Weave in their starting and finishing tails on the sides that will face inward.
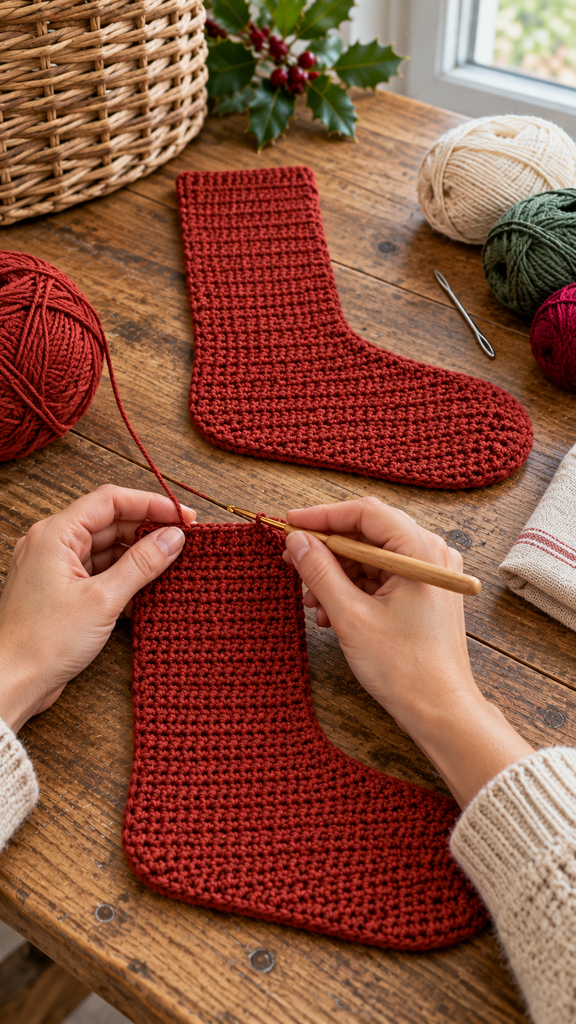
Join the Stocking Panels
Stack the two panels with their outlines matching and the chosen outer faces exposed. Align the foundation edges, toe curves, ankle corners, and leg tops. The seam is worked from the outside, so you do not need to turn the stocking through its narrow opening afterward.
With rust yarn and a blunt needle, whipstitch around the outside: down the heel side, across the bottom, around the toe, along the unworked top-of-foot section, and up the inner leg edge. Leave both fourteen-stitch top edges open.
Match corresponding stitches or row ends as you sew. Keep the tension relaxed enough that the edges do not gather. At the ankle corner, secure the junction neatly without sewing across the gift opening or drawing the foot into a fold.
Check that the two top edges still provide fourteen accessible stitches each. The stocking should now have a small open interior and a recognizable foot extension.
Crochet the Cream Folded Cuff
Round 1: Work Around the Opening
With cream, join yarn at the heel side of the opening. Ch 1; this does not count as a stitch. Sc in each of the fourteen top stitches of the front and each of the fourteen top stitches of the back. Join with a sl st to the first sc. 28 sc.
Do not add extra stitches into the side seams. The panel corner stitches are already included in the twenty-eight-stitch total.
Rounds 2–9: Extend the Cuff
Ch 1, sc in every stitch around, and join to the first sc. Work 28 sc per round through Round 9. Do not turn between rounds. Fasten off and weave in the ends.
Fold the cuff outward by approximately half its height. At the suggested gauge, the unfolded band is around 4 cm tall and the visible fold around 2 cm. Adjust the fold gently so the top edge looks even.
Crochet Three Holly-Inspired Leaves
Make the Flat Leaf Centers
With green, chain 2, leaving a long starting tail.
- Row 1: Sc in the second chain from the hook. 1 sc.
- Row 2: Ch 1, turn. Inc. 2 sc.
- Row 3: Ch 1, turn. Inc in both stitches. 4 sc.
- Row 4: Ch 1, turn. Inc, 2 sc, inc. 6 sc.
- Row 5: Ch 1, turn. Sc in every stitch. 6 sc.
- Row 6: Ch 1, turn. Dec, 2 sc, dec. 4 sc.
- Row 7: Ch 1, turn. Dec twice. 2 sc.
- Row 8: Ch 1, turn. Dec. 1 sc. Fasten off.
Make three. The Row 1 end is the attachment base, and the Row 8 end is the tip. Keep the long starting tail free for sewing.
Add Small Pointed Edges
For a picot, chain three and slip stitch into the first of those three chains. It forms a tiny point without consuming a base stitch.
Join green near the leaf base. Work eight sc evenly along one row-end side, adding a picot after the third and fifth sc. Work one sc into the tip stitch and add a picot. Work eight sc down the other row-end side, again adding picots after the third and fifth sc. Work one sc at the base and join to the first edging sc.
The edging contains 18 sc and five picots. Fasten off and weave in the edging ends. This produces a small holly-inspired leaf rather than a botanical replica. If the edge ripples, check your spacing and relax the picot tension.
Make Three Cranberry Berries
With dark cranberry, work 6 sc in an MR. Pull the ring closed and join with a sl st to the first sc. Fasten off with a sewing tail.
Make three small flat circles. Do not stuff them. Their dark color should stand out against the green leaf bases when the decoration is assembled.
Sew on the Holly Cluster
Place the leaves below the front cuff, with their starting bases meeting around the upper leg area and one tip angled upward and the other two downward and outward. Around Body Row 33 is a useful starting location for the bases, but adjust to the actual size of your pieces.
Sew the bases and a short portion of each leaf’s center to the front panel, leaving the points and some of the outer edges free. Add the three berry circles over the meeting point of the bases.
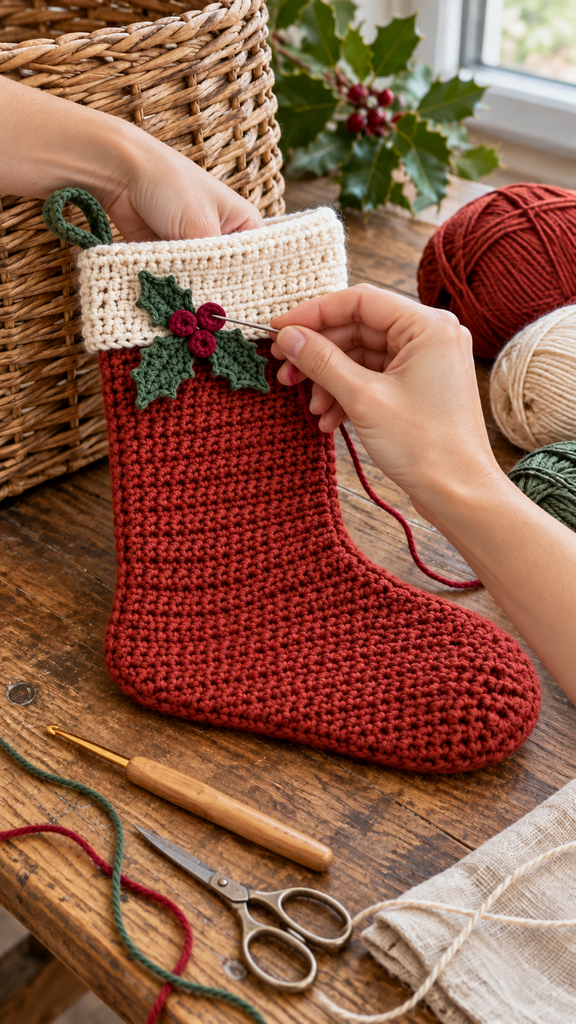
Keep one hand inside the stocking while sewing so the needle catches only the front layer. If you prefer, insert a smooth scrap of cardboard temporarily between the layers as a sewing barrier, then remove it completely afterward.
Check the motif from a little distance before finishing the tails. It should sit below the cuff without narrowing the opening or pulling the front into a pucker.
Add the Hanging Loop
With green, chain 5.
Row 1: Sc in the second chain from the hook and in every remaining chain. 4 sc.
Row 2 onward: Ch 1, turn. Sc in every stitch. 4 sc per row. Continue until the strip measures approximately 11 cm without stretching. Fasten off with a sewing tail.
Fold it into a loop and overlap each end by about 1 cm at the upper heel side. Secure the ends to the rust body just below the cuff attachment, placing them behind the folded cream band. Catch sturdy fabric rather than only the free cuff edge.
The remaining exposed strip is about 9 cm, giving a hanging drop near 4.5 cm. Check the attachment with the few lightweight items you intend to display. This soft decorative pattern has no tested load capacity.
Color Variations and Care
Try forest green with a cream cuff and red berries, or oatmeal with a deep burgundy cuff. Keep a visible contrast between the leaf bases and berry circles. The same panel counts work when changing only colors and using similar yarn thicknesses.
Follow the yarn label’s care instructions. Shape the stocking gently after cleaning and let it dry completely. If the toe seam gathers, loosen the sewing tension. If the cuff opening contracts, check for missed top stitches or extra-tight joins before decorating.
Frequently Asked Questions
Is this a wearable sock?
No. It is a decorative mini gift stocking. The flat panels create a stocking silhouette but do not provide a fitted heel, foot, or ankle for wearing.
Can a beginner make it?
It suits someone who can work single-crochet rows, simple increases and decreases, and basic seams. The small leaf edging needs a little extra counting. Practice a picot separately if that technique is new.
Why are ten stitches left unworked at Row 11?
They form the upper foot extension toward the toe. The fourteen worked stitches become the leg. Returning to all twenty-four stitches would remove the intended stocking shape.
Can I leave off the holly?
Yes. The stocking and cuff are complete without it. You can keep the piece plain or develop another small applique, checking that its weight and stitching do not distort the front.
Can I make a larger stocking?
You can develop a larger version with a new gauge or recalculated panels. Changing yarn weight alters both dimensions and fabric behavior. This article covers the mini draft, not a tested range of sizes.
Is it the same pattern as the supplied PDF?
No. The reference uses a worked-in-the-round stocking with heel and toe shaping and cross-stitch pictures. This version uses flat panels, a plain folded cuff, and crocheted holly pieces. Its counts are checked, but physical testing is still needed.