Crochet a Cozy Tiger Drawstring Pouch
A small handmade pouch is even more charming when it has a little personality. This crochet tiger pouch combines warm orange cotton, charcoal stripes, soft cream cheeks, and a sleepy embroidered face. Two rounded ears peek beside the opening, while matching drawstrings gather the top into a neat little bag.
Use it to organize small craft supplies, hold a few everyday essentials, or present a lightweight handmade gift. The main fabric is simple single crochet worked back and forth. You make two rectangular panels, decorate the front, sew the sides and bottom, then add an eyelet band and cords.
The supplied tiger amigurumi PDF inspired the character theme and contrasting colors. This newly drafted design changes the project into an unstuffed pouch with different construction, facial details, stripes, ears, and closure. Its counts have been checked mathematically, but it has not been physically crocheted or tested. The photographs are AI-generated concept illustrations; follow the written instructions for stitch counts and placement.
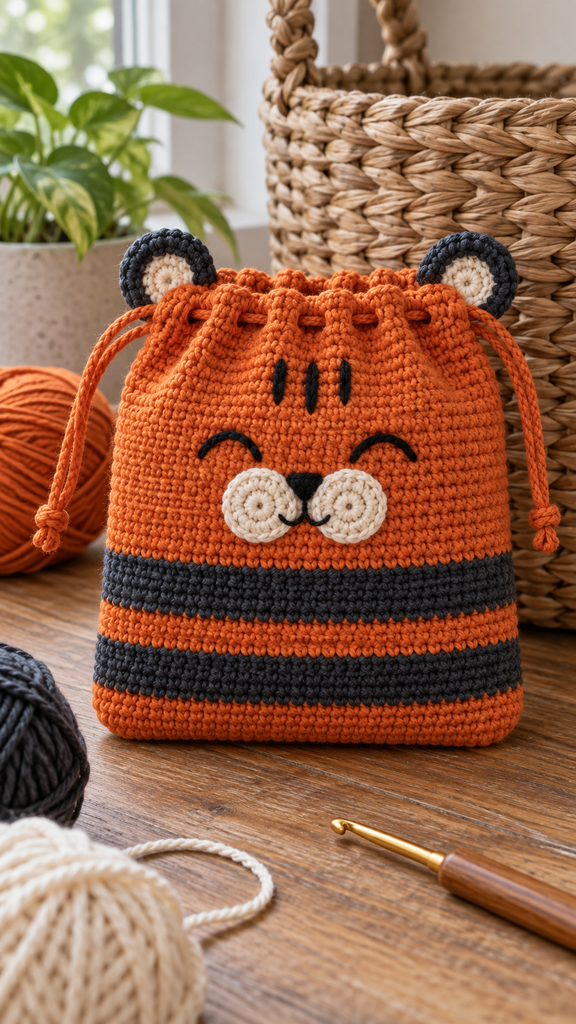
A Different Way to Crochet a Friendly Tiger
This tiger has a practical opening instead of a stuffed head and body. The charcoal bands are crocheted directly into both panels, and the small forehead markings are embroidered. Two cream circles create the muzzle, with a tiny triangular nose and a curved smile.
The ears are separate little pieces attached below the drawstring band. There are no legs, arms, tail, stuffing, or rigid facial decorations. This makes the foundation approachable for someone who prefers rows to complicated amigurumi shaping.
The pouch is soft and relatively flat when empty. It is intended for a few lightweight items rather than a heavy collection of tools. An optional lining can help keep tiny objects from pressing into the crochet fabric.
Project Details and Size
| Detail | Guide |
|---|---|
| Skill level | Confident beginner with basic sewing and embroidery |
| Terminology | US crochet terms |
| Main construction | Two rectangular panels joined on three sides |
| Panel dimensions | 32 sc across and 28 rows tall |
| Size target | Approximately 16 cm wide × 15–16 cm tall, excluding ears |
| Gauge target | 20 sc and 20 rows per 10 cm / 4 inches |
| Closure | Joined eyelet band and two opposing drawstrings |
| Hook starting point | 3.5 mm with smooth medium-weight cotton |
| Pattern status | Newly drafted and count-checked; not physically tested |
At the target gauge, each panel measures about 16 × 14 cm before joining. The three-round opening band adds height, while the seams can reduce the usable width slightly. These are calculated targets rather than measurements from a completed sample.
Materials and Supplies
- Warm orange cotton: allow approximately 100–140 metres for the panels, opening band, and cords.
- Charcoal cotton: approximately 20–30 metres for bands, ears, and embroidery.
- Cream cotton: approximately 10–15 metres for cheeks and ear centers.
- A 3.5 mm crochet hook, adjusted to suit your yarn and gauge.
- A blunt yarn needle, scissors, measuring tape, and removable markers.
- Optional woven cotton lining fabric, a sewing needle, and matching thread.
Yarn amounts are planning estimates, not measured consumption. Use similar yarn thicknesses for the orange and charcoal panels so the colored rows do not change their width. Smooth cotton makes the eyelet holes and embroidered features easier to see.
Make a Gauge Swatch
Chain 25 and work 24 sc across the first row. Continue for 24 rows, chaining one and turning between rows. Measure a central section without stretching it, aiming for 20 stitches and 20 rows in 10 cm.
If the fabric feels too open for your intended contents, try a smaller hook and measure again. A change in gauge changes the finished dimensions, so use your own panel measurements when planning the lining.
Abbreviations and Helpful Techniques
| Abbreviation | Meaning |
|---|---|
| MR | Magic ring |
| ch | Chain |
| sc | Single crochet |
| sl st | Slip stitch |
| inc | Work 2 sc in the same stitch |
| st / sts | Stitch / stitches |
| rnd | Round |
| sp | Space |
| RS / WS | Right side / wrong side |
Keep the Rows Straight
The turning chain does not count as a stitch. After chaining one and turning, work the first sc into the first actual stitch. Work the last sc into the final actual stitch, not the turning chain. Every panel row contains 32 sc.
Mark the first and last stitches if they are difficult to recognize. Count before each color change; a missing edge stitch is much easier to fix immediately than after several more rows.
Change Colors Without a Bulky Join
Begin the last sc of the current row with the old color. When two loops remain on the hook, yarn over with the next color and pull through both loops. Chain one in the new color, turn, and continue.
Cut the old yarn with a tail long enough to weave in. For this small striped project, separate tails make the reverse straightforward to tidy. Avoid tightening the color change until the edge pulls inward.
Crochet the Two Striped Panels
Make the Front Panel
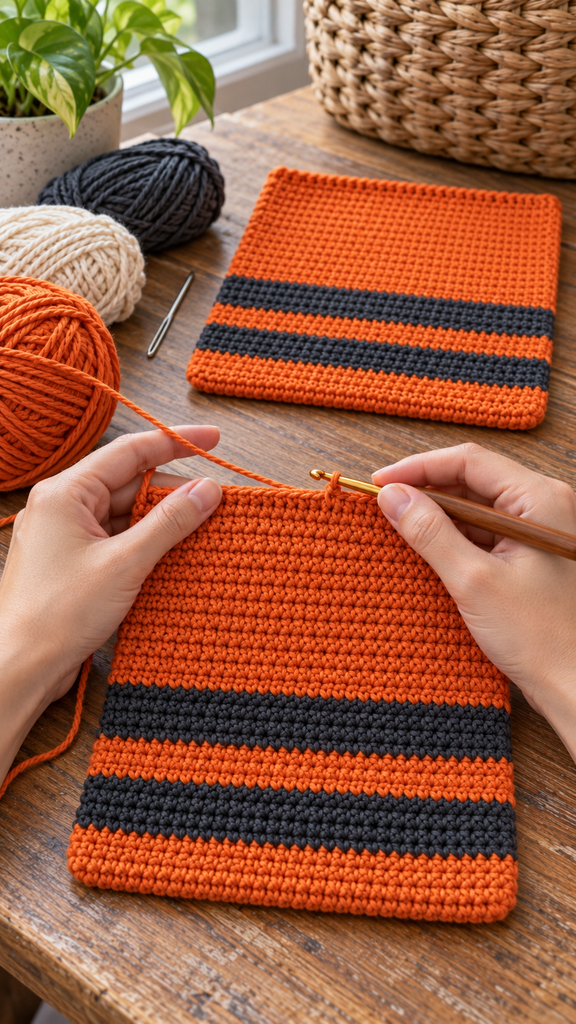
With orange, chain 33.
Row 1: Sc in the second chain from the hook and in every remaining chain. 32 sc.
Rows 2–4, orange: Ch 1, turn. Sc in every stitch across. 32 sc per row. Change to charcoal on the final stitch of Row 4.
Rows 5–6, charcoal: Ch 1, turn. Sc in every stitch across. 32 sc per row. Change to orange on the final stitch of Row 6.
Rows 7–10, orange: Ch 1, turn. Sc in every stitch across. 32 sc per row. Change to charcoal on the final stitch of Row 10.
Rows 11–12, charcoal: Ch 1, turn. Sc in every stitch across. 32 sc per row. Change to orange on the final stitch of Row 12.
Rows 13–28, orange: Ch 1, turn. Sc in every stitch across. 32 sc per row. Fasten off.
The two charcoal bands occupy the lower part of the pouch, leaving a larger orange area above them for the face. Keep Row 1 at the bottom when positioning decorations.
Make the Back Panel
Repeat the same 28-row sequence for a second panel. Compare both pieces before sewing: their widths, heights, and stripe positions should match closely.
Weave in the color-change tails on the wrong sides. If gentle blocking is appropriate for your yarn, shape both panels consistently and let them dry completely. Do not stretch one panel to hide an obvious difference in tension.
Crochet the Cheeks and Ears
Two Cream Cheek Circles
With cream, work 6 sc in an MR for Round 1. In Round 2, increase in every stitch: 12 sc. Join with a sl st to the first sc and fasten off with a sewing tail.
Make two. Keep them flat and unstuffed. At the intended gauge, they should form a modest pair of cheeks rather than covering the entire upper panel.
Two Charcoal Ears
With charcoal:
- Rnd 1: 6 sc in an MR. 6 sts.
- Rnd 2: Inc in every stitch. 12 sts.
- Rnd 3: Sc in every stitch. 12 sts.
Do not stuff. Flatten the opening into two facing layers of six stitches. Work 6 sc through both layers to close it, then fasten off with a sewing tail. The closing line is separate from the three numbered rounds.
For each cream inner ear, work 6 sc in an MR, join with a sl st, and fasten off with a sewing tail. Sew one small cream circle to the front of each charcoal ear.
Decorate the Front While It Is Flat
Position the Muzzle
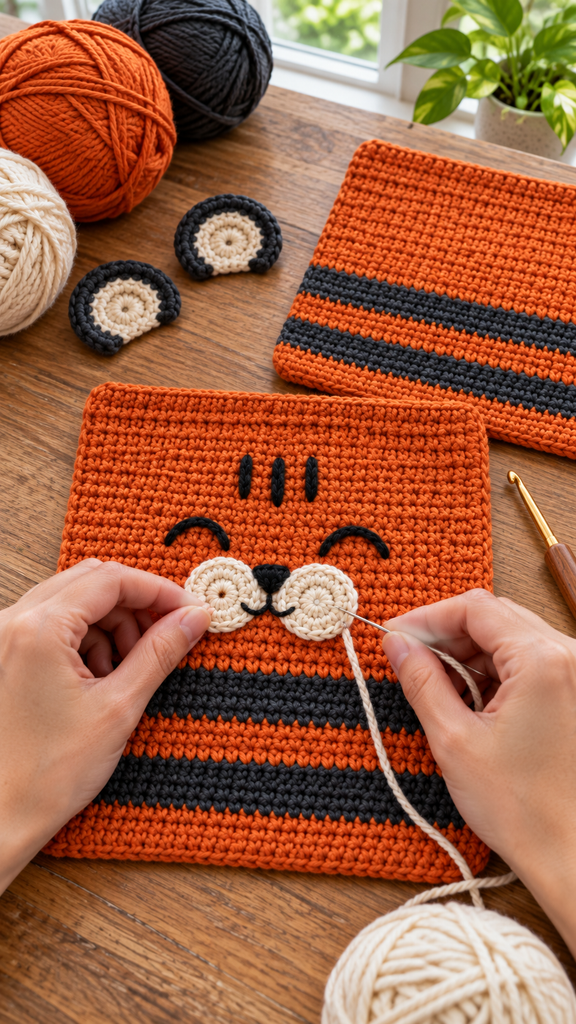
Choose the neater panel face as the right side. Place the cream cheek circles side by side around Rows 17–20, centered across the width. Their inner edges should touch. Adjust their exact position to your actual gauge.
Sew around the circles with cream yarn, keeping them flat. Catch the orange stitches without drawing the panel into a pucker. Leave enough space above the cheeks for eyes, forehead marks, and the opening band.
Embroider a Sleepy Tiger Face
With charcoal, embroider a small downward-pointing triangular nose at the upper meeting point of the cheeks. Fill it with short stitches, then add a short vertical line and two gentle smile curves over the cream circles.
Place two closed crescent eyes around Rows 23–24, balanced on either side of the center. Use several small stitches to make each curve. Add three short forehead markings near Rows 26–27: one centered mark and two slightly angled marks beside it.
Keep the embroidery soft and avoid long loose strands on the reverse. Secure and weave in the ends. The face should sit below the area that will gather when the pouch closes.
Join the Panels Into a Pouch
Place the front and back right sides together. Match their foundation edges, row ends, and charcoal stripes. Use markers at the bottom corners and at the top of both sides.
With orange and a yarn needle, whipstitch the two foundation edges together, pairing all 32 stitch positions. Sew one side by matching its 28 row ends, then sew the other side in the same way. Leave both top edges open.
Use relaxed sewing tension so the seams do not gather the fabric. Work neatly across the color-band sections with small stitches. Turn the pouch right side out and check that the opening has 32 top stitches on the front and 32 on the back, including their corner stitches.
Crochet the Drawstring Opening
Round 1: Reinforce the Top
With orange and the right side facing outward, join yarn at one side of the opening. Chain one; this does not count as a stitch. Sc in each of the front panel’s 32 top stitches and each of the back panel’s 32 top stitches. Join with a sl st to the first sc. 64 sc.
Do not add extra stitches into the side seams. The panel corner stitches are included in the 64-stitch count.
Round 2: Make the Eyelets
Ch 1. Starting in the first stitch, repeat (sc in the next 2 stitches, ch 1, skip 1 stitch, sc in the next stitch) sixteen times. Join with a sl st to the first sc.
Each repeat consumes four base stitches. The round contains 48 sc and 16 ch-1 spaces. The chains form holes for the cords; do not crochet into the skipped stitches later.
Round 3: Finish the Edge
Ch 1. Work one sc in every sc and one sc in every ch-1 space around. Join with a sl st to the first sc. 64 sc. Fasten off and weave in the ends.
Check that the eyelets remain open and that the finished edge feels flexible. An overly tight final round can make the drawstring difficult to gather.
Make and Thread the Two Cords
Crochet Matching Orange Cords
Make two cords with a finished length of approximately 55–60 cm each. As a starting point, chain about 65 cm, then sl st in the second chain from the hook and each remaining chain. Work loosely enough to avoid curling.
Measure the completed cord without stretching it. Slip-stitching can shorten the chain, so redo the starting length if the finished strip is much shorter than the target. Fasten off and weave in both ends. Use the actual opening circumference to confirm that each cord can travel all the way around and still leave usable ends.
Thread From Opposite Sides
With a blunt needle, weave the first cord through all sixteen eyelets, beginning at the left side and returning to that side. Pass alternately toward the inside and outside through the holes. Tie its two free ends together with a plain knot.
Thread the second cord through all the eyelets in the same way, beginning and ending at the right side. Keep it from catching the first cord or the fabric. Tie its ends together. Pull the two opposing cord ends gently to gather the opening, then spread the band to reopen it.
Attach the Ears
Place the ear closing edges near the upper corners of the front, around Row 26. The left base can span approximately stitches 2–7, and the right base approximately stitches 26–31. These positions are guides; adjust so the ears rise beside the opening and do not hide the eyes.
Sew each six-stitch closing edge to the front panel below the drawstring band. Catch only the front fabric, avoiding the back panel and the moving cords. Check that the pouch still opens fully before securing the last sewing tails.
Add an Optional Lining
Measure the internal body below the eyelet band. Choose a finished lining width and height about 1 cm smaller than those measurements. Cut two rectangles, adding 2 cm to the desired width for side seams and 3 cm to the desired height for the bottom seam and double-fold top hem.
For an internal body of 16 × 14 cm, a lining target of 15 × 13 cm uses two rectangles of 17 × 16 cm. Sew the sides and bottom with 1 cm seam allowances, then fold the top down 1 cm twice and stitch.
Keep the lining wrong side out and insert it into the right-side-out pouch, enclosing the raw seams between the layers. Hand-sew its hem just below the opening band. Do not stitch across the eyelet holes or through the cords.
Variations, Care, and Helpful Fixes
Try muted apricot with dark brown for a softer palette, or make one tiger pouch and one plain striped companion. Keep the same row and stitch counts when changing only colors.
Follow the care instructions for the yarn and optional lining. After washing, reshape the pouch gently and let it dry completely. If stripes do not align, check the row counts before sewing. If cords drag, loosen the final edging tension and check for snagged yarn ends inside the eyelets.
Frequently Asked Questions
Can a beginner make this pouch?
It suits someone who can maintain straight single-crochet rows, change colors, and sew small pieces. The opening uses simple chains and skipped stitches. Practice the eyelet repeat on a swatch if it is unfamiliar.
Does this pattern need stuffing?
No. The panels, cheeks, and ears remain unstuffed. This is a functional soft pouch, not a stuffed tiger toy.
Why are there two drawstrings?
They begin and end on opposite sides. Pulling them in opposite directions gathers the opening evenly. Test their movement before tying the final knots.
Can I leave out the lining?
Yes. A lining is optional, but it can help with tiny contents and cover the reverse embroidery. Check that your intended items suit the density of the unlined fabric.
How can I make a larger version?
Recalculate the panels and opening together. This eyelet repeat needs an opening count divisible by four. Also adjust the cord lengths and facial placement; the 64-stitch heading belongs to the 32-stitch panels described here.
Is this the same tiger as the supplied PDF?
No. The reference is a seated tiger amigurumi with a stuffed body, limbs, and tail. This version is a two-panel drawstring pouch with different stripes and embroidered features. Physical testing is still needed before describing it as a tested pattern.