Crochet a Cozy Sage Crossbody Bag
There is something lovely about a handmade bag that feels simple enough for everyday use and special enough to show off your stitches. This little sage crochet satchel has soft horizontal ribs, a contrasting cream flap, and a wooden button that gives it a warm, natural finish. It is the kind of project you can picture beside a linen outfit, a cozy cardigan, or a favorite pair of jeans.
The construction is easy to understand: make a front panel, crochet a longer back panel with its flap attached, join the sides and bottom, and add a flat strap. The main panels use half double crochet worked into the back loop. That small change creates texture without complicated cables, changing stitch counts, or decorative motifs.
This newly drafted design takes inspiration from the idea of a crochet crossbody bag in the supplied PDF. It changes the silhouette, stitch pattern, panel construction, closure, strap, and palette. The instructions below have been checked for stitch-count consistency but have not been physically crocheted or wear-tested. The photographs are AI-generated concept illustrations; follow the written directions rather than counting stitches in the pictures.
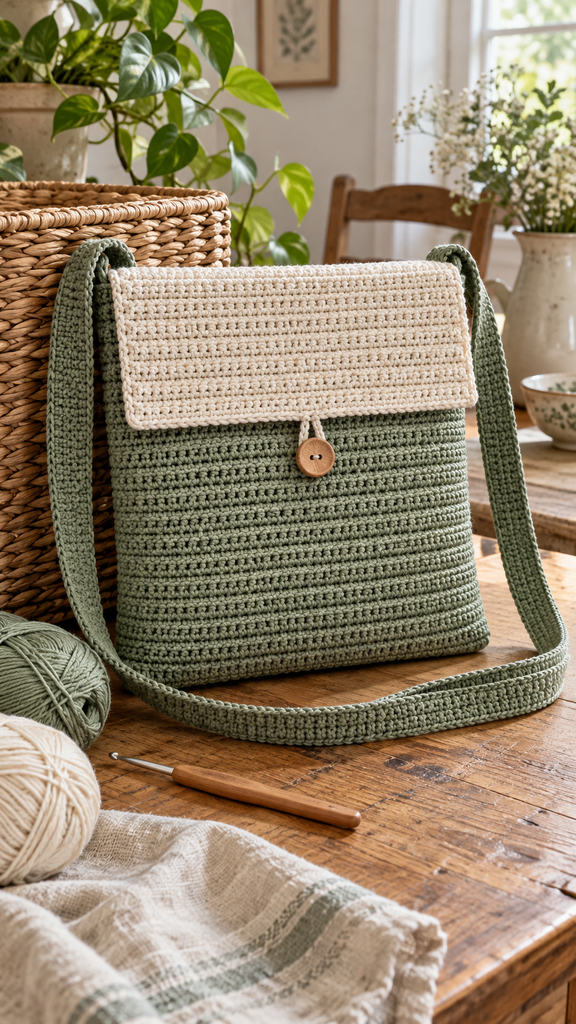
A Different Take on a Handmade Crossbody Bag
The supplied project uses colorful granny motifs. This version uses two dense rectangular panels, with a cream flap growing directly from the back. The front is uncluttered, letting the horizontal texture and muted color become the main details.
The button-and-loop closure keeps the assembly approachable. You do not need to fit a zipper or buy rings and clasps. A lining is optional, but it is a useful addition if you plan to carry small items or want the bag to hold its shape more neatly.
Think of this as a compact, soft satchel for a phone, wallet, and a few light essentials. Its exact capacity depends on your yarn, seams, and lining. Because there is no gusset, the bag stays relatively flat instead of having a wide base.
Project Details and Finished Size
| Detail | Guide |
|---|---|
| Skill level | Confident beginner, with basic sewing |
| Crochet terminology | US terms |
| Main stitch | Half double crochet in the back loop only |
| Construction | Two flat panels; the back includes the flap |
| Body size target | About 25 cm wide × 28 cm tall / 10 × 11 inches |
| Flap depth target | About 8–9 cm / 3¼–3½ inches |
| Strap length | Approximately 95–110 cm / 37–43 inches, adjusted to fit |
| Main gauge target | 16 hdc and 12 rows per 10 cm / 4 inches |
| Pattern status | Original draft; not physically tested |
Measurements exclude the strap and are approximate. At the stated gauge, 40 stitches give a 25 cm panel width and 34 rows give approximately 28.3 cm of height. Seaming can reduce the usable dimensions slightly. Measure both panels before joining them, and use their actual dimensions when cutting a lining.
Materials You Will Need
Choose a smooth medium-weight cotton yarn, or a firm cotton blend, that produces a fabric you like. A very soft or loosely spun yarn can make a relaxed bag, while firmer cotton can show the ribs more clearly.
- Sage yarn: allow approximately 300–400 metres for both body panels and the strap.
- Cream yarn: allow approximately 60–90 metres for the flap and its finishing row.
- A 4.5 mm crochet hook as a starting point for the panels.
- A hook suitable for a firm single-crochet strap; start with 4 mm and swatch.
- One smooth wooden button, approximately 18–22 mm across.
- A yarn needle, stitch markers, scissors, and a measuring tape.
- Sewing needle and strong matching thread for the button and optional lining.
- Optional woven cotton fabric for the lining and woven tape for reinforcing the strap.
Yarn quantities are generous planning estimates, not measured consumption from a tested sample. Strap length, yarn density, and tension will affect the amount needed. Use a button with openings that your sewing thread can pass through comfortably.
Check the Fabric With a Swatch
With sage and your panel hook, chain 21. Work 20 half double crochet stitches across the first row, then work another 15 rows in the back loop only. Chain one and turn between rows. Measure the central area without stretching it, aiming for 16 stitches and 12 rows in 10 cm.
The turning chain does not count as a stitch. If the fabric has large holes or feels too floppy for your intended use, adjust the hook and swatch again. Changing the gauge changes the dimensions, so do not assume that a tighter fabric will still make a 25 cm bag.
Abbreviations and Techniques
| Abbreviation | Meaning |
|---|---|
| ch | Chain |
| sc | Single crochet |
| hdc | Half double crochet |
| BLO | Back loop only |
| st / sts | Stitch / stitches |
| RS / WS | Right side / wrong side |
Half Double Crochet in the Back Loop
Yarn over, insert the hook into the back loop of the next stitch, yarn over and pull up a loop, then yarn over and draw through all three loops on the hook. The front loop remains unused, helping form the horizontal ridge.
After you turn the fabric, identify the back loop from the side currently facing you. Do not keep using the same physical loop from the previous viewing direction. Work every stitch of the textured rows in BLO, including the edge stitches.
Keep the Panel Edges Straight
Chain one before each new row and turn. The chain never counts as a stitch. Work the first hdc into the first actual stitch and the last hdc into the final actual stitch. Mark these two stitches if they are difficult to recognize.
Both panels stay at 40 stitches throughout. The flap also stays at 40 stitches. This project uses no increases or decreases in the panels, making it easier to check your progress as you work.
The Crochet Bag Pattern
Step 1: Crochet the Sage Front Panel
With sage and the panel hook, chain 41.
Row 1: Hdc in the second chain from the hook and in every remaining chain. 40 hdc.
Rows 2–34: Ch 1, turn. Hdc BLO in every stitch across. 40 hdc in each row.
Fasten off, leaving a generous tail if you want to use it for seaming. Lay the panel flat and check its width and height. Do not stretch it to force the gauge. Remove temporary edge markers only after you are satisfied that all rows contain 40 stitches.
Step 2: Crochet the Back Panel
With sage, chain 41.
Row 1: Hdc in the second chain from the hook and in every remaining chain. 40 hdc.
Rows 2–34: Ch 1, turn. Hdc BLO in every stitch across. 40 hdc per row.
On the last stitch of Row 34, change to cream: begin the hdc with sage, then use cream for the final yarn-over and pull through all three loops. Leave a sage tail to weave in. Do not fasten off the cream yarn.
The first 34 rows of the back should match the front panel. If their sizes differ noticeably, check your counts and tension before continuing. Matching the body portions is more useful than trying to correct unequal panels while sewing.
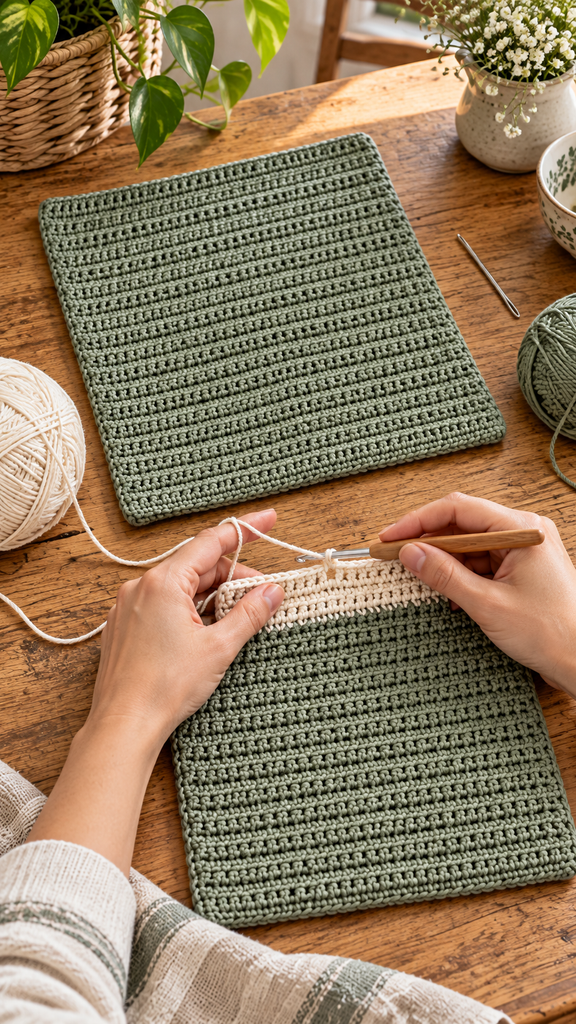
Step 3: Continue Into the Cream Flap
Rows 35–44, cream: Ch 1, turn. Hdc BLO in every stitch across. 40 hdc per row.
These ten cream rows form the flap. The back panel has 44 hdc rows in total: 34 sage rows and 10 cream rows. The flap folds forward along the color transition at the top of the sage body.
Before adding its finishing row, fold the cream section over the front panel to see the intended shape. Both sides of this textured fabric can look attractive; choose the outward-facing side you prefer and mark it as the right side.
Step 4: Finish the Flap and Make the Button Loop
After Row 44, keep using cream. Ch 1 and turn.
Work 1 sc in each of the first 20 stitches. Chain 8 for the button loop. Without skipping any body stitch, work 1 sc in the next stitch, then 1 sc in each of the remaining 19 stitches. Fasten off and weave in the end.
The finishing row contains 40 sc plus an 8-chain loop, centered between stitches 20 and 21. The chain bridge sits above two adjacent stitches and becomes the closure loop. It does not replace stitches in the row.
Test the loop with your actual button before fastening off completely. Eight chains are a starting point, not a guaranteed fit for every yarn and button. Adjust the chain length until the button passes through with gentle resistance. Record your final chain count if you plan to make another bag.
Join the Panels Into a Bag
Prepare the Pieces
Weave in any ends that will be difficult to reach after assembly. If the yarn label allows it, gently block the panels to matching body dimensions, then let them dry completely. Keep the cream flap free rather than folding it while wet.
Place the front and back with right sides facing each other. Align their foundation edges and the first 34 rows along both sides. The back’s cream section should extend above the front. Place markers at the bottom corners and at the top of each sage side.
Sew the Bottom and Both Sides
Using sage and a yarn needle, whipstitch the foundation edges together, matching all 40 stitch positions. Continue up one side, pairing the corresponding 34 row ends. Fasten off securely, then seam the other side in the same way.
Take a small stitch through sound fabric at each paired row end. Keep the yarn relaxed enough that the seam does not gather or shorten the panel. The opening is the front panel’s upper edge and the back panel’s color-change line; do not sew either opening edge closed.
Turn the bag right side out and check the corners. The seams should sit inside, with the cream flap folding smoothly over the front. This flat construction has no separately crocheted bottom or side gusset.
Crochet and Attach the Flat Strap
Make the Strap to Your Preferred Length
With sage and the strap hook, chain 7.
Row 1: Sc in the second chain from the hook and in each remaining chain. 6 sc.
Row 2 onward: Ch 1, turn. Sc through both loops of every stitch. 6 sc per row. Continue until the strip measures your chosen finished length plus 8 cm for attachment overlaps.
For example, an intended exposed strap of 100 cm needs a 108 cm strip, because 4 cm of each end will be sewn to the bag. Do not use the hdc panel row gauge to calculate the strap: single crochet has a different row height. Measure the strip directly, without stretching it, and check its drape against your body before attaching it.
Secure the Ends to the Bag
Place one strap end on each upper side seam, overlapping the bag by 4 cm. Keep the strip untwisted. Stitch a rectangle around each overlap, then add diagonal stitches across the rectangle for additional attachment points. Catch both the strap and sturdy body stitches.
Crochet straps can stretch. If you want a firmer result, sew woven tape along the underside before attaching the ends. Choose tape slightly narrower than the crochet strip and stitch it down without pulling either layer. Carry only light items until you have assessed the finished bag and its attachments in use; the draft has no verified load rating.
Add an Optional Cotton Lining
A lining helps keep small items from pressing into the fabric and covers the inside seams. Make it to fit your actual bag rather than relying entirely on the target gauge.
Choose a finished lining width and height about 1 cm smaller than the measured internal body dimensions. For each of two rectangles, add 2 cm to the desired width for side seams and 3 cm to the desired height for the bottom seam and top hem.
For a body measuring 25 × 28 cm internally, a lining target of 24 × 27 cm uses two fabric rectangles measuring 26 × 30 cm. Sew the sides and bottom with 1 cm seam allowances. Fold the top down by 1 cm twice and stitch the hem.
Keep the lining wrong side out and slip it inside the right-side-out crochet bag so the raw seams sit between the layers. Hand-sew its hem just below the opening. Let the lining rest against the bottom without pulling down on the crochet. Leave the cream flap outside the lining.
Sew on the Wooden Button
Close the flap naturally and bring its loop over the front. Mark the button position where the loop rests comfortably; do not stretch the flap to reach a preselected location.
Using strong sewing thread, attach the button to the crochet fabric before inserting the lining, or reach between the layers if the lining is already installed. A small backing patch of woven fabric can help distribute the pull behind the button. Keep stitches snug without crushing the crochet texture.
Check that the button passes through the loop easily and that the closed flap lies flat. Adjust the button position if necessary. The closure should be comfortable to use, with no need to tug the entire front panel upward.
Styling Ideas and Simple Variations
Try dusty blue with an oatmeal flap, warm terracotta with cream, or one neutral color throughout. Keep the same panel and strap counts when changing only the palette. A darker main color can make the wooden button stand out beautifully.
For a shorter shoulder-bag version, change the measured strap length while keeping the attachment overlaps. For a larger bag, swatch first and recalculate both the panel width and body height. Changing the stitch count also requires moving the button loop to the new center; the 20-and-20 division applies only to a 40-stitch flap.
Care and Common Problems
Follow the yarn and fabric care instructions, including any restrictions from the button or lining. Shape the bag gently after washing and avoid hanging it by a wet crochet strap. Let it dry fully before storing or using it.
If a panel narrows, count the first and last stitches of each row. If a seam puckers, loosen the sewing tension and realign the paired row ends. If the flap curls slightly, check that the finishing row is not tighter than the hdc fabric. A very loose closure loop can be shortened before you weave in its tail.
Frequently Asked Questions
Is this bag suitable for beginners?
It suits makers who can work half double crochet, identify the back loop, and maintain straight rows. The construction also needs basic hand sewing. Practice the textured stitch on a swatch before starting the full panels.
Do I need special granny-square yarn?
No. This design uses plain sage and cream yarns in flat rows. There are no granny motifs or color changes that need to align with a self-striping yarn sequence.
Can I leave out the lining?
Yes, although the bag will be softer and small items may press through gaps between stitches. Test the fabric with the items you intend to carry. A lining can also make the inside look tidier.
How do I keep the strap from stretching?
Work a firm single-crochet strip, choose an appropriate yarn, and consider adding woven tape underneath. Check the attachment stitches periodically. Reinforcement does not create a tested weight capacity for this untested pattern.
Why does my bag have a different size?
Your stitch or row gauge may differ from the target, or the seams may take up more fabric. Measure the swatch and finished panels. The pattern’s dimensions are approximate, and the lining must fit the bag you actually make.
Is this the same bag as the PDF?
No. The reference uses granny motifs and a different shape and closure. This new draft uses dense ribbed rectangular panels, an integrated cream flap, a button loop, and a plain single-crochet strap. Physical testing is still needed before presenting it as a tested pattern.