Cozy Colorblock Crochet Beanie
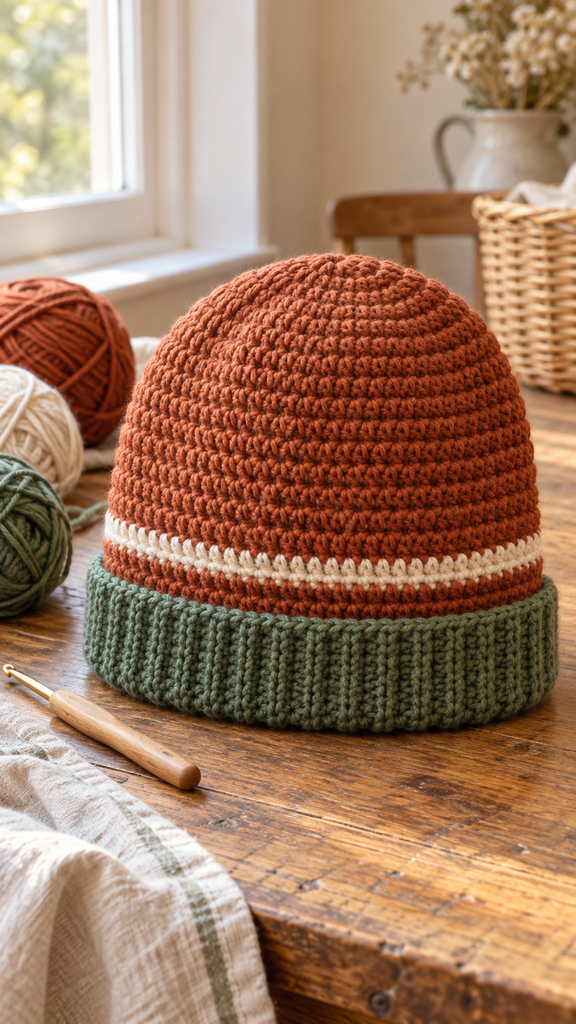
A warm handmade hat is one of those projects you can picture wearing as soon as you choose the yarn. This colorblock crochet beanie combines a softly rounded rust crown, a narrow cream stripe, and a forest-green cuff. The contrast is simple and cozy, with just enough detail to make an everyday hat feel special.
The main fabric uses ordinary half double crochet worked in joined rounds from the top down. The ribbed cuff is made separately in short single-crochet rows, then sewn to the opening and folded upward. This gives you two useful opportunities to check the fit: the hat body before finishing and the cuff before attachment.
The supplied PDF inspired the idea of a cozy cuffed crochet hat. This newly drafted version changes the direction of construction, crown shaping, body stitch, color arrangement, and cuff attachment. Its stitch counts and size calculations have been checked, but it has not been physically crocheted or fit-tested. All photographs are AI-generated concept illustrations; follow the written directions rather than counting stitches in the images.
A Different Construction for a Cozy Beanie
This hat begins with a circular crown and grows downward. The body is worked through both loops, so its texture follows horizontal rounds. Only the folded green cuff has vertical-looking ribs, created by working single crochet in the back loop.
There is no long rectangular body panel to sew into a tube or gather at the crown. The cuff has its own small seam, and the body will show a line of round joins. The rust-and-cream section stays understated while the green band adds a clear finishing detail.
The written size is an adult draft. Because yarn elasticity and individual tension affect fit, measure your head and use the checkpoints below before committing to the finished dimensions.
Size, Gauge, and Fit
| Detail | Guide |
|---|---|
| Skill level | Confident beginner with basic shaping and sewing |
| Terminology | US crochet terms |
| Intended head circumference | Approximately 56–59 cm / 22–23¼ inches, subject to stretch and fit checks |
| Body stitch count | 90 hdc after the crown increases |
| Body gauge target | 17 hdc and 12 joined rounds per 10 cm / 4 inches |
| Calculated relaxed body circumference | Approximately 53 cm / 20¾ inches |
| Body depth checkpoint | Approximately 18 cm from crown center to opening |
| Cuff width | Approximately 5–6 cm before folding |
| Finished depth target | Approximately 20–22 cm with cuff folded |
| Pattern status | New draft; count-checked, not physically fit-tested |
The intended head range assumes a fabric and cuff that stretch comfortably. It is not a guaranteed fit. A 90-stitch body at 17 stitches per 10 cm measures about 52.9 cm around, roughly 5–10% smaller than the intended head range. That difference is negative ease: the amount the fabric stretches during wear.
Measure Before Choosing the Size
Measure around the head where the cuff will sit, using a flexible tape without pulling it tight. Compare the measurement with your swatch’s comfortable stretch. If your fabric does not stretch enough, the stated stitch count is not suitable for that combination of yarn and hook.
This article covers one adult draft rather than a graded size range. Changing the crown count needs a new circumference calculation and a cuff adjusted to match.
Materials and Supplies
- Rust medium-weight yarn: allow approximately 130–170 metres.
- Forest-green yarn of a similar weight: approximately 60–90 metres for the cuff.
- Cream yarn: approximately 15–25 metres for the stripe.
- A 4.5 mm crochet hook as a starting point for the body.
- A hook for the cuff that produces comfortable, flexible ribbing; start with the same size and adjust after swatching.
- A blunt yarn needle, scissors, flexible measuring tape, and removable stitch markers.
These amounts are planning estimates, not tested yarn consumption. Choose a soft yarn with enough recovery for a hat you intend to wear. Keep the rust and cream yarns similar in thickness so the stripe does not noticeably change the body’s circumference.
Make a Gauge Swatch in Joined Rounds
Chain 42 and join to the first chain without twisting. Ch 1, then work one hdc into every chain: 42 hdc. Join to the first hdc. Continue for a total of 16 rounds, working 42 hdc each round and joining as for the hat below.
Measure a central area of the relaxed fabric, avoiding the join line. Aim for 17 hdc and 12 rounds in 10 cm. Care for the swatch according to the yarn label, let it dry, and measure again if laundering changes its dimensions. Check that the fabric stretches and returns comfortably.
Abbreviations and Helpful Notes
| Abbreviation | Meaning |
|---|---|
| MR | Magic ring |
| ch | Chain |
| sc | Single crochet |
| hdc | Half double crochet |
| sl st | Slip stitch |
| inc | Work 2 hdc in the same stitch, in the crown instructions |
| BLO | Back loop only |
| st / sts | Stitch / stitches |
| rnd | Round |
Joined-Round Rules
At the start of every hat round, chain one. This chain does not count as a stitch. Work the first hdc into the first actual stitch, then join the completed round with a slip stitch to that first hdc.
Do not crochet into the joining slip stitch or the starting chain on the next round. Keep a marker in the first hdc if needed. Work through both loops throughout the crown and body, and do not turn between rounds.
For hdc, yarn over, insert the hook, yarn over and draw up a loop, then yarn over and pull through all three loops. The crown increase is simply two hdc in one stitch.
Crochet the Rust Crown
Begin at the Top
With rust, make an MR. Chain one and work Round 1 into the ring. Join each round as described above.
- Rnd 1: 9 hdc in the ring. 9 sts.
- Rnd 2: Ch 1. Inc in every stitch. 18 sts.
- Rnd 3: Ch 1. (1 hdc, inc) × 9. 27 sts.
- Rnd 4: Ch 1. (2 hdc, inc) × 9. 36 sts.
- Rnd 5: Ch 1. (3 hdc, inc) × 9. 45 sts.
- Rnd 6: Ch 1. (4 hdc, inc) × 9. 54 sts.
- Rnd 7: Ch 1. (5 hdc, inc) × 9. 63 sts.
- Rnd 8: Ch 1. (6 hdc, inc) × 9. 72 sts.
- Rnd 9: Ch 1. (7 hdc, inc) × 9. 81 sts.
- Rnd 10: Ch 1. (8 hdc, inc) × 9. 90 sts.
Pull the magic ring closed and secure its starting tail. Smooth the crown gently without stretching it. At the intended stitch gauge, a perimeter of 90 stitches corresponds to a circle roughly 16.8 cm across, although the crocheted shape may differ somewhat from a perfect flat disk.
Check the Crown Before Continuing
Count all 90 stitches and look for pronounced ruffling or cupping. A little shaping is normal as a hat develops, but a strong distortion deserves a gauge and count check. Do not add or remove increases casually, because that changes the intended circumference.
This nine-increase crown sequence is part of an untested draft. If your yarn and tension do not produce a usable crown, revise and test the shaping before continuing with the full body.
Work the Body and Cream Stripe
Rust Body Section
Rnds 11–16, rust: Ch 1. Hdc in every stitch around, then join to the first hdc. 90 hdc in each round.
The rounds should now begin forming the sides of the hat. Keep the join line at the same general position and avoid pulling the joining slip stitch much tighter than the surrounding fabric.
Cream Stripe
At the end of Round 16, complete its joining slip stitch with cream and cut the rust yarn with a tail long enough to weave in.
Rnds 17–18, cream: Ch 1. Hdc in every stitch around, then join. 90 hdc per round. At the end of Round 18, complete the joining slip stitch with rust and cut cream with a finishing tail.
Keep the color changes relaxed. The stripe may show a small transition at the round join; position that line toward the back when wearing the finished hat.
Lower Rust Section
Rnds 19–22, rust: Ch 1. Hdc in every stitch around, then join. 90 hdc per round. Fasten off after checking the depth.
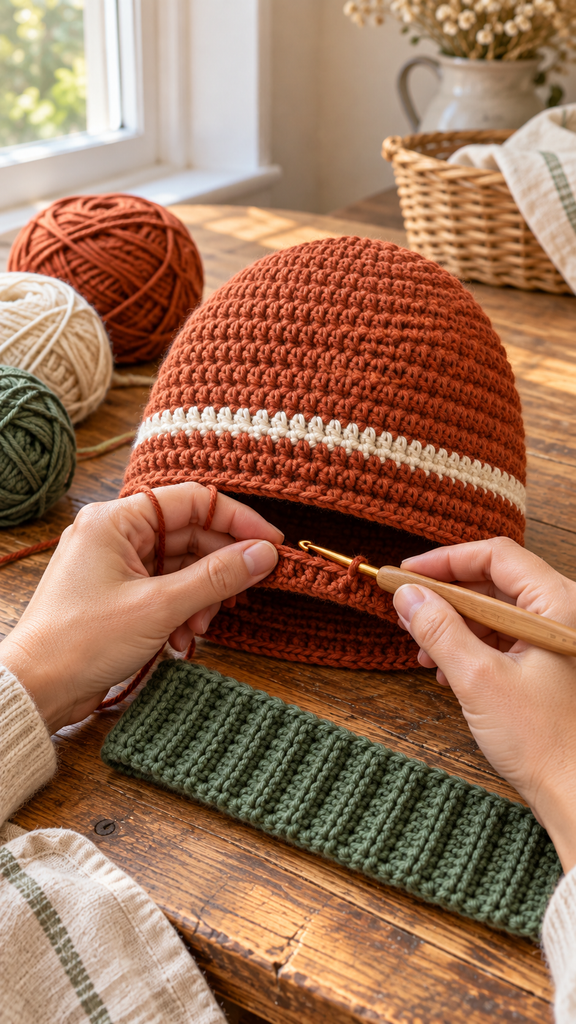
Measure from the crown center down the side to the opening, following the fabric without stretching. Aim for a body depth around 18 cm before the cuff is attached. Your actual row gauge and crown shape determine the result.
Adjust the Depth if Needed
The 22-round sequence is a starting point. Add or remove plain lower rust rounds if your measurement needs adjustment, keeping 90 stitches per round. Record the final number you work.
The cuff adds approximately half its unfolded width to the visible depth after it is folded. For example, an 18 cm body plus a 5.5 cm cuff folded in half gives a finished depth near 20.8 cm. Use this calculation as a guide and try the body on before attaching the band.
Crochet the Green Ribbed Cuff
Make a Short-Row Strip
With green, chain 12.
Row 1: Sc in the second chain from the hook and in every remaining chain. 11 sc.
Row 2: Ch 1, turn. Sc BLO in every stitch across. 11 sc.
Row 3 onward: Repeat Row 2, keeping 11 sc per row, until the relaxed strip measures approximately 51–52 cm long. Do not stretch it while measuring.
This target makes the cuff slightly shorter than the calculated body circumference. Test the strip around your own head before fastening off: it should stretch comfortably and recover without feeling tight. Use a longer strip if needed, rather than forcing a fit to the suggested length.
Check the Cuff Width and Stretch
The eleven-stitch width is intended to measure around 5–6 cm. A different sc gauge can change that width independently of the hdc body gauge. Check the swatch and adjust the starting chain if necessary, noting that the folded visible width will be about half the unfolded width.
Make any cuff changes before attachment. Its number of rows does not need to equal the body’s ninety stitches, because the band is sewn evenly around the opening rather than joined one row to one body stitch.
Join and Attach the Cuff
Seam the Short Ends
Fasten off with a sewing tail. Bring the foundation edge and final row together without twisting the strip. Match their eleven stitch positions and sew a relaxed seam, keeping the ribbing flexible.
Place the seam toward the back of the hat, near the body’s join line. Fold the cuff temporarily to check which side gives the neatest appearance before stitching it to the body.
Distribute the Attachment Evenly
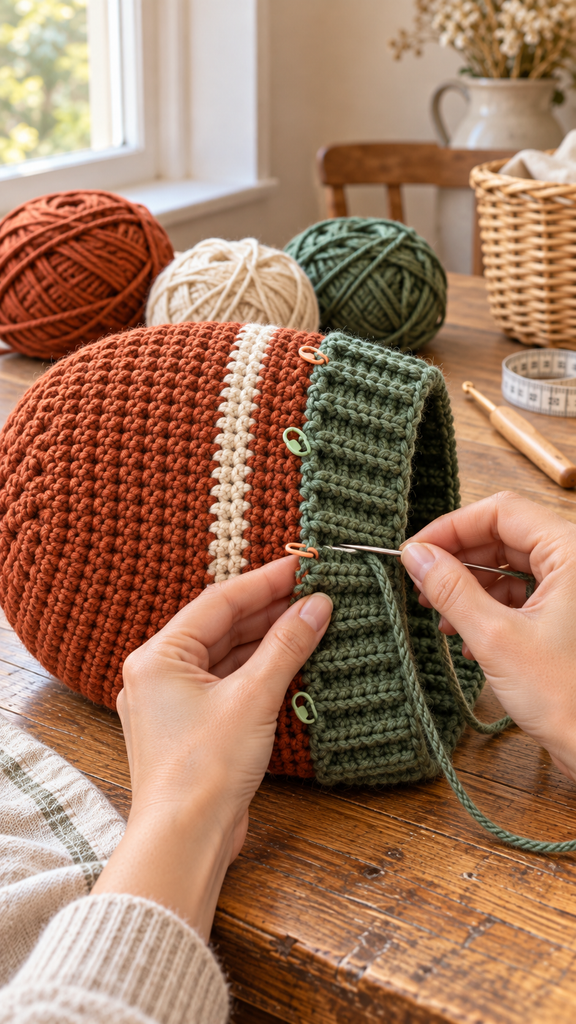
Mark the cuff into four equal lengths. Mark four corresponding points around the body opening, using sections of approximately 22, 23, 22, and 23 stitches to account for all ninety stitches.
With the hat and cuff facing outward, align one long edge of the cuff with the body’s opening. Match the quarter markers. Whipstitch through sturdy body stitches and the cuff’s row-end edge, distributing the cuff ends evenly between the markers.
Stretch the ribbing gently only as needed to match the body, without drawing all the ease into one small area. There is no fixed stitch-to-row ratio because your cuff row count depends on its actual length.
Fold and Finish
Fold the cuff upward by approximately half its width, covering the attachment seam. Check that the cream stripe remains visible above the green fold. Try on the hat and adjust the fold depth for comfort.
Weave in all ends on the inside without tightening the fabric. Check the crown ring, color changes, cuff seam, and attachment line. The body is joined in rounds; the only separate assembly seams are in and around the cuff.
Color Ideas and Simple Variations
Try navy with a cream stripe and a burgundy cuff, or oatmeal with a pale-blue stripe and a charcoal band. Keep the rust-equivalent and cream-equivalent yarns similar in thickness. A single-color body with a contrasting cuff also works with the same written counts.
For a slightly deeper hat, add lower body rounds after the stripe and recheck the depth. A different circumference requires a new calculation based on the actual hdc gauge; it cannot be achieved reliably just by adding length to the cuff.
Care and Common Problems
Follow the yarn label’s washing and drying instructions. Shape the hat gently and let it dry fully. Check how the yarn behaves in the washed swatch before deciding the final body and cuff measurements.
If the join line gains stitches, make sure you are not working into slip stitches or starting chains. If the opening gathers, check the cuff length and the distribution of attachment stitches. If the hat is too shallow, add body rounds before attaching the cuff rather than stretching the crown downward.
Frequently Asked Questions
Can a beginner make this beanie?
It suits someone who knows half double crochet, single crochet, and basic increases. The cuff attachment needs careful measuring and sewing. Practice identifying the back loop before starting the band.
Is this the same ribbed hat as the PDF?
No. The reference is worked side to side with a back seam and gathered crown. This version starts at the crown, uses plain hdc rounds for the body, and adds a separately made sc ribbed cuff.
Why does the cuff have a different gauge?
It uses single crochet BLO in rows, while the body uses half double crochet in rounds. Measure the two fabrics separately instead of using the body row gauge to predict the cuff length.
Can I make it smaller or larger?
Yes, as a separately calculated variation. Multiply the desired relaxed circumference in centimetres by your actual hdc stitches per centimetre to estimate a new body count, then plan matching crown increases and cuff measurements. This article does not provide tested size grading.
Can I omit the folded cuff?
You can develop a plain-edged variation, but the body would need more depth and a suitable finishing edge. The stated finished-depth calculation includes the folded cuff.
Has the pattern been tested for fit?
No. The stitch arithmetic and size calculations are checked, but the hat still needs physical crocheting, laundering, and fit testing before it can be described as a tested wearable pattern.