Cottony Soft Knit Boyfriend Cardigan
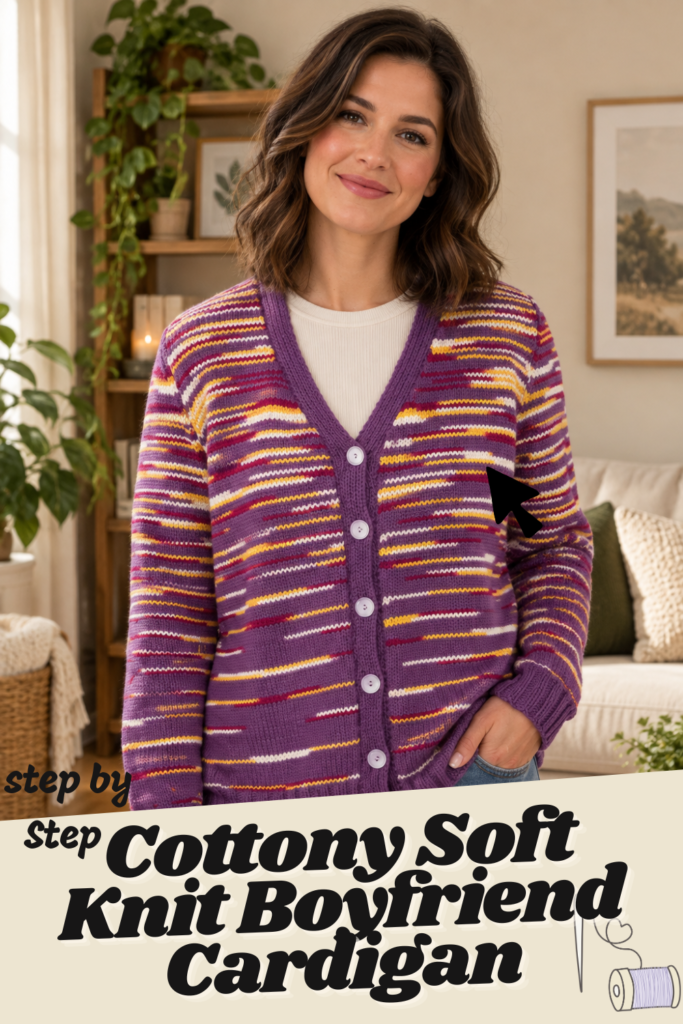
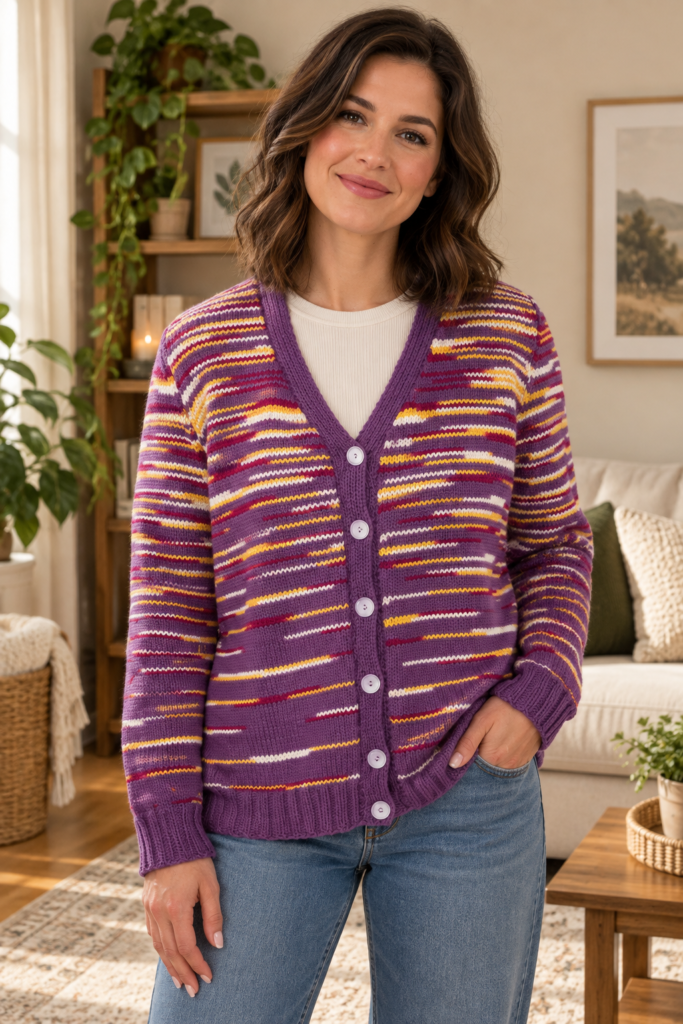
Some sweaters are precious — the kind you save for special occasions and handle carefully. Others earn a permanent spot on the back of a chair, ready to be thrown on over a t-shirt on a cool morning. The Cottony Soft Knit Boyfriend Cardigan from Caron is firmly the second kind: an easy, relaxed-fit cardigan with a soft horizontal stripe pattern, knit in breathable all-cotton yarn that makes it just as wearable in spring and early fall as it is in the depths of winter layering season.
Rated Intermediate, this cardigan is a satisfying project for a knitter who’s comfortable with basic shaping — increases, decreases, and simple armhole and neckline construction — and ready to tackle a full garment with six graded sizes. The stripe pattern itself isn’t difficult (it’s just a long, carefully mapped sequence of color changes), but the sheer scope of the project, from ribbed cuffs to a knit-in button band, makes this a true “sit down and commit” sweater rather than a quick weekend knit.
Below is the complete pattern, reorganized with clear section headings for every piece — Back, Left Front, Right Front, Sleeves, and the Button and Buttonhole Band — along with the full sizing information, gauge, abbreviations, and a set of tips and frequently asked questions to help you navigate a pattern with this many moving parts.
How Sizing Works in This Pattern
Before diving into the instructions, it helps to understand how Yarnspirations formats a six-size pattern like this one. The instructions are written for size XS/S. Wherever a larger size requires a different number, you’ll see it written as:
XS/S (M-L-XL-2/3XL-4/5XL)
So if you’re knitting the L size, for example, you’d always use the third number in each bracketed sequence. When only a single number appears in black without any parentheses, that number applies to every size. It’s worth reading through this note carefully and perhaps even circling or highlighting your size’s number throughout the pattern before you start, since a single misread number in a sequence like “7 (8-10-11-10-13)” can throw off your armhole shaping considerably.
Finished Measurements and Sizing
To Fit Chest Measurement
| Size | Measurement |
|---|---|
| XS/S | 28–34″ [71–86.5 cm] |
| M | 36–38″ [91.5–96.5 cm] |
| L | 40–42″ [101.5–106.5 cm] |
| XL | 44–46″ [112–117 cm] |
| 2/3XL | 48–54″ [122–137 cm] |
| 4/5XL | 56–62″ [142–157.5 cm] |
Finished Chest
| Size | Measurement |
|---|---|
| XS/S | 39″ [99 cm] |
| M | 43″ [109 cm] |
| L | 47″ [119.5 cm] |
| XL | 51″ [129.5 cm] |
| 2/3XL | 57″ [144.5 cm] |
| 4/5XL | 65″ [165 cm] |
This cardigan is designed with a relaxed, “boyfriend” fit, so the finished chest measurements run several inches larger than the actual body measurement — expect roughly 5 to 11 inches of positive ease, depending on size, for that comfortably oversized, borrowed-from-someone-else look.
What You’ll Need
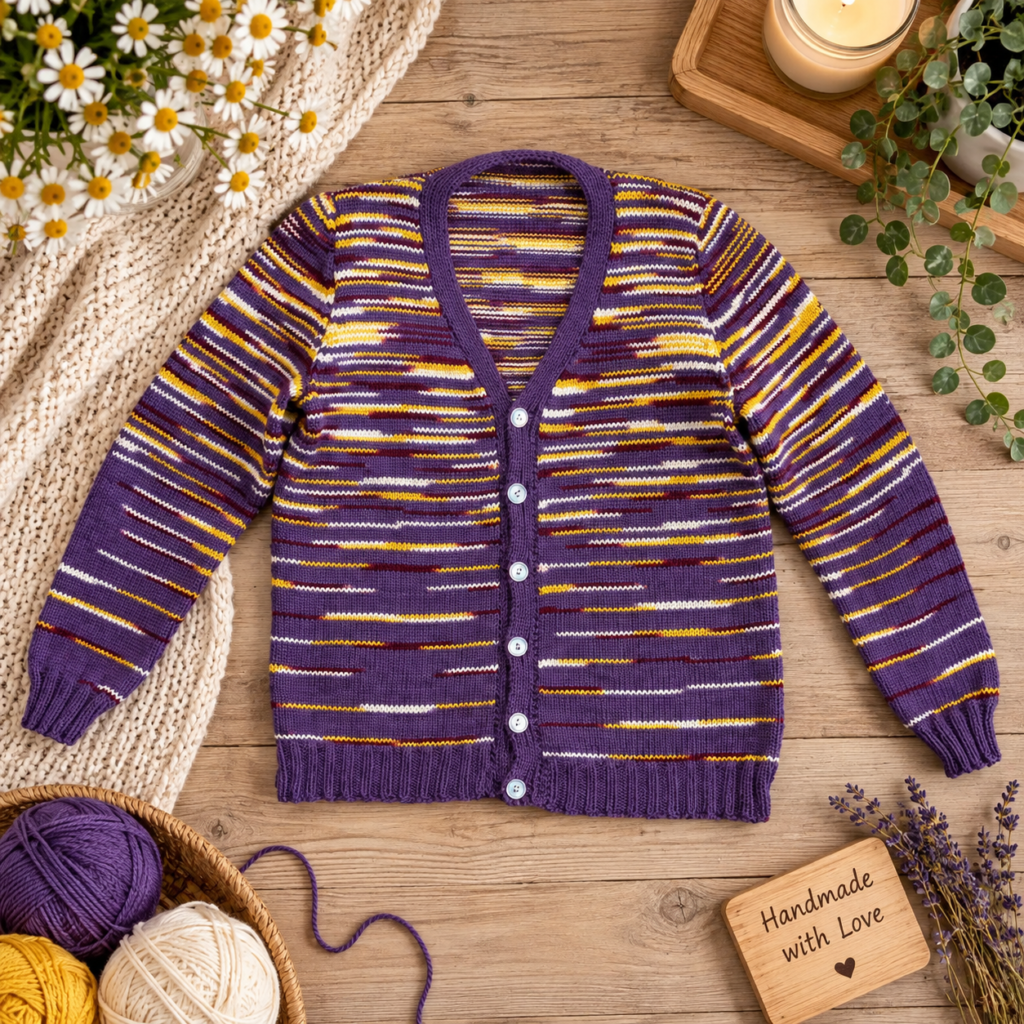
Yarn: Caron® All Day Cotton™ (3.5 oz/100 g; 173 yds/158 m)
Main Color (MC) — Plummy (00052):
| Size | XS/S | M | L | XL | 2/3XL | 4/5XL |
|---|---|---|---|---|---|---|
| Balls | 5 | 6 | 6 | 7 | 7 | 8 |
| Yards | 828 | 916 | 1008 | 1087 | 1211 | 1365 |
| Meters | 757 | 837.5 | 922 | 994 | 1106 | 1248 |
Contrast A — Autumn Forest (00045):
| Size | XS/S | M | L | XL | 2/3XL | 4/5XL |
|---|---|---|---|---|---|---|
| Balls | 4 | 4 | 5 | 5 | 5 | 6 |
| Yards | 594 | 657 | 723 | 780 | 865 | 979 |
| Meters | 543 | 601 | 661 | 713 | 790 | 895 |
Needles and notions:
- U.S. 6 (4mm) and U.S. 7 (4.5mm) Susan Bates® Silvalume® knitting needles, or the size needed to obtain gauge
- 6 Susan Bates® stitch markers
- Susan Bates® yarn needle
- 6 buttons
Gauge
- 20 sts and 28 rows = 4″ [10 cm] with the larger needles, in stocking stitch (stockinette)
Because this cardigan is worked across 148 rows of a carefully mapped stripe sequence, getting gauge right matters more than usual — a gauge that’s even slightly off will shift where every stripe falls relative to your armhole and neckline shaping.
Abbreviations Reference
| Abbreviation | Meaning |
|---|---|
| Alt | Alternate(ing) |
| Approx | Approximate(ly) |
| Beg | Begin(ning) |
| Cont | Continue(ity) |
| Dec | Decrease(ing) |
| Inc(s) | Increase 1 stitch by knitting into the front and back of the next stitch |
| K | Knit |
| K2tog | Knit next 2 stitches together |
| P | Purl |
| Pat | Pattern |
| P2tog | Purl next 2 stitches together |
| P2togtbl | Purl next 2 stitches together through back loops |
| Rem | Remaining |
| Rep | Repeat |
| RS | Right side |
| Ssk | Slip next 2 stitches knitwise one at a time, pass them back onto the left-hand needle, then knit through the back loops together |
| St(s) | Stitch(es) |
| WS | Wrong side |
The Stripe Pattern
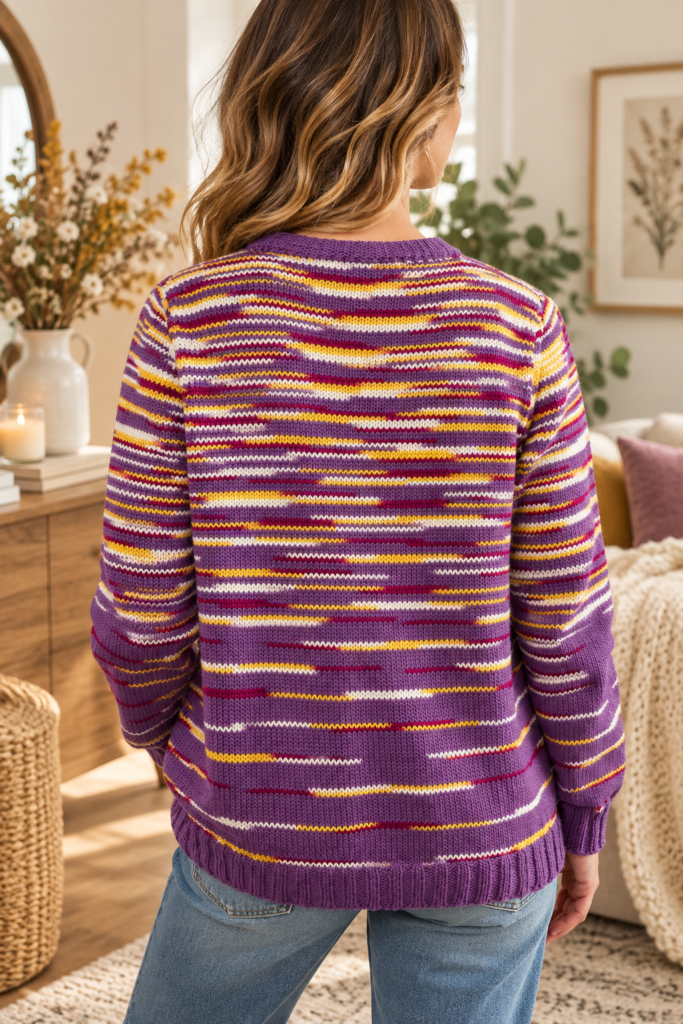
Before knitting any of the pieces, it’s worth working through the Stripe Pattern sequence once so you understand its rhythm, since it’s referenced constantly throughout every piece of the cardigan. It’s worked entirely in stocking stitch, alternating between Contrast A and Main Color in a sequence that gradually lengthens as it goes:
- 1st and 2nd rows: With A.
- 3rd to 10th rows: With MC.
- 11th to 20th rows: Repeat the 1st to 10th rows once more.
- 21st and 22nd rows: With A.
- 23rd to 28th rows: With MC.
- 29th to 44th rows: Repeat the 21st to 28th rows twice more.
- 45th and 46th rows: With A.
- 47th to 50th rows: With MC.
- 51st to 62nd rows: Repeat the 45th to 50th rows twice more.
- 63rd and 64th rows: With A.
- 65th and 66th rows: With MC.
- 67th to 86th rows: Repeat the 63rd to 66th rows 5 times more.
- 87th to 90th rows: With A.
- 91st and 92nd rows: With MC.
- 93rd to 104th rows: Repeat the 87th to 92nd rows twice more.
- 105th to 110th rows: With A.
- 111th and 112th rows: With MC.
- 113th to 128th rows: Repeat the 105th to 112th rows twice more.
- 129th to 136th rows: With A.
- 137th and 138th rows: With MC.
- 139th to 148th rows: Repeat the 129th to 138th rows once more.
These 148 rows together form the complete Stripe Pattern that shapes the visual rhythm of the entire sweater — notice how the stripes of Contrast A start short and frequent, then gradually stretch into longer bands of Main Color as the sequence progresses, which is what gives the finished garment its organic, hand-painted look rather than a rigid, repetitive stripe.
Knitting the Back
With the smaller needles and MC, cast on 94 (106-114-126-138-158) sts.
- 1st row (RS): *K2, P2; repeat from * to the last 2 sts, K2.
- 2nd row: *P2, K2; repeat from * to the last 2 sts, P2.
Repeat these last 2 rows in (K2, P2) ribbing for 2½” [6 cm], ending on a 2nd row, and increase 3 (1-3-1-5-5) st(s) evenly across the last row — 97 (107-117-127-143-163) sts.
Change to the larger needles.
Sizes L, XL, 2/3XL, and 4/5XL only: Work the 1st to 10th rows of the Stripe Pattern (1-1-2-2) time(s).
All sizes: Beginning with the 1st row of the Stripe Pattern, continue in the Stripe Pattern until the work from the beginning measures 18½ (18½-19-19½-19½-19½)” [47 (47-48-49.5-49.5-49.5) cm], ending on a purl row.
Shaping the Armholes
Keeping continuity of the Stripe Pattern, cast off 7 (8-10-11-10-13) sts at the beginning of the next 2 (2-2-2-4-4) rows — 83 (91-97-105-103-111) sts.
- 1st row (RS): K2, ssk, knit to the last 4 sts, K2tog, K2.
- 2nd row: Purl.
Repeat these last 2 rows 7 (9-10-12-10-12) times more — 67 (71-75-79-81-85) sts.
Continue even until the armhole measures 8 (8½-9-9½-10-10½)” [20.5 (21.5-23-24-25.5-26.5) cm], ending on a purl row.
Note: When the 148 rows of the Stripe Pattern are complete, break MC and proceed with A only.
Shaping the Shoulders
Cast off 8 (9-10-10-11-11) sts at the beginning of the next 2 rows, then 9 (9-10-11-11-12) sts at the beginning of the following 2 rows. Cast off the remaining 33 (35-35-37-37-39) sts.
Knitting the Left Front
With the smaller needles and MC, cast on 47 (51-55-59-67-79) sts.
- 1st row (RS): *K2, P2; repeat from * to the last 3 sts, K3.
- 2nd row: K1, *P2, K2; repeat from * to the last 2 sts, P2.
Repeat these last 2 rows for 2½” [6 cm], ending on a 2nd row, and increase 1 (2-3-4-4-2) st(s) evenly across the last row — 48 (53-58-63-71-81) sts.
**Change to the larger needles.
Sizes L, XL, 2/3XL, and 4/5XL only: Work the 1st to 10th rows of the Stripe Pattern (1-1-2-2) time(s).
All sizes: Beginning with the 1st row of the Stripe Pattern, continue in the Stripe Pattern until the work from the beginning measures the same length as the Back to the beginning of armhole shaping, ** ending on the same purl row of the Stripe Pattern as the Back.
Shaping the Armhole
Keeping continuity of the Stripe Pattern, cast off 7 (8-10-11-10-13) sts at the beginning of the next row — 41 (45-48-52-61-68) sts. Purl 1 row.
Sizes 2/3XL and 4/5XL only: Cast off (10-13) sts at the beginning of the next row — (51-55) sts. Purl 1 row.
Shaping the Neck (All Sizes)
- 1st row (RS): K2, ssk, knit to the last 2 sts, K2tog (this is the neck edge).
- 2nd row: Purl.
Repeat these last 2 rows 7 (9-10-8-6-8) times more — 25 (25-26-34-37-37) sts.
Sizes XS/S and M only:
- 1st row (RS): Knit to the last 2 sts, K2tog.
- 2nd row: Purl.
Repeat these last 2 rows 2 (0) times more — 22 (24) sts.
Sizes XL, 2/3XL, and 4/5XL only:
- 1st row (RS): K2, ssk, knit to the last 2 sts, K2tog.
- 2nd row: Purl.
- 3rd row: K2, ssk, knit to the end of the row.
- 4th row: Purl.
Repeat these last 4 rows once more — (28-31-31) sts.
All sizes: Decrease 1 st at the neck edge only on every following 4th row from the previous decrease, until there are 17 (18-20-21-22-23) sts.
Continue even until the armhole measures the same length as the Back to the beginning of shoulder shaping, ending on a purl row.
Note: When the 148 rows of the Stripe Pattern are complete, break MC and proceed with A only.
Shaping the Shoulder
Cast off 8 (9-10-10-11-11) sts at the beginning of the next row. Purl 1 row. Cast off the remaining 9 (9-10-11-11-12) sts.
Knitting the Right Front
With the smaller needles and MC, cast on 47 (51-55-59-67-79) sts.
- 1st row (RS): K3, *P2, K2; repeat from * to the end of the row.
- 2nd row: *P2, K2; repeat from * to the last 2 sts, P2, K1.
Repeat these last 2 rows for 2½” [6 cm], ending on a 2nd row, and increase 1 (2-3-4-4-2) st(s) evenly across the last row — 48 (53-58-63-71-81) sts.
Work from ** to ** exactly as given for the Left Front above, ending on the same knit row of the Stripe Pattern as the Back.
Shaping the Armhole
- Next row (WS): Cast off 7 (8-10-11-10-13) sts. Purl to the end of the row — 41 (45-48-52-61-68) sts.
Sizes 2/3XL and 4/5XL only: Knit 1 row. Cast off (10-13) sts at the beginning of the next row — (51-55) sts.
Shaping the Neck (All Sizes)
- 1st row (RS): Ssk (this is the neck edge), knit to the last 4 sts, K2tog, K2.
- 2nd row: Purl.
Repeat these last 2 rows 7 (9-10-8-6-8) times more — 25 (25-26-34-37-37) sts.
Sizes XS/S and M only:
- 1st row (RS): Ssk, knit to the end of the row.
- 2nd row: Purl.
Repeat these last 2 rows 2 (0) times more — 22 (24) sts.
Sizes XL, 2/3XL, and 4/5XL only:
- 1st row (RS): Ssk, knit to the last 4 sts, K2tog, K2.
- 2nd row: Purl.
- 3rd row: Knit to the last 4 sts, K2tog, K2.
- 4th row: Purl.
Repeat these last 4 rows once more — (28-31-31) sts.
All sizes: Decrease 1 st at the neck edge only on every following 4th row from the previous decrease, until there are 17 (18-20-21-22-23) sts.
Continue even until the armhole measures the same length as the Back to the beginning of shoulder shaping, ending on a knit row.
Note: When the 148 rows of the Stripe Pattern are complete, break MC and proceed with A only.
Shaping the Shoulder
Cast off 8 (9-10-10-11-11) sts at the beginning of the next row. Knit 1 row. Cast off the remaining 9 (9-10-11-11-12) sts.
Knitting the Sleeves
With the smaller needles and MC, cast on 46 (46-50-50-50-54) sts.
Work 2½” [6 cm] in (K2, P2) ribbing exactly as given for the Back, ending on a 2nd row and increasing 5 sts evenly across the last row — 51 (51-55-55-55-59) sts.
Change to the larger needles and proceed in the Stripe Pattern, increasing 1 st at each end of the next row and every following 10th (8th-8th-6th-6th-4th) row until there are 71 (69-75-67-81-69) sts.
Sizes M, L, XL, 2/3XL, and 4/5XL only: Increase 1 st at each end of every following (10th-10th-8th-8th-6th) row until there are (75-79-81-85-91) sts.
All sizes: Continue even until the work from the beginning measures 19 (19-19-18-18-17½)” [48 (48-48-45.5-45.5-44.5) cm], ending on a purl row.
Note: If necessary, when the 148 rows of the Stripe Pattern are complete, break MC and proceed with A only.
Shaping the Sleeve Top
Cast off 7 (8-10-11-10-13) sts at the beginning of the next 2 rows — 57 (59-59-59-65-65) sts.
Sizes L, XL, 2/3XL, and 4/5XL only:
- 1st row (RS): K2, ssk, knit to the last 4 sts, K2tog, K2.
- 2nd row: Purl.
- 3rd row: Knit.
- 4th row: Purl.
Repeat these last 4 rows (1-2-1-2) time(s) more — (55-53-61-59) sts.
All sizes:
- 1st row (RS): K2, ssk, knit to the last 4 sts, K2tog, K2.
- 2nd row: Purl.
Repeat these last 2 rows 14 (17-14-13-14-11) times more — 27 (23-25-25-31-35) sts.
Proceed as follows:
- 1st row (RS): K2, ssk, knit to the last 4 sts, K2tog, K2.
- 2nd row: P2, P2tog, purl to the last 4 sts, P2togtbl, P2.
Repeat these last 2 rows 3 (2-2-2-3-4) times more. Cast off the remaining 11 (11-13-13-15-15) sts.
Repeat the entire Sleeve instructions to make a second, matching sleeve.
Finishing
Pin the garment pieces to their finished measurements and cover with a damp cloth, leaving the cloth in place until fully dry — this blocking step helps the stitches relax and the pieces hold their intended shape.
Sew the shoulder seams. Sew the side and sleeve seams. Sew in the sleeves.
Knitting the Button and Buttonhole Band
With the smaller needles and MC, cast on 9 sts.
- 1st row (RS): K2, (P1, K1) 3 times, K1.
- 2nd row: K1, (P1, K1) 4 times.
Repeat these last 2 rows until the band, when slightly stretched, measures the length needed to fit up the Right Front, sewing it in place as you knit. Place markers on the band for 6 buttons: the bottom button ½” [1 cm] above the lower edge, the top button ½” [1 cm] below the first front decrease, and the remaining 4 buttons spaced evenly between them. Continue in ribbing to fit up the neck edge, across the back neck edge, and down the opposite neck edge to the first button marker.
Making the Buttonholes
- 1st row (RS): Rib 4, cast off 2 sts, rib to the end of the row.
- 2nd row: Rib, casting on 2 sts over the cast-off sts.
Continue in ribbing to the end of the Left Front. Cast off in ribbing.
Sew on the buttons to correspond with the buttonholes.
Reading the Schematic
The pattern’s final page includes a full garment schematic showing the Back, Front, and Sleeve pieces laid flat, with measurements given in the same size order (XS/S–M–L–XL–2/3XL–4/5XL) at every key point: the shoulder width, the armhole depth, the overall body length, the hem width, and the sleeve width and length. If you’re ever unsure whether a piece is shaping up correctly mid-project, laying your knitting against the appropriate schematic measurements for your size is a quick way to check.
Tips for Knitting the Boyfriend Cardigan
- Track your row count obsessively. With 148 rows in the Stripe Pattern alone, plus all the shaping rows layered on top, a row counter (digital, mechanical, or even a simple tally on paper) is essential. Losing track of exactly which stripe row you’re on will throw off the color sequence for the rest of the piece.
- Circle your size throughout the pattern before starting. Because every shaping instruction is written with six numbers separated by hyphens, going through the pattern in advance and highlighting or circling your specific size’s number in every instance will save you from misreading a neighboring size’s number mid-row.
- Knit the button band in as you go, not after. The pattern specifically instructs you to sew the button band in place as you knit it, rather than knitting the whole band separately and seaming it on afterward — this helps you get the length exactly right without guessing.
- Break your MC at the right moment. Several sections include a note to break Main Color and proceed with Contrast A only once the 148 rows of Stripe Pattern are complete. Keep an eye on your row count as you approach that point so you don’t accidentally continue the stripe sequence past where the shoulder or sleeve shaping calls for a solid color.
- Block before seaming. The finishing instructions call for pinning the pieces to measurement and covering with a damp cloth before it’s fully dry. Doing this before you sew the shoulder, side, and sleeve seams will make it much easier to match up edges evenly, especially across a stripe pattern where mismatched rows are highly visible.
Frequently Asked Questions
What skill level is required for this pattern? This pattern is rated Intermediate. The stitches themselves — knit, purl, basic increases and decreases like k2tog and ssk — aren’t advanced, but the scope of the project, with six graded sizes, a 148-row stripe sequence, and multiple pieces to shape and seam, makes it more involved than a beginner project.
How much yarn do I need for my size? Yarn requirements vary by size and by color. For the Main Color (Plummy), you’ll need between 5 balls (XS/S) and 8 balls (4/5XL); for Contrast A (Autumn Forest), between 4 balls (XS/S and M) and 6 balls (4/5XL). Check the materials table for your specific size before purchasing.
Why does the pattern use two different needle sizes? The smaller needles (U.S. 6 / 4mm) are used for the ribbed cuffs, hem, and button band, giving those sections a snugger, more elastic fabric. The larger needles (U.S. 7 / 4.5mm) are used for the main body of the garment in stocking stitch, which is also the needle size the gauge is measured with.
What does it mean when the pattern says “break MC and proceed with A only”? This note appears at several points in the Back, Fronts, and Sleeves. It means that once you’ve completed all 148 rows of the Stripe Pattern, you cut the Main Color yarn and continue knitting with Contrast A alone for any remaining rows of shoulder or armhole shaping, since the stripe sequence itself is now finished.
How are the buttonholes made? The buttonhole band is knit as one long ribbed strip sewn onto the Right Front as you go. Once it reaches the neck edge, buttonholes are formed by casting off 2 stitches in one row and then casting on 2 new stitches over that same gap in the following row, creating six evenly spaced openings that correspond to marker placements made earlier on the band.
Do I need exactly 6 buttons? The pattern is written for 6 buttons, evenly spaced with the bottom button ½” above the lower edge and the top button ½” below the first front decrease. You could adjust the spacing for a different number of buttons, but you’d need to recalculate your own marker placement and buttonhole rows accordingly.
What is the finished fit like? This cardigan is designed with generous positive ease — the finished chest measurements run roughly 5 to 11 inches larger than the “to fit chest” body measurements, giving it the relaxed, oversized “boyfriend” silhouette the name promises.
Can I substitute a different yarn for Caron All Day Cotton? You can, as long as you match the gauge of 20 sts and 28 rows = 4″ [10 cm] in stocking stitch with the larger needles. Since this pattern relies on precise stripe placement relative to armhole and neckline shaping, matching gauge closely is especially important here.
A Sweater Built to Become a Favorite
Between its soft cotton fiber, relaxed fit, and gently evolving stripe pattern, the Cottony Soft Knit Boyfriend Cardigan is designed to be lived in — not admired from a distance. It’s a genuine commitment of a project, with six sizes, 148 rows of coordinated striping, and a fully knit-in button band, but the payoff is a cardigan with the kind of easy, well-worn character that usually only comes from a sweater you’ve had for years.
Whether you knit it for yourself or as a gift for someone who’ll wear it on repeat, this is the sort of piece that becomes a permanent fixture in a wardrobe — the one that’s always within reach on a cool morning.