Camo Corset Crochet Top Pattern
Some crochet projects are made to blend quietly into your wardrobe.
This is definitely not one of them.
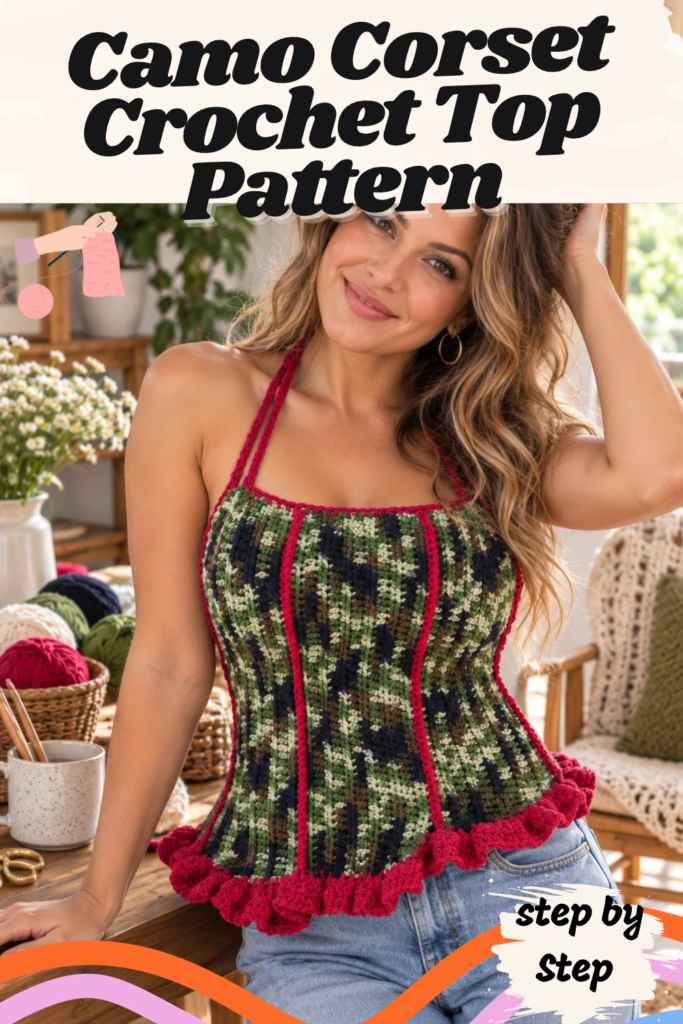
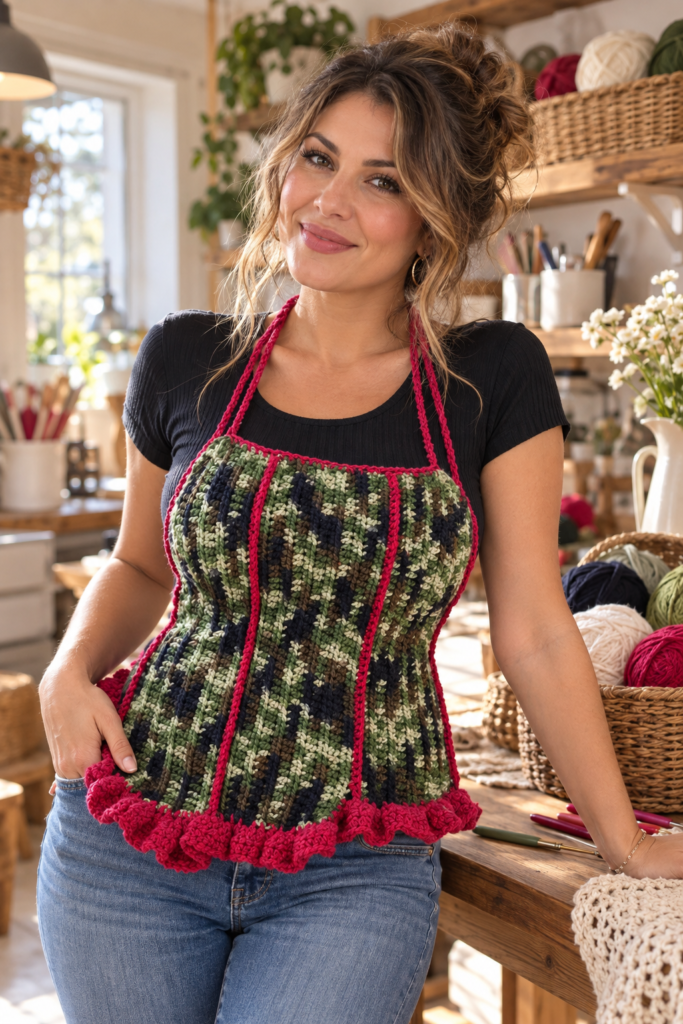
The Camo Corset Crochet Top combines camouflage yarn, deep burgundy accents, corset-inspired lacing, a fitted panel construction, long neck ties, and a dramatic ruffled hem to create a handmade top with plenty of personality.
What caught my attention immediately is the contrast between the yarn and the silhouette. Camouflage yarn is usually associated with rugged, outdoorsy pieces, but here it is transformed into a fitted camisole-style top. Burgundy crochet seams outline the individual panels, while the matching lace-up sides and ruffled lower edge give the design a softer, more decorative finish.
The original pattern describes it perfectly: although the camisole can be made in camouflage yarn, it is designed to stand out in any wardrobe. RHC0140-023042M
This pattern was designed by Double Stitch and is rated intermediate. It is written for five sizes—Small through XX-Large—with size changes shown in parentheses throughout the instructions.
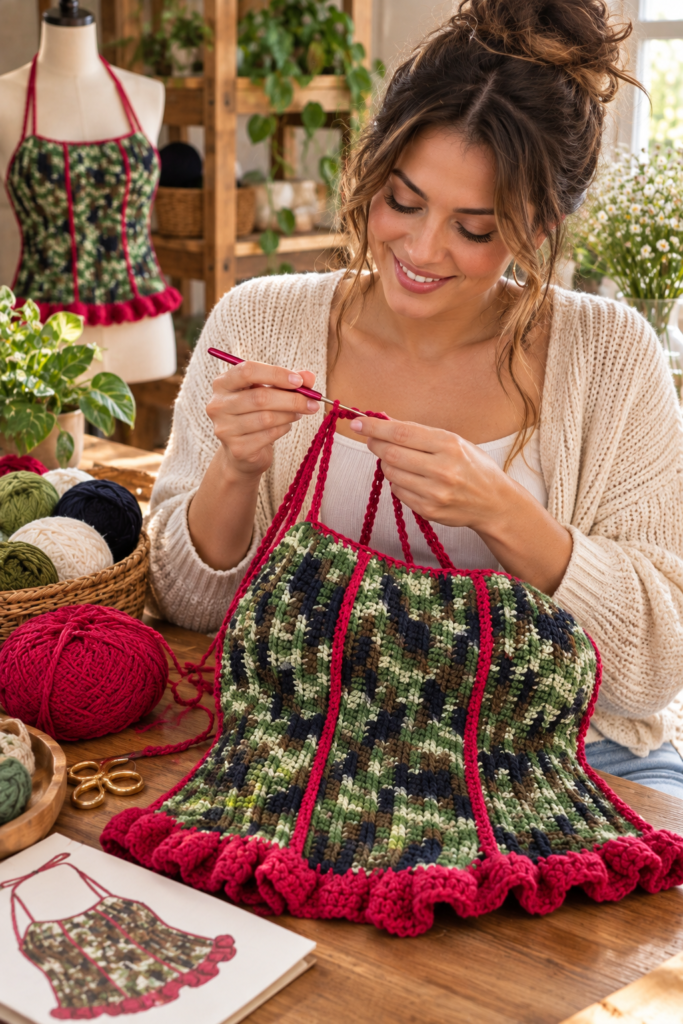
The construction is also much more interesting than simply crocheting a rectangle and sewing it together. You will make three graduated center panels, join them with contrasting crochet seams, add separate side panels with eyelets, create neck ties, crochet a dramatic ruffle along the bottom, and finish everything with a long corset tie.
If you enjoy crochet clothing with unusual construction and bold details, this is a project worth exploring.
About the Camo Corset Crochet Top
The corset is built primarily from five vertical sections:
- Right side panel
- Panel 1
- Panel 2
- Panel 3
- Left side panel
The three central camouflage panels are different lengths.
That difference is intentional.
When they are lined up at the top, their opposite edges create a stepped lower silhouette. The burgundy ruffle is later worked across those lower edges, turning the uneven panel lengths into one of the most distinctive design features.
The diagram on page 2 makes this construction much easier to visualize. It shows the three center panels arranged between the right and left sides, along with approximate vertical measurements of 12½, 14, and 15½ inches.
The finished garment has a shortest length of approximately 13½ inches and a longest length of approximately 16½ inches. RHC0140-023042M
Pattern at a Glance
Project: Crochet corset-style camisole
Designer: Double Stitch
Skill Level: Intermediate
Sizes: Small, Medium, Large, X-Large and XX-Large
Main Yarn: Camouflage
Contrast Yarn: Burgundy
Hook: 5 mm / U.S. H-8
Construction: Multiple vertical panels joined together
Main Techniques: Half double crochet, back-loop crochet, single crochet joining, eyelets, double crochet ruffle, chain ties and assembly
Finished Sizes
The instructions are written for Small, with changes for Medium, Large, X-Large, and XX-Large shown in parentheses.
The finished bust measurements listed in the pattern are:
Small: 20″
Medium: 20½”
Large: 27½”
X-Large: 30″
XX-Large: 35″
The diagram on page 2 also labels the overall horizontal measurement as 20 (22½, 27½, 30, 35) inches, so there is an apparent discrepancy between the Medium measurement in the written finished-bust line and the diagram. I would preserve the source as written and check your intended size carefully before beginning rather than silently assuming which Medium value was intended. RHC0140-023042M RHC0140-023042M
Materials You’ll Need
The original design uses RED HEART Super Saver yarn.
You will need:
Color A – 971 Camouflage: 1 skein
Color B – 376 Burgundy: 1 skein
You will also need:
- 5 mm / U.S. H-8 crochet hook
- Yarn needle
The pattern uses camouflage for the three central panels and burgundy for the joining, sides, ties, ruffle, and corset detailing. RHC0140-023042M
Crochet Gauge
The required gauge is:
14 hdc = 4 inches
and
11 rows = 4 inches
The source emphasizes checking your gauge and changing hook size if necessary. RHC0140-023042M
For a fitted garment, this step matters.
Even a relatively small difference in stitch width can significantly alter the finished circumference after several panels are joined together.
Crochet Abbreviations
A – Color A
B – Color B
Ch – Chain
Dc – Double crochet
Hdc – Half double crochet
Sc – Single crochet
St/Sts – Stitch/Stitches
Brackets indicate that the enclosed directions should be repeated the specified number of times.
An Important Note About the Construction
The three center panels are worked using:
back loops only throughout.
Working into the back loop rather than both loops creates the vertical ribbed texture visible across the camouflage portion of the top.
Each center panel starts with a different number of chains, which produces three different finished lengths.
The number of rows, meanwhile, changes according to garment size.
How to Crochet Center Panel 1
Using Color A – Camouflage:
Chain:
55
Panel 1 – Row 1
Working in back loops only:
Work 1 hdc in the second chain from the hook.
Continue with 1 hdc in every chain across.
You should have:
54 stitches
Remaining Rows
Chain 2.
The chain 2 counts as a half double crochet here and throughout the panel instructions.
Turn.
Skip the first hdc.
Work 1 hdc in every remaining hdc across.
Continue until you have completed:
11 (13, 15, 17, 19) rows
depending on your size.
Fasten off.
How to Crochet Center Panel 2
Using Color A:
Chain:
50
Row 1
Working in back loops only:
Hdc in the second chain from your hook.
Hdc in every chain across.
You should have:
49 stitches
Remaining Rows
Chain 2.
Turn.
Skip the first hdc.
Hdc in every hdc across.
Continue through:
11 (13, 15, 17, 19) rows
Fasten off.
How to Crochet Center Panel 3
Using Color A:
Chain:
45
Row 1
Working in back loops only:
Hdc in the second chain from the hook and in every chain across.
You should have:
44 stitches
Remaining Rows
Chain 2.
Turn.
Continue working hdc across according to the source instructions.
Complete:
11 (13, 15, 17, 19) rows
Fasten off.
The three starting chains—55, 50, and 45—create the descending lengths that form the stepped bottom of the corset center. RHC0140-023042M
Arrange the Three Corset Panels
Before joining anything, lay the three panels on a flat surface with their right sides facing you.
Arrange them:
Panel 1 on the left
Panel 2 in the center
Panel 3 on the right
Place their long edges together.
One short edge of all three panels should align evenly.
This becomes the:
Top edge.
The opposite short edges should be staggered because the panels are different lengths.
Those stepped edges become the bottom.
The source specifically instructs you to preserve this stepped arrangement rather than trying to align both ends. RHC0140-023042M
Join Panels 1 and 2
Now switch to Color B – Burgundy.
Place Panels 1 and 2 with:
wrong sides together.
At the top edge, join Color B through both layers with a slip stitch.
Chain 1.
Working through both layers:
Sc in each stitch along the adjoining long edges
until you reach the side edge of Panel 2.
Leave the remaining stitches of Panel 1 unworked.
Fasten off.
This exposed burgundy joining line becomes part of the visual design rather than being hidden inside the garment.
Join Panels 2 and 3
Repeat the same joining process to connect:
Panel 3 to the opposite long edge of Panel 2.
Again, leave the remaining stitches unworked where instructed.
At this point, your three camouflage center panels should be connected by contrasting burgundy crochet seams.
Crochet the Right Side Panel
With the right side facing, use Color B.
Join with a slip stitch in the first stitch along the opposite long edge of Panel 1.
Chain 2.
Work hdc into the next:
44 stitches
across.
Leave the remaining stitches unworked.
You should have:
45 hdc
Right Side Rows 2–10
For Small, work through Row 10.
For the larger sizes, continue through:
12, 14, 16, or 18
as indicated.
For each row:
Chain 2.
Turn.
Work hdc into every hdc across.
Create the Right Corset Eyelets
The final right-side row is:
Row 11 (13, 15, 17, 19)
Chain:
4
This counts as one hdc plus chain 2.
Turn.
Skip the next:
2 hdc
Work:
1 hdc in each of the next 3 hdc
Then repeat:
Chain 2
Skip 2 hdc
Hdc in next 3 hdc
across.
Fasten off.
These chain-2 spaces form the eyelets through which the long corset tie will eventually be woven. RHC0140-023042M
Crochet the Left Side Panel
With the right side facing, join Color B with a slip stitch in the first stitch along the opposite long edge of Panel 3.
Chain 2.
Hdc into the next:
44 stitches
You should have:
45 hdc
Left Side Rows 2–10
Continue as for the right side:
Chain 2.
Turn.
Hdc in each hdc across.
Work the number of rows specified for your size.
Create the Left Corset Eyelets
On:
Row 11 (13, 15, 17, 19)
Chain 2.
Turn.
Hdc in the next:
2 hdc
Then repeat:
Chain 2
Skip 2 hdc
Hdc in next 3 hdc
across until the final two stitches.
Chain 2.
Hdc in the final stitch.
Fasten off.
The left and right eyelet rows are intentionally written differently so the openings sit correctly along the garment edges. RHC0140-023042M
Add the Side Panel Boning Effect
The pattern calls the next detail:
Side Panel Boning
This isn’t rigid corset boning.
Instead, it is a crochet line worked along the first row of each burgundy side panel, creating a stronger visual edge.
With the right side facing, join Color B into the first row of the Right Side.
Working across the row ends:
Sc in each row
until you reach the top edge.
Fasten off.
Repeat the same process along the first row of the Left Side.
This extra line of single crochet contributes to the corset-inspired panel definition.
Crochet the Neck Ties
The neckline and straps are created in one continuous edging-and-chain sequence.
With the right side facing, join Color B into the last stitch of the last row of the Left Side.
Single crochet evenly along the row edges until you reach the last:
9 rows of Panel 3
Now:
Chain 100
This creates one long neck tie.
Skip:
2 rows
Then continue working single crochet evenly along the remaining specified center-panel edges.
Work across the remaining rows of Panel 3, all rows of Panel 2, and the specified rows of Panel 1 according to the source sequence.
Then:
Chain 100
to create the second neck tie.
Skip 2 stitches as instructed.
Continue working evenly to the last row of the Right Side.
Fasten off.
The two long 100-chain straps are what allow the top to tie around the neck rather than requiring conventional shoulder straps. RHC0140-023042M
How to Crochet the Ruffled Hem
Now we get to one of the most distinctive details of the entire top.
The ruffle travels across the stepped lower edge and helps visually unite the differently sized panels.
Use Color B.
Ruffle Row 1
With the right side facing, join Color B in the last stitch of the last row of the Right Side.
Work hdc evenly along the lower row edges.
Continue across the unworked stitches and row edges of the center panels as specified in the pattern.
The route travels across:
- Right Side
- Panel 3
- Panel 2
- Panel 1
- Left Side
The goal is to establish a continuous foundation across the entire bottom edge.
Ruffle Row 2
Chain:
3
This counts as a double crochet.
Turn.
Work:
2 dc in the same space
Then:
3 dc in every stitch across
This dramatic increase creates the fullness of the ruffle.
Instead of one stitch becoming one stitch, each foundation stitch effectively supports three double crochets.
That extra fabric naturally ripples into the flared burgundy border visible in the page 1 photograph.
Ruffle Row 3
Chain 2.
Turn.
Work:
1 hdc in every dc across
Fasten off.
Weave in your ends.
The complete three-row ruffle sequence appears on page 2 of the source. RHC0140-023042M
Make the Long Corset Tie
The final major crochet component couldn’t be simpler.
Chain:
300
Fasten off.
This very long chain becomes your corset tie.
Weave it through the eyelets created along the final rows of the two side panels.
The source simply instructs you to make the 300-chain tie and weave it through the side eyelets. RHC0140-023042M
How the Corset Construction Comes Together
The diagram on page 2 is particularly helpful for understanding the finished shape.
Rather than thinking of this top as one continuous piece, imagine a series of narrow vertical rectangles.
From left to right, the diagram shows:
Right Side → Panel 1 → Panel 2 → Panel 3 → Left Side
Panels 1, 2, and 3 descend to different lengths.
This is why the lower edge has that asymmetrical stepped appearance before the ruffle is added.
The diagram also indicates approximate center-panel lengths of:
12½”
14″
and
15½”
while the side width changes according to size.
Looking at this diagram before assembly is worthwhile because it explains why certain stitches are deliberately left unworked when the panels are joined.
Tips for Crocheting a Better-Fitting Corset Top
Make a Gauge Swatch
This is a fitted garment.
Skipping gauge can change the finished width considerably.
The target is:
14 hdc × 11 rows = 4 inches.
Choose Your Size Before Starting
The number of rows in nearly every panel depends on size.
Highlight or write down the number that corresponds to your chosen size before crocheting.
For example, where the instructions say:
11 (13, 15, 17, 19)
don’t try to reread all five numbers every time.
Follow only the number corresponding to your size.
Remember the Back Loops
The center panels specifically use back-loop-only half double crochet.
That technique creates their textured appearance.
Don’t Align the Bottom Edges
Only the top edges of Panels 1, 2, and 3 should align.
The bottom should remain stepped.
That is part of the design.
Keep the Burgundy Joins Visible
The contrasting joining seams contribute to the corset appearance.
They aren’t merely hidden construction seams.
Make Your Chain Ties Consistent
Both neck ties use 100 chains.
Try to maintain similar chain tension so one doesn’t become noticeably longer than the other.
Styling the Finished Crochet Corset
The photograph on page 1 shows the corset layered over a fitted black short-sleeve top and worn with casual pants.
Layering is a practical way to style the open neckline and fitted crochet construction while letting the camouflage and burgundy details remain the focus.
You could also experiment with the corset over a simple tank or fitted long-sleeve shirt depending on the season.
Because the garment already includes camouflage, contrast seams, lacing, and a ruffle, a simple base layer keeps the overall look balanced.
Frequently Asked Questions
What skill level is the Camo Corset?
The original pattern rates it:
Intermediate.
The individual stitches aren’t especially complicated, but the multi-panel construction, size-specific instructions, assembly, eyelets, and finishing require careful attention.
Who designed this crochet corset?
It was designed by:
Double Stitch.
What yarn does the pattern use?
The original version uses RED HEART Super Saver in:
971 Camouflage
and
376 Burgundy.
How much yarn do I need?
The materials list calls for:
1 skein Camouflage
and
1 skein Burgundy.
What crochet hook is required?
The recommended hook is:
5 mm / U.S. H-8.
What is the gauge?
The gauge is:
14 hdc = 4 inches
and
11 rows = 4 inches.
What sizes are included?
The pattern includes:
Small
Medium
Large
X-Large
XX-Large
How long is the finished top?
Approximately:
13½ inches at the shortest edge
and
16½ inches at the longest edge.
Why are there three different center panels?
The panels begin with different foundation-chain lengths.
This creates a stepped lower edge that becomes part of the corset’s distinctive silhouette.
How many chains do I need for the center panels?
Panel 1:
Chain 55
Panel 2:
Chain 50
Panel 3:
Chain 45
Are the center panels crocheted through both loops?
No.
The instructions specify:
back loops only throughout.
How are the center panels joined?
Color B is joined through both layers, and single crochet stitches are worked through both panels along their adjoining long edges.
How are the corset eyelets made?
The eyelets are created with repeated:
chain 2, skip 2 stitches
sections on the final rows of the side panels.
How long is the corset lace?
The corset tie begins with:
Chain 300.
It is then woven through the eyelets along the side panels.
How are the neck straps made?
Two long chains of:
100 chains each
are incorporated while edging the upper portion of the garment.
How is the bottom ruffle created?
After establishing a foundation row of hdc across the bottom, the second ruffle row places:
3 dc in every stitch across.
That large increase creates the fullness.
Final Thoughts
This Camo Corset is one of those crochet patterns where the construction is almost as interesting as the finished garment.
You don’t begin with something that looks remotely like a corset.
Instead, you make three simple ribbed rectangles.
One begins with 55 chains.
The next begins with 50.
The third begins with 45.
Lay them beside one another, and suddenly you can see the stepped silhouette starting to form.
Then the burgundy yarn changes everything.
Contrasting seams divide the camouflage panels. Burgundy side sections extend outward. Eyelets appear along the edges. Two long chains become neck ties, and a 300-chain cord becomes corset-style lacing.
Finally, you reach the bottom.
Three double crochets are worked into every stitch, and that simple increase transforms the lower edge into a dramatic ruffle.
The finished top has an unusual mixture of rugged camouflage and feminine crochet detailing—the exact contrast that makes the design so recognizable.
If you make it, pay particular attention to gauge, size-specific row counts, and the arrangement diagram on page 2. Those details matter more than any individual stitch.
Take the construction one panel at a time, keep those center-panel bottom edges intentionally uneven, and save that dramatic burgundy ruffle for the end.
Once the lacing is woven through the eyelets and the final ends are tucked away, you’ll have a crochet top that certainly doesn’t disappear into the background.
Happy crocheting!