Buttercup Square-Neck Crochet Tank
A soft yellow crochet top brings a little sunshine to an ordinary outfit. This Buttercup Tank pairs a simple square neckline with broad straps and a narrow cream hem, keeping the details light and easy to wear. I like the way the small contrast at the bottom makes the yellow feel finished without needing a decorative stitch pattern. Pair it with jeans, linen trousers, or a simple skirt, and let the handmade fabric be the interesting part.
The construction is straightforward: make two matching rectangles, join their sides, then attach two separately crocheted straps. There is no skirt, button band, or shaped bodice. You can check the strap length on your own shoulders before committing to the final seams, which is especially useful for a first garment sample.
Pattern status: This is a newly drafted, untested pattern. Stitch arithmetic and measurement calculations have been reviewed, but no physical sample has been made. Fit, coverage, drape, strap stretch, and yarn quantities require testing. The four images are AI-generated concepts; stitch texture, proportions, and apparent fit are illustrative. Follow the written draft rather than counting stitches or copying shaping from the pictures.
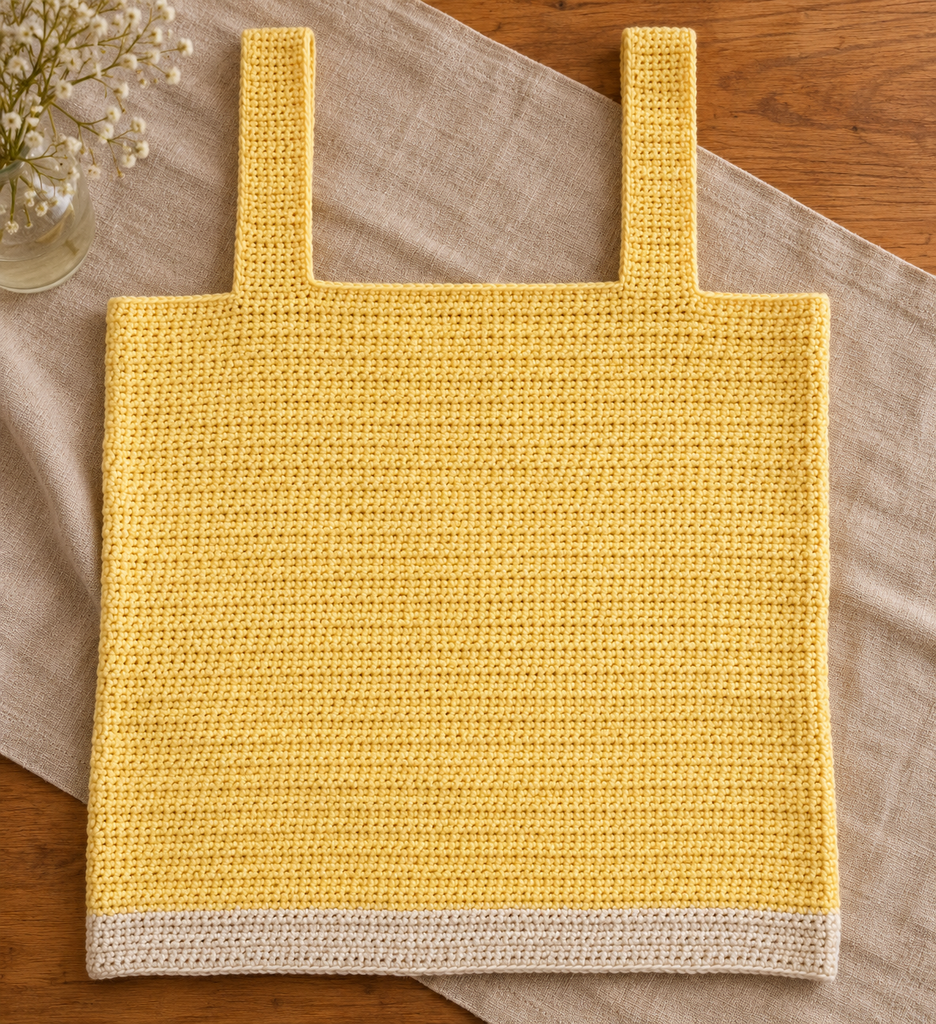
About This New Design
The supplied reference is a long, button-front crochet dress. This project takes the idea of a wearable cotton garment into a different silhouette: a short, closed-front tank with a square neckline, separate broad straps, a cream hem, and plain half double crochet. The reference’s skirt shaping, bodice instructions, button closure, and photographs are not reproduced.
This is a straight, relaxed garment without bust darts or waist shaping. Choose it for a simple layering shape rather than a fitted camisole. The same fabric width continues from the upper body to the hem, so compare the intended circumference with your chest, waist, and high hip before choosing a size.
Materials and Gauge
Choose smooth DK cotton or a cotton blend that produces a flexible fabric at gauge. Avoid a very stiff yarn, especially for the straps and top edge. A blend with some recovery can help the straps hold their length, although every substitution needs a washed swatch.
- Butter yellow main yarn, provisional allowance for A (B, C, D): 700–900 (850–1100, 1050–1350, 1200–1550) m.
- Oatmeal cream yarn: approximately 60–90 (70–105, 85–120, 95–140) m.
- A 4 mm hook, or the size required to obtain gauge.
- Blunt yarn needle, scissors, measuring tape, and removable stitch markers.
- Optional camisole or suitable underlayer for the first fitting and coverage check.
The quantities are estimates, not sample measurements. Use compatible colors from the same yarn range and retain a little spare yellow for strap adjustments.
Aim for 20 hdc stitches and 14 rows per 10 cm, after washing and drying the swatch according to the yarn label. Work through both top loops, with an ordinary ch 1 turn. Measure the center of a swatch larger than 10 cm so its edges do not distort the result.
Also swatch the narrow strap strip. Its gauge may differ from the broad panels even with the same yarn and hook. Hang the washed swatch or hold it vertically to assess how much it lengthens under its own weight.
Choose a Draft Size
Sizes A–D are calculated drafts rather than tested commercial sizes. Dimensions below exclude edging and small seam allowances. The body circumference is twice the panel width; the strap adds height above the body rather than changing that circumference.
| Draft detail | A | B | C | D |
|---|---|---|---|---|
| Approximate body circumference | 96 cm | 112 cm | 128 cm | 144 cm |
| Width of each body panel | 48 cm | 56 cm | 64 cm | 72 cm |
| Stitches per panel | 96 | 112 | 128 | 144 |
| Rows per panel, including cream | 56 | 56 | 60 | 60 |
| Body height, top edge to hem | 40 cm | 40 cm | 42.9 cm | 42.9 cm |
| Rows per strap, before fitting | 60 | 64 | 68 | 72 |
| Strap length before attachment | 42.9 cm | 45.7 cm | 48.6 cm | 51.4 cm |
| Outer top stitches left beside each strap | 16 | 24 | 32 | 40 |
| Center top stitches between straps | 48 | 48 | 48 | 48 |
As a starting preference, choose a circumference around 6–12 cm larger than your largest relevant torso measurement. For example, an 86 cm chest and a smaller high hip might make size A a reasonable first sample. If your high hip is larger than the chosen circumference, the hem can bind even when the chest is comfortable.
The draft neckline spans approximately 24 cm between the inner strap edges. That width is a starting layout, not a universal shoulder fit. Strap position and length should be checked on the intended wearer before sewing permanently.
Abbreviations and Working Notes
US terms are used. Ch means chain, hdc means half double crochet, sc means single crochet, sl st means slip stitch, and st/sts means stitch/stitches. RS refers to the preferred outside face; WS is the inside.
For hdc, yarn over, insert the hook, yarn over and pull up a loop, then yarn over and pull through all three loops. The turning ch 1 does not count as a stitch. Work into the first actual stitch and finish in the last actual stitch every row.
Instructions are written A (B, C, D). Follow one set of numbers consistently. Count regularly and use edge markers if you tend to miss the last stitch. Both body panels begin at the cream hem and finish at the yellow top edge.
How to Make the Crochet Tank
Step 1: Crochet the Cream Hem of the First Panel
With cream, ch 97 (113, 129, 145) loosely.
Row 1: Hdc in the second chain from the hook and each remaining chain: 96 (112, 128, 144) hdc. Ch 1 and turn.
Rows 2–4: Hdc in every stitch across, keeping the same count. Ch 1 and turn after each row. On the final stitch of Row 4, use yellow for the last yarn-over to complete the color change, then ch 1 with yellow and turn.
These four cream rows make an approximately 2.9 cm strip at the stated row gauge. It is part of the main panel, not a ribbed band or a separate piece sewn on later. Cut the cream yarn with a tail long enough for secure weaving.
Step 2: Complete the Yellow Body
Row 5: With yellow, hdc in each stitch across: 96 (112, 128, 144) hdc. Ch 1 and turn.
Continue plain hdc rows until the panel has 56 (56, 60, 60) rows total, counting the four cream rows. The yellow section therefore contains 52 (52, 56, 56) rows. Do not increase or decrease at either edge.
Fasten off after the final row without adding another turning chain. The finished rectangle should measure approximately 48 x 40 (56 x 40, 64 x 42.9, 72 x 42.9) cm before seams and edging.
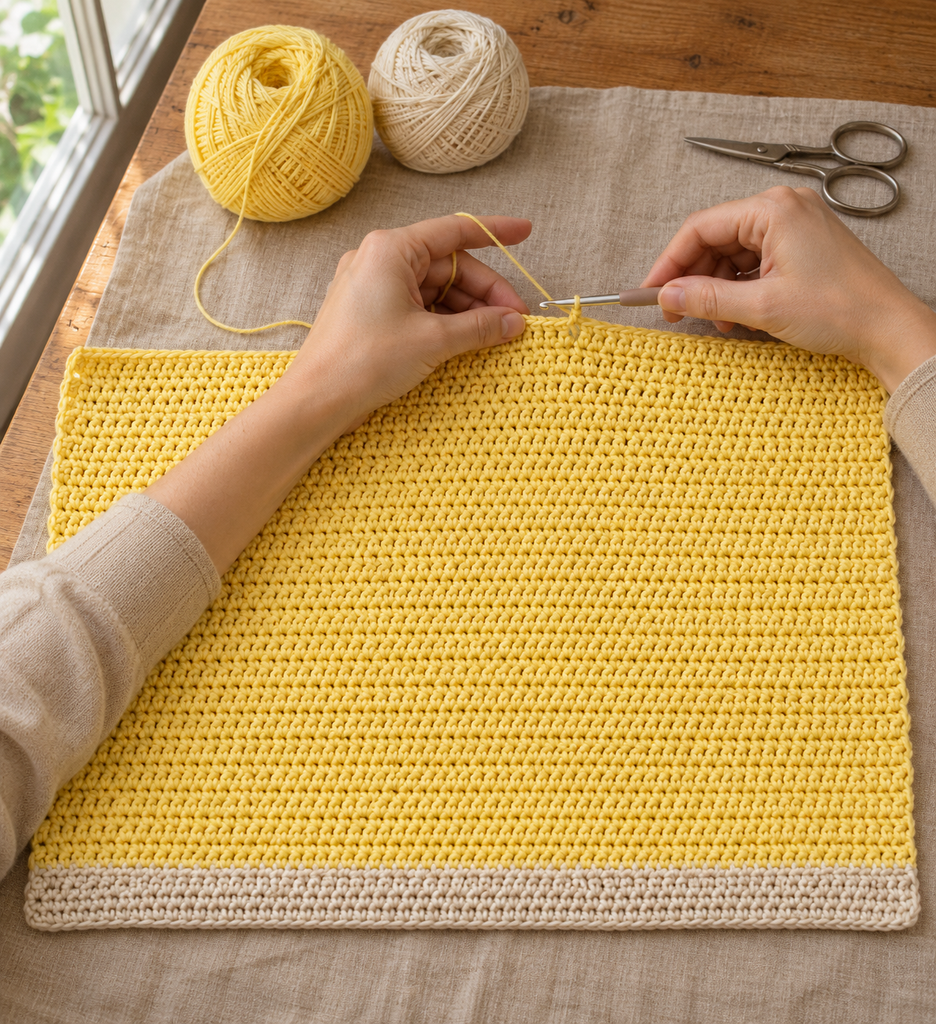
Step 3: Make the Second Panel and Prepare the Pieces
Make a second panel exactly like the first, including the same cream row count and total length. There is no front-versus-back shaping in this draft.
Wash or dampen both pieces according to the yarn label and dry them flat. Smooth their edges into rectangles without pulling hard. Compare the stitch counts, row counts, widths, and lengths after they are fully dry. Correct an unequal panel before joining them.
Choose and mark the RS of each piece. If the fabric looks nearly identical on both faces, choose one consistently. Keep the color-change tails toward the future inside of the garment.
Step 4: Join the Two Side Seams
Place the panels with right sides together, matching cream hems, yellow upper edges, and corresponding row ends. Clip both side edges together with removable markers.
Sew each complete side from the hem to the top edge with relaxed whipstitches or another flat seam. Match one row end on the front to one row end on the back: 56 (56, 60, 60) matched pairs per side. Secure both seam ends without tightening the edge into a ridge.
Leave the entire bottom and entire top open. You now have a simple open-ended body tube. There are no armhole cutouts in these rectangles; the space above the side seams and outside the straps will become the arm openings.
Turn the body RS out. Check that the cream stripe runs evenly around the hem and that the upper edge is level.
Step 5: Crochet Two Broad Straps
With yellow, ch 9.
Row 1: Hdc in the second chain from the hook and every remaining chain: 8 hdc. Ch 1 and turn.
Following rows: Hdc in all 8 stitches, ch 1, and turn. Make 60 (64, 68, 72) rows total, then fasten off. Repeat for the second strap.
At the proposed gauge, each strap is approximately 4 cm wide. Its full length is 42.9 (45.7, 48.6, 51.4) cm, but those figures need confirmation on a narrow-strip swatch. Approximately 2 cm at each end will overlap the body inside, leaving about 38.9 (41.7, 44.6, 47.4) cm exposed from front attachment to back attachment over the shoulder.
Wash and dry the straps before the fitting. Do not assume that a tight new strip will stay the same length after washing and wearing.
Step 6: Mark the Strap Positions
On the front top edge, count inward from one side seam and leave 16 (24, 32, 40) stitches free. Mark the next 8 stitches for the first strap. Leave the next 48 stitches free for the center neckline. Mark the next 8 stitches for the second strap. The remaining 16 (24, 32, 40) stitches form the other outer section.
Repeat the same arrangement on the back. The calculation is symmetrical: two outer sections, two 8-stitch strap positions, and one 48-stitch center section. This leaves approximately 24 cm between the inner strap edges for every draft size.
Treat the marks as a first fitting layout. You may need to move the straps to align with your shoulders or undergarment straps. Keep corresponding front and back positions balanced and mark every change before sewing.
Step 7: Fit and Sew the Straps
Place each strap end inside the body with a 2 cm overlap below the top edge. Pin or temporarily baste each end across its marked 8-stitch span. Run one strap from the left front to the left back and the other from the right front to the right back, checking that neither strip twists.
Try the garment on over the intended underlayer. Check neckline height, underarm coverage, shoulder position, and freedom to lift your arms. Shorten or lengthen the strips as needed; the row totals are starting lengths, not a requirement to keep an uncomfortable fit.
At the proposed lengths, half of the exposed strap is roughly 19.4 (20.9, 22.3, 23.7) cm. That is only an approximate shoulder rise, since the strap follows the body rather than a straight vertical line. Final overall length must be measured on the wearer.
When satisfied, sew the perimeter of each overlapped strap end to the inside of the body, catching multiple sound loops. Add a horizontal reinforcing line through the overlap and secure the tails in more than one direction. Do not attach a strap with just one stitch or a knot at the corner.

Step 8: Add a Neat Yellow Edge
With the RS facing, join yellow at the back neckline. Work one light round of sc around the complete neck opening: across the back center edge, along one strap’s inner edge, across the front center edge, and along the other strap’s inner edge. Join with a sl st and fasten off.
Work a separate sc round around each arm opening, following the outer strap edge and the free top-edge sections outside the straps. The side seam top forms the bottom of that opening. Keep the turn there smooth and avoid a bulky cluster.
As a starting distribution, use one sc per body top stitch and approximately 10 sc across every 7 strap row ends. The row-end ratio is based on the main gauge rather than a tested border count. Adjust locally so the border lies relaxed: add stitches if it gathers and use fewer if it waves. Do not crochet over an opening or join opposite edges together.
The cream hem is already finished by its foundation edge and does not need a yellow border. Weave in all remaining tails and check the garment once more after any final wash.

More Information and Useful Adjustments
Check Coverage in Daylight
Crochet can reveal more between stitches when stretched over the body. Check the washed fabric against the light, then assess it while wearing the garment. A camisole underneath is a simple option when you want additional coverage. The generated styling image does not establish the opacity of your chosen yarn.
Adjust the Body Length
At the stated row gauge, 7 rows add approximately 5 cm. Add or remove the same number of yellow rows on both panels while keeping the four cream rows unchanged. This moves the hem without changing the neckline or strap layout.
For example, increasing size A from 56 to 63 total rows gives a body height of approximately 45 cm. It also adds weight, so reassess strap stretch and yarn quantity.
Adjust Width Between the Draft Sizes
At gauge, every stitch adds approximately 0.5 cm to one panel. Adding 8 stitches to each panel increases the total body circumference by about 8 cm. Keep both panels identical.
If retaining the same 48-stitch center neckline and two 8-stitch strap positions, divide the remaining stitches evenly between the two outer sections. For a 104-stitch panel, the layout would be 20 outer stitches, 8 strap stitches, 48 center stitches, 8 strap stitches, and 20 outer stitches. That gives a draft body circumference of approximately 104 cm.
This is a mathematical adjustment, not a tested size. Check the shoulder spacing and torso measurements before deciding that a width change is enough for your fit.
Care for the Straps and Hem
Support the whole garment when wet and dry it flat. Avoid hanging it by its straps, which can stretch the strips and lower the neckline. Store it folded and follow the yarn label for washing.
If the straps lengthen after wear, undo and shorten them or consider a compatible woven backing applied with sewing thread. Test that alteration on your sample rather than assuming the original row count will remain comfortable indefinitely.
Frequently Asked Questions
Is this the same garment as the PDF dress?
No. This draft is a short square-neck tank with two rectangular body panels, separate broad straps, and a cream hem. It does not use the reference dress’s skirt, button closure, or bodice construction.
Is this suitable for a first crochet garment?
It is approachable once you can keep straight edges and make matching rectangles. The important part is fitting the straps and checking coverage. Make a washed swatch and baste the straps before sewing permanently.
Do I leave part of the body side seams open for armholes?
No. In this design the body sides are sewn from hem to top. The arm openings are above the body, between the outer strap edges and the unoccupied top-edge sections. Leaving the side seams open would change the coverage and construction.
Why is the neckline sitting too low?
The straps may be too long, may have stretched, or may need different attachment positions. Refit them while wearing the intended underlayer. Shorten evenly and confirm the underarm comfort before sewing again.
Can I add buttons down the front?
That would require an open-front redesign with new panel widths and closure allowances. This written pattern has a continuous closed front and no button band.
Have the four sizes been physically tested?
No. Their counts and proposed measurements have been checked mathematically, but none has been made into a sample. Record actual yarn use, washed gauge, and fit before presenting the instructions as tested.