Sunny the Potted Sunflower
A small smiling sunflower brings a little color to a desk or a handmade gift box. Sunny has a chocolate-brown face, eight golden petals, two green leaves, and a terracotta-colored crochet pot. Everything is made from yarn and filling, including the soil surface.
The flower sits on a deliberately short, thick stem. This keeps the construction compact and avoids a tall unsupported stalk. You make the pot and soil separately, attach the flower assembly to the soil disc, then sew the disc into the filled pot. The embroidered face belongs on the flower center rather than on the container.
Sunny is a newly drafted design created for this crochet gift project. The shaping uses simple single crochet rounds, while the small flat leaves introduce a few taller stitches. Pinning the parts before sewing gives you room to adjust the flower angle and the spread of its petals.
Pattern status: Stitch arithmetic has been reviewed, but this draft has not been physically crocheted or tested. Dimensions, yarn quantities, attachment positions, and upright balance are estimates. The four images are AI-generated concepts rather than photographs of a sample made from these instructions. Evaluate a physical sample before presenting this as a tested pattern.
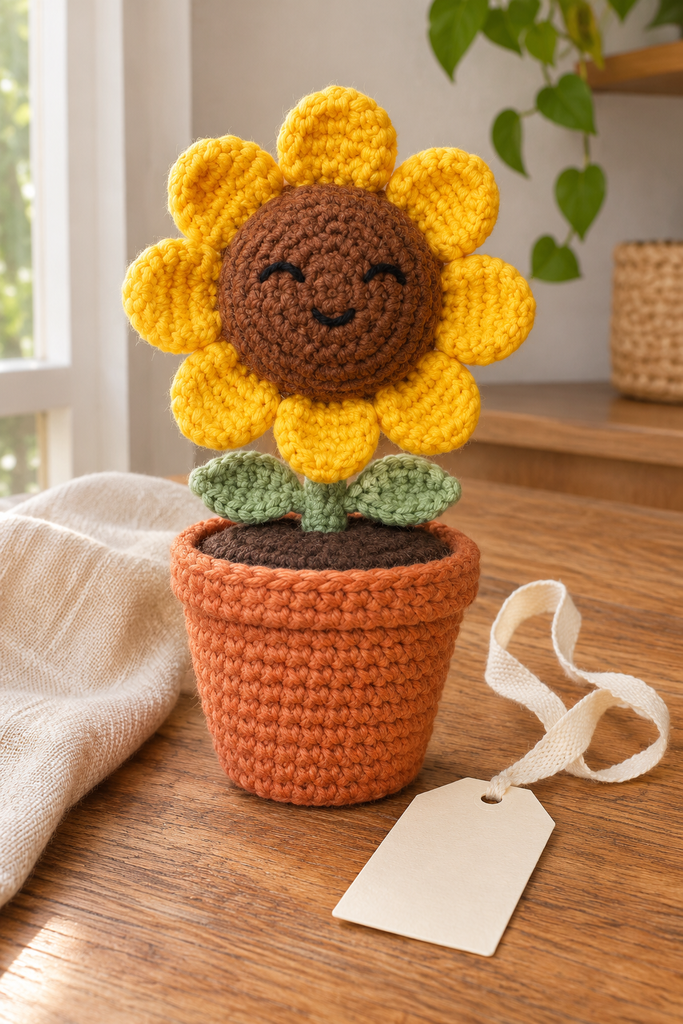
Project Overview
The intended overall height is approximately 10–13 cm using DK cotton and a 3 mm hook. This is an untested estimate. A starting gauge of about 22 single crochet stitches and 25 rounds per 10 cm should produce a compact fabric, though your yarn, tension, and filling will change the dimensions.
This project suits a confident beginner familiar with spiral rounds, increases, decreases, and sewing. The leaves use half double crochet and double crochet. The assembly is more involved than the individual shapes because the stem and flower need a broad, reinforced connection.
Sunny is intended as a small decorative gift. Its ability to stand without support has not been tested. Keep the stem short and assess the actual balance before choosing a display position.
Materials
- Terracotta DK cotton yarn, approximately 40–60 m for the pot.
- Chocolate-brown DK cotton yarn, approximately 25–40 m for the soil and flower center.
- Golden-yellow DK cotton yarn, approximately 25–40 m for eight petals.
- Sage-green DK cotton yarn, approximately 20–30 m for the stem and leaves.
- Black embroidery thread or thin black yarn for the face.
- A 3 mm hook, or another size that gives dense, comfortable stitches.
- Suitable fiberfill, a blunt tapestry needle, scissors, removable stitch markers, and temporary assembly pins.
- Optional packaging: a small paper box, tissue paper, ribbon, and a handwritten tag.
These quantities include a margin for sewing but are not measured sample requirements. Keep the main yarns similar in thickness. Use a medium chocolate shade so the black face remains visible, and keep the embroidery strand thin for a delicate expression.
The written project contains no wire, stick, real soil, or hard pot. It is a soft decorative object, and this pattern does not establish suitability for babies or young children. Loose filling and detached components can be hazardous. Choose materials for the intended recipient and assess every seam.
Abbreviations and Working Notes
US crochet terminology is used throughout.
| Term | Meaning |
|---|---|
| MR | Magic ring |
| ch | Chain |
| sc | Single crochet |
| hdc | Half double crochet |
| dc | Double crochet |
| sl st | Slip stitch |
| inc | Work 2 sc into the same stitch |
| dec | Decrease 2 stitches into 1 |
| BLO | Back loop only |
| st / sts | Stitch / stitches |
| R | Round |
| (instructions) × number | Repeat the bracketed sequence the stated number of times |
Work the pot, soil, flower discs, stem, and petals in continuous spirals unless a finishing instruction says otherwise. Do not join each round or add turning chains. Mark the first stitch and move the marker at the start of every round.
For an invisible decrease, insert the hook under the front loop of each of the next two stitches, yarn over and draw through those front loops, then yarn over and draw through the remaining two loops. A standard single crochet decrease also works.
When a twelve-stitch opening is flattened, it forms six pairs and closes with six sc through both layers. A four-stitch opening forms two pairs and closes with two sc. These are short closing rows across an opening, not extra rounds around it.
Pattern: Terracotta Pot
Begin at the center of the base with terracotta yarn.
- R1: 6 sc into an MR. Tighten the center. 6 sts.
- R2: Inc in every stitch. 12 sts.
- R3: (1 sc, inc) × 6. 18 sts.
- R4: (2 sc, inc) × 6. 24 sts.
- R5: Sc in BLO in every stitch. 24 sts.
- R6–R7: Sc through both loops in every stitch for two rounds. 24 sts each round.
- R8: (3 sc, inc) × 6. 30 sts.
- R9–R10: Sc in every stitch for two rounds. 30 sts each round.
- R11: (4 sc, inc) × 6. 36 sts.
- R12–R13: Sc in every stitch for two rounds. 36 sts each round.
Fasten off and secure the end inside. Leave the pot open. The BLO round creates a subtle bend between the base and wall; the gradual increases make the upper edge wider than the bottom.
Press the base gently with your fingers. A soft crochet pot may remain slightly rounded rather than perfectly flat. Do not add a rigid insert as part of this written version.
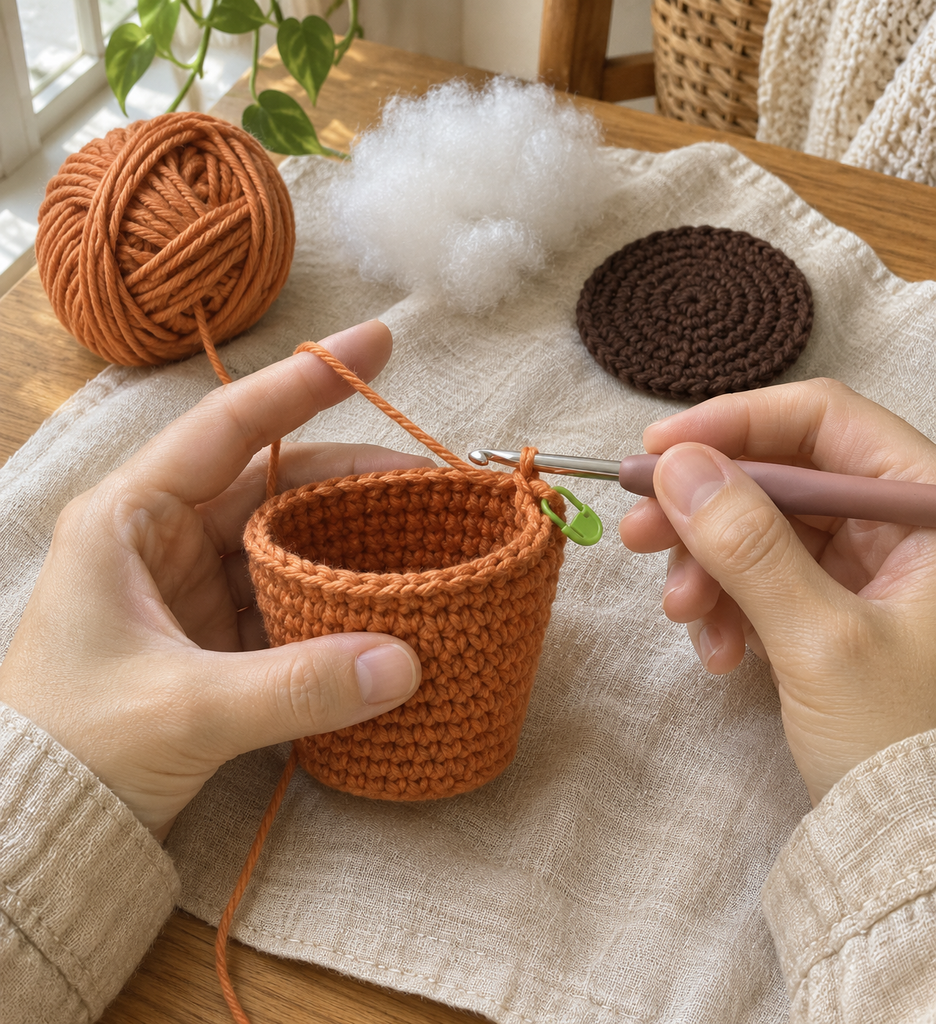
Pattern: Brown Soil Disc
With chocolate yarn:
- R1: 6 sc into an MR. 6 sts.
- R2: Inc in every stitch. 12 sts.
- R3: (1 sc, inc) × 6. 18 sts.
- R4: (2 sc, inc) × 6. 24 sts.
- R5: (3 sc, inc) × 6. 30 sts.
- R6: (4 sc, inc) × 6. 36 sts.
Fasten off with a 60 cm sewing tail. Do not attach the disc to the pot yet. Its 36 edge stitches will meet the pot’s 36 top stitches one to one after the flower assembly is complete.
Pattern: Flower Center Front
With chocolate yarn:
- R1: 6 sc into an MR. 6 sts.
- R2: Inc in every stitch. 12 sts.
- R3: (1 sc, inc) × 6. 18 sts.
- R4: (2 sc, inc) × 6. 24 sts.
- R5: Sc in every stitch. 24 sts.
Fasten off with a 40 cm tail. The final plain round gives the front a shallow cup shape. Do not fill it yet.
Embroider two small black closed-eye arches in the upper half of this disc, each spanning roughly two fabric stitches. Add a short curved black smile below them. Use several short stitches rather than long loose strands, then secure the ends on the back.
Choose the face orientation independently of the spiral start. A marker at the top helps you keep the eyes level while assembling the flower.
Pattern: Flower Center Back
With chocolate yarn:
- R1: 6 sc into an MR. 6 sts.
- R2: Inc in every stitch. 12 sts.
- R3: (1 sc, inc) × 6. 18 sts.
- R4: (2 sc, inc) × 6. 24 sts.
Fasten off and secure the end. Place the front and back with their wrong sides facing inward and their 24-stitch edges aligned.
Using the front disc’s tail, sew the two edges together one stitch pair at a time. Leave a small gap, add a thin layer of filling, then finish the seam. Keep the center lightly padded rather than spherical so its weight stays modest.
Pattern: Golden Petals, Make Eight
Each petal is a tiny unstuffed pouch that is flattened and sewn to the flower perimeter.
With yellow yarn:
- R1: 4 sc into an MR. 4 sts.
- R2: Inc in every stitch. 8 sts.
- R3: Sc in every stitch. 8 sts.
- R4: Dec × 4. 4 sts.
Do not stuff. Flatten the opening into two pairs and work a closing row of 2 sc through both layers. Fasten off with a 25 cm tail.
Make eight petals before sewing any of them. Compare their shape and gently flatten each one. These written petals have rounded tips; their exact outline may differ from the illustrated concepts.
Arrange the Petal Ring
Divide the 24-pair flower-center seam into eight sections of three stitch pairs. Mark the center of each section with a temporary marker. This gives you eight evenly distributed attachment positions.
Place each petal’s narrow closed base at one marked section with its rounded tip facing outward. Sew the two-stitch petal base securely across that section of the center seam, catching both center-disc edges where practical. Add a small reinforcing stitch behind the base.
Continue until all eight petals are attached. Check the ring from the front before burying the ends. The petals may overlap slightly, but do not stretch them into a rigid star.
Pattern: Short Stout Stem
With green yarn, leave a 40 cm starting tail for attaching the base.
- R1: 6 sc into an MR. Tighten and secure the center while retaining the long tail. 6 sts.
- R2: Inc in every stitch. 12 sts.
- R3–R6: Sc in every stitch for four rounds. 12 sts each round.
Add a little filling, keeping the stem firm but soft. Flatten the twelve-stitch opening into six pairs and work a closing row of 6 sc through both layers. Fasten off with a 45 cm tail.
The starting ring is the lower end; the closed six-stitch row is the upper attachment edge. The stem is intentionally short. Adding height increases the chance that the flower will lean, and this untested draft does not validate a taller version.
Pattern: Flat Green Leaves, Make Two
With green yarn, ch 5.
Work along the first side of the chain:
- Sc in the second chain from the hook.
- Hdc in the next chain.
- Dc in the next chain.
- Hdc in the final chain.
Turn the chain gently so you can work into its unused opposite-side loops. Do not turn the work as for a normal new row.
- Hdc in the opposite-side loop of that same final chain.
- Dc in the opposite side of the next chain.
- Hdc in the opposite side of the next chain.
- Sc in the opposite side of the last chain, beside the first sc.
Sl st to the first sc to finish the outline. You have worked eight main stitches around the chain, plus the finishing slip stitch. Fasten off with a 30 cm tail.
The chain-start end is the narrow leaf tip; the opposite end is broader. Use the broader end as the attachment base. The leaf may curve naturally; do not stuff it.
Assembly: Support the Flower Before Closing the Pot
There are fifteen crochet pieces: pot, soil disc, two flower-center discs, eight petals, stem, and two leaves. The center and petals may already be assembled into one flower head.
Attach the Stem to the Flower
Lay the flower face downward on a soft surface. Place the stem’s closed six-stitch edge horizontally across the lower half of the brown back disc. The stem should extend downward behind the lower petals, with its base pointing toward the future pot.
Sew the entire six-stitch edge to sound back-disc loops, then add small supporting stitches between the adjacent upper stem fabric and the flower back. Spread the seam rather than suspending the flower from one point.
Lift the assembly and check the angle. A slight forward tilt is acceptable, but the stem should not pull the face into a fold. Keep the filling light and adjust the contact area before proceeding.
Attach the Leaves and Stem Base
Sew one green leaf to each side of the stem, using its broader end as the base and directing the narrow tip outward. Offset their heights slightly if the exposed stem allows it. Keep the seams clear of the stem’s lower attachment area.
Center the stem’s starting end over the middle of the soil disc. Using the reserved starting tail, sew around the lower stem side near R2 to a corresponding ring of sound soil stitches around its center. Work around this contact area twice if necessary, securing the stem broadly.
The soil underside is still accessible, so you can finish the sewing ends there. Check the assembly from the side and front before closing the pot.
Fill the Pot and Sew the Soil Edge
Add fiberfill to the pot in small tufts. Keep the base evenly filled without forcing it into a hard ball. Add enough beneath the soil to support the insert while allowing its edge to meet the rim comfortably.
Match the soil’s 36 edge stitches to the pot’s 36 top stitches. Mark four groups of nine pairs to keep them aligned. Sew each soil stitch to its matching pot stitch with the brown tail.
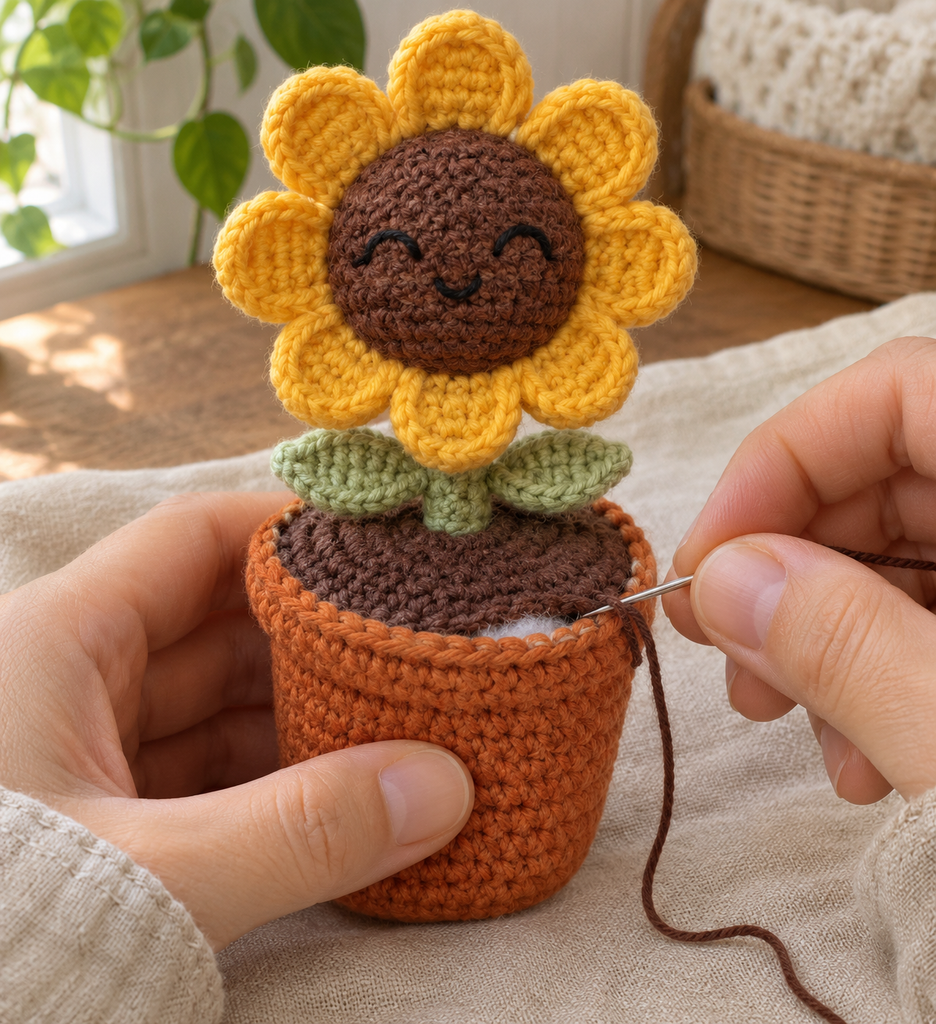
Before closing the final few pairs, redistribute filling and check that the soil is level. Finish the seam without drawing the pot mouth into a tight gathered circle. Bury the tail and remove every pin and marker.
Place Sunny on a level surface and assess the actual balance. Adjust the soft base gently by hand. If the flower still leans or the pot rocks, use discreet support for decorative display. The generated images do not establish that the written design will stand independently.
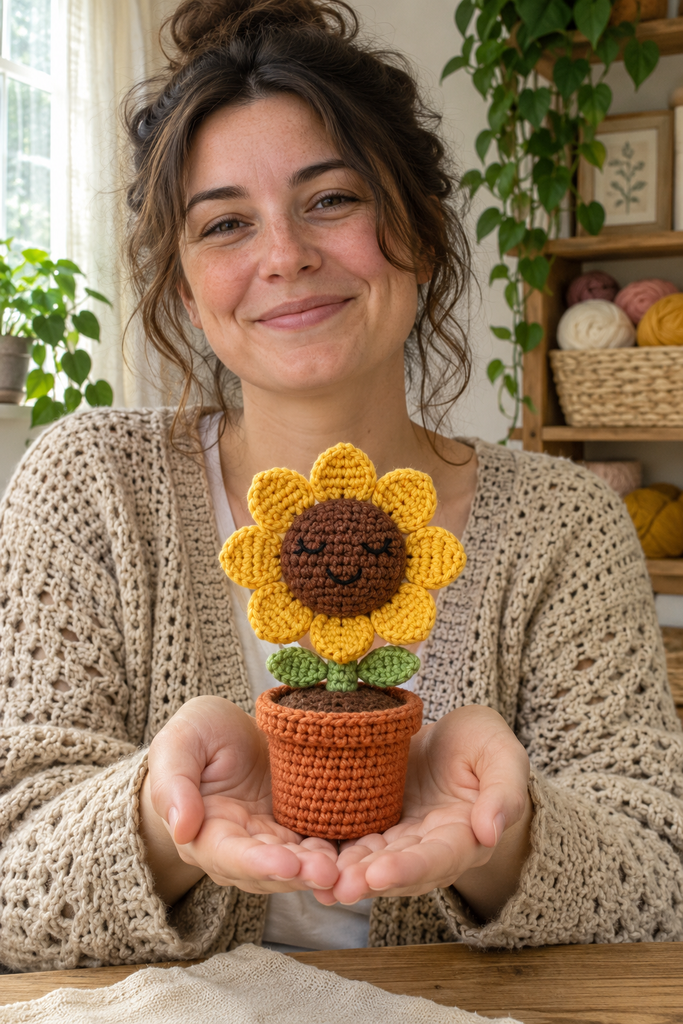
More Information: Gift Presentation and Care
Wrap Without Crushing the Petals
Use a small box that leaves space above and around the flower head. A little tissue around the pot can hold the gift upright without pressing the petals flat. Tie ribbon around the box rather than tightly around the stem.
A handwritten tag can include the yarn and filling care information you actually used. Avoid promising a washing method that has not been checked against those materials.
Choose a Different Palette
Mustard, butter yellow, or warm gold can replace the petal shade. A cream pot gives a softer look, while dusty blue makes the yellow more prominent. Color substitutions do not require new counts when yarn thickness stays similar.
A heavier yarn, larger face, or longer stem changes the support requirements. Make and assess a physical sample before relying on an altered version.
Keep the Shape Light
Overfilling the flower head adds weight and can make the stem bend. Use only enough filling to soften the two discs. The pot needs an even outline, not hard packing that pushes its base outward.
Cleaning and Storage
Follow the care instructions for both yarn and filling. Where those materials permit, gentle spot cleaning and thorough air drying can help preserve the embroidery and leaves. Do not store the flower while damp. Recheck the stem, petals, and soil seam after cleaning or frequent handling.
Frequently Asked Questions
Is Sunny a beginner project?
A confident beginner can work the individual shapes with practice in spiral rounds and decreases. The assembly requires more care than the crochet itself. Read the stem-support section before beginning and leave generous sewing tails.
Why is the stem so short?
A short stout stem reduces the distance between the flower head and its support. The written design uses yarn and filling only. A longer version would need its own practical assessment rather than assuming the same seams will support it.
Are the pot and soil real?
No. Both are crocheted pieces, and the pot is filled with fiberfill. The brown disc is sewn into the upper opening and supports the stem assembly.
Can I leave off the face?
Yes. The embroidery does not affect the shaping. A plain brown center gives the project a simpler floral appearance, with the same crochet counts and assembly.
Why does my flower lean?
A heavy center, loose stem seam, uneven pot filling, or rounded base can affect the balance. Recheck the broad contact seams and the distribution of filling. This draft has not been physically tested, so independent standing should not be assumed from the images.
Has this pattern been tested?
No. The round arithmetic, leaf stitch sequence, petal spacing, and 36-to-36 soil seam have been reviewed, but no finished sample has been made. Yarn use, size, support, and balance still require practical validation before the pattern is described as tested.