Ruby the Strawberry Gift Buddy
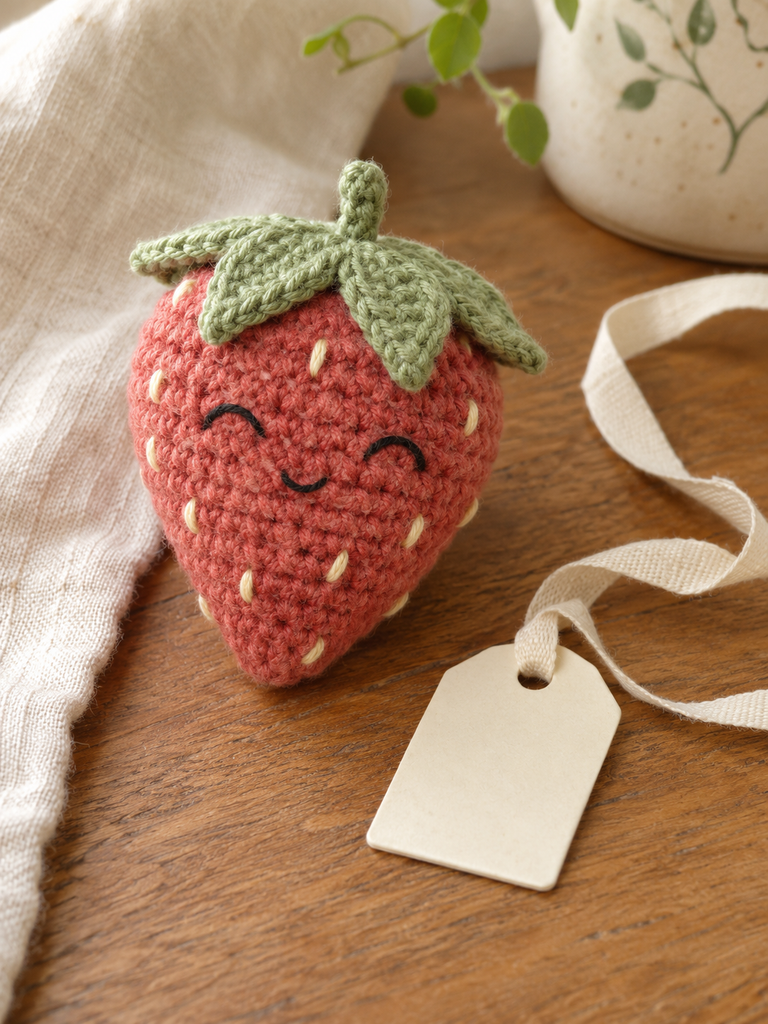
A tiny smiling strawberry makes a cheerful handmade gift without needing a large supply of yarn. Ruby has a coral-red body, short cream seed stitches, a sage leafy cap, and a sleepy embroidered face. The shape is simple enough to recognize from across a desk, while the small details reward a closer look.
This project uses three crochet pieces: the stuffed fruit, a five-leaf cap, and a short stem. The face and seeds are embroidered directly onto the fruit. There are no arms, legs, clothing pieces, or metal fittings to assemble, so the finishing stays focused on a few clear tasks.
Ruby is a newly drafted design created for this gift project. The fruit begins at its pointed bottom and grows toward its broad shoulders before the top is closed. The leaves are worked from a small central disc and sewn over that closure.
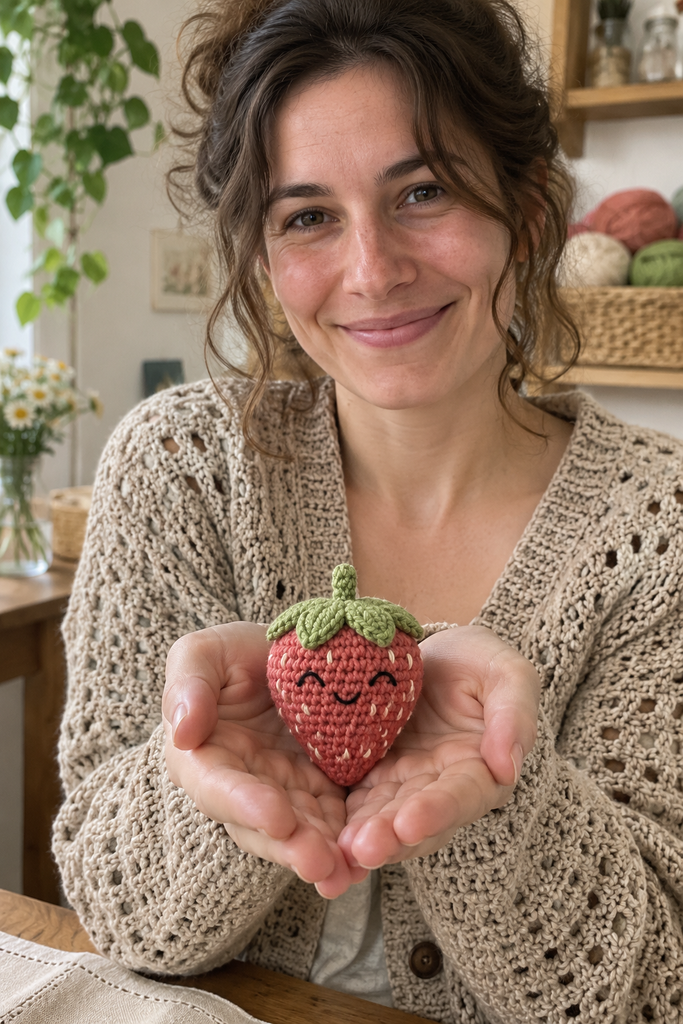
Pattern status: The stitch arithmetic has been reviewed, but this draft has not been physically crocheted or tested. Size, yarn use, leaf behavior, and attachment positions are estimates. The four photographs are AI-generated concepts rather than evidence of a sample made from these instructions. Follow the written counts and assess a physical sample before describing this as a tested pattern.
Project Overview
The intended finished height is approximately 8–10 cm including the stem, using DK cotton yarn and a 3 mm hook. This is an untested estimate. The strawberry is designed as a small soft character for a handmade gift or decorative display.
A starting gauge of approximately 22 single crochet stitches and 25 rounds per 10 cm should produce compact fabric. Gauge does not establish the final dimensions on its own: yarn thickness, tension, and filling all change the result.
This pattern suits a confident beginner who can increase and decrease in a spiral. The leaf cap also uses chains, half double crochet, double crochet, and slip stitches. Read that short section before beginning if those stitches are less familiar.
Materials
- DK cotton yarn in dusty coral or strawberry red, approximately 35–50 m.
- Sage green DK cotton yarn, approximately 10–20 m.
- A short length of cream yarn or embroidery thread for the seeds.
- Black embroidery thread or thin black yarn for the eyes and mouth.
- A 3 mm hook, or another size that gives dense, comfortable stitches.
- Suitable fiberfill, a blunt tapestry needle, scissors, a removable stitch marker, and temporary assembly pins.
- Optional gift wrapping: a small paper box, tissue paper, cotton ribbon, and a blank tag.
These yarn quantities include a margin for sewing but are not measured sample requirements. Choose similar yarn weights for the fruit and leaves. If the embroidery yarn looks heavy, split it into fewer strands or use a thinner thread.
This draft does not establish suitability for babies or young children. Loose filling and detached parts can be hazardous. Choose materials for the intended recipient and assess the completed seams. Keep gift ribbons and packaging separate from the finished toy when evaluating its use.
Abbreviations and Techniques
US crochet terminology is used throughout.
| Term | Meaning |
|---|---|
| MR | Magic ring |
| ch | Chain |
| sc | Single crochet |
| hdc | Half double crochet |
| dc | Double crochet |
| sl st | Slip stitch |
| inc | Work 2 sc into the same stitch |
| dec | Decrease 2 stitches into 1 |
| st / sts | Stitch / stitches |
| R | Round |
| (instructions) × number | Repeat the bracketed sequence the stated number of times |
Work the fruit and stem in continuous spiral rounds. Do not join those rounds or add turning chains. Mark the first stitch and move the marker at the beginning of every new round. The total after each instruction is the number of stitches remaining around the piece.
For an invisible decrease, insert the hook under the front loop of each of the next two stitches. Yarn over and pull through those front loops, then yarn over and pull through the remaining two loops. A standard single crochet decrease can also be used.
For hdc, yarn over, insert the hook into the stitch, yarn over and draw up a loop, then yarn over and pull through all three loops. For dc, yarn over and draw up a loop, then pull through two loops twice. The different heights help each leaf widen from its tip toward the cap.
Pattern: Coral Strawberry Body
Begin at the pointed bottom with coral yarn. This first section expands more slowly than a standard six-increase circle, creating a tapered fruit shape.
Shape the Lower Point
- R1: 6 sc into an MR. Tighten the center. 6 sts.
- R2: (1 sc, inc) × 3. 9 sts.
- R3: (2 sc, inc) × 3. 12 sts.
- R4: (3 sc, inc) × 3. 15 sts.
- R5: (4 sc, inc) × 3. 18 sts.
Keep the right side outward as the shape grows. Secure the starting tail inside before filling the point. Avoid pulling the first rounds so tightly that the hook becomes difficult to insert.
Broaden the Shoulders
- R6: (2 sc, inc) × 6. 24 sts.
- R7: (3 sc, inc) × 6. 30 sts.
- R8: (4 sc, inc) × 6. 36 sts.
- R9–R12: Sc in every stitch for four rounds. 36 sts each round.
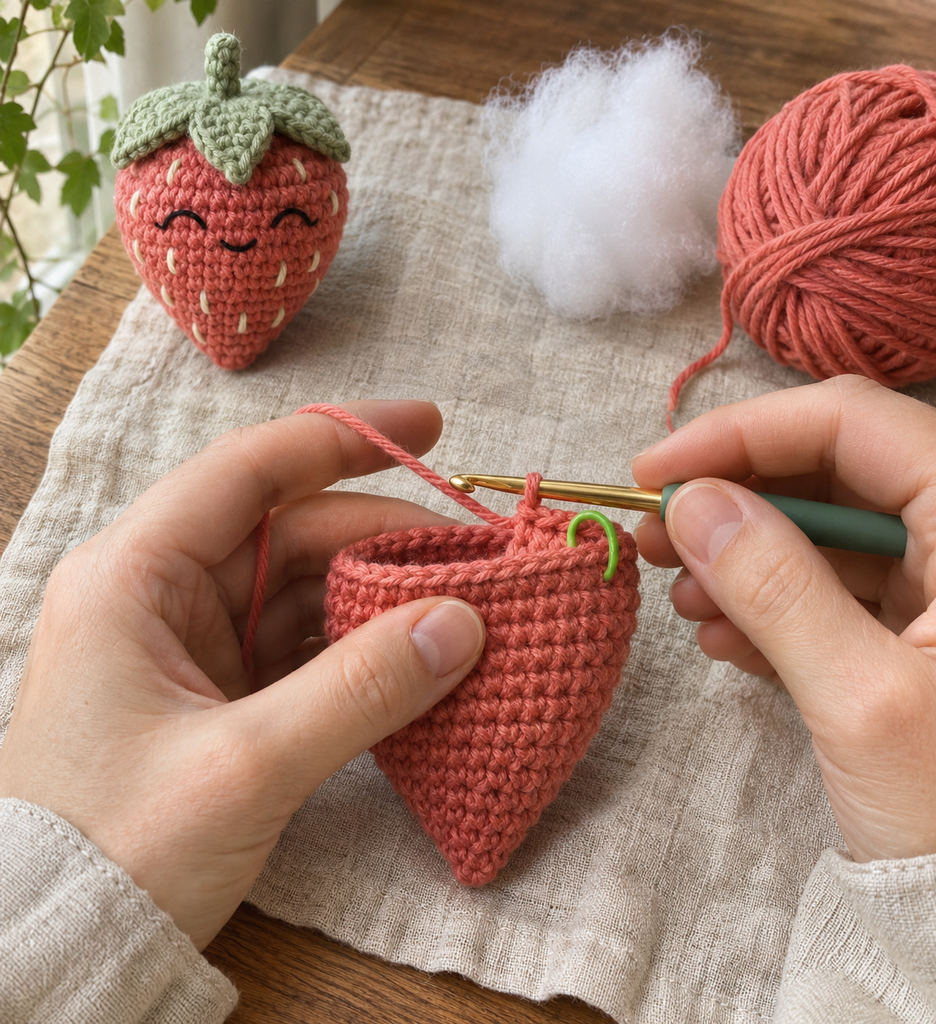
The open piece should now resemble a small tapered cup with a rounded upper section. Check the 36-stitch count before beginning the closing rounds.
Embroider the Face and Seeds
Keep the top open while adding the embroidery. Choose a smooth front and mark it independently of the round marker. Spiral drift means that marker may not stay directly at the back.
Add the Sleepy Expression
Place two small closed-eye arches around R11, each spanning approximately two fabric stitches. Leave roughly four stitches between the inner ends, adjusting for your actual yarn and curvature.
Below the eyes, embroider a tiny curved smile around R9–R10. Use a few short backstitches instead of one long floating strand. Keep the smile centered when the fruit is viewed straight on.
Add a little temporary filling to see the face on its rounded surface. Loosen any embroidery that pulls the fabric inward, then secure the ends inside the open fruit. Remove some temporary filling if it obstructs the needle.
Scatter the Cream Seeds
Embroider approximately 10–14 short cream seed stitches around the front and sides, mainly between R5 and R12. Each seed can be one short vertical or slightly angled stitch, spanning about one round of fabric.
Leave the eye and mouth area clear. Place seeds with gentle variation rather than forcing them into a perfect grid. A few can sit toward the back, but they do not need to cover the entire fruit evenly.
Anchor the ends securely on the inside. Keep interior carrying strands relaxed enough that they do not squeeze the body, while avoiding long loose loops. The generated photographs may show a different number of seeds; use this written range as a decorative guide.
Fill and Close the Fruit
Continue crocheting with coral yarn.
- R13: (4 sc, dec) × 6. 30 sts.
- R14: (3 sc, dec) × 6. 24 sts.
- R15: (2 sc, dec) × 6. 18 sts.
Add filling in small tufts. Push a little into the lower point without making it hard, then distribute filling through the broad shoulders. The fruit should feel softly firm, with no stretched gaps between stitches.
- R16: (1 sc, dec) × 6. 12 sts.
Finish filling through the remaining opening. Inspect the face and lower point once more; extra stuffing can change their appearance.
- R17: Dec × 6. 6 sts.
Fasten off with a 20 cm tail. Thread through the front loops of the last six stitches, draw the opening closed, and secure it. Bury the end inside the fruit. This closure is the top, where the green cap will sit.
Pattern: Five-Leaf Sage Cap
The cap begins with a tiny central disc, then adds five leaves around its ten-stitch edge. Each leaf uses a chain extension and returns to the disc with two slip stitches.
With sage yarn:
- R1: 5 sc into an MR. 5 sts.
- R2: Inc in every stitch. 10 sts.
Keep the working loop on the hook. Move a marker to the first unworked stitch of the ten-stitch disc edge so you can track where the leaf round begins.
Make One Leaf Unit
- Ch 4.
- Work 1 sc into the second chain from the hook.
- Work 1 hdc into the next chain.
- Work 1 dc into the last remaining chain, nearest the disc.
- Sl st into the next unworked stitch of the disc edge.
- Sl st into the following unworked stitch of the disc edge.
That completes one pointed leaf and consumes two disc-edge stitches. The three return stitches are worked into the chain extension, not into the disc.
Repeat this leaf unit five times in total, moving to the next two unworked disc stitches after each chain extension. All ten edge stitches will have been used, with exactly five leaves around the center.
Fasten off with a 45 cm sewing tail. Do not add an extra joining stitch or sixth leaf. Gently arrange the points outward. Their exact spread depends on the yarn; the photographs show an intended leafy outline rather than a tested result.
Pattern: Short Green Stem
With sage yarn:
- R1: 4 sc into an MR. 4 sts.
- R2–R4: Sc in every stitch for three rounds. 4 sts each round.
Do not stuff. Flatten the four-stitch opening into two pairs and work a closing row of 2 sc through both layers. Fasten off with a 25 cm tail.
The narrow tube can be fiddly, so count carefully and mark the first stitch. The closed two-stitch edge becomes the attachment base; the magic-ring end is the top of the stem.
Sew the stem base securely to the center of the cap before attaching the cap to the fruit. Reinforce the base with small stitches through the central disc and secure the ends beneath it. A short stem may lean naturally; do not assume it will stand exactly upright.
Assembly: Finish the Strawberry
You should have three crochet pieces: the fruit body, five-leaf cap, and stem. The stem may already be joined to the cap, leaving one final assembly seam.
Place the cap over the closed coral top. Arrange the five leaf points over the rounded shoulders, turning the cap until the face remains clearly visible. Keep the stem centered over the fruit rather than sliding toward the back.
Pin the central disc first. Sew its edge securely to sound coral surface loops, working around the entire central area. These are surface attachment stitches; the cap edge does not match a single body round one to one.
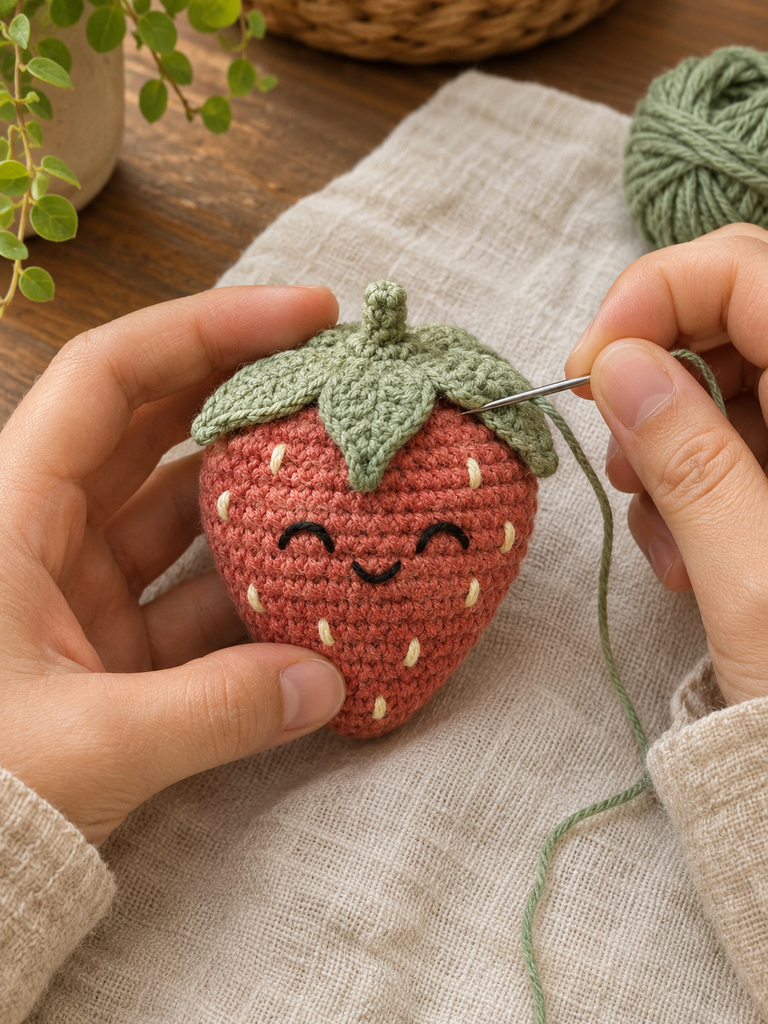
Add a discreet sage tack near the base or middle of each leaf where it meets the coral shoulder. Keep the pointed tips free if they lie neatly. If a tip curls excessively, a small additional tack can hold it without pulling the fruit out of shape.
Avoid sewing only through the final six-stitch closure at the top. Spreading the attachment across adjacent sound fabric creates a broader connection. Secure all sewing ends and bury them beneath the cap or inside the fruit.
Remove every pin and temporary marker. Check Ruby by sight and touch, gently tugging the stem and cap. Strengthen loose stitches and inspect the embroidery before wrapping.
More Information: Turning Ruby into a Gift
Present It Simply
A small paper box with a little tissue paper keeps the leaves from being crushed. Set the strawberry inside with its face visible and place the tag beside it. Tie the ribbon around the packaging rather than tightly around the stem.
A short handwritten note can make the gift feel personal. If you include care information, base it on the yarn and filling actually used rather than promising a washing method you have not checked.
Adjust the Palette
Classic red with fresh green gives a bright strawberry, while dusty coral and sage create a softer look. Keep the cream seeds visible against the fruit. Changing colors alone does not require new counts when the yarn thickness stays similar.
Using bulky plush yarn changes the scale, embroidery visibility, and behavior of the tiny stem and leaves. Make a sample rather than transferring the DK quantities directly.
Troubleshoot the Shape
If the point looks blunt, check the early three-increase rounds and avoid overfilling the base. If the shoulders look lumpy, redistribute the filling before closing R17. Packing in more stuffing generally stretches gaps rather than smoothing the surface.
If the cap pulls upward, loosen the sewing tension and spread its attachment across the shoulders. Leaf tips can curl softly; they do not need to be pressed into a rigid flat star.
Care and Storage
Follow the care instructions for both yarn and filling. Where those materials permit, gentle spot cleaning and thorough air drying can help preserve the face and cap. Do not store the strawberry while damp, and recheck the stem and leaf attachments after cleaning or frequent handling.
Frequently Asked Questions
Is this a beginner-friendly gift project?
A confident beginner can follow the fruit shaping after practicing spiral rounds and decreases. The cap uses several stitch heights, and the stem has a small four-stitch opening. Read those sections first and work slowly if they are new to you.
Why does the fruit start with three increases per round?
The gradual expansion creates a narrower lower point before the shoulders widen with six increases. Working six increases from the start would produce a rounder base and change the strawberry silhouette.
Can I skip the face?
Yes. The face is decorative and does not affect the shaping. A fruit-only version can keep the cream seeds and green cap with the same crochet counts.
Can I make the stem longer?
Adding plain four-stitch rounds increases its length, but a longer unstuffed stem may bend more. This draft is written for a short stem. Treat changes as experiments and assess the attachment on your actual sample.
Why are the leaves not identical to the images?
The pictures are AI-generated concepts. Yarn, tension, chain length, and sewing position affect the real leaf outline. The written cap makes five leaves, each returned along a three-stitch chain section and anchored across two disc stitches.
Has this pattern been physically tested?
No. The round arithmetic and cap-edge consumption have been reviewed, but no finished sample has been made. Yarn requirements, size, shape, leaf posture, and attachment behavior still need practical validation before the draft is described as tested.