Lumi the Amigurumi Moon Bunny
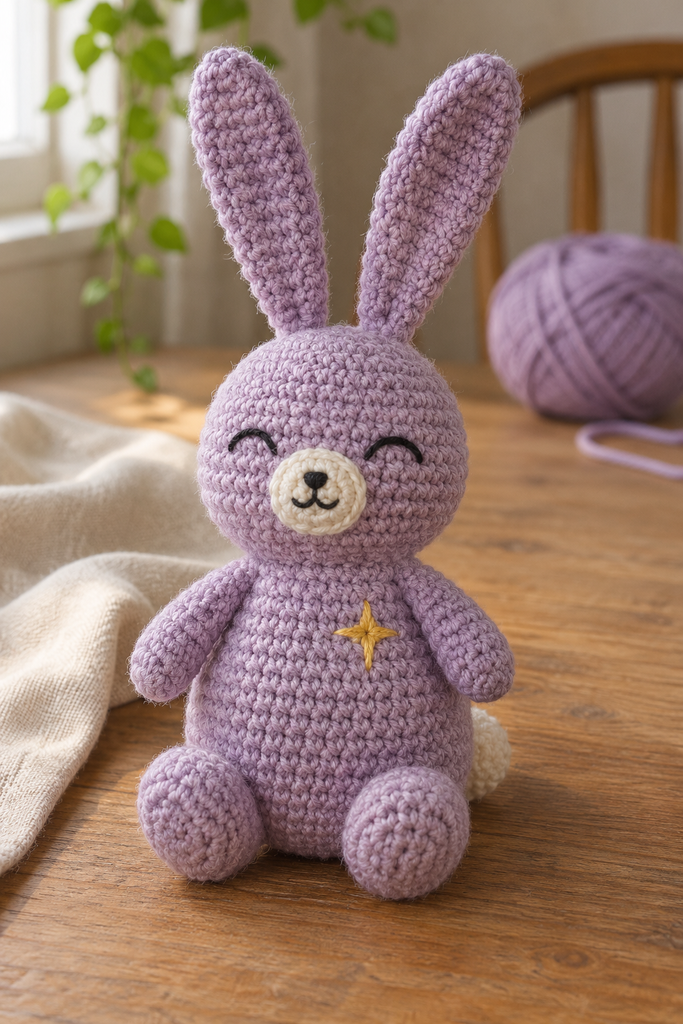
A sleepy little bunny makes a cheerful companion for a craft shelf, a reading corner, or a handmade gift display. Lumi has a lavender body, long narrow ears, a cream muzzle, and a tiny golden star embroidered on the belly. The face uses simple thread stitches rather than plastic eyes, keeping the expression soft and the supply list short.
The main body and head are crocheted in one continuous piece. You add two ears, two arms, two feet, a muzzle, and a small tail afterward. This construction gives you a clear sequence: shape the main piece, embroider the face, fill and close it, then position the smaller pieces before sewing.
This newly drafted project takes only the playful fantasy mood of the supplied Purr-anormal Alien Cat Knit Dishcloth as inspiration. It changes the animal, silhouette, colors, stitch structure, function, and assembly. A flat knitted alien-cat cloth becomes a stuffed crochet rabbit with a star detail. The source chart, knitting instructions, and photographs are not reproduced.
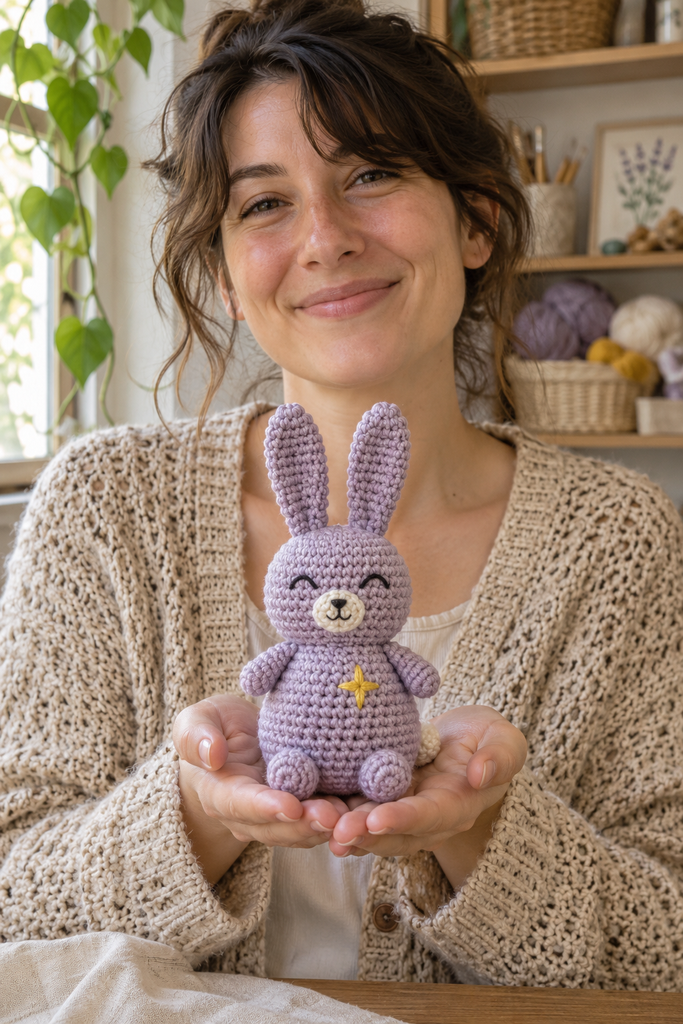
Pattern status: Stitch arithmetic has been reviewed, but this draft has not been physically crocheted or fit-tested. Finished size, yarn quantities, balance, and attachment positions are estimates. All four photographs are AI-generated illustrations; use the written instructions for the actual construction.
Project Overview
Lumi is suited to a confident beginner who can work single crochet in a spiral, increase, decrease, and sew small pieces together. The face and star are embroidered with a tapestry needle. No separate colorwork chart is needed.
The intended finished height is approximately 15–18 cm including the ears, using DK cotton yarn and a 3 mm hook. This is an untested size estimate. Cotton gives the fabric a defined texture; choose a hook that creates firm stitches without hurting your hands.
The suggested working gauge is approximately 22 single crochet stitches and 25 rounds per 10 cm. Gauge is a starting point rather than a guarantee of the finished dimensions. Stuff a small sample lightly and check that the filling stays hidden before committing to the main piece.
Materials
- DK cotton yarn in dusty lavender, approximately 100–140 m.
- Cream DK cotton yarn, approximately 10–20 m, for the muzzle and tail.
- A short length of mustard-gold yarn for the embroidered star.
- Black embroidery thread or a thinner black yarn for the face.
- A 3 mm crochet hook, or another size that gives dense, comfortable fabric.
- Polyester toy stuffing or another appropriate fiberfill.
- A blunt tapestry needle, scissors, removable stitch markers, and temporary assembly pins.
These quantities include a margin for sewing and small adjustments. Keep all main colors in a similar yarn weight. If your black yarn is thick, split it into fewer strands for a more delicate expression.
Use washable materials if you expect to clean the finished item. This pattern alone does not establish suitability for babies or young children. Loose stuffing and detached pieces can be hazardous; the maker must choose suitable materials and assess the finished object for its intended recipient.
Abbreviations and Techniques
This pattern uses US crochet terminology.
| Term | Meaning |
|---|---|
| MR | Magic ring |
| ch | Chain |
| sc | Single crochet |
| inc | Work 2 sc into the same stitch |
| dec | Decrease 2 stitches into 1; use an invisible decrease if comfortable |
| st / sts | Stitch / stitches |
| R | Round |
| (instructions) × number | Repeat the bracketed sequence that many times |
Work in continuous spiral rounds unless a closing row is specifically stated. Do not join each round or add a turning chain. Place a marker in the first stitch and move it at the start of every new round.
The number after each round is the total stitch count. An increase consumes one stitch and produces two. A decrease consumes two stitches and produces one. Count before continuing whenever the shape changes.
For an invisible decrease, insert the hook under the front loop of each of the next two stitches, yarn over and draw through both front loops, then yarn over and draw through the remaining two loops. Keep the outside of the work facing outward as the piece grows.
When a piece is flattened for a closing row, align its open edge into two layers. Work through one stitch from each layer together. Six stitches around the opening form three pairs, so the closing row contains three sc.
Pattern: Main Body and Head
Build the Rounded Body
With lavender yarn, begin at the bottom of the body.
- R1: Work 6 sc into an MR. Tighten the center. 6 sts.
- R2: Inc in every stitch. 12 sts.
- R3: (1 sc, inc) × 6. 18 sts.
- R4: (2 sc, inc) × 6. 24 sts.
- R5: (3 sc, inc) × 6. 30 sts.
- R6: (4 sc, inc) × 6. 36 sts.
- R7–R12: Sc in every stitch for six rounds. 36 sts each round.
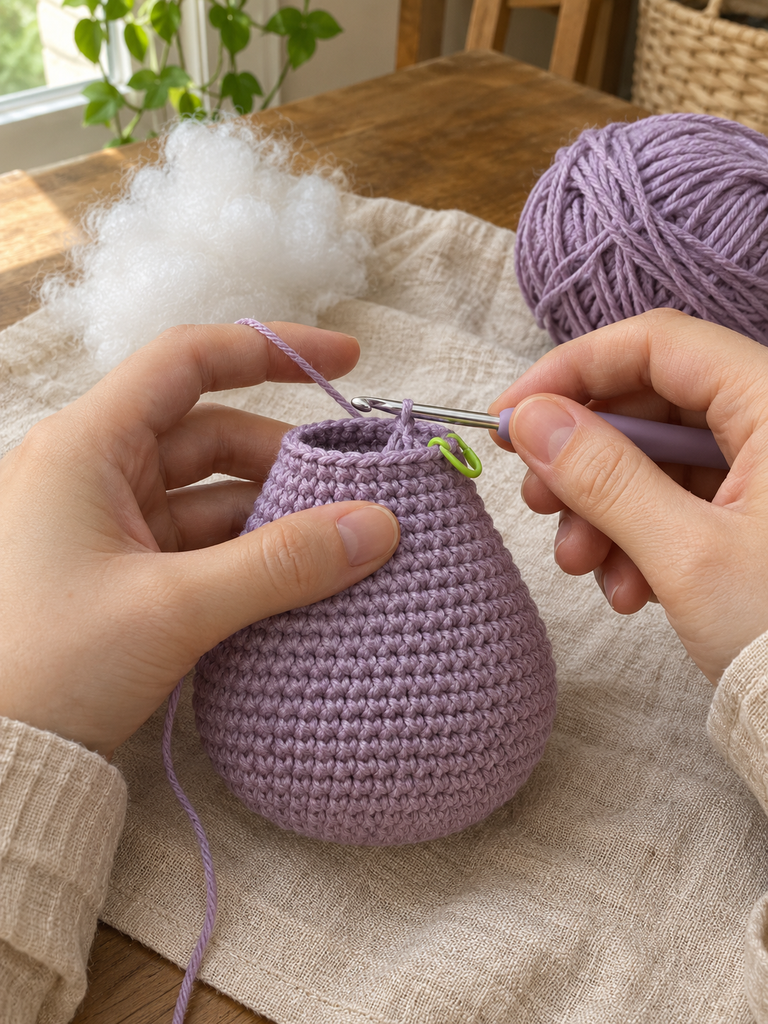
The growing piece should resemble a rounded cup. Check the outside texture before proceeding; the wrong side often shows more pronounced horizontal bars. If necessary, turn the cup right side out now.
Do not add stuffing so early that it catches in your hook. At this stage, inspect the base for a loose center and secure the starting tail on the inside. Keep the working yarn attached.
Narrow the Shoulders
- R13: (4 sc, dec) × 6. 30 sts.
- R14: (3 sc, dec) × 6. 24 sts.
- R15: (2 sc, dec) × 6. 18 sts.
- R16: Sc in every stitch. 18 sts.
Add small tufts of stuffing through the neck opening. Push filling toward the base and sides with your fingers or the blunt end of a suitable tool. Keep the base softly rounded rather than packed into a hard ball.
The neck should hold its shape while remaining flexible. Avoid a sharp waist pulled tight by overly snug stitches. Your final seating position will depend on the feet, tail, and stuffing distribution as well as the body shape.
Expand and Shape the Head
Continue with the same lavender yarn; do not fasten off at the neck.
- R17: (2 sc, inc) × 6. 24 sts.
- R18: (3 sc, inc) × 6. 30 sts.
- R19–R24: Sc in every stitch for six rounds. 30 sts each round.
Choose a front that looks smooth and even. The round marker can sit toward the back if convenient, but spiral drift means it should not be treated as a fixed anatomical center. Mark the front independently with a contrasting thread.
Leave the crown open while preparing and attaching the muzzle. This allows you to hide embroidery ends inside the head. Add only enough head stuffing to support its shape temporarily, removing a little if the needle needs more room.
Pattern: Cream Muzzle
With cream yarn, make one small circular patch.
- R1: 6 sc into an MR. 6 sts.
- R2: Inc in every stitch. 12 sts.
- R3: Sc in every stitch. 12 sts.
Fasten off with a 30 cm sewing tail. The last round may give the patch a shallow cup shape. Gently flatten it with your fingers; do not stuff it.
Place the muzzle centrally on the front of the head, approximately over R20–R22. Its precise span depends on your gauge. Sew all around its edge to sound surface loops without pulling the patch into a cone.
Embroider a tiny black nose near the upper center of the cream circle with two or three short stitches. Add a short vertical line below it, followed by two small angled stitches to suggest a mouth. Use light tension so the cream patch stays smooth.
Position one closed-eye arch on either side of the muzzle, near R23. Each arch can span roughly two head stitches; leave enough space that the eyes do not disappear under the muzzle edge. Check the expression from straight ahead before securing the ends inside the still-open head.
Finish the Head
Continue crocheting the main piece.
- R25: (3 sc, dec) × 6. 24 sts.
- R26: (2 sc, dec) × 6. 18 sts.
- R27: (1 sc, dec) × 6. 12 sts.
Finish filling the head through the remaining opening. Add enough support at the neck that the head does not fold forward, while preserving a soft feel. Inspect the muzzle and eyes again; extra stuffing can change their appearance.
- R28: Dec × 6. 6 sts.
Fasten off with a 20 cm tail. Thread the tail through the front loops of the final six stitches, pull the opening closed, and secure it. Bury the end inside the head. The crown now provides a closed surface for attaching the ears.
Pattern: Long Ears, Make Two
With lavender yarn, begin at the tip of each ear.
- R1: 6 sc into an MR. 6 sts.
- R2: (1 sc, inc) × 3. 9 sts.
- R3–R10: Sc in every stitch for eight rounds. 9 sts each round.
- R11: (1 sc, dec) × 3. 6 sts.
Leave the ears unstuffed. Flatten each opening into three pairs of stitches. Work a closing row of 3 sc through both layers, then fasten off with a 35 cm tail.
Make both ears to the same number of rounds before deciding on their placement. Narrow unstuffed ears can lean or fold; their posture will depend on yarn firmness and the sewn base. Do not assume the upright pose in the generated image will occur automatically.
Pattern: Arms, Make Two
With lavender yarn, begin at the rounded hand end.
- R1: 6 sc into an MR. 6 sts.
- R2: Inc in every stitch. 12 sts.
- R3–R5: Sc in every stitch for three rounds. 12 sts each round.
- R6: Dec × 6. 6 sts.
Add a very small tuft of filling to the rounded hand if desired, keeping the opening unfilled. Flatten into three pairs and work a closing row of 3 sc through both layers. Fasten off with a 30 cm sewing tail.
The arms are short and rounded. Keeping their upper edges soft makes it easier to sew them close to the body rather than making them stick out rigidly.
Pattern: Feet, Make Two
With lavender yarn, begin at the front of each foot.
- R1: 6 sc into an MR. 6 sts.
- R2: Inc in every stitch. 12 sts.
- R3–R4: Sc in every stitch for two rounds. 12 sts each round.
Add a small amount of filling, shaping the piece into a softly rounded paw.
- R5: Dec × 6. 6 sts.
Fasten off with a 35 cm tail. Thread through the front loops of the six remaining stitches and close the opening. Leave the tail accessible for attaching the foot. Make the second foot and compare their filling before sewing either one onto the body.
Pattern: Cream Tail
With cream yarn, make one small tail.
- R1: 6 sc into an MR. 6 sts.
- R2: Inc in every stitch. 12 sts.
- R3: Sc in every stitch. 12 sts.
Add a little filling.
- R4: Dec × 6. 6 sts.
Fasten off with a 30 cm tail, thread through the remaining front loops, and close. Keep the sewing tail outside. This small crocheted tail provides a tidy finish without the loose fibers of a yarn pom-pom.
Assembly: Give Lumi a Balanced Pose
You should now have nine crochet pieces: the joined body and head, two ears, two arms, two feet, one muzzle already attached, and one tail. The star is embroidery rather than a tenth crochet piece.
Attach the Ears
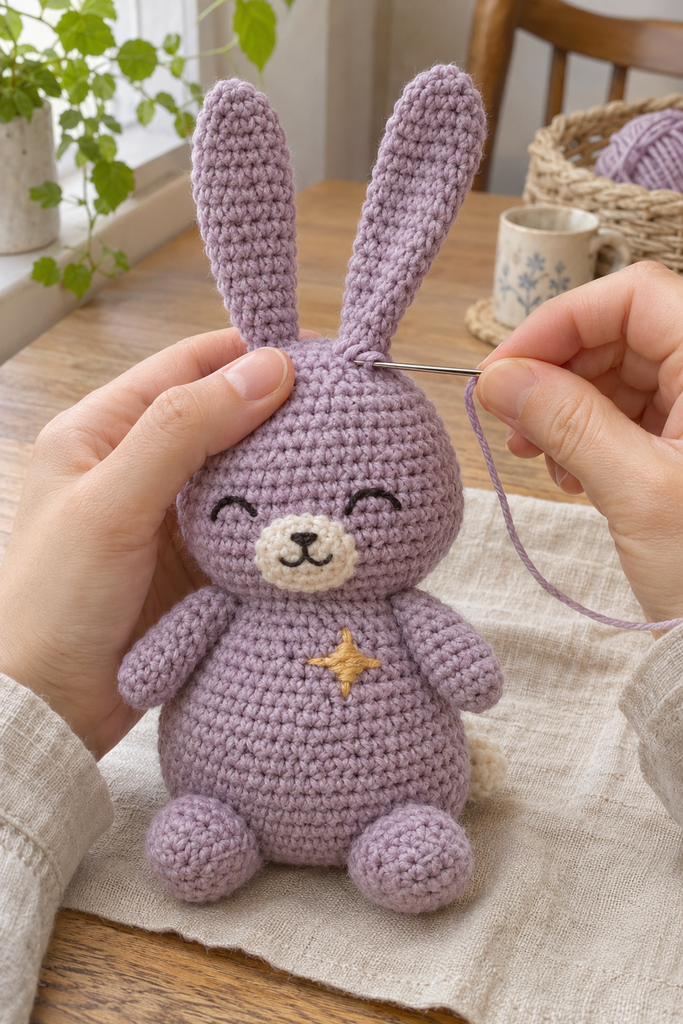
Pin the ears to the upper left and right sides of the crown, approximately over R25–R27. Leave a small gap between them and check that both bases are equally far from the face center. Start with a slight outward tilt.
Sew each three-stitch closed base onto sound head loops. Pass back across the base a second time for reinforcement, including a few small stitches through the back of the base if needed to support the ear angle. Do not pull so tightly that the crown dents.
Attach the Arms and Feet
Pin the arms at the sides of the upper body, approximately around R13–R15, with the rounded ends pointing down. Keep their upper edges clear of the head so the neck remains visible. Sew each three-stitch closed edge securely across the body surface and reinforce the attachment.
Position the feet at the lower front, approximately across R3–R6. Set their closed ends against the body with the rounded portions projecting forward. Leave a small gap between the paws. Sew each closed end and a little of its underside to the body; a single attachment point may allow the foot to swivel.
Place Lumi on a level surface before finishing the sewing. Adjust the feet together, then pin the cream tail at the lower back around R4–R6. Sew the tail around its closed end and adjacent side stitches. It may help support the pose, but this untested draft does not guarantee that the toy will sit independently. If needed, display it against a cushion or on a small stand.
Embroider the Golden Star
Use mustard-gold yarn to embroider a small four-point star at the center front of the body, approximately across R8–R11. Make one vertical stitch spanning two or three rounds, one shorter horizontal stitch across it, forming four outward points. Add a second parallel stitch along either axis only if the yarn needs more coverage.
Keep each stitch short enough to lie flat against the fabric. Guide the needle under surface stitches where possible rather than repeatedly passing through the full stuffing mass. Secure both ends and bury them inside the body. The star should read as a small stitched sparkle, with no loose loops.
Remove every assembly pin and temporary thread. Check the entire bunny by touch and sight, then give each attachment a gentle tug. Rework loose seams and bury any remaining yarn ends.
More Information: Adjustments and Troubleshooting
Keep the Fabric Dense
If filling is visible between stitches, try a smaller hook or a firmer yarn. Adding more stuffing usually widens the gaps further. A different hook changes the size of every piece, so use the same main hook throughout unless you deliberately test an adjustment.
A pale filling can show especially clearly through lavender fabric in bright light. Inspect under ordinary daylight as you work. Correct the tension early rather than relying on dim photography to hide gaps.
Avoid a Wobbly Neck
Support the neck with small tufts of filling before fully packing the head. Fill the narrow area evenly rather than pushing one large lump upward. If the finished head still leans, redistribute filling while the crown is open and check that the ears are not pulling it off-center.
Personalize the Palette
Dusty blue, sage, or warm rose can replace lavender while keeping the cream muzzle readable. A darker body may need a lighter embroidery thread for the eyes. Change colors without changing the stitch counts for the most straightforward variation.
Longer ears are possible by adding plain rounds in the nine-stitch section, but they may become floppy and alter the balance. Treat that change as an experiment. Avoid wire inserts for a soft toy project.
Care and Storage
Follow the care instructions for both the yarn and filling. Where those instructions permit, gentle spot cleaning and air drying can help preserve embroidered details. Do not store the bunny while damp. Check seams and embroidery after cleaning, especially if the item is handled frequently.
Frequently Asked Questions
Can a beginner crochet Lumi?
A confident beginner can follow the draft with practice in spiral rounds, increases, decreases, and sewing. Make one ear first to practice shaping and closing a flattened opening. The most demanding part is usually arranging the small pieces symmetrically.
Why are the head and body joined together?
Working them in one piece removes a separate head seam and creates a continuous neck. You still need to support that neck with filling. Joining the crochet fabric does not automatically prevent wobbling.
Can I replace the embroidered eyes with plastic eyes?
This version is written for embroidered closed eyes. Hardware would require its own placement and installation before closing the head, and its suitability depends on the intended recipient. The supplied draft does not validate a hardware-based version.
Why do my ears bend instead of standing up?
The ears are unstuffed, so yarn softness, tension, length, and attachment angle all affect their posture. Strengthen the sewn base gently or accept a relaxed lean. The generated photographs show a concept rather than proof of an achieved ear position.
Can I use bulky chenille yarn?
Changing to chenille substantially changes the scale, fabric behavior, sewing visibility, and yarn use. A larger version would need appropriate hook selection and a sample. The DK yarn estimates and finished-size estimate do not transfer directly.
Has this pattern been tested with a finished sample?
No. The round arithmetic has been checked, but no physical prototype has been made. Photograph proportions, yarn requirements, sitting balance, and exact attachment positions remain illustrative or estimated. Make and assess a sample before relying on this draft for repeated production or publication as a tested pattern.