Tavi the Amigurumi Sea Turtle
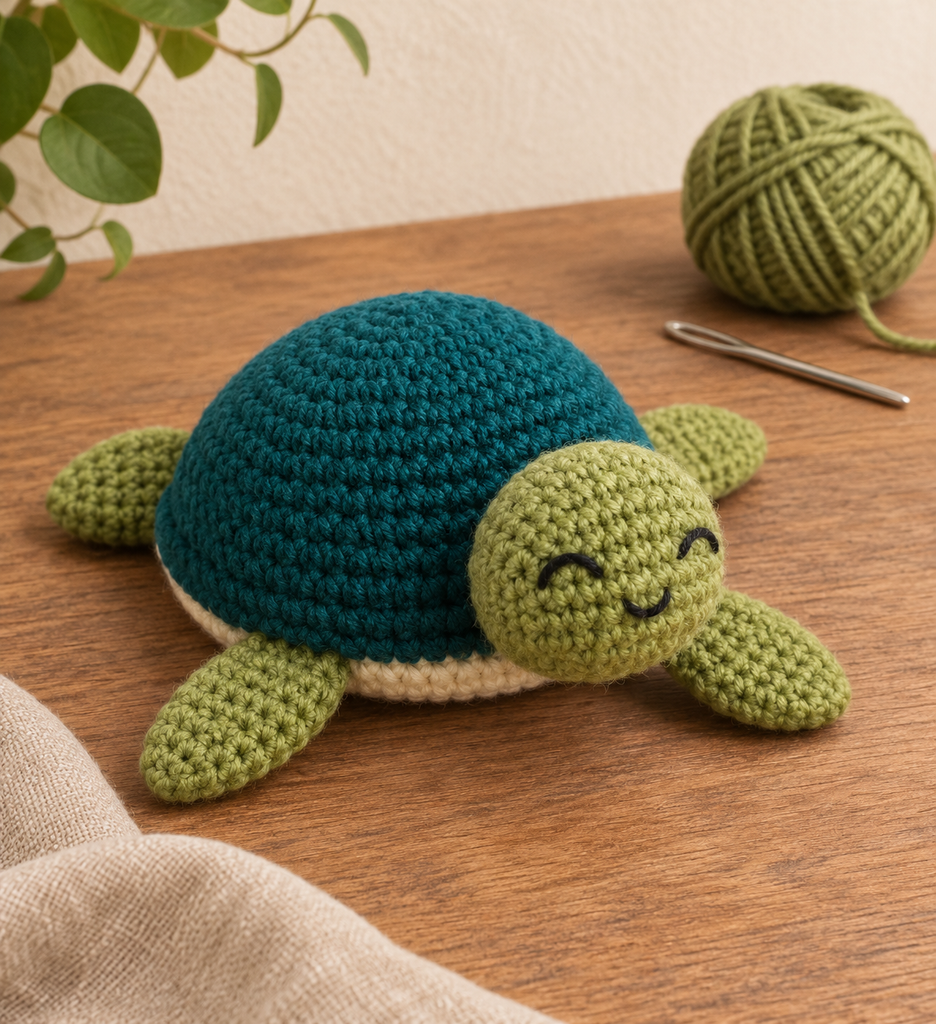
Meet Tavi, a small crochet sea turtle with a deep teal shell, a cream belly, and four soft olive flippers. A round head and a few embroidered stitches give the character a gentle expression. I like this simple color combination because it feels playful without needing a complicated shell pattern or lots of decorative pieces.
Tavi is made from seven crocheted parts: one shell, one belly disc, one head, and four flippers. The shell and belly close around the stuffing before the smaller pieces are sewn on. This gives you a chance to check the body shape first and then arrange the flippers in balanced pairs.
Pattern status: This is a newly drafted, untested pattern. Stitch arithmetic and matching join counts have been reviewed, but no physical sample has been made. Finished proportions, yarn quantities, filling, head position, and seam durability require testing. All four images are AI-generated design or process concepts; stitch texture, size, and apparent round counts are approximate. Follow the written draft for construction.
About This New Design
The supplied reference is a fish-shaped crochet dishcloth with a shell-stitch surface. This project takes the broad ocean theme into a different item: a stuffed sea turtle worked in single crochet, with a separate belly, round head, and four flippers. The reference’s fish shape, dishcloth construction, shell-stitch pattern, and photographs are not reproduced.
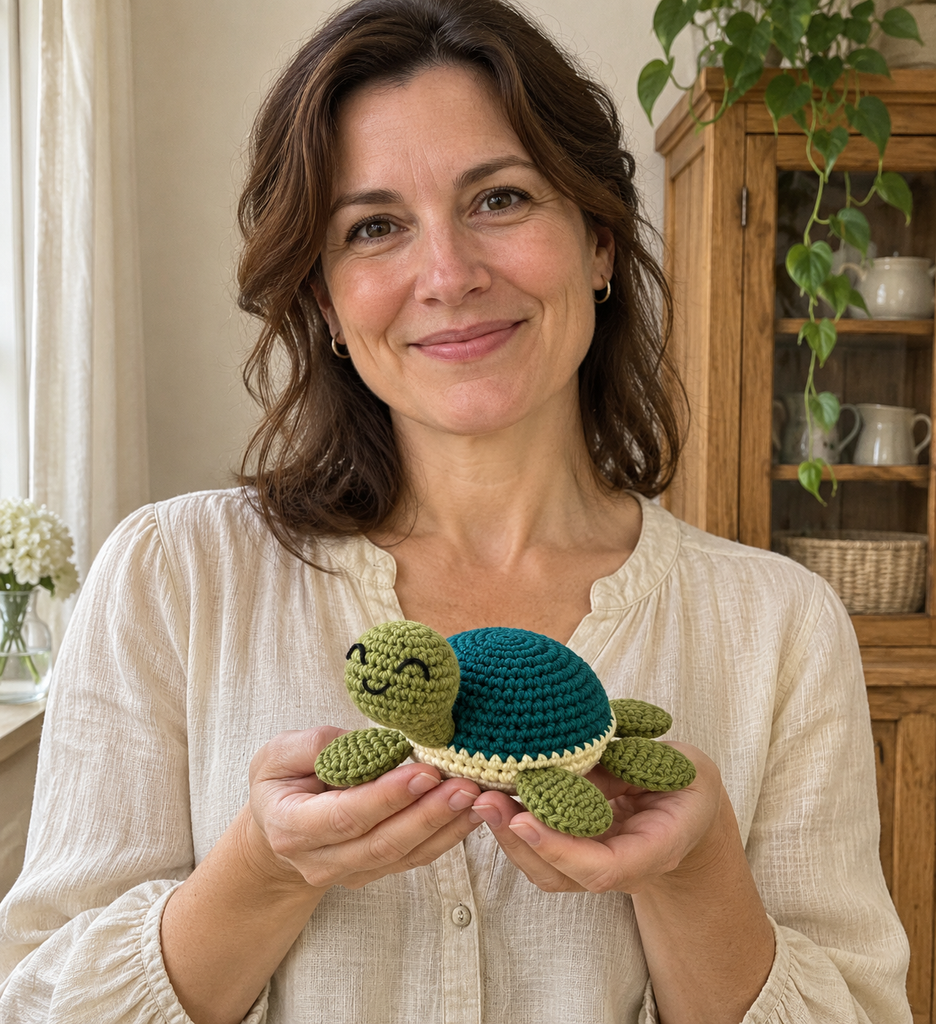
The proposed finished length is approximately 9–11 cm including the head, with a shell around 6 cm across at its widest point. These are planning estimates rather than measurements from a sample. Tavi is a craft character; suitability for a particular recipient or use needs separate assessment.
| Project detail | Draft specification |
|---|---|
| Skill level | Confident beginner familiar with small spiral pieces |
| Terminology | US crochet terms |
| Shell | 12 rounds, reaching 42 stitches and ending at 36 |
| Belly | Six-round flat disc ending at 36 stitches |
| Head | Nine rounds, ending with six stitches to close |
| Flippers | Four matching pieces, each closed with three sc |
| Face | Embroidered closed eyes and a small smile |
| Construction | Seven pieces with a sewn body join and attachments |
Materials and Gauge
Choose smooth DK cotton or a cotton blend that makes close, clear stitches. A 3 mm hook is a reasonable starting point, but adjust for your yarn and tension. The fabric should hold the filling without gaps while remaining comfortable to work.
- Deep teal: approximately 45–65 m for the shell.
- Olive green: approximately 40–60 m for the head and four flippers.
- Cream: approximately 15–25 m for the belly and its seam.
- A little black embroidery thread or fine black yarn.
- Polyester fiberfill, added in small portions.
- A 3 mm hook, or suitable size for the fabric.
- Removable markers, blunt yarn needle, embroidery needle, scissors, and measuring tape.
The yarn quantities are provisional allowances, not measured sample consumption. Use compatible yarns for the shell and belly so their matching stitch counts also make reasonably compatible edge lengths.
A suggested gauge is 22 sc stitches and 26 rounds per 10 cm in representative fabric worked in the round. At that stitch gauge, 42 stitches give a circumference near 19.1 cm, corresponding to a rounded width around 6.1 cm. The final 36-stitch opening is smaller, drawing the shell’s lower edge inward.
The shell, head, and flippers are shaped pieces, so gauge alone does not establish their final dimensions. Aim for a dense fabric, then measure and record the actual sample.
Abbreviations and Working Notes
Ch means chain, sc means single crochet, sl st means slip stitch, and st/sts means stitch/stitches. Inc means work two sc in one stitch. Dec means reduce the next two stitches to one sc.
For a regular decrease, draw up a loop in each of the next two stitches, yarn over, and pull through all three loops. An invisible decrease through the front loops of the next two stitches is an alternative if that is your usual technique.
Work all round pieces continuously, without joining or turning. Mark the first actual stitch and move the marker as you progress. Do not add a starting chain between rounds. Ordinary sc use both top loops.
When a sequence says “4 sc, inc,” work one sc in each of four separate stitches, then two sc in the following stitch. The bold count is the total after completing that round.
How to Crochet Tavi the Sea Turtle
Step 1: Begin the Teal Shell
With teal, make an adjustable ring.
- Round 1: Work 6 sc into the ring and mark the first stitch: 6 sc.
- Round 2: Inc in every stitch: 12 sc.
- Round 3: Repeat 1 sc, inc six times: 18 sc.
- Round 4: Repeat 2 sc, inc six times: 24 sc.
- Round 5: Repeat 3 sc, inc six times: 30 sc.
- Round 6: Repeat 4 sc, inc six times: 36 sc.
- Round 7: Repeat 5 sc, inc six times: 42 sc.
Secure the starting-ring tail through the backs of several stitches inside. Do not leave the center dependent on ring tension alone.
The increase section can have a gentle six-sided outline because the increases line up. Check the counts before continuing; strong waves or accidental extra increases will affect the body join later.
Step 2: Shape the Shell Dome
Rounds 8–11: Sc in every stitch around: 42 sc per round. These four rounds build the shell’s sides.
Round 12: Repeat 5 sc, dec six times: 36 sc.
Finish with a sl st into the next stitch and fasten off. The finishing slip stitch does not create an extra attachment position. Leave the shell opening unclosed; it will be matched to the belly disc.
The shell is a curved piece rather than a flat circle at this stage. The final decrease round makes its lower opening smaller than its widest section. Do not stretch that opening back to the 42-stitch width.

Step 3: Crochet the Cream Belly
With cream, make an adjustable ring.
- Round 1: Work 6 sc into the ring: 6 sc.
- Round 2: Inc in every stitch: 12 sc.
- Round 3: Repeat 1 sc, inc six times: 18 sc.
- Round 4: Repeat 2 sc, inc six times: 24 sc.
- Round 5: Repeat 3 sc, inc six times: 30 sc.
- Round 6: Repeat 4 sc, inc six times: 36 sc.
Finish with a sl st into the next stitch and fasten off with a long cream sewing tail. Secure the center tail on the underside.
The belly should lie reasonably flat. Its 36 outer stitches match the shell’s 36 final stitches, but compare the actual pieces before sewing. A thicker cream yarn or different tension can make a physical mismatch despite equal counts.
Step 4: Make the Olive Head
With olive, make an adjustable ring.
- Round 1: Work 6 sc into the ring: 6 sc.
- Round 2: Inc in every stitch: 12 sc.
- Round 3: Repeat 1 sc, inc six times: 18 sc.
- Rounds 4–7: Sc around: 18 sc per round.
Pause while the opening remains wide enough to embroider the face. Choose a front area and mark two small eye positions around Rounds 5–6, with roughly three stitches between their nearest ends. Make each eye as a gentle curved arch using two or three short black stitches.
Add a small curved smile below them around Round 7. The head begins at its top and closes at its lower neck, so increasing round numbers move downward in the intended face orientation. Keep the thread relaxed and secure its ends inside.
Round 8: Repeat 1 sc, dec six times: 12 sc.
Fill the head lightly, distributing small portions around the sides. Avoid pushing the face into a hard, stretched shape.
Round 9: Dec six times: 6 sc.
Fasten off with a long tail. Pass it through the front loops of the remaining six stitches, draw the opening closed, and secure it. Keep the rest of the tail for attachment.
Step 5: Crochet Four Matching Flippers
With olive, make an adjustable ring.
- Round 1: Work 6 sc into the ring: 6 sc.
- Round 2: Inc in every stitch: 12 sc.
- Rounds 3–4: Sc around: 12 sc per round.
- Round 5: Repeat 2 sc, dec three times: 9 sc.
- Round 6: Repeat 1 sc, dec three times: 6 sc.
Leave the flipper unstuffed. Flatten its final opening into three matched stitch pairs.
Closing row: Work 3 sc through both layers, one sc through each matched pair. This is a flat closing row, not a new six-stitch round. Fasten off with a long sewing tail.
Make four flippers total. Gently flatten each into an oval or paddle shape. Compare them before sewing; the same counts can still produce different sizes if the tension changes between pieces.
Stuff and Assemble the Turtle
Step 6: Match the Shell to the Belly
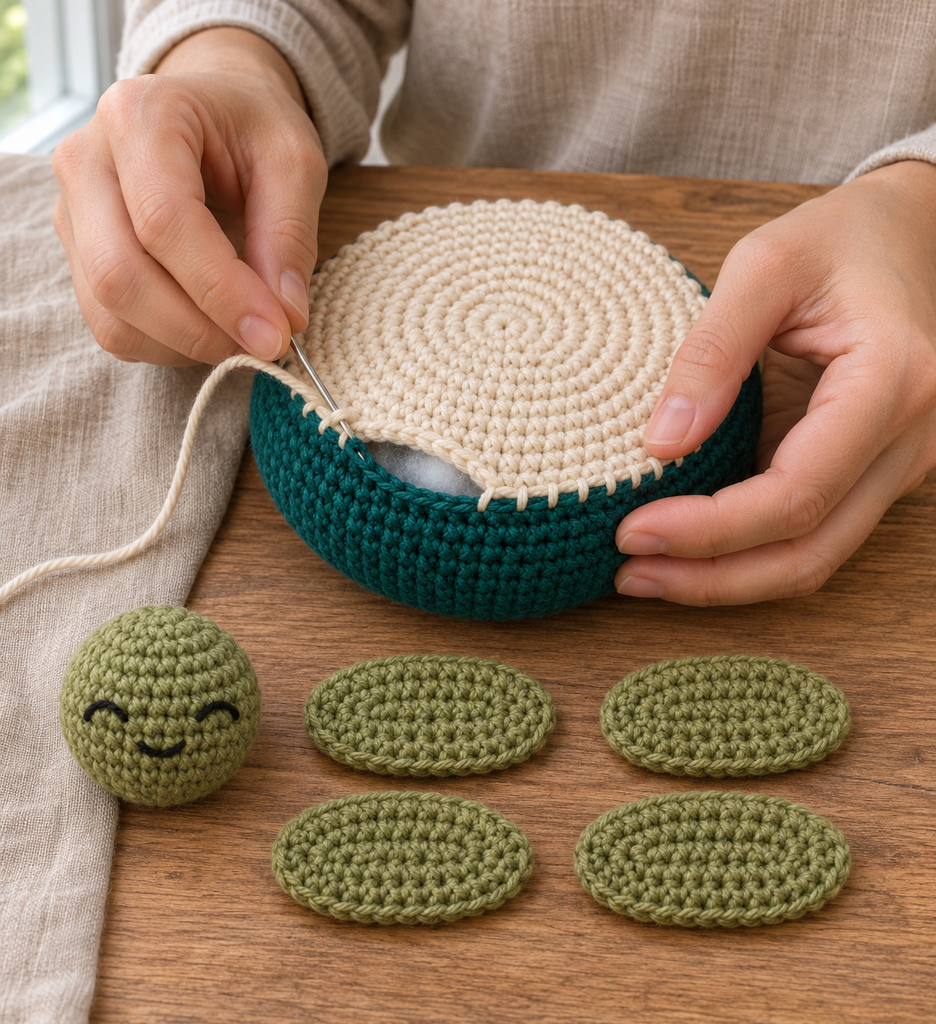
Lay the shell with its preferred outside face outward and place the belly over its opening, with the belly’s preferred outside face visible on the underside. Match one shell edge stitch to one belly edge stitch.
Mark three equally spaced reference points around each 36-stitch edge, twelve stitches apart. Clip matching marks together so the seam distributes evenly. Both edges have 36 positions; do not skip shell stitches to force an oversized disc into place.
Using the cream tail, begin sewing the two edges together with small, relaxed whipstitches through sound loops. Keep the dome above and the flat belly beneath. Avoid catching opposite sides of the body together or pulling the seam into a tight cord.
Step 7: Fill and Close the Body
After sewing roughly two thirds of the seam, add small portions of fiberfill through the remaining gap. Support the teal dome while spreading the filling evenly. Keep the cream belly relatively flat instead of forcing it into a second dome.
Add enough filling to support the shell without stretching the stitches apart. Check the shape from above and below, then complete the remaining one-to-one seam. Secure and hide the tail inside the body.
No stuffing should remain visible around the join. The body is now a closed stuffed unit, ready for its head and flippers.
Step 8: Plan the Head and Flipper Positions
Choose the front of the body and mark a center point on the cream belly close to the shell join. For a placement guide, call that seam position 1, then count the 36 positions around the join. The back center is approximately opposite it, around position 19.
Pin the closed lower end of the head at the front, spanning the area around positions 35, 36, 1, 2, and 3. Tilt the face gently forward and upward. The head should sit at the shell edge rather than on top of the dome.
Place the flippers on the cream underside close to the join. Suggested attachment spans are 5–7 and 30–32 for the front pair, and 12–14 and 23–25 for the rear pair. Each flattened closing edge has three stitches, matching the three-position span.
These are calculated placement guides, not physically tested positions. View the turtle from above, below, and in front before sewing. Angle the front pair outward toward the head and the rear pair outward toward the back, keeping all four paddles free to project.
Step 9: Sew the Flippers and Head Securely
Sew each flipper’s three-stitch closed edge to sound cream body loops just inside its marked seam span. Add a reinforcing pass through adjacent loops without drawing the paddle into a gathered shape. Keep the rest of each flipper free.
Check the symmetry after attaching the first pair, then sew the rear pair. Do not accidentally catch a flipper’s free end to the shell or sew across the belly through an opposite paddle.
Attach the head around its lower contact area, catching several sound body loops near the front seam and loops around the head’s closed neck. Spread the attachment around that area rather than pulling everything into the single closure point.
Support the head while assessing its angle. If it tilts farther than intended, adjust the pinning or seam placement instead of tightening one stitch aggressively. Secure the olive tails and hide them through the stuffed body.
Step 10: Finish and Inspect Tavi
Remove every pin, marker, and temporary thread. Check the body join, neck seam, and four flipper attachments with gentle tugs. Inspect the embroidery for loose surface loops and hide all remaining tails.
Shape the shell and belly with your fingers. Tavi is complete without a tail, hanging loop, hat, or extra shell decoration. The plain dome, four paddles, and sleepy expression form the intended character.
More Information and Helpful Tips
Keep the Belly Flat
Too much filling can push the cream disc outward and make the turtle rock on its underside. Add filling gradually and check the body from the side before closing the last seam section.
If the belly and shell edge differ significantly in physical size, check gauge and yarn compatibility before sewing. Equal stitch counts are useful, but they do not remove the need to compare the actual pieces.
Keep All Four Flippers Similar
Make the four paddles before attaching any of them. Compare their length, width, and closing edges together. If one has an extra round or a tighter closing row, correct it while it is still separate.
Leave them unstuffed for a soft, flat shape. Filling the paddles changes their appearance and can make the small attachment edge harder to position neatly.
Personalize the Color Palette
Teal, olive, and cream give a quiet ocean-inspired combination. A sea-green shell with pale sage flippers would use the same shaping. Keep the yarn thickness consistent across colors and choose a face thread that remains visible against the head.
For a first sample, change colors before changing counts. A larger shell also needs a matching belly and a reconsidered head and flipper scale. It is better to test the stated proportions before drafting another size.
Care for the Finished Character
Follow the yarn and filling care instructions, test contrasting thread for colorfastness, and support the shape while drying. Inspect the neck and paddle seams afterward. Embroidered features and secure sewing do not by themselves establish a tested toy-safety rating; assess the finished item’s intended use separately.
Frequently Asked Questions
Is this the same fish as the supplied PDF?
No. Tavi is a stuffed sea turtle with a domed shell, belly disc, separate head, and four flippers. It does not use the fish outline, shell-stitch surface, or dishcloth construction.
Is this a no-sew amigurumi pattern?
No. The shell and belly are sewn together, and the head and four flippers are attached afterward. Careful pinning and sewing are part of the project.
Why do the shell and belly both finish at 36 stitches?
Matching final counts lets you sew the two edges one-to-one. The shell first expands to 42 stitches and then decreases, creating a fuller dome above the smaller joining edge.
Should the flippers be filled?
No. The written draft leaves all four unstuffed and closes their openings with a three-stitch flat row. That gives soft paddles rather than rounded legs.
Can I use plastic eyes instead of embroidery?
The written draft uses closed embroidered eyes. Plastic eyes would require a separate installation and placement plan and are not included in the assessment of this character’s finished use.
Has this pattern been physically tested?
No. The counts and attachment arithmetic have been reviewed, but size, proportions, yarn use, assembly, and finished-item suitability still require a real sample. The generated images illustrate the design and do not establish tested results.