Pip the Amigurumi Pear
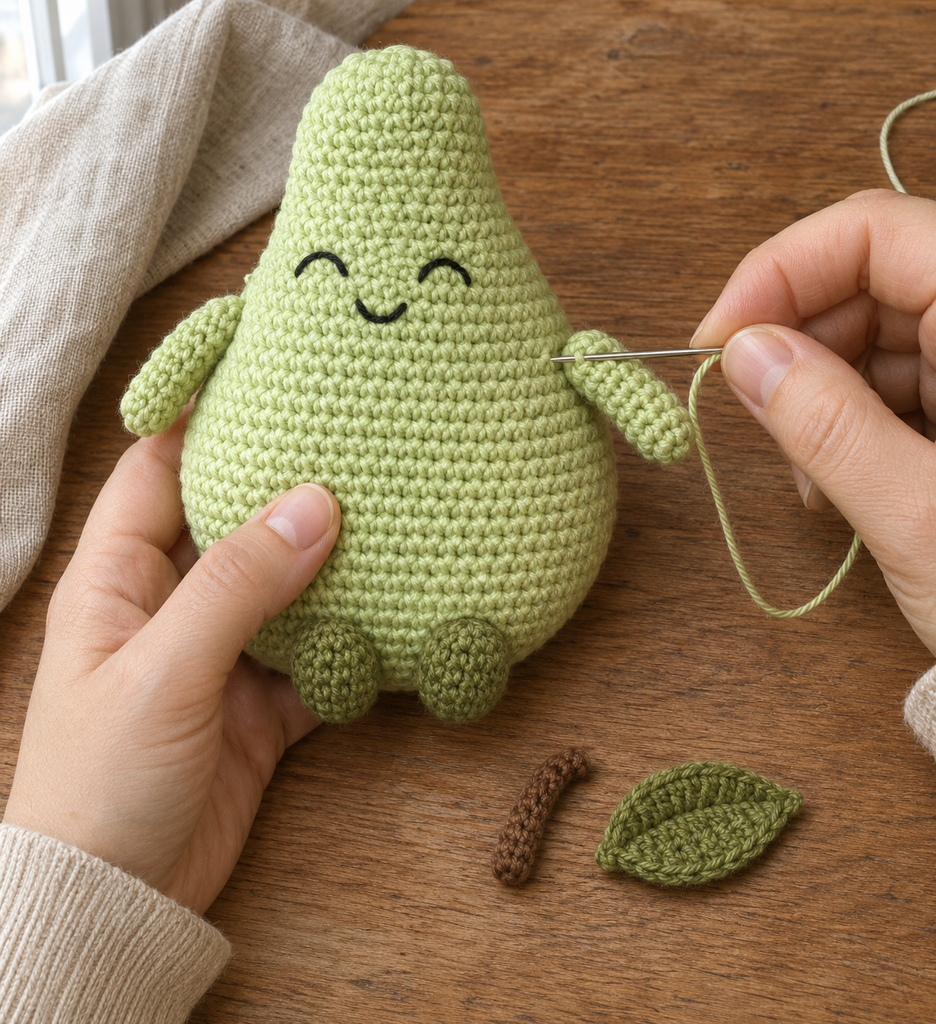
Meet Pip, a small crochet pear with a rounded belly, tiny olive feet, and a quiet embroidered smile. The pale green body and little leaf give the character a gentle, cheerful look without needing an outfit or a collection of decorations. I like the simplicity of a fruit character: a familiar shape becomes something full of personality with just a few stitches for the face.
This amigurumi begins with one stuffed body, worked from the bottom upward. Its shape narrows gradually into the pear’s neck. Add two small arms, two feet, a short stem, and one flat leaf, then take your time arranging the expression. The face is entirely embroidered, so this version uses no plastic eyes or beads.
Pattern status: This is a newly drafted, untested pattern. All shaping counts have been checked mathematically, but a physical sample has not been made. Finished proportions, yarn quantities, stuffing, and attachment positions need sample testing. The four images are AI-generated design or process concepts; stitch texture, scale, and apparent round counts are approximate. Follow the written instructions for construction.

About This New Amigurumi Design
The supplied reference is a small gingerbread character with icing, a cherry, and a scarf. Pip is a different character with a continuous pear-shaped body, a stem and leaf, small separate limbs, and an embroidered face. The reference’s gingerbread shape, decorative pieces, instructions, and photographs are not reproduced.
The proposed finished height is approximately 13–15 cm including the stem and feet, depending on yarn, tension, stuffing, and assembly. This is a planning estimate rather than a measured sample size. Pip is a craft character; these instructions have not assessed the finished item for use as a child’s toy.
| Project detail | Draft specification |
|---|---|
| Skill level | Confident beginner familiar with small spiral pieces |
| Terminology | US crochet terms |
| Main body | One piece, bottom up, 29 rounds |
| Widest body round | 36 single crochet stitches |
| Separate pieces | Two arms, two feet, one stem, one leaf |
| Face | Embroidered closed eyes and a curved smile |
| Main colors | Pistachio green, olive, brown, and black thread |
Materials and Gauge
Choose a smooth DK cotton or cotton blend that makes clear, close stitches. A 3 mm hook is a reasonable starting point, but use the size that gives a dense fabric without making each stitch difficult to work. Stuffing should not show between relaxed stitches.
- Pistachio green: approximately 75–100 m for the body and arms.
- Olive green: approximately 15–25 m for feet and leaf.
- Brown: approximately 3–5 m for the stem.
- A small amount of black embroidery thread or fine black yarn.
- Polyester fiberfill, added in small portions.
- A 3 mm crochet hook, or suitable size for your yarn.
- Removable stitch marker, blunt yarn needle, embroidery needle, scissors, and measuring tape.
The yarn quantities are provisional allowances. Keep spare green yarn for attachment seams and adjustments.
A suggested body gauge is approximately 22 sc stitches and 26 rounds per 10 cm in the round. At that stitch gauge, a 36-stitch circumference measures about 16.4 cm, corresponding to a rounded width near 5.2 cm. Stuffing and shaping affect the actual dimensions.
Matching a dense fabric matters more than forcing the character to a particular height. If you substitute a thicker yarn, expect a larger character and different yarn use; do not assume the generated pictures establish the size of your sample.
Abbreviations and Techniques
Ch means chain, sc means single crochet, hdc means half double crochet, dc means double crochet, sl st means slip stitch, and st/sts means stitch/stitches. Inc means two sc in one stitch. Dec means reduce the next two stitches to one sc.
For a regular sc decrease, insert the hook into the next stitch and draw up a loop, then into the following stitch and draw up another loop. Yarn over and pull through all three loops. An invisible decrease through the front loops of the next two stitches is an alternative if you already use that technique consistently.
Work the body, arms, feet, and stem in continuous rounds unless instructed otherwise. Do not join or turn between rounds. Mark the first actual stitch and move the marker each round. Work through both loops for ordinary sc.
When a sequence says “4 sc, dec,” work one sc in each of four separate stitches, then decrease across the next two. The count at the end of every shaping round is the new total.
How to Crochet Pip the Pear
Step 1: Start the Rounded Body
With pistachio green, make an adjustable ring.
- Round 1: Work 6 sc into the ring. Mark the first stitch: 6 sc.
- Round 2: Inc in every stitch: 12 sc.
- Round 3: Repeat 1 sc, inc six times: 18 sc.
- Round 4: Repeat 2 sc, inc six times: 24 sc.
- Round 5: Repeat 3 sc, inc six times: 30 sc.
- Round 6: Repeat 4 sc, inc six times: 36 sc.
Close the starting ring gently and secure its tail through the backs of several stitches inside. A small adjustable-ring beginning should not be left unsecured where it could loosen later.
Step 2: Build the Lower Pear
Rounds 7–14: Work one sc in each stitch around: 36 sc in every round. These eight rounds form the widest part of the pear.
Keep moving the first-stitch marker rather than relying on the spiral’s visible ridge. Check for 36 stitches periodically. The body should begin to curve upward naturally after the increase section; it is no longer intended to remain a flat circle.
Round 15: Repeat 4 sc, dec six times: 30 sc.
Rounds 16–18: Sc in every stitch around: 30 sc per round.
You now have a rounded lower body with the first gentle narrowing above it. Do not force the opening into a flat shape while working the next decreases.

Step 3: Embroider the Face While the Opening Is Accessible
Choose the front so any visible starting-round drift can sit toward the back. Mark two eye positions around Rounds 10–11, roughly six body stitches apart between their nearest ends. The positions are starting guides; view the body from the front before making the final stitches.
For each closed eye, make a small curved line about two stitches wide. You can use two or three short backstitches to form a gentle arch, as if the eyes are smiling. Keep the thread relaxed so the stitches do not pull deep dents into the fabric.
Add a small curved smile beneath the eyes around Rounds 12–13. Make it about two or three stitches wide. Secure the thread ends inside while you can still reach them, then check that no long loose loops remain on the outside.
This draft uses embroidered curves rather than oval plastic eyes. A different expression is possible, but keep it small enough that the body shape remains the main feature.
Step 4: Shape the Neck and Add Stuffing
- Round 19: Repeat 3 sc, dec six times: 24 sc.
- Rounds 20–22: Sc around: 24 sc per round.
- Round 23: Repeat 2 sc, dec six times: 18 sc.
- Rounds 24–26: Sc around: 18 sc per round.
Begin filling the lower body with small pieces of fiberfill. Spread the filling evenly against the sides rather than pushing one large lump down the center. Shape a rounded belly with a narrower upper section.
Round 27: Repeat 1 sc, dec six times: 12 sc.
Round 28: Sc around: 12 sc.
Add a little more filling to support the neck, keeping the fabric smooth rather than stretched open. Leave enough space to work the final round comfortably.
Round 29: Dec six times: 6 sc.
Fasten off with a tail. Thread it through the front loops of the remaining six stitches, draw the opening closed gently, and secure it. Hide the tail inside the body without distorting the top.
Step 5: Make Two Small Arms
With pistachio green, make an adjustable ring.
- Round 1: Work 4 sc into the ring: 4 sc.
- Round 2: Inc in every stitch: 8 sc.
- Rounds 3–7: Sc around: 8 sc per round.
Leave the arms unstuffed so they can sit softly against the sides. Flatten the opening, matching the front and back edges into four stitch pairs.
Closing row: Work 4 sc through both layers, one sc through each matched pair. This is a flat closing row, not another eight-stitch round. Fasten off with a long sewing tail. Repeat for the second arm.
Step 6: Make Two Olive Feet
With olive, make an adjustable ring.
- Round 1: Work 6 sc into the ring: 6 sc.
- Round 2: Inc in every stitch: 12 sc.
- Rounds 3–4: Sc around: 12 sc per round.
- Round 5: Dec six times: 6 sc.
Add a small amount of filling before closing. Fasten off with a long tail, pass it through the front loops of the six remaining stitches, and draw the opening closed. Leave the rest of the tail for attaching the foot.
Make a second foot the same way. Gently flatten them into small rounded ovals. The feet are decorative supports at the lower front; this draft does not guarantee that Pip will stand without assistance.
Step 7: Crochet the Brown Stem
With brown, make an adjustable ring.
Round 1: Work 5 sc into the ring: 5 sc.
Rounds 2–5: Sc around: 5 sc per round.
Leave the narrow stem unstuffed. Fasten off with a sewing tail and leave its final opening available for attachment. The closed adjustable-ring end becomes the visible tip; the open end will sit against the pear’s top.
Step 8: Make One Flat Olive Leaf
With olive, ch 9. Work along both sides of this foundation chain.
First side: Beginning in the second chain from the hook, work sl st in the next chain, sc in the next, hdc in the next, dc in each of the next two chains, hdc in the next, sc in the next, and 3 sc in the final chain.
That uses all eight available chains. The three sc sharing the final chain form the far tip turn.
Return side: Rotate the work and use the unused foundation loops on the opposite side. Skip the tip chain that already holds 3 sc. Across the remaining seven chains, work sc, hdc, dc, dc, hdc, sc, sl st. Join with a sl st to the first slip stitch and fasten off with a sewing tail.
There are 17 worked stitches around the leaf before the joining slip stitch, including the two worked slip stitches. Shape it gently with your fingers. There is no wire or stiff insert inside.
Assemble the Amigurumi Pear
Step 9: Pin the Pieces Before Sewing
Position the feet near the lower front of the body, around Rounds 4–6, with a small gap between them. Let them project slightly forward rather than pointing straight down. View Pip from the front and side to compare the pair.
Pin one arm at each side around Rounds 15–17, keeping the folded closing rows against the body and the rounded ends pointing downward. Adjust so neither arm covers the embroidered face.
Place the stem at the very top over the body’s closed opening. Position the leaf beside its base with the pointed end extending outward. These round references are approximate attachment guides; your actual stuffed shape should determine the final arrangement.
Step 10: Sew Each Attachment Securely
Sew the flattened upper edge of each arm to the body, catching both its closed edge and sound body loops. Secure the tail inside the attachment area and pass it through the body before trimming.
Sew each foot around its contact area with the lower body. Spread the stitches across several loops rather than anchoring the entire piece at a single point. Keep the two feet similar in position and projection.
Sew the open stem base around its full edge to the top of the pear. Attach the leaf’s starting end beside the stem, adding a few small stitches along its base if needed to stop it rotating. Do not glue the pieces in place as a substitute for the described seams.
Check every attachment with a gentle tug and inspect the embroidery for loose loops. Hide all tails inside. If an attachment shifts, reinforce it before considering the piece finished.
More Information and Useful Tips
Shape with Filling, Not Force
Add stuffing a little at a time. Too much can spread the stitches and make the lower body hard; too little can leave a hollow under the face or a neck that collapses. The goal is an evenly supported pear that still feels soft.
A blunt tool can help guide filling into a narrow area, but avoid forcing it between stitches or stretching the fabric. Check the face as you stuff, since excess tension can change the expression.
Keep the Pieces Consistent
Make both arms and both feet before attaching any of them. Compare the paired pieces for length and firmness. An extra round or a different amount of filling can make one side look larger even when the color matches.
Use markers or short temporary threads to compare placement from the front, back, and side. Small asymmetries can be charming, but the planned position should be deliberate rather than caused by sewing one limb before checking the other.
Change Colors Before Changing Counts
A warm yellow pear with a brown stem and green leaf would use the same shaping plan. Keep all yarns similar in thickness. A bulky or plush substitution changes scale, stitch visibility, and the way the small limbs sit.
For your first sample, keep the stated counts so you can assess the shape. Making the pear wider or shorter requires redistributing the shaping, not simply removing random rounds near the neck.
Care for the Finished Character
Follow the yarn and filling care instructions and test colorfastness before washing contrasting threads together. Support the shape while drying and check seams afterward. The character’s final use should be assessed separately; embroidery and strong seams alone do not establish a tested toy-safety rating.

Frequently Asked Questions
Is Pip the same character as the PDF gingerbread figure?
No. Pip is a newly drafted pear with a continuous tapered body, separate small limbs, a stem, and one leaf. The gingerbread outline, icing, cherry, scarf, and hanging loop are not used.
Is this a no-sew amigurumi pattern?
No. The main body is one piece, but the arms, feet, stem, and leaf are sewn on separately. Careful pinning and attachment are part of the project.
Why is my round count wrong after a decrease?
Check that each decrease consumes two old stitches and creates one new stitch. Count the full round after shaping and compare with the stated total before continuing.
Can I use plastic safety eyes instead of embroidery?
The written draft uses embroidered closed eyes. Plastic eyes would require a different placement and installation plan, and they are not included in these instructions or in an assessment of the finished character’s suitability.
Why does my pear look different from the pictures?
The images are generated concepts. Your yarn, gauge, stuffing, and attachment positions determine the real shape. The written counts describe this draft; the images are not exact diagrams or evidence of a tested sample.
Has this amigurumi been physically tested?
No. Its stitch arithmetic has been reviewed, but proportions, actual yarn use, assembly, and finished-item suitability require a real sample before calling it a tested pattern.