Mulberry and Cream Crochet Twist Headband
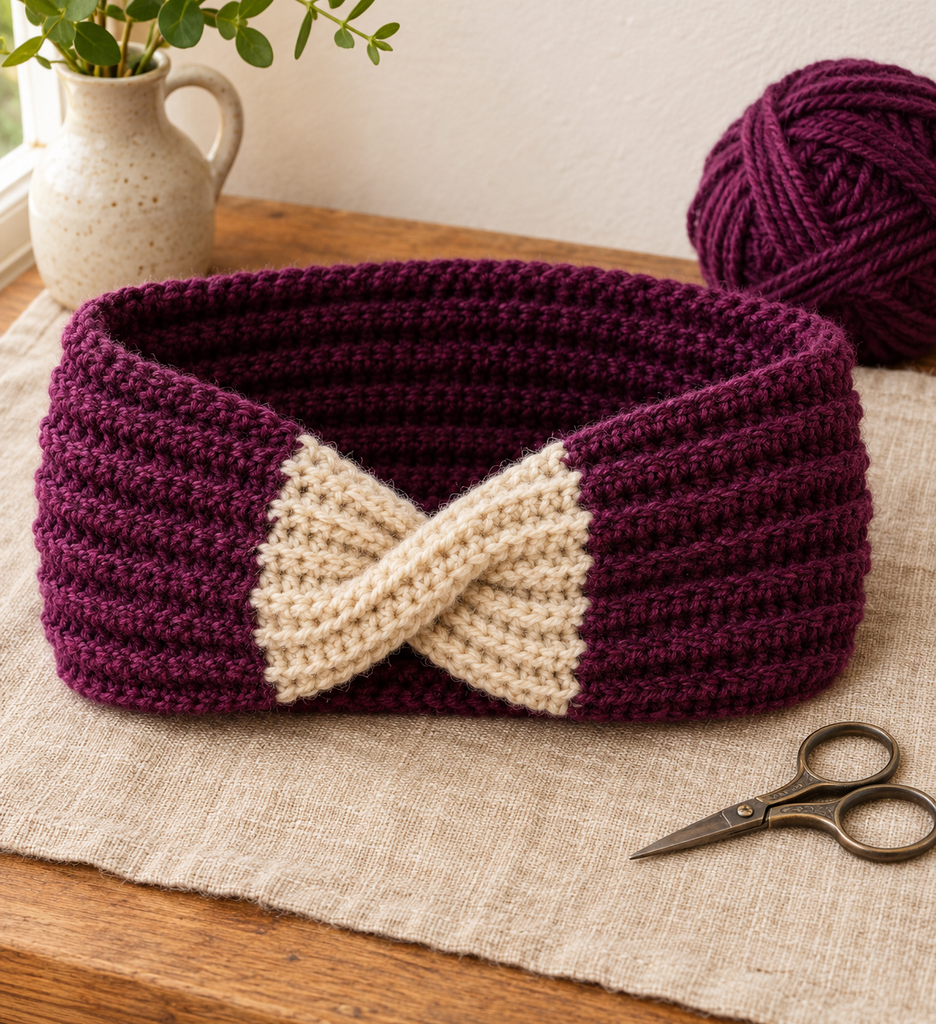
A wide crochet headband is a lovely option when you want warm ears and an open crown. This mulberry version has a soft ribbed texture and a cream twist at the front, giving a small everyday accessory a little character. I like it with a low bun, a loose ponytail, or hair left down, paired with a simple sweater so the two colors can stand out.
The construction begins with one rectangle. Cream rows at both short ends meet at the front, while the mulberry section wraps around the sides and back. A four-layer seam turns those ends into the crossover. There is no separate bow, center wrap, or decorative applique to attach.
Pattern status: This is a newly drafted, untested pattern. Stitch arithmetic and gauge calculations have been reviewed, but a physical sample has not been made. Stretch, comfort, seam bulk, yarn use, and final fit require sample testing. All four images are AI-generated design or process concepts; texture, scale, and seam placement are illustrative. Follow the written instructions rather than using the images as a stitch diagram.
About This New Design
The supplied reference is a brimmed hat with a cluster of crochet flowers. This new project changes the shape and construction into a wide ear-warmer headband, worked flat in back-loop half double crochet and joined with a hidden twist seam. The reference’s crown, brim, flowers, and photographs are not reproduced.
The proposed draft is an adult accessory with an approximately 11 cm width. Its flat rectangle measures about 51.4 cm long before sewing, and the closed circumference will be a little smaller, depending on seam depth. Treat roughly 50–51 cm as a planning estimate rather than a tested finished measurement.
| Project detail | Draft specification |
|---|---|
| Skill level | Confident beginner; careful assembly at the twist |
| Terminology | US crochet terms |
| Rectangle width | Approximately 11.1 cm |
| Rectangle length | Approximately 51.4 cm before the seam |
| Main fabric | Back-loop half double crochet in turned rows |
| Body count | 20 stitches across and 72 rows total |
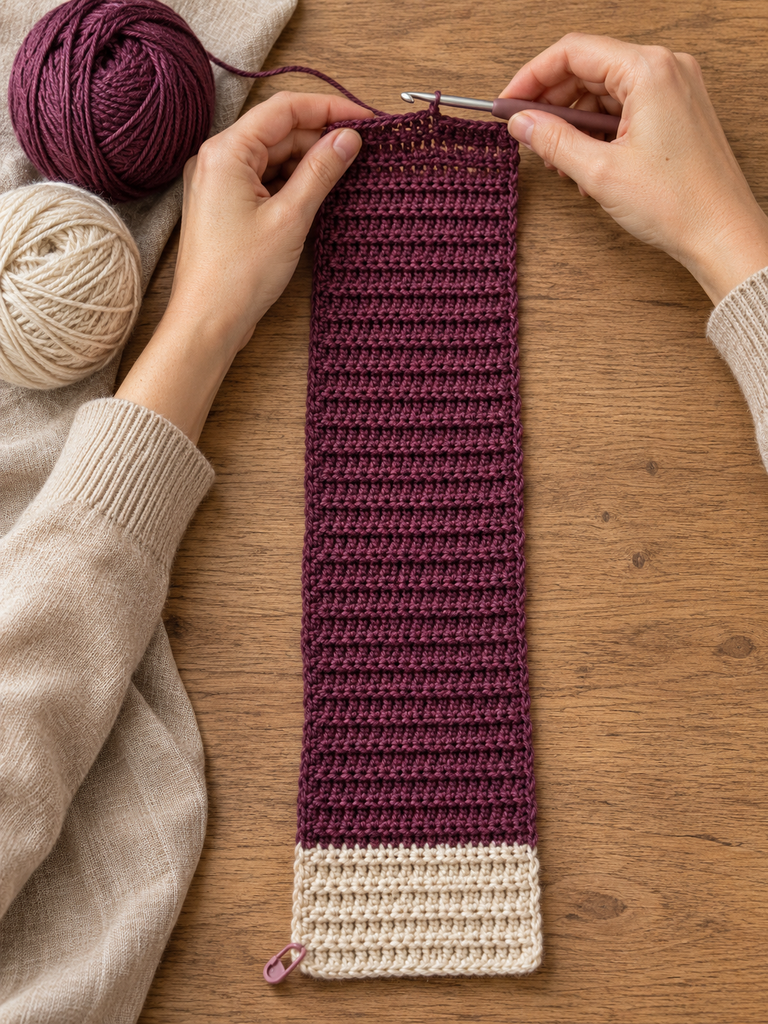
| Color layout | 6 cream rows, 60 mulberry rows, 6 cream rows |
| Construction | One rectangle with a four-layer end seam |
Materials and Gauge
Choose a smooth, springy DK wool blend or another yarn with comfortable stretch and recovery. A limp cotton or a very stiff yarn may not hold the same fit, even if its stitch width matches. Test the washed fabric against the forehead and ears before committing to the whole band.
- Deep mulberry main color: approximately 120–170 m as a provisional allowance.
- Oatmeal cream: approximately 25–40 m, including a sewing tail.
- A 4 mm hook, or the size needed to obtain gauge.
- Blunt yarn needle, scissors, measuring tape, and removable stitch markers.
The yarn quantities are estimates, not measured sample consumption. Use compatible colors from the same range so the cream sections have similar thickness and stretch to the main fabric.
Aim for 18 hdc stitches and 14 rows per 10 cm, measured in the back-loop pattern after washing and drying according to the yarn label. Measure the swatch relaxed, without pulling the ribbing open.
At this gauge, 20 stitches measure approximately 11.1 cm. Seventy-two rows measure approximately 51.4 cm. The 60-row mulberry section measures approximately 42.9 cm, and each six-row cream end measures about 4.3 cm.
Choose the Length for Your Head
Measure around the path where the headband will sit: across the forehead, over the ears, and around the back of the head. A stretchy ear warmer usually needs a relaxed circumference slightly smaller than that path, but the correct amount depends on the yarn’s actual recovery and your comfort.
For a head path around 54–56 cm, this draft is a possible starting sample if the washed fabric stretches comfortably to that size and recovers afterward. It is not a verified fit range. A rigid yarn may feel tight, while a yarn that grows after wearing may slip.
Before sewing, gently wrap the washed rectangle around your head, overlapping the ends enough to allow for a small seam. It should hold without pressure or a deep mark. If the fit is wrong, adjust the row count rather than planning to fix it by stretching the finished seam.
Abbreviations and Working Notes
Ch means chain, hdc means half double crochet, st/sts means stitch/stitches, and BLO means back loop only. RS is the preferred outside face and WS is the inside. US crochet terms are used.
For hdc, yarn over, insert the hook into the stitch, yarn over and draw up a loop, then yarn over and pull through all three loops. For BLO insertion, use only the top loop farther from you when looking at the stitch’s V. Do not use the extra horizontal loop sometimes called the third loop.
The turning ch 1 does not count as a stitch. Work the first hdc into the first actual stitch and the last hdc into the last actual stitch. Every row has 20 hdc, with no increases or decreases.
How to Crochet the Twist Headband
Step 1: Make the First Cream End
With cream, ch 21 loosely.
Row 1: Hdc in the second chain from the hook and each remaining chain: 20 hdc. Ch 1 and turn.
Row 2: Working BLO, hdc in each of the 20 stitches. Ch 1 and turn.
Rows 3–6: Repeat Row 2. On the last stitch of Row 6, complete the final yarn-over with mulberry, then ch 1 with mulberry and turn.
Cut cream with a suitable tail for weaving. This short cream section becomes one half of the front crossover; it is not a separate bow or a folded cuff.
Step 2: Crochet the Mulberry Center
Row 7: With mulberry, work 20 hdc BLO. Ch 1 and turn.
Rows 8–66: Continue the same 20-stitch BLO row. From Row 7 through Row 66 inclusive, there are 60 mulberry rows.
The ribs develop as the unused front loops form small ridges. Keep the side edges relaxed, and check the count every few rows. A missed last stitch can make the band narrow gradually, which becomes obvious at the cream ends.
At the final stitch of Row 66, complete the last yarn-over with cream. Ch 1 with cream and turn. Cut mulberry with a tail for weaving.
Step 3: Add the Second Cream End
Rows 67–72: With cream, work 20 hdc BLO in every row. Ch 1 and turn after Rows 67–71. At the end of Row 72, fasten off without adding a turning chain, leaving a generous cream tail for sewing through the four layers.
The rectangle now has six cream rows at each end and a mulberry center. Both short ends contain 20 stitches, which will fold into two ten-stitch halves during assembly.
Weave the color-change tails into matching sections on the side you intend to keep inside. Do not pull them so tightly that the color boundaries gather.
Step 4: Wash, Measure, and Check the Fit
Wash or dampen the rectangle according to the yarn label and dry it flat. Smooth it into a rectangle without stretching the ribs open. Compare the two short ends and check that the width stays consistent.
Measure the relaxed length and test how comfortably it stretches around the intended head path. If you need more or less length, undo the final cream section and adjust the number of mulberry rows before remaking the six-row cream end. Keep the cream ends equal.
At the stated row gauge, adding two mulberry rows adds approximately 1.4 cm before seaming. Removing two rows shortens the rectangle by the same amount. Actual fit still depends on the washed fabric, so make the change by measurement rather than counting alone.
Step 5: Label the Two Ends and Fold Them
Lay the rectangle flat with the preferred outside face up. Call the starting cream end A and the finishing cream end B. Bring the short ends near each other to form a loop, keeping the long mulberry section untwisted.
At each short end, fold its 20-stitch edge in half so its two ten-stitch halves sit together. You are folding across the band’s width at the very end, making a small C-shaped fold. Do not fold the whole long strip in half along its length.
Call the two halves of A A1 and A2, and the two halves of B B1 and B2. Use removable markers to keep track if helpful. The next step interleaves these halves instead of simply stacking one folded end on top of the other.
Step 6: Interleave the Four Layers
Slide one half of B between the two halves of A, while the other half of A sits between the two halves of B. Align the raw short edges into one flat stack. Across the seam thickness, the sequence should be:
| Layer order through the stack | End half |
|---|---|
| First outer layer | A1 |
| Second layer | B1 |
| Third layer | A2 |
| Fourth outer layer | B2 |
The essential point is the alternating order: A, B, A, B. Each original end has one half inside and one half outside the other folded end. If your stack reads A, A, B, B, the folds are only placed together and will not form the intended crossover in the same way.
There should be approximately ten aligned stitch positions across the folded edge, with four layers at each position. Pin the stack and keep the rest of the loop free from an extra twist. Do not sew the long side edges together.
Step 7: Baste and Check Before Sewing Permanently
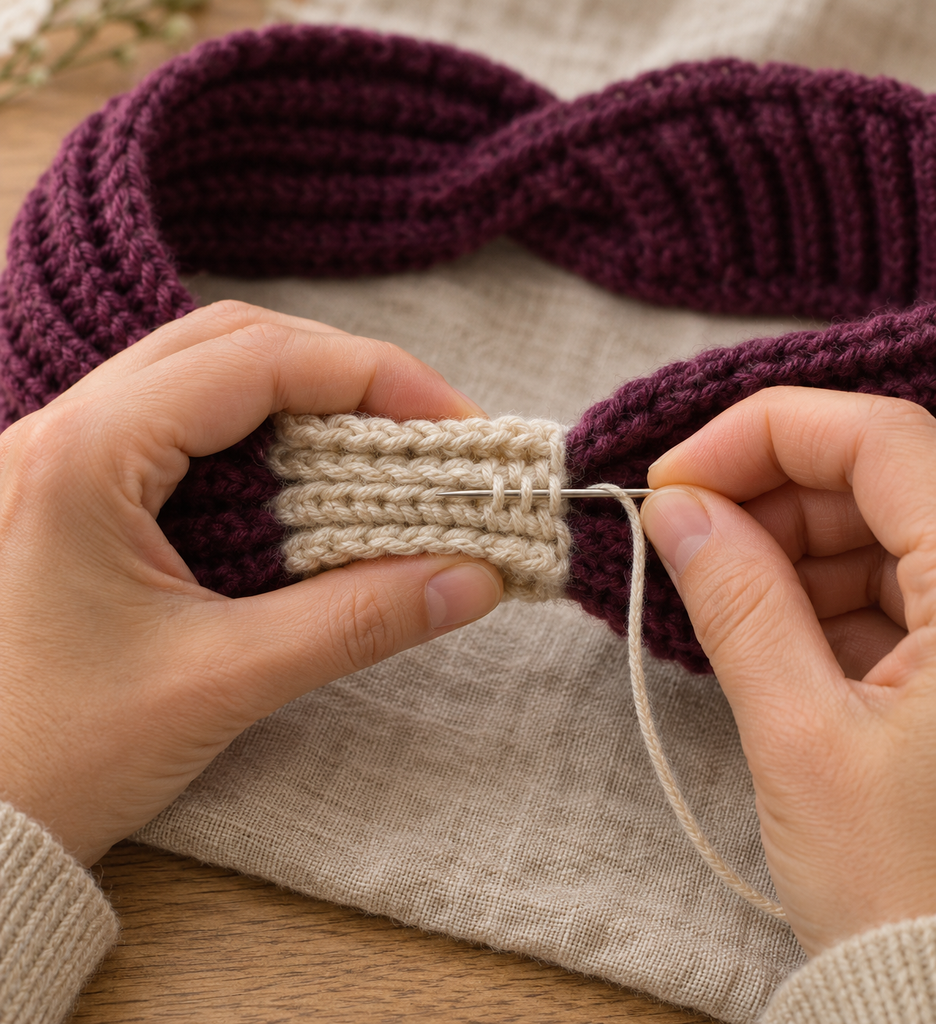
With the long cream tail and a blunt needle, baste through all four layers across the aligned short edges. Catch sound edge loops and make the stitches loose enough that you can undo them easily.
Turn the loop so the seam sits inside, then gently open and arrange the front. The interleaved folds should create the cream crossover. Try it on carefully and check that the seam is hidden, the mulberry band lies smoothly, and the twist does not create an uncomfortable lump against the forehead.
If the layers slip apart, a raw edge shows, or the front lies flat instead of crossing, undo the basting and check the alternating stack. This is the right point to correct the arrangement; pulling the finished front harder will not fix a missed layer.
Step 8: Sew and Finish the Hidden Seam
Return to the inside of the join and sew securely across the stack with small whipstitches through all four layers. Work through the aligned edge loops close enough to the edge to limit bulk, while catching enough fabric to prevent a layer escaping.
Spread the tension evenly across the seam. Do not pull the yarn into a tight cord. Make a small reinforcing pass near each end of the seam, secure the tail, and weave it through the inside cream stitches in more than one direction.
Turn the headband right side out and arrange the crossover gently. There is no extra center band to add and no need to stitch an X onto the outside. The shape comes from the interleaved join itself.
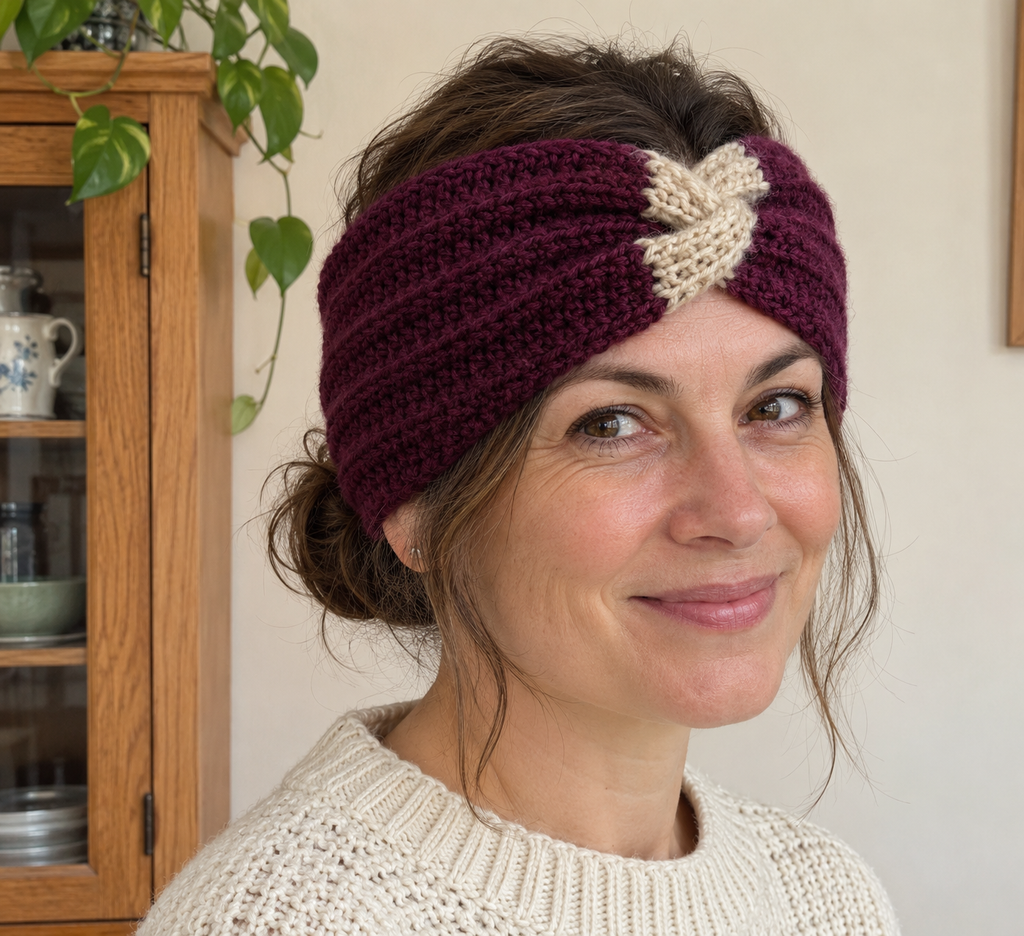
Wear the cream twist at the front, with the mulberry sides covering the ears and the back sitting comfortably beneath the hair. The crown remains open, so you can wear the band with a bun or ponytail without fitting the hair inside a hat.
More Information and Personalization
Adjust the Width
The foundation count controls the width over the ears. At the proposed gauge, 18 stitches give approximately 10 cm, while 22 stitches give approximately 12.2 cm. Chain one more than the desired stitch count.
Keep an even stitch count so both end folds divide into equal halves. An 18-stitch end folds into nine positions per layer; a 22-stitch end folds into eleven. The seam still passes through four alternating layers.
Changing the width also changes warmth, bulk at the crossover, and yarn use. A broader band is not automatically more comfortable, so check how the folded cream join feels on the sample.
Keep the Color Balance
For a different overall length, add or remove mulberry rows while retaining six cream rows at each end. That keeps the two cream sections similar in depth. If you change the cream row count deliberately, use the same count at both ends.
A navy band with oatmeal ends or a forest-green band with pale gray ends would use the same construction. Avoid a much thicker contrast yarn, which could make the four-layer seam bulky even when the main band feels soft.
Care for Stretch and Recovery
Follow the yarn label and dry the band relaxed rather than stretched over a bowl or head-shaped form. Pulling the wet band too wide can reduce its ability to stay in place afterward.
Store it flat and check the seam occasionally. If a layer begins to loosen, reinforce the inside join before wearing again. If the band grows substantially with use, reassess the yarn and the relaxed length rather than tightening the front seam into a hard knot.
Frequently Asked Questions
Is this the same hat as the supplied reference?
No. This is an open-crown ear-warmer headband made from a flat rectangle with a twist seam. It does not use the reference’s hat crown, brim, flower cluster, or decorative construction.
Does back-loop hdc mean using the third loop?
No. Use the back of the two top loops that form the stitch’s V. The separate horizontal third loop is a different insertion point and is not used in this draft.
Why is the front not twisting after sewing?
Check that the folded halves alternate A, B, A, B and that the seam catches all four layers. If the two halves of one end are simply stacked together, undo the seam and interleave them before trying again.
Can I use a straight seam instead?
You can make a plain headband with a separate straight joining plan, but it will not create this cream crossover. The written draft is calculated and described around the interleaved twist join.
Why does the band slip over my hair?
It may be too long, too smooth, or made from a yarn that grows after wearing. Check the washed relaxed length and recovery. Shortening the mulberry section can help when the fit is loose, but the right change needs a physical fitting.
Has the pattern been physically tested?
No. The stitch counts and proposed measurements have been reviewed mathematically, but comfort, seam bulk, stretch, and yarn consumption still require a sample. The generated images illustrate the intended look and do not establish tested results.