Olive and Cream Crochet Hair Kerchief
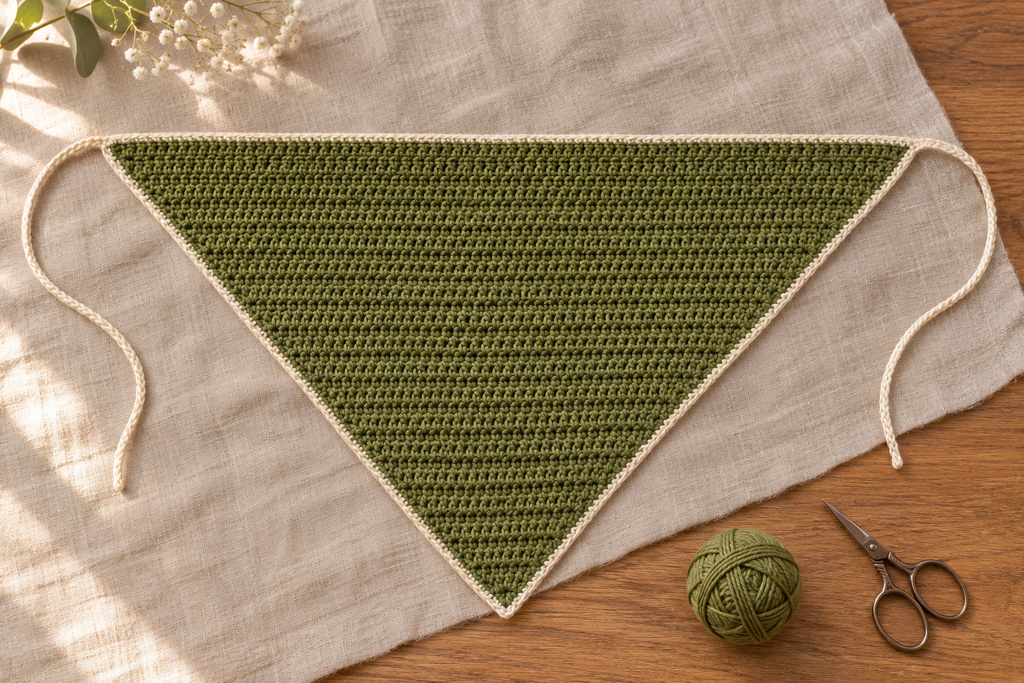
A little crochet hair kerchief can make a plain outfit feel quietly handmade. This olive version has a simple triangular shape, a fine cream border, and two slim ties that fasten at the nape. The earthy color works beautifully with a linen blouse or a soft cotton tee, while the pale edging gives the shape a clean finish. It is a small accessory with enough repetition to feel relaxing once the increases become familiar.
The triangle grows from its lower point toward the long upper edge. Two extra stitches in each shaping row create the widening sides. After the olive section is complete, add one light cream border and make the ties directly from its upper corners. There is no sewing or complicated color chart.
Pattern status: This is a newly drafted, untested pattern. Stitch counts and gauge calculations have been reviewed, but a physical sample has not been made. Fit, coverage, edging distribution, tie behavior, and yarn consumption require testing. The four images are AI-generated design or process concepts; stitch texture, scale, and drape are illustrative. Follow the written instructions rather than copying stitch placement from the images.
About This New Design
The supplied reference is a reversible, double-knitted floral scarfette. This project changes the craft, shape, and use: a single-layer crochet triangle worn over the hair, with plain half double crochet, a narrow contrasting border, and corner ties. The reference’s knitting technique, flower chart, rectangular dimensions, and photographs are not reproduced.
The draft is intended as an adjustable adult hair accessory. Its triangle provides crown coverage, while the ties bridge the remaining distance around the head. This is not a fitted cap, and it will sit differently on short hair, loose hair, and a ponytail.
| Project detail | Draft specification |
|---|---|
| Skill level | Confident beginner |
| Terminology | US crochet terms |
| Olive triangle width | Approximately 45 cm across the final row |
| Triangle depth | Approximately 29 cm before edging |
| Final olive row | 81 half double crochet stitches |
| Body rows | 41 total |
| Ties | Two, approximately 25 cm each after slip stitching |
| Construction | One triangle with a continuous border and attached ties |
Materials and Gauge
Choose smooth DK cotton or a cotton blend that makes a soft, flexible fabric. A very stiff yarn may stand away from the head, while a heavy yarn can pull on the ties. Make a washed swatch and hold it against your hair and skin before choosing the final yarn.
- Olive green main color: approximately 180–250 m as a provisional allowance.
- Oatmeal cream contrast: approximately 30–50 m for edging and ties.
- A 4 mm hook, or the size needed to obtain gauge.
- Scissors, blunt yarn needle, measuring tape, and removable stitch markers.
Use compatible colors from the same yarn range if possible. The yardage figures are estimates, not measurements from a sample.
Aim for 18 hdc stitches and 14 rows per 10 cm, measured after washing and drying a swatch according to the yarn label. Work through both top loops with a ch 1 turn. Measure the center of a swatch larger than 10 cm rather than including its distorted edge stitches.
At this gauge, 81 stitches measure approximately 45 cm. Forty-one rows suggest a depth near 29.3 cm, although the small starting point and shaping can affect the actual measurement. The cream border adds a little more around the edges.
If your swatch is too narrow, try a larger hook; if it is too wide, try a smaller one. Check row height too, since a different row gauge changes the triangle’s depth even when its long edge matches the proposed width.
Abbreviations and Pattern Notes
Ch means chain, hdc means half double crochet, sc means single crochet, sl st means slip stitch, and st/sts means stitch/stitches. Inc means work two hdc into the same stitch. US crochet terms are used throughout.
For hdc, yarn over, insert the hook, yarn over and draw up a loop, then yarn over and pull through all three loops. For sc, insert the hook, draw up a loop, yarn over and pull through both loops.
The turning ch 1 never counts as a stitch. Beginning with Row 3, work an increase into the first actual stitch and another into the last actual stitch. The turning chain does not receive a separate stitch.
Mark the first and last stitch after every row if you tend to miss the edges. There are no center increases. The two sloping sides come from the paired edge increases, while the final working row becomes the long edge worn near the hairline.
How to Crochet the Hair Kerchief
Step 1: Make the Lower Point
With olive, ch 2.
Row 1: Work 1 hdc in the second chain from the hook: 1 hdc. Ch 1 and turn.
Row 2: Work 3 hdc in the single stitch: 3 hdc. Ch 1 and turn.
Row 2 is a special start that adds two stitches in one place. Do not try to place separate first- and last-stitch increases into a row containing only one stitch; simply work the stated three hdc into it.
Leave a tail long enough to weave securely later. The starting point may feel a little rounded before edging, which is normal for a one-stitch beginning.
Step 2: Establish the Two Edge Increases
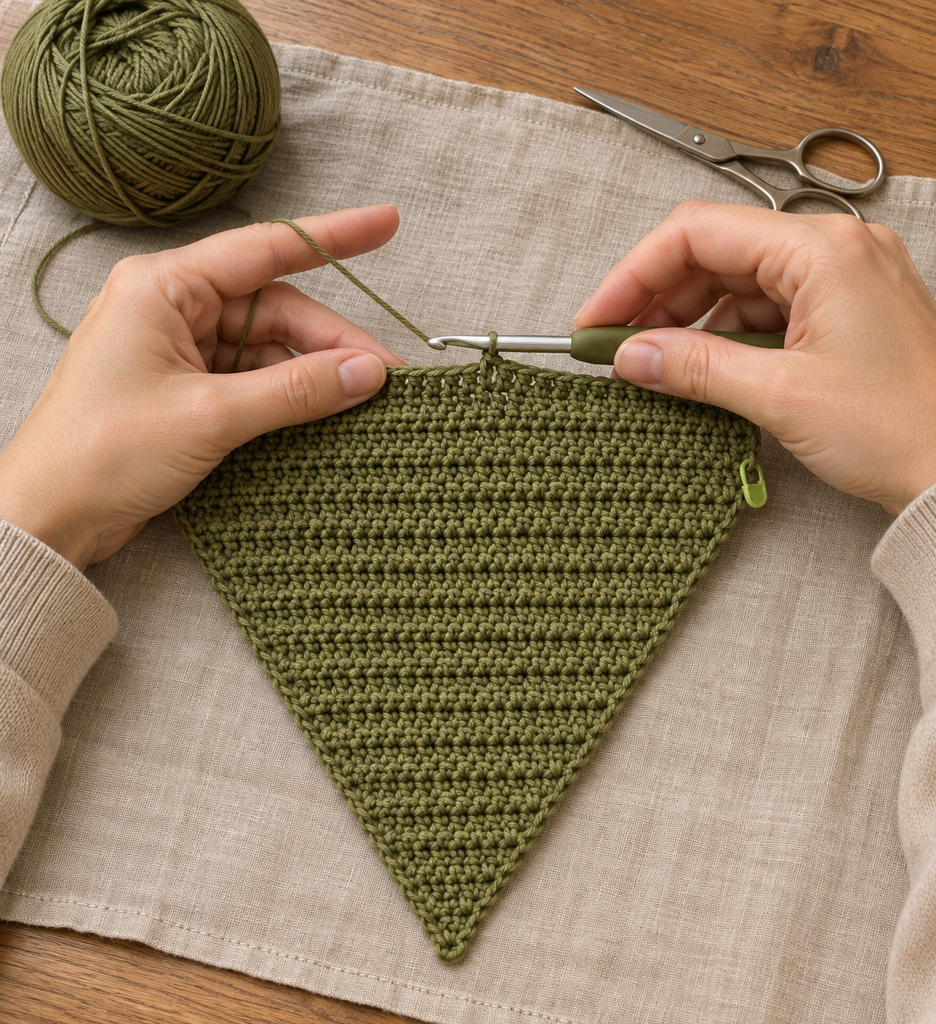
Row 3: Work 2 hdc in the first stitch, 1 hdc in the middle stitch, and 2 hdc in the last stitch: 5 hdc. Ch 1 and turn.
Row 4: Work 2 hdc in the first stitch, 1 hdc in each stitch across to the final stitch, and 2 hdc in the final stitch: 7 hdc. Ch 1 and turn.
The second instruction is the repeating shaping row. Each time you work it, the stitch count increases by two. Keep the stitches at the edges relaxed enough to turn without tightening the sides.
Step 3: Grow the Triangle to 41 Rows
Repeat the Row 4 instruction until you have completed 41 rows total, counting the two starting rows. The final olive row contains 81 hdc.
Useful checkpoints are:
- Row 5: 9 stitches.
- Row 10: 19 stitches.
- Row 15: 29 stitches.
- Row 20: 39 stitches.
- Row 25: 49 stitches.
- Row 30: 59 stitches.
- Row 35: 69 stitches.
- Row 40: 79 stitches.
- Row 41: 81 stitches.
For any body row numbered R, the expected count is 2 x R minus 1. This formula includes Rows 1 and 2, even though their working instructions are special.
On Row 41, fasten off without adding another turning chain. Lay the triangle flat and check that it widens evenly. A missed edge increase can make one side shorter or change the stitch count. Correct that before adding the cream border.
Step 4: Wash and Check the Triangle
Wash or dampen the olive piece according to the yarn label and dry it flat. Smooth the triangle into its natural shape without stretching it hard. Measure its long edge and the depth from that edge to the lower point.
Near the proposed gauge, it should be about 45 cm wide and 29 cm deep. If the fabric is substantially different, decide whether its coverage suits you before proceeding. A width error changes how far the ties must bridge around the head, while a depth error changes how far the point hangs toward the nape.
Place the long edge near your hairline and let the point fall backward. Use temporary pieces of yarn at the upper corners to assess the layout. The triangle should rest comfortably without having to stretch it tightly across your head.
Step 5: Begin the Cream Border on the Sloping Sides
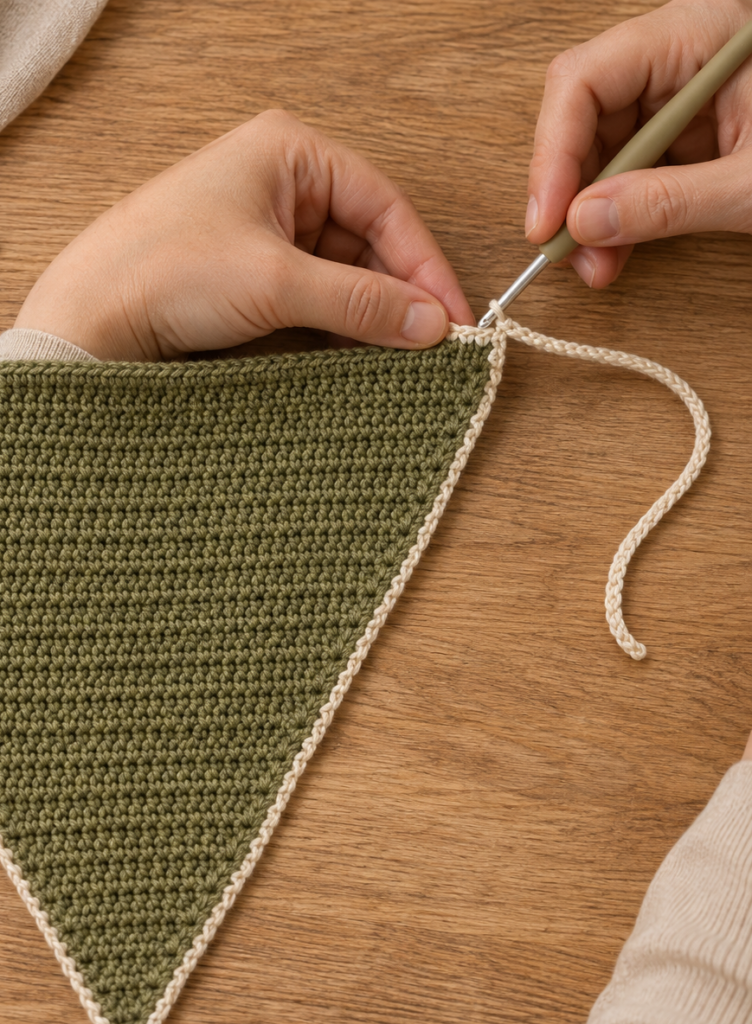
Lay the triangle flat with the long final row across the top and its starting point below. Call the two top corners A and B. Join cream at corner A with the preferred outside face toward you.
Work sc down the first sloping side toward the lower point, distributing stitches through sound row-end loops. A starting distribution is approximately 7 sc across every 4 row ends, spread evenly rather than grouped into a bulky cluster. This is an untested edging ratio: check the fabric frequently and adjust so it stays flat.
At the lower point, work approximately 3 sc into suitable starting-chain or point loops to turn the corner smoothly. Continue up the second sloping side to corner B with a similar distribution. Keep both sides relaxed and visually balanced.
If the border gathers the olive fabric, undo that section and add stitches. If it ripples, use fewer stitches. The border should follow the existing triangle rather than force a new shape. Do not add a tie at the lower point.
Step 6: Make the First Cream Tie
At corner B, chain loosely until the chain measures approximately 25 cm without stretching. Make a note of the chain count so you can repeat it for the second tie.
Sl st into the second chain from the hook and into every remaining chain, working back toward the triangle. Keep the slip stitches relaxed; tight slip stitches can shorten the cord or make it curl firmly. Sl st into a sound corner loop to anchor the tie back to corner B.
Measure the finished cord. If it has shortened substantially, undo and remake it with more relaxed stitches or a little extra chain length. The goal is a finished tie near 25 cm, not a fixed chain count that may vary with yarn and tension.
Step 7: Border the Long Edge and Make the Second Tie
From corner B, continue with sc across the long olive edge toward corner A. Begin with roughly one sc per hdc, avoiding double-working a corner stitch already used by the side border. Check that the top edge remains relaxed.
Single crochet can have a different stitch width from hdc. If the border draws the top edge inward, distribute a few extra sc, such as one additional stitch after roughly every 8–10 hdc, then reassess. Do not rely on an exact top-border count; this is a finishing distribution that needs to suit the actual washed fabric.
At corner A, make a second chain-and-slip-stitch tie the same finished length as the first. Anchor it back into the corner with a sl st, join neatly to the beginning of the border, and fasten off.
You now have a cream outline around all three sides and one tie at each end of the long upper edge. The point remains free to drape down the back of the head.
Step 8: Finish and Fit the Kerchief
Weave the olive and cream tails through the backs of matching stitches. Secure the tie anchors without creating a hard knot or lump near the ears. Give the finished piece a gentle final wash if needed and dry it flat, smoothing the cords without stretching them.
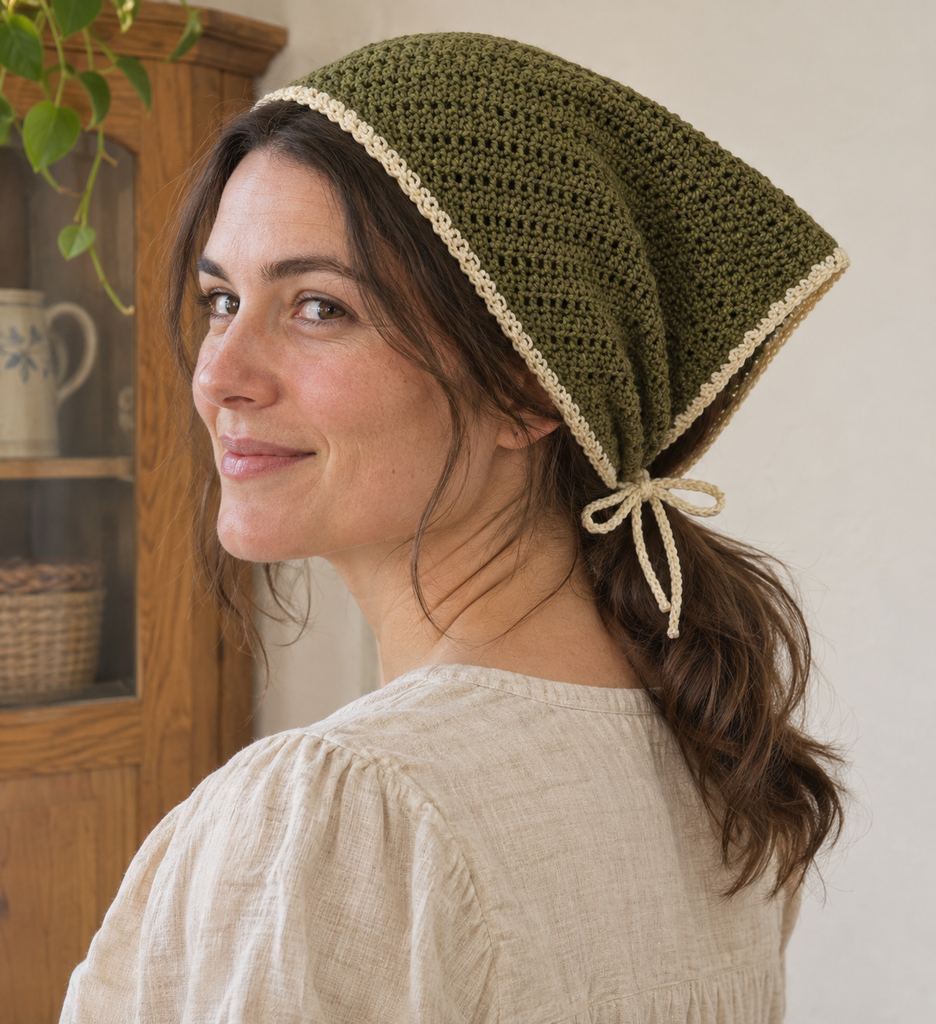
To wear it, place the long edge just behind the front hairline. Let the triangle rest over the crown with the point falling toward the back. Bring the ties behind the ears and fasten them in a small comfortable bow at the nape, beneath or beside the hair as preferred.
The ties should hold the cloth without pressure at the temples. If they are difficult to bow, make them a little longer rather than pulling the triangle tighter. This draft is intended as an adult hair accessory, with the ties at the back of the head rather than under the chin.
More Information and Personalization
Adjust the Triangle Size
Every extra shaping row adds two stitches. At the proposed gauge, that is approximately 1.1 cm more along the long edge and about 0.7 cm more depth. Adding four rows would give 89 stitches across Row 45, approximately 49.4 cm wide and 32 cm deep before edging.
Removing four rows gives 73 stitches at Row 37, approximately 40.6 cm wide and 26.4 cm deep. These are mathematical variations rather than tested fits. Check the actual cloth against your head before committing to the border.
Increasing the triangle also increases its depth; this construction does not let you change those measurements independently. A wider but shallower kerchief would need a different increase plan.
Choose Colors and Yarn Texture
Olive and cream make a gentle everyday combination. Dusty blue with oatmeal or a warm berry shade with pale gray would keep the same simple structure. Match yarn thickness across the two colors so the border does not feel heavy or pull on the body.
A smooth yarn is easier to check for missed increases. A textured or fuzzy yarn can hide stitch placement and make a small tie harder to undo. Test the finished fabric against your hair, since a slippery yarn may need a different tie length or styling position.
Care for the Edging and Ties
Follow the yarn label, support the wet triangle, and dry it flat. Untie the bow before washing so the cords can dry evenly. Store the kerchief folded loosely rather than hanging it from one tie.
Check the corner anchors occasionally. If an end loosens, secure it before wearing again. Avoid tightening the border into a cord while repairing it; the top edge needs enough flexibility to rest comfortably across the crown.
Frequently Asked Questions
Is this the same scarfette as the supplied PDF?
No. This draft is a triangular crochet hair kerchief with a plain single-layer fabric and corner ties. It does not use the reference’s double knitting, reversible flowers, or rectangular scarfette construction.
Can a beginner make it?
It is approachable once you can work hdc and identify the first and last stitch of a row. Practice the increase row slowly and count after each turn. The border needs judgment about keeping the edges flat.
Why is my stitch count increasing by only one?
One edge increase may have been missed. Starting with Row 3, both the first and last actual stitch receive two hdc. The turning chain is not a stitch and does not replace either increase.
Why is the cream border pulling inward?
The edging may contain too few stitches or be worked too tightly. Undo the affected section, relax the tension, and distribute more stitches through the row ends or top edge as needed.
Are the ties long enough for every adult?
Not necessarily. Hair volume, styling position, head size, and cord tension affect the fit. Treat 25 cm per finished tie as a starting length and adjust before fastening off permanently.