Blueberry and Cream Crochet Bucket Bag
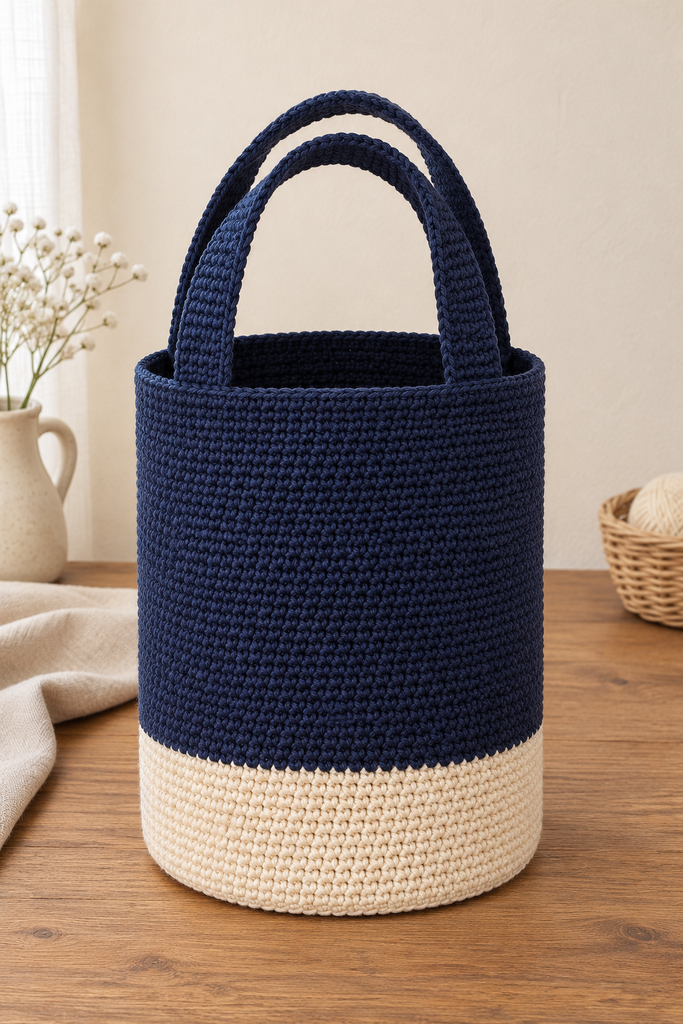
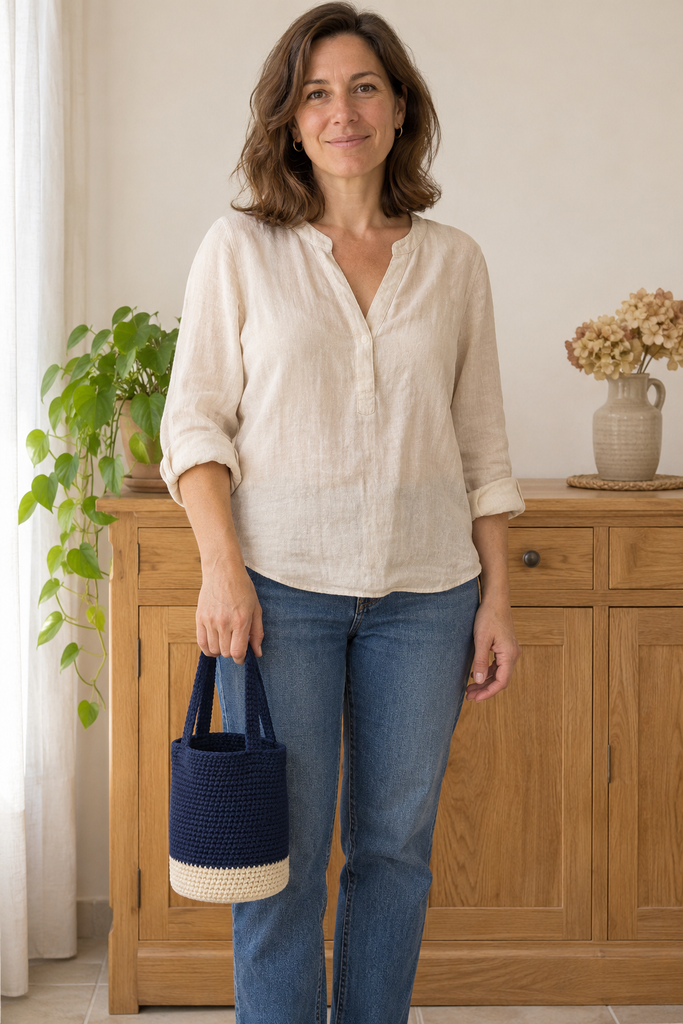
A small crochet bucket bag is a lovely change from a roomy market tote. This blueberry and cream version has a round base, straight sides, and two short handles that are easy to carry in the hand. The pale lower section keeps the deep blue from feeling too heavy, while the simple stitches give the bag a quiet handmade texture. I would pair it with a linen shirt and jeans for an easy everyday outfit.
The bag begins at the center of its base and grows upward in continuous rounds. Once the body is complete, add two separately crocheted handles. There are no folded triangles, complicated color motifs, or long seams to assemble. The main things to watch are the increasing stitch count on the base and the four reinforced handle attachments.
Pattern status: This is a newly drafted, untested pattern. Stitch arithmetic and gauge calculations have been reviewed, but no physical sample has been made. Base flatness, yarn use, handle stretch, capacity, and load performance require testing. All four images are AI-generated design or process concepts; texture, proportions, and apparent firmness are illustrative. Follow the written instructions for counts and assembly.
About This New Design
The supplied reference is a large tote made from a folded moss-stitch rectangle with diagonal color placement. This new design uses a compact cylindrical shape, a round single-crochet base, horizontal color blocking, and two separate short handles. The reference’s folding plan, moss stitch, dimensions, and photographs are not reproduced.
The base draft has an open top with no drawstring, zip, or button closure. It is intended for light essentials rather than a heavy grocery load. A fabric lining is optional and can help keep small items from catching in the stitches.
| Project detail | Draft specification |
|---|---|
| Skill level | Confident beginner comfortable with continuous rounds |
| Terminology | US crochet terms |
| Base diameter | Approximately 16–18 cm; confirm on the actual circle |
| Body height above base | Approximately 22 cm |
| Body circumference | Approximately 54 cm before stretch |
| Width when flattened | Approximately 27 cm |
| Handle width | Approximately 3 cm |
| Handle length | Approximately 40 cm before attachment; 34 cm exposed |
| Construction | One round base and body, plus two handles |
Materials and Yarn
Choose smooth cotton or a firm cotton blend that gives a close fabric at gauge. A loosely spun or very stretchy yarn can make the handles lengthen and the body sag. The fabric should feel firm enough for a bag while still letting the hook pass through each stitch comfortably.
- Deep blueberry or navy yarn: approximately 350–450 m as a provisional allowance.
- Oatmeal cream yarn: approximately 200–260 m.
- A 4 mm hook, or the size required for gauge.
- Removable stitch markers, including one distinct round-start marker.
- Blunt yarn needle, scissors, and measuring tape.
- Optional woven lining fabric, sewing thread, and sewing needle.
Use compatible yarns from the same range for both colors. The allowances include the handles and attachment tails, but they have not been measured from a finished sample. Keep a little spare navy for reinforcement or later repairs.
Gauge and Shape Checks
Aim for 20 sc stitches and 22 rounds per 10 cm in the straight body fabric, measured after washing and drying according to the yarn label. Make a representative swatch in the round if possible. A small flat swatch is useful, but its row gauge may differ from continuous rounds.
At this stitch gauge, 108 sc around the body give a circumference of approximately 54 cm. A corresponding circular diameter is about 17.2 cm. The actual base will be slightly affected by increase placement, the starting ring, and stitch height, so measure the circle itself before building the sides.
The 48 body rounds above the base give approximately 21.8 cm of height. The first 12 are cream and the following 36 are blueberry, making the cream lower body approximately 5.5 cm high.
If the base develops deep waves or cups strongly, stop and check the count and gauge. The proposed six-increase rhythm is a starting construction that still needs a physical sample with your yarn; do not force a badly shaped circle flat by stretching it aggressively.
Abbreviations and Working Notes
Ch means chain, sc means single crochet, sl st means slip stitch, st/sts means stitch/stitches, and rnd means round. Inc means work two sc in the same stitch. BLO means back loop only: insert under the loop farther from you when looking at the stitch’s top.
For sc, insert the hook into the stitch, yarn over and draw up a loop, then yarn over and draw through both loops. Work through both top loops except for the one specified BLO transition round.
The base and body are worked continuously without joining or turning. Mark the first actual stitch of every round and move the marker as you progress. Do not add a starting chain between rounds. The handles are worked separately in turned rows, where ch 1 does not count as a stitch.
How to Crochet the Bucket Bag
Step 1: Start the Cream Base
With cream, make an adjustable ring.
Round 1: Work 6 sc into the ring. Mark the first sc and pull the center closed gently: 6 sc. Continue directly into the next round without a slip-stitch join.
Round 2: Inc in every stitch around: 12 sc.
Round 3: Repeat sc in the next stitch, inc in the next stitch six times: 18 sc.
Secure the starting tail through the backs of several stitches when you can reach it comfortably. Do not rely on the adjustable ring’s tension alone to keep the center closed.
Step 2: Increase the Base to 108 Stitches
For Rounds 4–18, work six repeats per round. On Round number R, work one sc in each of the next R minus 2 stitches, then inc in the following stitch. Repeat that sequence six times around. Each round adds six stitches.
The full sequence is:
- Round 4: 2 sc, inc, repeated six times; 24 stitches.
- Round 5: 3 sc, inc, repeated six times; 30 stitches.
- Round 6: 4 sc, inc, repeated six times; 36 stitches.
- Round 7: 5 sc, inc, repeated six times; 42 stitches.
- Round 8: 6 sc, inc, repeated six times; 48 stitches.
- Round 9: 7 sc, inc, repeated six times; 54 stitches.
- Round 10: 8 sc, inc, repeated six times; 60 stitches.
- Round 11: 9 sc, inc, repeated six times; 66 stitches.
- Round 12: 10 sc, inc, repeated six times; 72 stitches.
- Round 13: 11 sc, inc, repeated six times; 78 stitches.
- Round 14: 12 sc, inc, repeated six times; 84 stitches.
- Round 15: 13 sc, inc, repeated six times; 90 stitches.
- Round 16: 14 sc, inc, repeated six times; 96 stitches.
- Round 17: 15 sc, inc, repeated six times; 102 stitches.
- Round 18: 16 sc, inc, repeated six times; 108 stitches.
For clarity, “2 sc, inc” means one sc in each of two separate stitches, then two sc in the following stitch. Count at the end of every round rather than relying only on the visible shape.
The aligned increases can give the circle a gentle six-sided outline. That is normal for this particular placement. The base should nevertheless lie reasonably flat without strong ruffles or a deep bowl shape. Near the proposed gauge it should measure approximately 16–18 cm across.
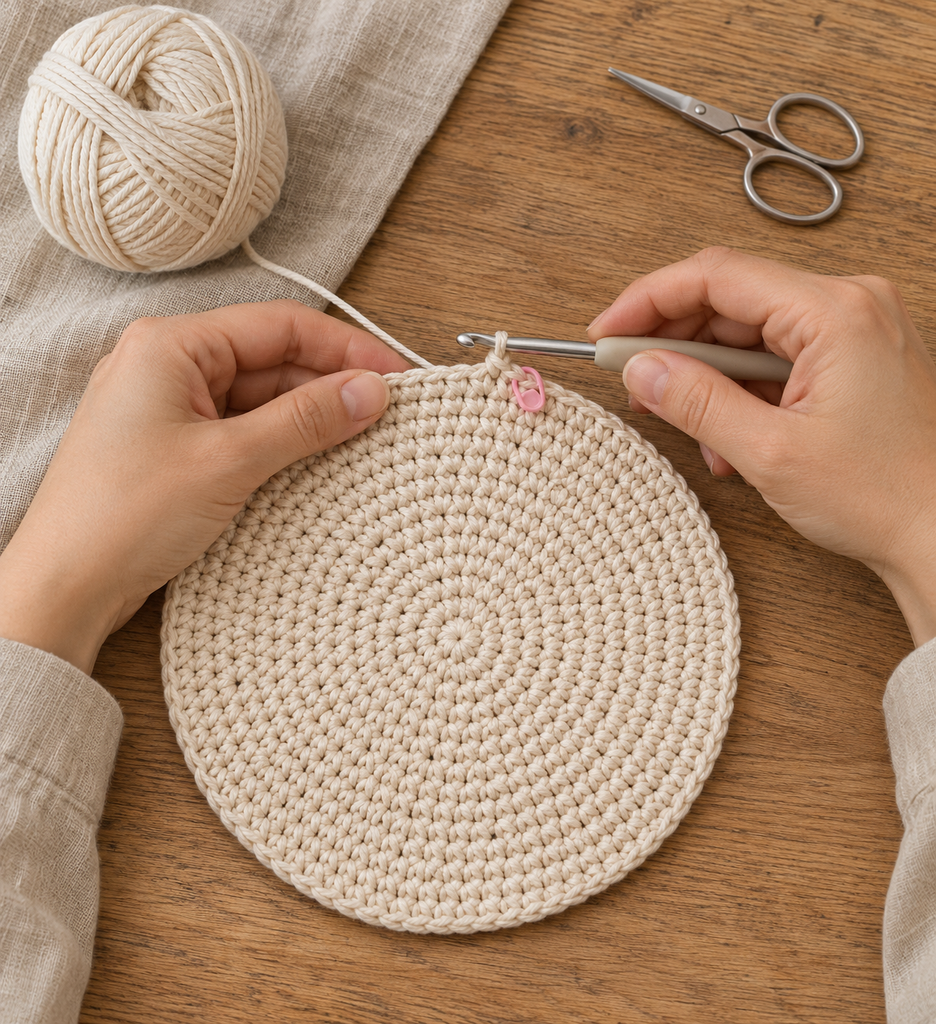
Step 3: Turn Up the Sides
Round 19: With cream, work one sc in the back loop only of each of the 108 stitches. Do not increase. This round begins the body and makes a subtle turning line above the base.
Rounds 20–30: Work one sc in each stitch through both loops: 108 sc per round. There are now 12 cream body rounds in total, including Round 19.
The fabric should begin rising into a cylinder. Do not flatten it as if it were still part of the base. Keep the first-stitch marker moving, and check that you have not accidentally worked into a marker or added an extra stitch at the start.
Step 4: Add the Blueberry Upper Body
On the final stitch of Round 30, complete the last yarn-over with blueberry. Cut the cream yarn with a suitable tail and continue in the new color.
Rounds 31–66: Work one sc in every stitch around: 108 sc in each round. These 36 blueberry rounds form the upper body. Keep working through both loops without increasing or decreasing.
Because this is a spiral, the horizontal color boundary may show a small step near the change. That is part of the continuous-round method used here. You can position that area toward the eventual back of the bag rather than pulling the yarn tight to hide it.
After Round 66, work a sl st into the next stitch to taper the end, then fasten off. This finishing slip stitch is not an extra body round or an extra stitch for handle placement. Keep the last round’s first stitch marked until the handles are planned.
Step 5: Crochet Two Short Handles
With blueberry, ch 7.
Row 1: Sc in the second chain from the hook and each remaining chain: 6 sc. Ch 1 and turn.
Rows 2–88: Sc in all 6 stitches, ch 1, and turn after every row except the final one. Fasten off at the end of Row 88, leaving a generous sewing tail. Make a second handle exactly the same.
At the proposed gauge, each strip measures approximately 3 cm wide and 40 cm long. Narrow strips can have a different row gauge, so check their actual measurements after washing. Both handles should match before attachment.
Approximately 3 cm at each end will overlap the bag inside, leaving about 34 cm exposed. That is a short carry handle rather than a shoulder strap. The eventual rise depends on the attachment spacing and how the strip curves over the opening.
Step 6: Mark Four Attachment Areas
Wash or dampen the bag and handles according to the yarn label, then dry them without stretching. Smooth the circular base and let the sides rest in their natural shape.
Number the 108 actual stitches of the final body round, beginning with the marked first stitch. Mark these four six-stitch spans:
- Attachment A: stitches 1–6.
- Attachment B: stitches 28–33.
- Attachment C: stitches 55–60.
- Attachment D: stitches 82–87.
The spans begin 27 stitches apart, dividing the rim into four equal quarters. There are 21 unoccupied rim stitches between one span and the next, including the section from D back around to A.
One handle will connect A to B, and the other will connect C to D. These become two opposite carry handles when the bag is flattened into front and back faces. Pin the ends and view the arrangement before sewing; do not connect A to C or B to D across the opening.
Step 7: Attach and Reinforce the Handles
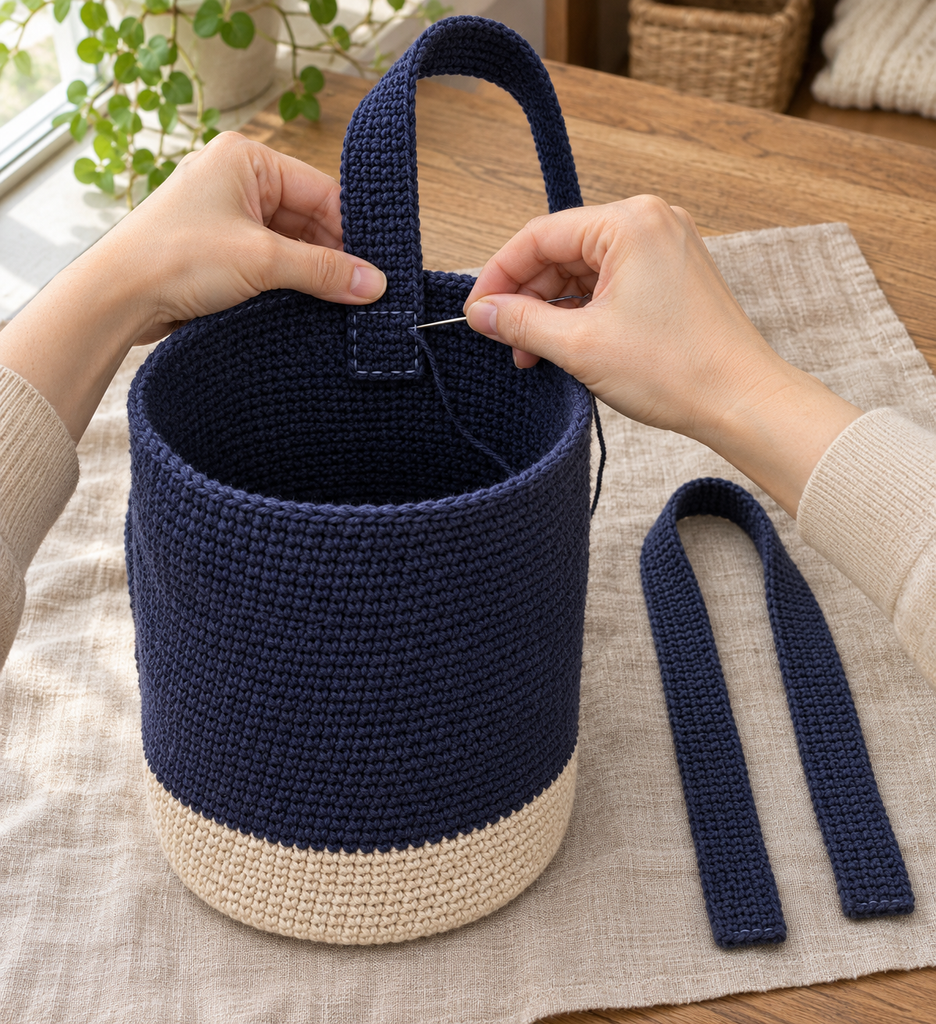
Place each handle end inside the bag, aligned across its marked six-stitch span with approximately 3 cm overlap below the rim. Keep every strip untwisted. Check that the two exposed lengths match and that the bag hangs evenly when the handles are held together.
With matching yarn, sew the perimeter of each overlap to sound loops of the inside wall. Add several horizontal reinforcing passes through the overlapped section, spreading the attachment across the full handle width. Avoid fastening a handle with one stitch at the rim or a knot at the corner.
Weave the tails through the attachment area in more than one direction. Inspect all four ends, then test gently with a few light items. Load capacity is not established by the stitch count or the generated pictures, so assess stretch and attachment behavior on the physical sample before everyday use.
More Information: Lining, Size Changes, and Care
Add an Optional Fabric Lining
A lining can help keep a key or pen from catching on the crochet. Measure the actual inside circumference and height after washing and attaching the handles. For a simple cylindrical lining, cut a side rectangle to the measured circumference plus seam allowances, and to the measured height plus bottom-seam and top-hem allowances.
Sew the side rectangle into a tube. Cut a circular base matching the lining tube’s seam-line circumference, with an added seam allowance around it, then sew that circle to the bottom. Test the fit before finishing the top hem; the lining should sit inside without stretching the crochet outward.
Turn the lining’s top edge inward and hand sew it just below the rim. Leave the handle attachments unobstructed and catch crochet loops gently rather than drawing the opening tight. A lining reduces snagging but does not make the bag waterproof or secure its open top.
Change the Height Without Changing the Base
At the stated round gauge, 11 body rounds add approximately 5 cm. Add them to the blueberry section if you want a taller bag, keeping 108 stitches around. Remove the same number for a shorter version.
A taller body carries more fabric weight and invites a heavier load, so reevaluate the handles and yarn allowance. Do not assume the original draft’s attachments have a verified strength rating.
Change the Base Size Deliberately
Stopping the base increases earlier changes the circumference of every later round. For example, stopping after Round 16 gives 96 stitches, or approximately 48 cm around the body at gauge. You would then need to redistribute four six-stitch handle spans around that new circumference.
That is a separate calculated variation requiring its own sample. For a first attempt, follow the stated base size so you can assess the flatness, proportions, and handle arrangement before drafting another version.
Carry and Store the Bag Gently
Use it for light essentials and avoid overfilling the body. Cotton can stretch despite feeling firm when new. Check the handle ends after the first few uses and repair any loosening before adding more weight.
Follow the yarn label for cleaning, support the wet fabric, and dry the bag with its base gently rounded. Store it empty rather than hanging a loaded bag from its handles. A simple cream blouse or denim outfit lets the blueberry color stand out without adding more pattern.
Frequently Asked Questions
Is this the same tote as the PDF reference?
No. This draft uses a small circular base, cylindrical single-crochet body, horizontal color blocking, and two separate handles. The reference’s folded rectangular construction and diagonal color placement are not used.
Can a beginner make this bucket bag?
A beginner who can keep track of continuous rounds can work through it slowly. The important habits are marking the first stitch, counting every increase round, and checking the handle placement before sewing.
Why is my base forming a bowl?
Check that each increase round gained six stitches and that the stitches have the intended height and width. Missing increases or a gauge mismatch can cause cupping. Correct the base before continuing into the body.
Why does the color change have a small step?
The body is worked in a continuous spiral rather than joined rounds. A small jog at the color boundary is expected with this method. Keep it toward the back if you prefer, and avoid tightening the change so much that it puckers.
Does the bag have a drawstring or closure?
No. The written base draft has an open top. Adding a closure would need separate planning for its placement and reinforcement; no closure is included in the instructions or yardage calculation.
Has this bag been made and load-tested?
No. The stitch calculations have been checked, but base behavior, actual yarn use, capacity, and handle strength remain untested. Make and assess a sample before calling this a tested pattern or relying on it for carrying heavier items.