Sea Glass Crochet Hooded Scarf:
A hooded scarf brings two useful layers together without adding another loose accessory to carry. This sea-glass version has a roomy green hood, a long narrow scarf, and oatmeal cream blocks at both tips. The simple half double crochet keeps the surface quiet, letting the soft color contrast and generous hood shape do the work.
The starting inspiration was a hooded baby cocoon. This project takes only the idea of an attached hood and develops a different garment: an adult scarf with open ends and a separately made hood. There is no closed sack, circular base, or bobble fabric. Two flat rectangles become the finished piece through a crown seam and a centered neckline join.
Pattern status: this is a newly drafted, untested crochet pattern. Stitch counts, row totals, and assembly measurements have been checked, but no physical sample has been made. Fit, drape, yarn consumption, and seam behavior still need checking in a real sample. All four images are AI-generated concepts, including the woman wearing the intended design.

The Design: Two Rectangles and Two Joins
The scarf is one long rectangle with cream tips and a sea-glass center. The hood is another rectangle, worked entirely in green. Folding the hood across its width and sewing only its top edge creates the crown, while its lower foundation edge remains open for attaching to the scarf.
The scarf’s middle section becomes the neckline. Matching the center and quarter points helps distribute the hood’s base evenly along that section. The two scarf ends remain free and can hang down the front when the hood is raised.
This draft uses plain half double crochet through both loops. It does not reproduce the source’s bobble pattern or infant proportions. The intended fabric is flexible enough to fold around the neck without becoming a stiff collar.
Project Details
| Detail | Draft specification |
|---|---|
| Skill level | Confident beginner comfortable sewing crochet pieces |
| Terminology | US crochet terms |
| Construction | One scarf rectangle plus one folded hood rectangle |
| Scarf reference | 36 hdc across and 210 rows long |
| Calculated scarf size | Approximately 20 cm wide by 150 cm long |
| Hood reference | 116 hdc across and 48 rows tall |
| Hood rectangle size | Approximately 64.5 cm wide by 34.3 cm tall |
| Folded hood depth | Approximately 32 cm before allowing for the top seam |
| Cream tips | 12 rows at each end, approximately 8.6 cm each |
| Pattern status | Arithmetic checked; not physically crocheted or tested |
Materials and Yarn Choices
- Soft DK yarn in sea-glass green: provisionally 850–1,050 m.
- The same yarn in oatmeal cream: provisionally 90–140 m.
- A 4.5 mm crochet hook, adjusted to obtain the suggested fabric and gauge.
- Tapestry needle, scissors, measuring tape, and removable stitch markers.
Choose a smooth wool blend or soft acrylic that feels comfortable against the neck and forehead. Match the yarn thickness in both colors. A much heavier cream yarn can make the tips hang differently from the center, while very stiff yarn can stop the hood from settling around the head.
The meterage ranges are planning estimates rather than measured sample consumption. Yarn length per gram varies, so compare the labeled length as well as the ball weight. Keep extra green available if you want longer scarf tails or a larger hood.
Gauge and Fit Planning
The provisional gauge is 18 half double crochet stitches and 14 rows per 10 cm. Make a swatch larger than the measurement area and measure it after it has relaxed. Do not stretch it to reach the target.
At that gauge, 36 stitches make a scarf around 20 cm wide, and 210 rows give 150 cm of length. The hood’s 116 stitches make approximately 64.5 cm across; folding that width in half creates a depth around 32 cm. Forty-eight rows give a height just over 34 cm.
These are calculated reference dimensions, not a tested adult size. Head size, hair volume, shoulder position, and preferred coverage all affect the fit. Check the hood with removable markers before making its seam permanent, then check the full garment before securing the neckline join.
Abbreviations and Working Notes
| Abbreviation | Meaning |
|---|---|
| ch | Chain |
| hdc | Half double crochet |
| st / sts | Stitch / stitches |
| RS | Right side, the face chosen for the outside |
To make hdc, yarn over, insert the hook into the stitch, yarn over and pull up a loop, then yarn over and pull through all three loops.
Ch 1 and turn before every new row. This turning chain does not count as a stitch. Work through both loops throughout. The first hdc goes into the first actual stitch beside the chain, and the last goes into the last actual stitch at the far edge.
Mark the row ends if you tend to miss them. Both rectangles keep a constant stitch count, so an unexpected taper usually means an edge stitch has been lost or the turning chain has been counted by mistake.
Part One: Crochet the Scarf
Make the First Cream Tip
With cream, ch 37.
Row 1: Hdc in the second chain from the hook and in every remaining chain. 36 sts.
Rows 2–12: Ch 1, turn. Hdc in every stitch across. 36 sts each row.
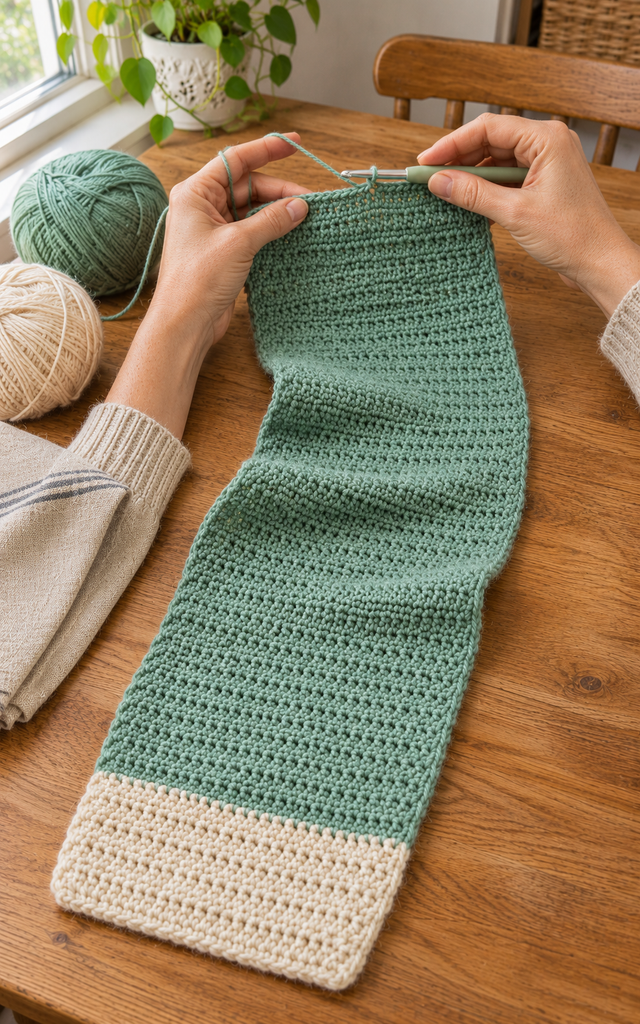
There are twelve cream rows in total, including Row 1. At the provisional gauge, this section should measure approximately 8.6 cm long. Check its width and fabric before working the much longer center section.
On the last hdc of Row 12, stop before the final pull-through. Drop cream, yarn over with sea-glass green, and pull through all three loops. Leave both tails long enough to weave securely later.
Work the Green Center
Rows 13–198: Ch 1, turn. With green, hdc in every stitch. 36 sts each row. Work 186 rows in this section.
Keep a row tally and measure the scarf relaxed from time to time. A long piece can look narrower after it has been pulled around on the table. Let it settle before judging the measurements or comparing it with the hood.
The reference scarf uses a plain surface rather than added texture rows. Keep the edge stitches even, and avoid tightening the first few stitches after every turn. Consistent row ends will make the later neckline join easier to distribute.
Finish the Second Cream Tip
Change to cream on the last pull-through of the final green stitch.
Rows 199–210: Ch 1, turn. With cream, hdc in every stitch. 36 sts each row. Fasten off and weave in the ends.
The finished reference scarf contains 24 cream rows and 186 green rows, giving 210 rows altogether. Its two short ends are the cream tips; its two long side edges are formed by the row ends.
Part Two: Crochet the Hood Rectangle
Work the Main Panel
With green, ch 117.
Row 1: Hdc in the second chain from the hook and in every remaining chain. 116 sts.
Rows 2–48: Ch 1, turn. Hdc in every stitch. 116 sts each row. Fasten off, leaving a long sewing tail.
Lay the panel flat and identify its edges. The foundation and final row are the two long edges, each approximately 64.5 cm. The turning sides are the shorter edges, each approximately 34.3 cm tall. Mark the foundation edge as the future lower neckline edge.
Choose the face you prefer as the outside. Place a small removable marker on that face so it remains easy to identify while folding and sewing.
Fold and Check the Hood
Place the hood rectangle with its outward face inward. Fold it across its width so that the two short turning-side edges meet. The fold becomes the center back of the hood, while the matching short edges will become its two open face edges.
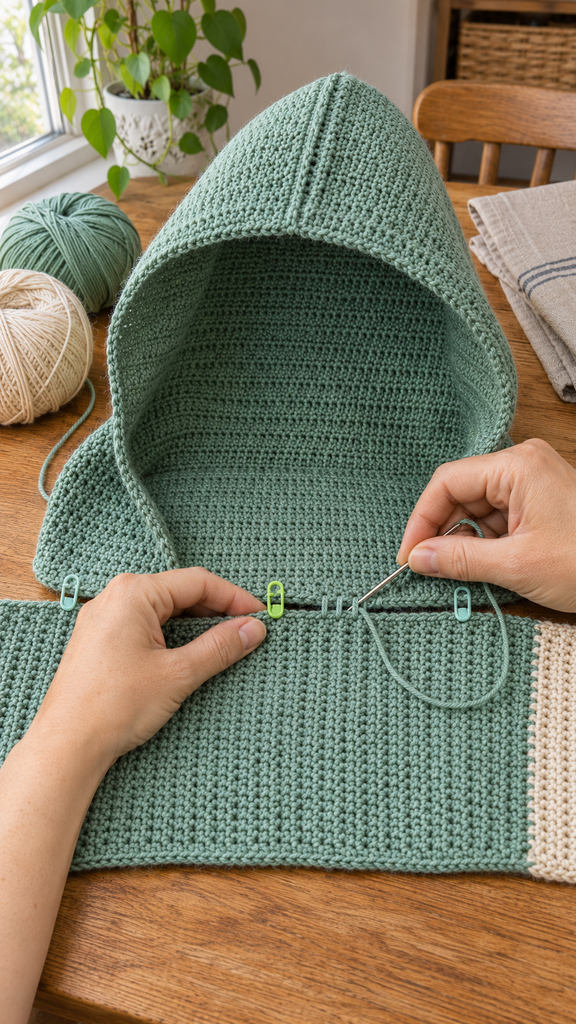
The final Row 48 now folds into two matching halves, with 58 stitch positions on each half. Temporarily connect those two top halves with removable markers. Do not join the short face edges together. The foundation edge at the bottom also stays open at this stage.
Try the shape gently over the head. Check the height from the lower neckline to the crown and the depth from the face opening toward the back fold. If it is too deep or too shallow, adjust the rectangle’s stitch count before sewing. If it needs more or less height, adjust the row count.
Sew the Top Seam
With the outward faces still together, whipstitch the two halves of Row 48 to one another, matching the 58 positions on each half. Sew only that folded top edge, from the face-side top corner toward the back fold, or in the reverse direction if easier.
Keep the seam flexible and avoid drawing the stitches into a tight cord. Secure the tail and turn the hood right side out. Its two short side edges now form the open face, and its unsewn foundation edge forms the lower attachment edge.
The top seam creates a softly angular crown rather than a separately shaped dome. Smooth it by hand and check it again before joining the scarf. The actual outline depends on the yarn’s drape and the amount of ease you choose.
Part Three: Join the Hood to the Scarf
Mark the Centered Neckline Section
Lay the scarf flat with its chosen outward face visible. Find its lengthwise midpoint, between reference Rows 105 and 106. Mark that point on one long side edge; only this long edge will receive the hood.
Measure the actual relaxed width of the hood’s foundation edge. Center a matching-length section along the marked scarf edge. For the reference measurements, this is approximately 64.5 cm, leaving about 42.8 cm of free scarf length beyond each end of the neckline section.
Mark both ends of that section, its center, and its quarter points. Mark the same divisions along the hood foundation. Use the actual measurements if your gauge differs rather than forcing the reference row numbers to align.
Sew the Neckline Join
Match the hood’s center-back foundation point to the scarf’s center marker, with the hood opening facing the same direction as the free scarf tails when worn. Match the quarter points and both attachment ends before sewing.
The hood foundation contains stitch positions, while the scarf long edge contains row ends. Those counts do not match one for one. Use small whipstitches and distribute the join evenly between the quarter markers, catching an extra hood stitch against a row end where needed without stretching either piece.
Keep both free scarf tails outside the join. Do not sew across the scarf’s full width or attach both long edges together. The hood should open above one long edge, with the rest of the scarf lying flat below it.
Temporarily secure the join in sections and try the garment before fastening every tail permanently. The seam should rest comfortably at the back of the neck, and the hood should lift without pulling the scarf ends awkwardly upward.
How to Wear the Hooded Scarf
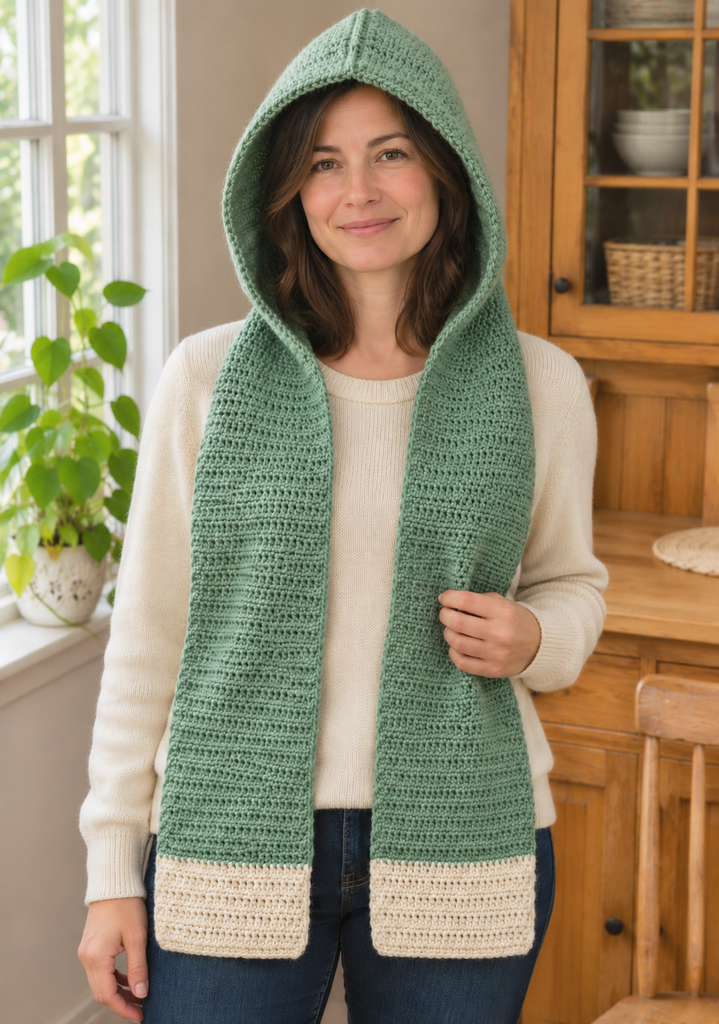
Place the scarf behind the neck with its tails hanging at the front, then lift the hood over the head. Let the face edges sit naturally and arrange the cream tips so they hang comfortably. When the hood is down, it can rest behind the neck while the scarf remains in place.
The woman in the styling image illustrates an imagined arrangement. Her garment is AI-generated, so the image does not demonstrate a tested fit, seam placement, or exact drape. Use your own sample to check comfort and coverage before wearing it regularly.
More Information: Adjustments and Care
Change the Scarf Length Evenly
Add or remove green rows in the center section before making the second cream tip. Keep the two cream blocks at twelve rows each. Every fourteen green rows add approximately 10 cm of total length at the reference row gauge.
After changing the length, find the new midpoint rather than preserving the old Row 105 marker. Center the hood’s measured foundation width there so the free tails remain equal. Recheck their length with the hood raised.
Adjust the Hood With Its Edges in Mind
The foundation stitch count controls twice the hood’s folded depth. Keep that count even if you want equal halves at the top seam. The row total controls the height of the opening.
Changing the hood width also changes the length of scarf edge it needs for attachment. Measure and remark the neckline section accordingly. Fit changes are connected here, so check the hood and scarf together before committing to the final seam.
Keep the Neckline Smooth
If the scarf gathers under the hood, the join may have been tightened or the attachment section may be too short. If the neckline waves, the hood may have been stretched along the scarf. Unpick that section and redistribute it between the quarter marks.
Weave yarn tails through matching stitches and reverse direction without bulky knots. Follow the yarn’s care instructions when washing, reshape gently, and dry flat. Avoid hanging the wet garment by the hood or one scarf tip, which can distort its proportions.
Frequently Asked Questions
Is this the same project as the baby cocoon?
No. This draft is an adult hooded scarf made from two flat rectangles. It has open scarf tails, plain half double crochet, contrasting tips, and a centered sewn hood. The source cocoon’s construction, proportions, and bobble instructions are not reproduced.
Can a beginner follow this pattern?
It suits a confident beginner who can work half double crochet and sew crochet edges. The fabric is repetitive. The important finishing task is identifying the hood edges correctly and distributing the neckline join evenly.
Which hood edge is sewn first?
Only the final-row top edge is folded and sewn into two matching halves. The short side edges remain open for the face. The foundation edge remains open until it is attached to the scarf.
Does every hood stitch match one scarf row end?
No. The two edges have different stitch structures and counts. Match their measured lengths, then use center and quarter markers to distribute the join without pulling or gathering.
Can I add a cream border around the hood?
That is an optional adaptation. Extra edging can change the opening’s size and stretch. Check the plain hood first, then test a short edging sample before adding it around the whole face opening.
Has this pattern been physically tested?
No. The scarf’s 210-row total, color sections, 116-stitch hood, and 58-position top seam have been checked mathematically. Fit, yarn consumption, drape, and seam behavior still need a real crocheted sample. All four images are AI-generated concepts.