Terracotta Triangle Crochet Wrap
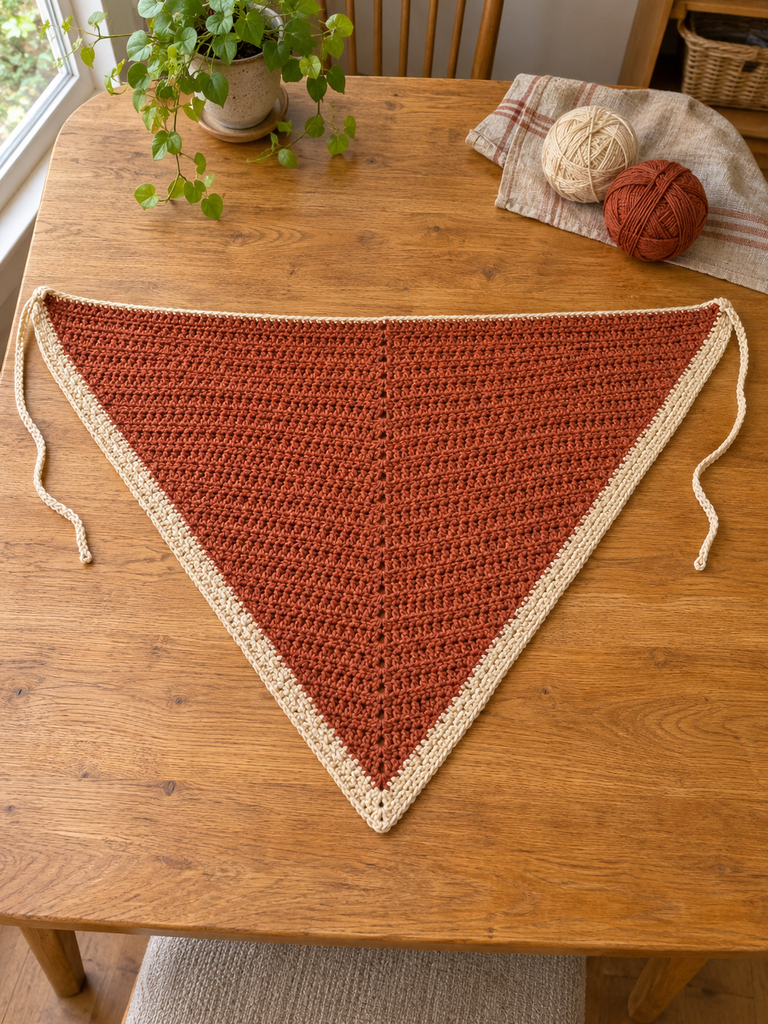
A small shoulder wrap can be an easy layer to reach for when the room feels cool or a light jacket needs a little extra warmth. This terracotta triangle has a plain double-crochet body, four cream rows along the sloping edges, and two soft ties at the upper corners. Its shape does most of the styling, so it needs very little decoration.
The starting inspiration was a rectangular pocket shawl. This project changes the silhouette, construction, palette, and finishing: it is worked outward from the upper center into a triangle, with no pockets or fringe. The cream edging frames the point, while the ties help you arrange the wrap comfortably over your shoulders.
Pattern status: this is a newly drafted, untested crochet pattern. Stitch arithmetic and color-section totals have been checked, but no physical sample has been made. Dimensions, drape, yarn consumption, and fit still need checking in a crocheted sample. All four images are AI-generated concepts, including the woman wearing the intended design.
A Different Shape for Everyday Layering
The straight upper edge sits across the back of the neck and shoulders. Two increasing sides meet at a center point that hangs down the back. Bring the upper corners toward the front and use the narrow ties to hold them loosely together.
The body uses ordinary double crochet rather than the reference shawl’s post-stitch texture. You add stitches at both outer ends and at the center of each row, forming the triangular outline without a separate panel or seam. The cream border is simply the final four increasing rows in another color.
This is a shoulder wrap rather than a full-length blanket shawl. Before finishing, check whether its span lets the corners reach the position you prefer. If it needs more coverage, add body rows before changing to cream and allow more yarn.
Project Details
| Detail | Draft specification |
|---|---|
| Skill level | Confident beginner |
| Terminology | US crochet terms |
| Construction | Center-out triangle worked in turned rows |
| Main fabric | Double crochet with a ch-2 center space |
| Reference rows | 38 terracotta rows plus 4 cream rows |
| Intended size | Approximately 115–125 cm across the upper edge and 53 cm deep |
| Closure | Two narrow crochet ties, approximately 30 cm each |
| Final main-row count | 252 dc plus the center ch-2 space |
| Pattern status | Arithmetic checked; not physically crocheted or tested |
Materials and Yarn Choices
- Soft worsted yarn in terracotta: provisionally 450–550 m.
- The same yarn in oatmeal cream: provisionally 150–200 m, including the upper edge and ties.
- A 4.5 mm crochet hook, adjusted to obtain a flexible fabric and the suggested gauge.
- Removable stitch markers, tapestry needle, scissors, and measuring tape.
Choose yarn that feels comfortable against the neck and bends easily over the shoulder. A soft wool blend or acrylic is a practical starting point. Use the same yarn family in both colors, since a firm border around a much softer body can change how the triangle hangs.
The meterage ranges are planning estimates rather than measured sample use. Yarn weights vary between brands, so compare length as well as the weight printed on the label. Keep extra terracotta available if you intend to increase the span.
Gauge and Calculated Dimensions
The provisional gauge is 16 double crochet stitches and 8 rows per 10 cm in relaxed fabric. Make a swatch larger than the measurement area and let it settle before measuring. The stitches should be even and flexible, with enough drape to fold over the shoulders.
Forty-two rows at this row gauge suggest a depth around 52.5 cm before the small upper edging. The intended span is approximately 115–125 cm, but actual width depends on stitch proportions, tension, and shaping. Treat that range as a target for the first sample, not a guaranteed finished measurement.
The four cream rows add approximately 5 cm of depth. When deciding whether to add terracotta rows, include that unfinished border in your calculation. Check the wrap over the clothes you expect to wear rather than measuring only its appearance on the table.
Abbreviations and Essential Notes
| Abbreviation | Meaning |
|---|---|
| ch | Chain |
| dc | Double crochet |
| sc | Single crochet |
| sl st | Slip stitch |
| st / sts | Stitch / stitches |
| ch-2 space | The opening beneath the center two chains |
To make dc, yarn over, insert the hook, yarn over and pull up a loop, yarn over and pull through two loops, then yarn over and pull through the remaining two loops.
The ch 3 at the beginning of every main row counts as the first dc. Its base also receives one additional dc, creating the outer increase. At the far end of the row, work two dc into the top of the previous row’s turning ch 3.
The center ch-2 space is not counted as a dc. Mark that space after every row and move the marker as you continue. You will work into the space as a whole, not separately into its two chains.
The Crochet Wrap Pattern
Step 1: Start the Upper Center
With terracotta, make a magic ring.
Row 1: Ch 3, counting as the first dc. Work 2 dc into the ring, ch 2, then work 3 dc into the ring. 6 dc plus one center ch-2 space. Mark the center space and turn.
Draw the ring closed carefully without tightening the center ch-2 space. That opening belongs to the stitch pattern and must remain accessible. Secure the ring tail later by weaving it through the foundation stitches in more than one direction.
At this stage, the piece is small and may look more like two little groups than a triangle. The outline becomes clearer as the increasing rows build. Do not add extra stitches to force the foundation into a wider shape.
Step 2: Establish the Increasing Row
Row 2: Ch 3, counting as the first dc. Work 1 dc into the same first stitch. Dc in each remaining dc on the first side until you reach the center space. Into that space, work (2 dc, ch 2, 2 dc). Dc in each stitch on the second side until the final stitch, then work 2 dc into that final stitch, which is the top of the previous turning ch 3. Turn.
You now have 12 dc plus the center ch-2 space, with 6 dc on each side of the center. The outer increases add two stitches overall, and the center space receives four new dc, giving six additional dc in the row.
Keep the turning chains close to the height of the adjacent stitches. A very loose chain can leave a gap at the wing tip, while a tight chain can pull the upper edge inward.
Step 3: Grow the Terracotta Body
Rows 3–38: Repeat Row 2, always working two dc in the first and last stitch positions and (2 dc, ch 2, 2 dc) in the marked center space. Work one dc in every other existing dc. Turn after each row.
Each row adds 6 dc. The total after Row n is 6 × n dc, divided equally around the center space. Use these checkpoints as you work:
- Row 3: 18 dc, or 9 on each side.
- Row 10: 60 dc, or 30 on each side.
- Row 20: 120 dc, or 60 on each side.
- Row 30: 180 dc, or 90 on each side.
- Row 38: 228 dc, or 114 on each side.
The two center chains remain separate from all those counts. If the sides differ, inspect the most recent row for a missed turning-chain stitch or an accidental extra dc near the marker. Fixing a short section now is easier than trying to disguise unequal sides in the border.
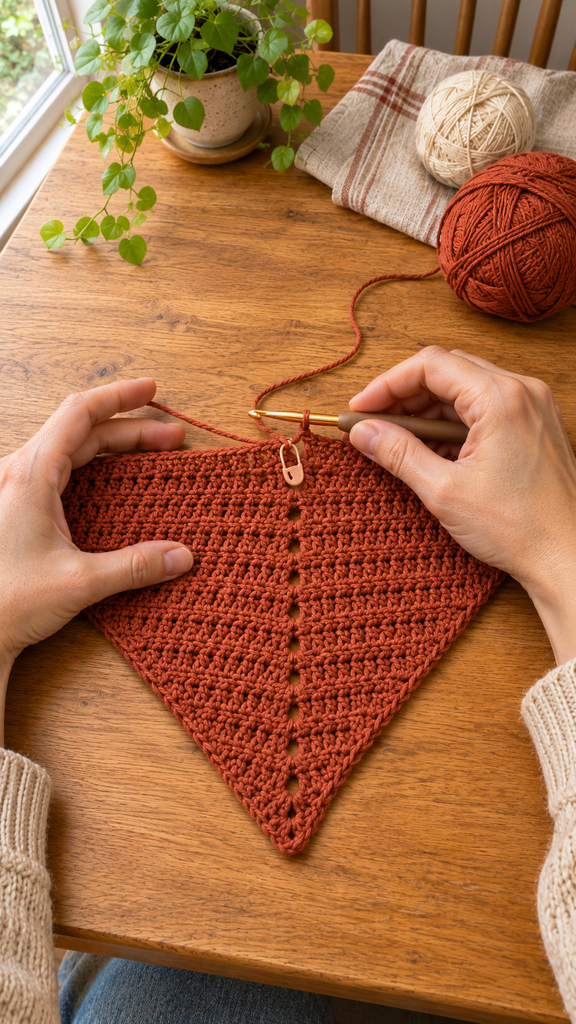
Step 4: Check the Coverage Before the Border
Lay the triangle flat without pulling the upper corners apart. Check its center depth and upper span, then drape it over the shoulders. Remember that four cream rows will still add size.
If you want more coverage, continue the increasing row in terracotta before changing color. Every extra row adds six dc and approximately 1.25 cm of depth at the provisional row gauge. Keep a note of the new row total so you can calculate the border counts.
For a smaller wrap, stop the terracotta section earlier. Preserve the same increasing sequence rather than skipping center increases or tightening the outer edge. The final shape depends on those increases remaining consistent.
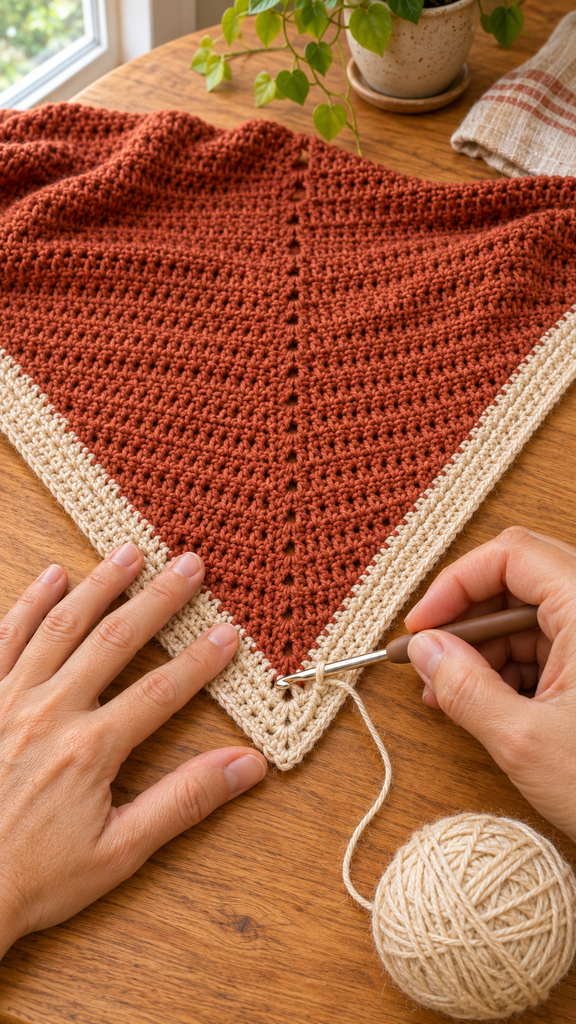
Step 5: Work the Four Cream Rows
On the final dc of Row 38, or your chosen last body row, use cream for the last pull-through. Leave tails long enough to weave securely and turn.
Rows 39–42: With cream, repeat the same increasing row used for the body. Ch 3 counts as the first dc; work another dc in its base stitch, increase in the center space, and work two dc in the final turning-chain stitch.
- Row 39: 234 dc plus the center ch-2 space.
- Row 40: 240 dc plus the center ch-2 space.
- Row 41: 246 dc plus the center ch-2 space.
- Row 42: 252 dc plus the center ch-2 space.
Fasten off after the fourth cream row. If you changed the body length, use the formula 6 × total row number rather than these reference counts. Four cream rows always add 24 dc to the total that existed before the color change.
The cream rows follow both sloping sides and meet at the lower point. They do not form a separate strip that needs sewing on. Keep their tension similar to the body so that the border drapes instead of becoming a stiff frame.
Step 6: Add the Upper Neckline Edge
Choose the face you prefer as the outside. With that face toward you, join cream at one upper corner of the straight neckline edge. Ch 1, which does not count as a stitch.
Work sc evenly along the full upper edge to the opposite corner. Begin with approximately two sc around each dc row end and check the fabric frequently. Continue smoothly across the small foundation-center area instead of leaving a gap there.
There is no fixed sc total for this edge because turning-chain tension and the foundation area affect the spacing. If it waves, remove a few stitches from that section; if it draws the neckline inward, give it more room. The goal is a relaxed upper edge, not a tightly gathered neckline. Fasten off and weave in the tail.
Step 7: Make the Two Ties
With cream, join yarn securely at one upper corner. Chain until the strand measures approximately 30 cm without stretching. Starting in the second chain from the hook, sl st into every chain back toward the corner. Sl st into the corner attachment point and fasten off.
Repeat at the other upper corner, matching the first tie’s relaxed length. Weave the tails into the nearby border stitches. Make a gentle bow to test the closure; the ties should hold the corners in position without pulling tightly around the neck.
How to Wear the Triangle Wrap
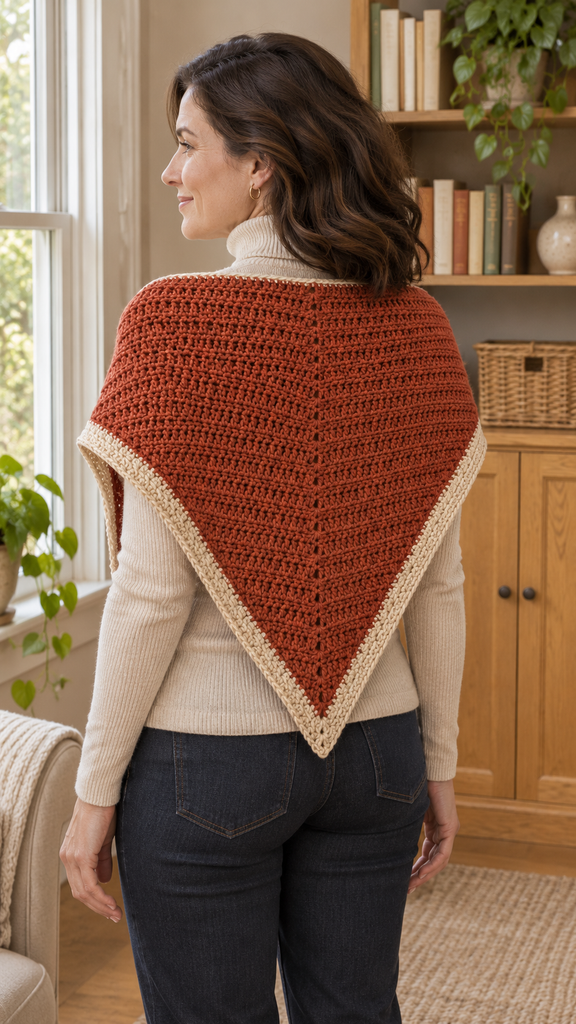
Place the long straight edge across the shoulders, with the central point hanging down the back. Bring the upper corners toward the front and tie a loose bow where it feels comfortable. Let the cream border follow the sloping sides naturally instead of pulling it into a rigid line.
The woman in the styling image illustrates one possible arrangement. Her garment and pose are AI-generated, so the image does not demonstrate a tested fit or the exact drape of the written pattern. Use the real sample’s measurements and your comfort to decide where the corners should meet.
More Information: Adjustments, Finishing, and Care
Keep the Triangle Balanced
Count the two sides separately if a full row becomes difficult to track. At every reference row, each side contains three times the row number in dc. For example, Row 42 has 126 dc before the center chains and 126 after them.
A small step at the color change is less important than consistent stitch placement. Do not compensate for a visible edge irregularity by adding an unplanned increase. Check whether the turning chain or last stitch is the actual source of the problem.
Finish Without Distorting the Drape
Weave the color-change tails through matching stitches, reversing direction without forming a bulky knot. If the yarn permits blocking, smooth the damp triangle into a balanced outline and dry it completely. Avoid pulling the outer corners hard to chase the target span.
The ties can stretch when damp. Arrange them at matching relaxed lengths and let them dry alongside the shawl rather than hanging them over an edge. Follow the yarn label for washing and drying.
Try Another Palette
Dusty blue with oatmeal gives a quieter version; deep forest green with warm cream creates more contrast. Keep the body and border in the same yarn family so they have similar weight and care requirements.
For a single-color version, continue in the main yarn for all 42 rows and work the upper edge and ties in that same color. The construction and stitch totals remain unchanged, while the triangle becomes a simpler everyday layer.
Frequently Asked Questions
Is this the same shawl as the PDF?
No. The reference is a rectangular pocket shawl with fringe and post-stitch texture. This draft is a center-out triangle with plain double crochet, a contrast border, and narrow corner ties. Its shape, construction, colors, and finishing are different.
Is the pattern suitable for beginners?
It suits a confident beginner who can work double crochet and recognize the turning chain. The stitch itself is simple; the main task is keeping the outer and center increases consistent on every row.
Does the turning ch 3 count as a stitch?
Yes. It is the first dc of every main row. The final stitch of the following row goes into the top of that chain. Forgetting this position is a common reason one side becomes shorter than the other.
How many stitches should I add each row?
Six dc overall: one additional stitch at each outer end, plus four new dc worked into the center space. The center ch 2 is separate and is not included in the dc count.
Can I make the wrap larger?
Yes. Add complete terracotta increasing rows before the four cream rows. Recalculate the total as six times the new row number, allow more yarn, and check the actual coverage before finishing the upper edge and ties.
Has this pattern been physically tested?
No. The six-stitch increases, 42-row reference, 38-plus-four color split, and final 252-dc count have been checked mathematically. Fit, drape, yarn consumption, and finished measurements still need a real crocheted sample. All four images are AI-generated concepts.