Cocoa and Cream Gingerbread Cottage Mug Rug
A small mug rug can make an ordinary cocoa break feel a little more festive without taking over the whole table. This oatmeal-cream panel, with thin cherry-red stripes at the top and bottom, is sized for one mug, and a small gingerbread cottage sewn on top gives it a quiet holiday detail. It is a quick, flat project, with no shaping in the round and no separate lining to add.
The starting point is only the familiar gingerbread house idea in general. This version turns it into something different: a small, flat table accent, not a large blanket, worked as a plain rectangular panel with separate appliqué pieces sewn on afterwards. It does not use a pixel chart, a corner-to-corner construction, or a multi-round blanket border. The cottage here is built from a rectangle, a decreasing triangle, and a few small squares, all joined by hand.
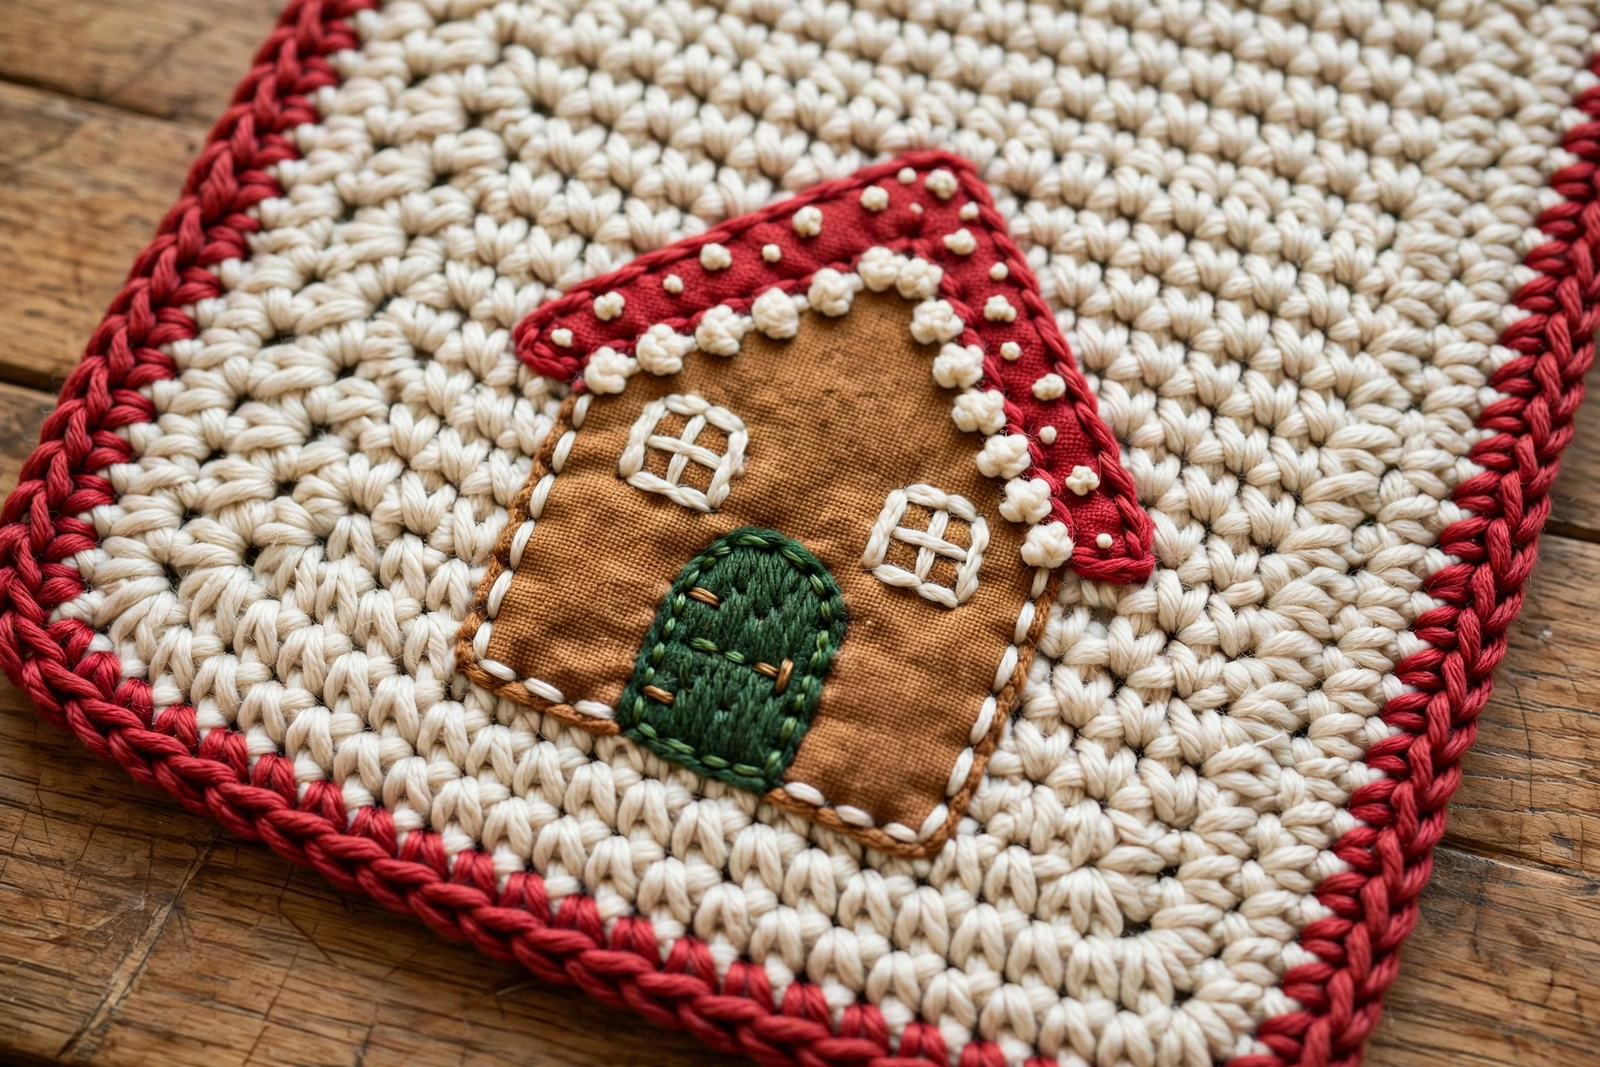
Pattern status: this is a newly drafted, untested crochet pattern. Stitch counts and row totals have been checked, but no physical sample has been made. Fit, gauge, yarn consumption, and how the appliqué sits after washing still need checking in a real sample. All three images are AI-generated concept illustrations, not photographs of a tested mug rug.
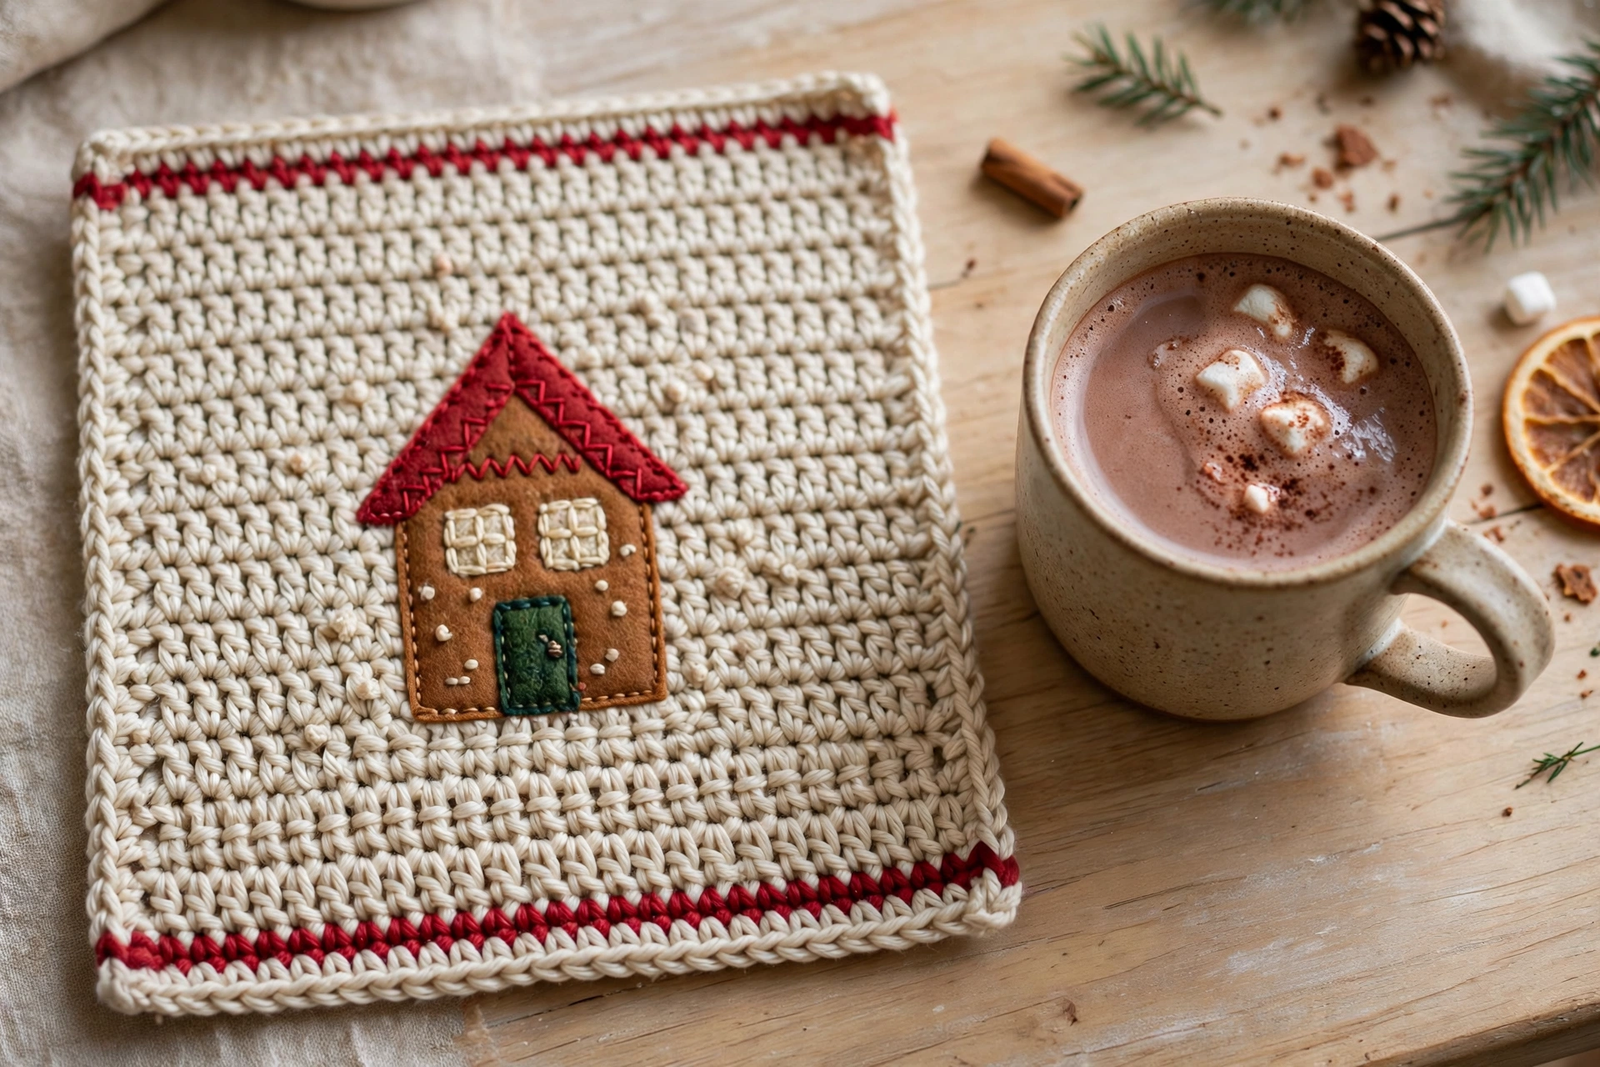
What Makes This Mug Rug Different?
The base is worked in simple rows, back and forth, so the panel stays flat and easy to measure as you go. The colour changes are only at the top and bottom edges, two cherry-red rows at each end, with a long oatmeal section in between. That keeps the counting simple: once the first row is right, every row that follows has the same stitch count.
The cottage is not worked into the panel. It is made separately, in five small pieces, and sewn on at the end. That means a mistake in a window or a door does not mean unravelling the whole rug, and the cottage can be moved slightly before it is fixed in place. The roof is the only shaped piece, decreased evenly on both sides until it comes to a narrow top.
Project Details
| Detail | Draft specification |
|---|---|
| Skill level | Confident beginner |
| Terms | US crochet terminology |
| Construction | Flat rectangular panel, plus separate sewn-on appliqué pieces |
| Finished panel size | Approximately 20 cm wide x 12.5 cm tall, before the edge round |
| Main stitch | Single crochet |
| Main colours | Oatmeal cream, cherry red, warm gingerbread brown, deep green |
| Pattern status | Arithmetic checked; not physically crocheted or tested |
Materials and Yarn Choices
- Smooth DK or light worsted yarn in oatmeal cream: approximately 30-40 g for the panel.
- Matching yarn in cherry red: approximately 10-15 g for the end stripes and the roof.
- Matching yarn in warm gingerbread brown: approximately 10-15 g for the cottage body.
- Matching yarn in deep green: approximately 5 g for the door.
- A small amount of cream yarn for the window crosses and snow dots.
- A 4 mm crochet hook, adjusted for gauge and a flat, firm fabric.
- Tapestry needle, scissors, measuring tape, and removable stitch markers.
Use the same yarn family for all colours, so the panel and the appliqué pieces behave the same way when washed. A smooth cotton blend or soft acrylic makes the stitches easy to count. A very fluffy or chenille yarn will hide the appliqué edges and should not be substituted without swatching first.
The yarn amounts are provisional rather than measured sample consumption. Keep a little extra oatmeal cream available, as the panel uses the most yarn of any piece.
Gauge and Expected Dimensions
The provisional gauge is 16 single crochet stitches and 19 rows per 10 cm in single crochet fabric. Measure a swatch after letting it relax, and count the stitches across the middle of the swatch rather than at the edges.
At this gauge, 32 stitches measure about 20 cm across. Twenty-four rows suggest a height of about 12.5 cm. Those are calculated targets rather than sample results. If your gauge is looser, the panel will be larger; if it is tighter, it will be smaller. Check the width after the first few rows, while it is still easy to restart.
To change the width, multiply your target width in centimetres by 1.6 and round to a whole stitch. For example, a 22 cm panel needs approximately 35 stitches, with a starting chain of 36. Keep that chosen stitch count throughout every row of the panel.
Abbreviations and Working Notes
| Abbreviation | Meaning |
|---|---|
| ch | Chain |
| sc | Single crochet |
| sc2tog | Single crochet two together (decrease) |
| st / sts | Stitch / stitches |
| RS | Right side, the chosen outward face |
Chain 1 and turn before each new row of the panel and of the flat appliqué pieces. The turning chain does not count as a stitch. Work the first sc into the first actual stitch, and finish in the last actual stitch. Mark both row ends if you tend to gain or lose stitches.
Work all pieces with the same hook size unless your swatch tells you otherwise. Keep the appliqué pieces flat as you work them; a piece that curls strongly at the edges will be harder to sew neatly onto the panel.
The Crochet Pattern
Step 1: Crochet the Base Panel
With cherry red, ch 33 for the reference size, or your chosen stitch count plus one chain.
Row 1: Sc in the second chain from the hook and in every remaining chain. 32 sts, or your chosen count.
Rows 2: Ch 1, turn. Sc in every stitch across. 32 sts.
Change to oatmeal cream on the last sc of Row 2, leaving tails long enough to weave in later. Do not tie a hard knot at the colour change, where it can show through the light-coloured fabric.
Rows 3-22: Ch 1, turn. With oatmeal cream, sc in every stitch across. 32 sts in each row.
Change to cherry red on the last sc of Row 22.
Rows 23-24: Ch 1, turn. With cherry red, sc in every stitch across. 32 sts in each row.
You now have 24 rows altogether: 2 cherry-red rows, 20 oatmeal rows, and 2 cherry-red rows. Lay the panel flat without stretching and measure it before continuing. Fasten off, leaving a tail for weaving in.

Note: the process illustration shows more red stripes than the written draft; the draft uses cherry red only in Rows 1-2 and Rows 23-24.
Step 2: Crochet the Cottage Body
With warm gingerbread brown, ch 13.
Row 1: Sc in the second chain from the hook and in every remaining chain. 12 sts.
Rows 2-8: Ch 1, turn. Sc in every stitch across. 12 sts in each row.
Fasten off, leaving a long tail for sewing. You have a small rectangle, 12 stitches wide and 8 rows tall.
Step 3: Crochet the Roof Triangle
With cherry red, ch 13.
Row 1: Sc in the second chain from the hook and in every remaining chain. 12 sts.
Row 2: Ch 1, turn. Sc2tog, sc in the next 8 sts, sc2tog. 10 sts.
Row 3: Ch 1, turn. Sc2tog, sc in the next 6 sts, sc2tog. 8 sts.
Row 4: Ch 1, turn. Sc2tog, sc in the next 4 sts, sc2tog. 6 sts.
Row 5: Ch 1, turn. Sc2tog, sc in the next 2 sts, sc2tog. 4 sts.
Row 6: Ch 1, turn. Sc2tog twice. 2 sts.
Fasten off, leaving a long tail for sewing. The decreases are the same on both sides in every row, so the triangle stays centred.
Step 4: Crochet the Door and Windows
Door, with deep green: ch 5.
Row 1: Sc in the second chain from the hook and in every remaining chain. 4 sts.
Rows 2-5: Ch 1, turn. Sc in every stitch across. 4 sts in each row.
Fasten off, leaving a tail for sewing. Make one door, 4 stitches wide and 5 rows tall.
Windows, with cream: ch 4.
Row 1: Sc in the second chain from the hook and in every remaining chain. 3 sts.
Rows 2-3: Ch 1, turn. Sc in every stitch across. 3 sts in each row.
Fasten off, leaving a tail for sewing. Make two windows, each 3 stitches wide and 3 rows tall.
Step 5: Sew the Cottage Together
Lay the base panel flat with the right side facing up. Place the cottage body in the centre of the panel, with its bottom edge about 4 rows above the bottom cherry-red stripe, and an equal amount of oatmeal panel showing on the left and right. Pin or mark the position before sewing, and check it from a normal table distance, not only from close up.
Sew the cottage body to the panel with its brown tail, using small whip stitches around the edges that catch the panel without pulling it into a pucker. Work through only the top layer of the panel if you can, so the back stays neat.
Place the roof triangle so its bottom row overlaps the top row of the cottage body by one row, and its point sits above the centre of the body. Sew it in the same way, with the red tail.
Place the door in the centre of the bottom half of the cottage body, with its bottom edge level with the bottom edge of the body. Place one window on each side of the upper half of the body, leaving a small gap between the window and the roof. Sew both windows with their cream tails.
Step 6: Add the Window Crosses and Snow Dots
With cream yarn, embroider one small plus-shaped cross in the centre of each window: one short horizontal stitch crossed by one short vertical stitch, worked through only the window piece, not through the panel underneath.
With cream yarn, work a row of small dots along the lower edge of the roof, spaced evenly, using short straight stitches or small French knots. Keep the dots light and even, and do not pull them tight enough to pucker the roof.
Weave in all remaining tails on the back of the panel, reversing direction once so they stay secure. Trim the tails close only after checking that no appliqué edge has lifted.
More Information and Finishing Tips
Keep the Panel Flat
A panel that curls at the corners usually means the edge stitches are tighter than the middle, or the row ends have been missed. Count the stitches at the end of every few rows, and keep the turning chain loose. If the finished panel still curls slightly, lay it flat under a light, dry cloth for a short time; follow the yarn label before using any steam or blocking.
Work one round of edge stitches only if you want a neater finish: with oatmeal cream, sc evenly around the whole panel, placing 2 sc in each corner, and join to the first sc. This is optional, and it is not counted in the 20 cm x 12.5 cm panel size above.
Adjust the Size With a Plan
For a wider mug rug, increase the starting chain as described in the gauge section, and keep the same 24 rows unless you also want a taller rug. For a taller rug, add oatmeal rows in the middle of the panel, in pairs, so the cherry-red stripes stay at the two ends. Record the new row numbers so a second rug matches the first.
For a smaller coaster version, reduce the panel to about 24 stitches and 18 rows, and reduce the cottage body to 10 stitches wide and 6 rows tall, keeping the same roof decrease method. Treat that smaller version as a separate draft, and check its measurements before sewing the cottage on.
Choose Another Palette
Sage green with oatmeal gives the same cottage a quieter, woodland look, with a deep red door instead of a green one. Try charcoal with pale grey for an everyday table, keeping the roof in a single contrasting colour so the cottage still reads clearly. Keep all yarns in the same family, so the panel and the appliqué wash in the same way.
If you omit the embroidery, the cottage shape and the colour contrast still carry the design. Make the first version simple and check that the appliqué sits flat before adding more decoration.
Care for the Finished Rug
Follow the yarn label when washing. Reshape the panel to its flat rectangle while damp and dry flat. Avoid hanging it by a corner while wet, since that can stretch the panel out of shape. Keep hot mugs on the oatmeal section rather than directly on the appliqué, so the sewn edges are not repeatedly pressed and loosened.
After washing, check the appliqué edges, especially at the roof corners. Secure a loose stitch before it works its way along an edge.
Frequently Asked Questions
Is this the same as the gingerbread blanket that inspired it?
No. This is a small, flat mug rug with a sewn-on appliqué cottage. It uses a different size, a different construction, and a different way of forming the house shape, and it does not reproduce the blanket’s instructions, chart, or border.
Can a beginner make this mug rug?
It suits a confident beginner who can work single crochet, decrease evenly, and sew small pieces together with a tapestry needle. The most important steps are keeping the panel stitch count steady and pinning the cottage in place before sewing it down.
Why make the cottage separately instead of working it into the panel?
Separate pieces are easier to place, easier to replace if one piece goes wrong, and easier to sew flat. Working the cottage into the panel would require colour changes in the middle of every row, which makes counting much harder for a small first project.
What if my panel curls or the cottage lifts at the edges?
Count the panel stitches first, then check the row ends. For a lifting appliqué edge, add a few extra small stitches along that edge, catching the panel firmly but without pulling it tight. Do not add glue; a few extra stitches hold better and survive washing.
Can I use a different yarn weight?
It will change the size and the firmness substantially, so the written measurements will no longer apply. Use the gauge section to recalculate the stitch count for your yarn, and make a swatch that includes the appliqué colours before starting the full panel.
Has this mug rug been physically tested?
No. The 32-stitch panel, the 24-row total, the cottage, roof, door, and window counts have been checked mathematically. Gauge, yarn use, appliqué hold, and practical use still need a real crocheted sample. The images show the intended style and may differ in stitch detail or proportions.