Sage and Cream Crochet Neck Warmer
A small crochet collar can be just the layer you want when the morning feels cool but a long scarf seems like too much. This sage and cream neck warmer brings together soft ribbing, two quiet colors, and a row of wooden buttons. It folds neatly into a bag, opens completely for easy styling, and adds a handmade detail to a plain sweater or jacket.
The starting inspiration was a two-color knitted headband. Here, that simple color pairing becomes a different accessory: a short crochet neck wrap with a flat buttoned overlap. There is no twisted seam to assemble. You work a rectangle, add three buttonholes near one end, and position the buttons after checking the actual fit.
Pattern status: this is a new, untested crochet draft. Stitch arithmetic and row totals have been checked, but no physical sample has been made. Gauge, yarn consumption, fit, and buttonhole behavior need checking in your own sample. The three images are AI-generated concept illustrations, not photographs of a tested garment.
The Design: Soft Ribbing and a Simple Closure
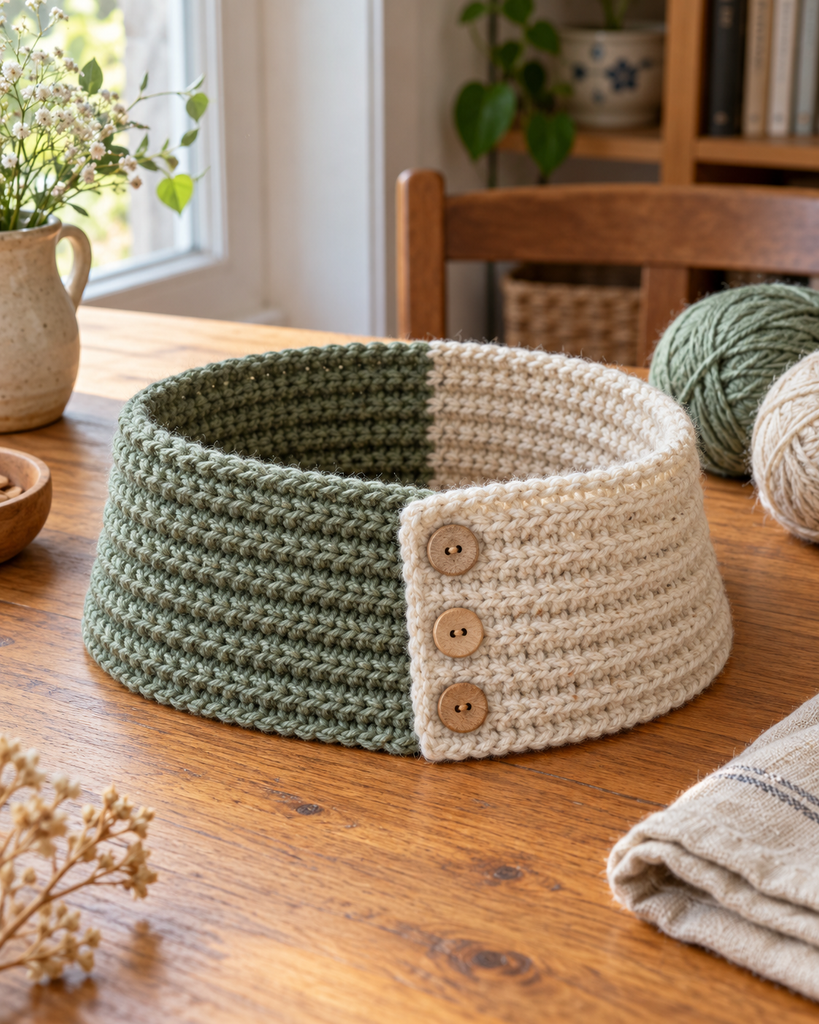
Half double crochet worked through the back loop creates a gently ridged fabric. Each short row travels across the width of the collar, while the repeated rows build its length. One half is sage and the other is oatmeal cream, with a single color change near the middle.
The cream end overlaps the sage end and closes with three buttons arranged across the width. This makes a small vertical column when the collar is worn upright. The opening allows you to put the piece on without pulling it over your head, and the flat overlap keeps the front straightforward.
The written size is a starting point for an adult accessory, not a universal fit. Measure a comfortable loose circumference over the clothes you expect to wear, then adjust the rectangle before making the buttonholes. A neck warmer should sit comfortably without relying on stretching to close it.
Project Details at a Glance
| Detail | Draft specification |
|---|---|
| Skill level | Confident beginner |
| Terminology | US crochet terms |
| Main stitch | Half double crochet in the back loop only |
| Construction | One flat rectangle with three buttonholes |
| Draft flat size | About 52 cm long by 11.5 cm wide |
| Intended overlap | Approximately 2.5–3 cm |
| Approximate closed circumference | About 49 cm at the provisional gauge |
| Closure | Three small wooden buttons |
Materials and Yarn Choices
- Soft worsted yarn in muted sage: approximately 40–50 g.
- The same yarn in oatmeal cream: approximately 40–50 g.
- A 5 mm crochet hook, or the size needed for the suggested fabric.
- Three smooth buttons, approximately 15 mm across, with holes large enough for sewing yarn or suitable strong thread.
- Tapestry needle, scissors, measuring tape, and removable stitch markers.
Choose a yarn that feels pleasant against your neck. A smooth wool blend or a soft acrylic can work, but check its feel and stretch with a swatch. Match fiber content and thickness between the two colors so that one half does not drape differently from the other.
The quantities are provisional rather than measured consumption. Keep extra cream yarn if you plan to lengthen the collar. Very fuzzy yarn can make the buttonholes difficult to find, while a stiff cotton may produce a collar with less give than the intended soft fabric.
Gauge and What It Means
The provisional gauge is 14 half double crochet stitches and 12 rows per 10 cm, worked in the back loop only after the foundation row. Measure the fabric relaxed, without pulling the ribs apart. Make a swatch larger than the measurement area and let it settle before measuring.
At this gauge, 16 stitches give a width of approximately 11.4 cm. Sixty-two rows give a length of approximately 51.7 cm. Allowing about 2.5–3 cm for overlap leaves a closed circumference around 49 cm. These figures are calculations, not a measured sample result.
The rectangle’s length travels around the neck; its stitch count determines the collar’s height. If your row gauge differs, work to a measured length instead of forcing the draft row count. Decide the desired loose finished circumference first, then add the overlap allowance.
Abbreviations and Working Notes
| Abbreviation | Meaning |
|---|---|
| ch | Chain |
| hdc | Half double crochet |
| BLO | Back loop only |
| st / sts | Stitch / stitches |
| RS | Right side, the chosen outward face |
To make a half double crochet, yarn over, insert the hook into the stitch, yarn over and pull up a loop, then yarn over and pull through all three loops. For BLO, insert under only the loop farther from you along the top of the stitch.
Chain 1 and turn before each new row. This chain does not count as a stitch. Work into the first actual stitch immediately beside it, and finish in the last actual stitch at the far edge. Mark those edge stitches if you tend to miss them.
The buttonhole row uses both loops for a firmer opening, and the final three rows also use both loops. This creates a small plain closure band at the cream end. No border or seam is needed around the rectangle.
Before Starting: Check Your Buttons
Make a small buttonhole sample in the same yarn. Work a short hdc row, then on the next row make one ch 1 opening by skipping one stitch. On the following row, work one hdc into that chain space. Test the actual button through the opening after the fabric has relaxed.
The button should pass with a little resistance and stay closed when you gently handle the fabric. If it falls through, choose a larger button or a smaller hook for the closure band. If it cannot pass, try a smaller button or a ch 2 opening, still skipping only one stitch and working just one hdc into that space on the next row.
Checking this now prevents sewing three unsuitable buttons onto a finished piece. The nominal 15 mm size is only a starting suggestion; yarn thickness and chain tension affect the useful opening.
The Crochet Pattern
Step 1: Begin the Sage Half
With sage, ch 17.
Row 1: Hdc in the second chain from the hook and in every remaining chain. 16 sts.
Rows 2–31: Ch 1, turn. Hdc BLO in every stitch across. 16 sts in each row.
This gives 31 sage rows in total, including the foundation row. At the provisional gauge, the sage section should be approximately 26 cm long. Count the rows as well as measuring, because relaxed ribbing can compress when it is moved around on the table.
Keep the first and last stitches at an even tension. Tight edge stitches can pull the long sides inward; loose turning chains can leave little loops. Work with the same comfortable motion across the full row rather than tugging the edges into position.
Step 2: Change to Oatmeal Cream
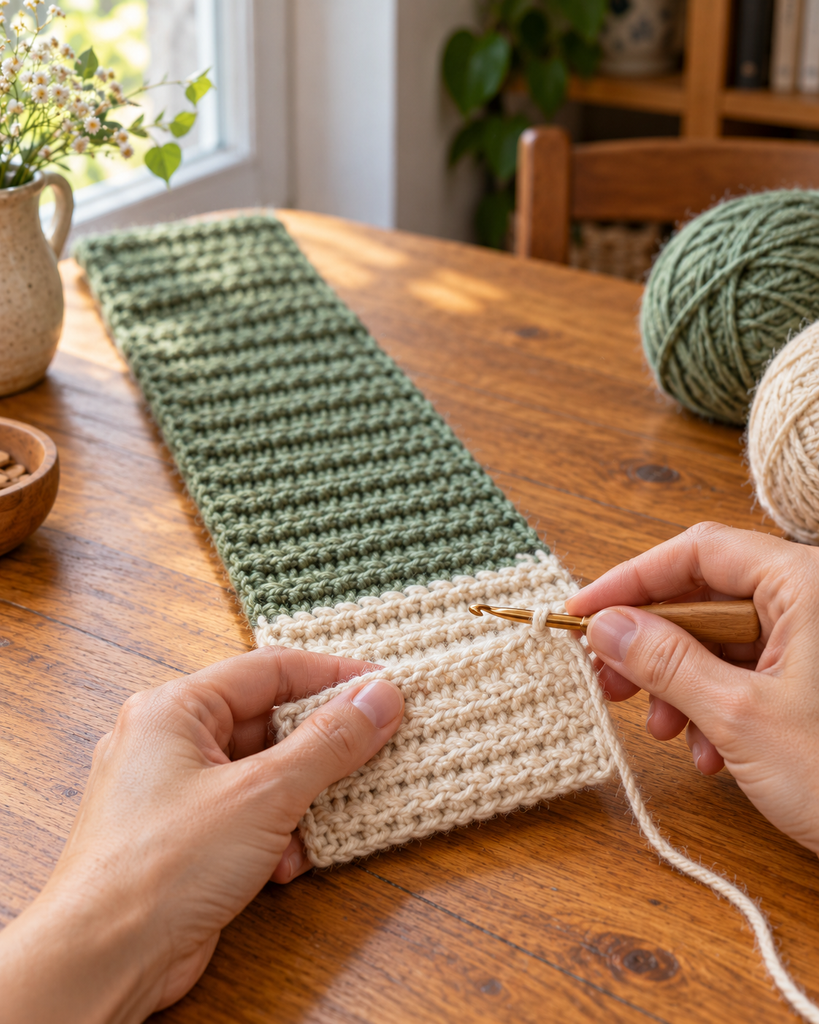
On the final hdc of Row 31, stop before the last pull-through. Drop sage, yarn over with cream, and pull through all three loops. Leave tails long enough to weave securely. The color change is now complete for the next row.
Rows 32–58: Ch 1, turn. With cream, hdc BLO in every stitch across. 16 sts in each row. Work 27 rows in this section.
You now have 58 rows altogether: 31 sage and 27 cream. Four cream rows remain in the standard draft. Lay the strip flat without stretching and check its projected finished length. Those remaining four rows add approximately 3.3 cm at the stated row gauge.
Step 3: Adjust the Length Before the Closure
For the written size, continue directly to Row 59. For a longer collar, add plain cream BLO rows here. For a shorter collar, remove plain cream rows from this section before working the buttonhole band. Keep a note of the changed row numbers so the closure steps remain clear.
Try the relaxed strip around your neck over clothing without pulling it tight. Allow for the four unfinished closure rows and the overlap. If you want both colors to remain equal in length, plan the adjustment before starting and distribute the change between the two plain sections.
The important checks are the measured rectangle length and comfortable closed fit. Row numbers are a useful guide, but a different yarn or gauge can change the result even when all counts are correct.
Step 4: Work the Three Buttonholes
Row 59: Ch 1, turn. Working through both loops, hdc in the next 2 stitches, ch 1 and skip the next stitch, hdc in the next 4 stitches, ch 1 and skip the next stitch, hdc in the next 4 stitches, ch 1 and skip the next stitch, hdc in the final 3 stitches.
You have 13 hdc and 3 ch-1 spaces, occupying 16 positions across the row. The buttonholes replace original stitch positions 3, 8, and 13, counted in the direction this row was worked. Do not add another stitch into the skipped positions.
If your sample required ch 2 openings, use ch 2 at each of those three openings while still skipping only one stitch beneath each. The next row still receives only one hdc per opening, preserving the 16-stitch width.
Step 5: Complete the Closure Band
Row 60: Ch 1, turn. Hdc through both loops in every hdc and work 1 hdc into each chain space. 16 sts.
Rows 61–62: Ch 1, turn. Hdc through both loops in every stitch across. 16 sts in each row. Fasten off, leaving a tail to weave in.
The standard rectangle now contains 31 sage rows and 31 cream rows. The holes sit a few rows inward from the cream edge, leaving a small margin beyond the closure. Check all three with the actual buttons before proceeding.
Step 6: Relax the Fabric and Weave In Ends
Choose the face you prefer as the outside. Weave the color-change tails through matching stitches on the inward face, reversing direction to secure them without creating a bulky knot. Weave the start and finish tails similarly, avoiding the buttonholes.
If blocking is appropriate for the yarn, follow its care label. Shape the rectangle gently and dry it flat at its relaxed dimensions. Do not stretch it to the target measurement while damp; the fit should work after the fabric settles naturally.
Step 7: Mark and Sew the Buttons
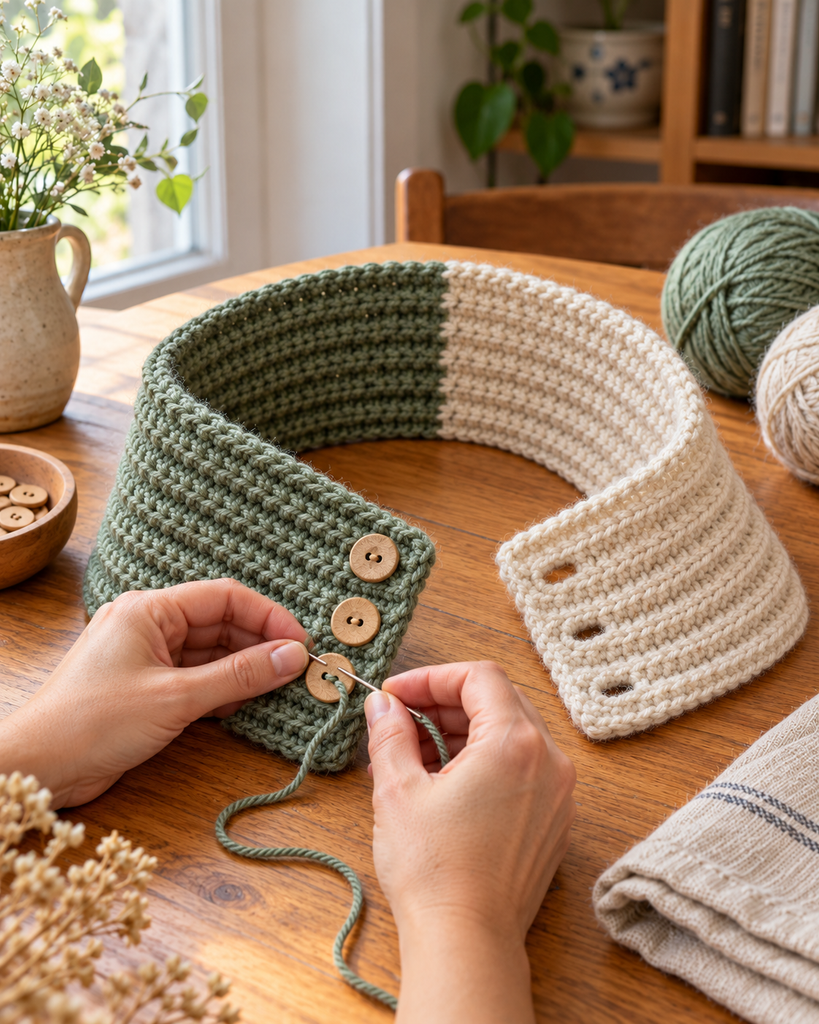
Wrap the collar without twisting it. Place the cream end over the sage end with approximately 2.5–3 cm of overlap. Keep both long edges aligned. Use a removable marker through the center of each buttonhole to transfer its position onto the sage layer beneath.
Unwrap the collar and sew one button at each marked position on the outward face of the sage end. Use several secure passes and leave enough space under each button for the cream fabric to sit comfortably. Avoid stitching through both ends of the collar together.
Fasten all three buttons and check the alignment. The overlap should lie flat without diagonal pulling, and the collar should feel comfortable when you turn your head. Reposition a button if needed rather than stretching the buttonhole to meet it.
More Information: Fit, Styling, and Care
Keep the Ribbing Flexible
The ridges should open slightly when handled and settle back when released. If the fabric is stiff, try a larger hook in a swatch and recalculate the measurements. If it feels loose enough for buttons to pull through the fabric, use a smaller hook or a more substantial yarn.
Keep measuring after the swatch has relaxed. Ribbed fabric can appear longer immediately after being stretched, which makes a freshly handled strip an unreliable fit guide.
Try Other Color Combinations
Dusty rose with oatmeal makes a soft everyday pairing. Charcoal with heather gray creates a quieter look, while rust with camel feels warm and autumnal. Use the same yarn family in both colors to keep the fabric consistent.
Buttons can echo the palette without becoming the main decoration. Smooth natural wood suits the sage version, while a matte neutral button works well with darker colors. Test each style through the sample opening before buying a full set.
Look After the Finished Collar
Follow the yarn’s washing instructions and check whether the chosen buttons tolerate the same treatment. If wooden buttons need different care, remove them before washing and sew them back on after drying. Smooth the collar into shape and store it flat without hanging it by a buttonhole.
Before wearing it again, check that all three buttons remain secure and that the openings have not stretched excessively. A short repair is easier when caught before a button becomes loose.
Frequently Asked Questions
Is this the same project as the PDF headband?
No. This design uses crochet rather than knitting and makes a buttoned neck wrap instead of a twisted headband. The stitch structure, yarn scale, colors, closure, and fit method are different. The reference supplies only the starting idea of a simple two-color accessory.
Can a beginner follow this pattern?
Yes, if you can work half double crochet and identify the back loop. The buttonholes require careful counting, but there is no complex shaping. Practice one opening on a swatch before working the closure row.
Can I leave out the buttons and sew it closed?
That would create a different fit requirement because the collar would need to pass over the head. The written draft is designed to open fully. Keep its button closure for the first version rather than sewing the ends together at the stated circumference.
Why are the button positions marked after overlapping?
The actual fabric and its overlap determine the best positions. Transferring each hole onto the layer beneath accounts for small tension differences and prevents a reversed or uneven alignment across the collar’s height.
Can I make the collar narrower?
Yes, but changing the 16-stitch width also changes the space available for the three buttonholes. Replan their placement on a sample first. Length adjustments are simpler because you can add or remove plain rows before the closure band.
Has this pattern been physically tested?
No. The written row totals and buttonhole arithmetic have been checked. Finished fit, stretch, yarn consumption, and closure performance still need a real sample. Use the concept images for styling and the written instructions for the actual construction.