Mini Mitten Crochet Gift Pocket
A tiny handmade pocket can make a small present feel especially thoughtful. This Mini Mitten Crochet Gift Pocket combines a red body, a cream cuff, three green embroidered crosses, and a matching hanging loop. The top remains open for a little wrapped gift or a piece of tissue around a small keepsake.
The supplied Very Merry Knit Stocking PDF suggested the broad idea of a festive container that can hang from a hook. This project changes the shape, technique, scale, and construction: a small crochet mitten replaces the large knitted stocking. Two flat panels form the new pocket, including a short thumb extension and a shaped lower end. The stocking’s knitting instructions, foot construction, and photographs are not reproduced.
Pattern status: Panel counts, the thumb extension, and lower shaping have been checked mathematically. This newly drafted pattern has not been physically crocheted or sample-tested. Dimensions, yarn use, and the finished outline are provisional. All three photographs are AI-generated concept illustrations; follow the written instructions for technical construction.

A Decorative Mitten With an Open Cuff
Each panel begins at the cuff and works downward. A short chain extension adds the thumb on one side. After a few wider rows, the main body continues over sixteen stitches while the thumb stitches are left unworked. Decreases narrow the finger end.
Make a matching second panel, embroider the front, and sew the pieces together around the lower outline and sides. The cuff edges remain separate, making an opening for the gift. There is no stuffing or lining in this draft.
This is a decorative pocket rather than a wearable mitten. Check the finished interior before choosing its contents, and keep the gift light enough that the hanging loop and seams are not strained.
Project Details
| Feature | Planned specification |
|---|---|
| Project | Small mitten-shaped hanging gift pocket |
| Skill level | Confident beginner comfortable with decreases |
| Terms | US crochet terminology |
| Panels | Two matching flat pieces |
| Main width | 16 sc; 21 sc across the thumb section |
| Length | 26 numbered panel rows, with a fresh join at Row 19 |
| Approximate finished size | 13–14 cm tall and 11–12 cm across the widest point |
| Opening | Unsewn cream cuff |
| Decoration | Three green crosses and one green hanging loop |
Materials and Color Planning
- Smooth DK cotton yarn in red A, cream B, and forest green C.
- A provisional allowance of 55–75 m / 60–82 yd red, 15–25 m / 16–27 yd cream, and 5–10 m / 5½–11 yd green.
- A 3.5 mm crochet hook as a starting point, plus nearby sizes for adjusting gauge.
- A blunt tapestry needle, scissors, tape measure, and removable stitch markers.
- A small lightweight gift for checking the completed opening and interior.
Choose compatible yarn thicknesses so the cream cuff has the same width as the red body. A much heavier cuff yarn can flare outward and make the panels difficult to align. Smooth cotton also makes the thumb stitches and embroidery easier to see.
The quantities are planning estimates, not measured sample consumption. Keep extra red yarn available for sewing the outline and adjusting the shaping if your first sample needs refinement.
For a softer palette, use dusty rose, ivory, and sage. A whole row of pockets can share the same cuff color while using different body colors. Make one complete sample before multiplying the pattern for a larger display.
Abbreviations and Working Notes
- ch: chain.
- sc: single crochet.
- sc2tog: single crochet two stitches together; decreases by one stitch.
- sl st: slip stitch.
- st / sts: stitch / stitches.
- RS / WS: right side / wrong side.
To make sc2tog, draw up a loop in each of the next two stitches, yarn over, and pull through all three loops. Work through both top loops unless otherwise stated.
The turning ch 1 never counts as a stitch. Work into the first and last actual stitch of each row. Mark the edge stitches if necessary to avoid adding a stitch into a turning chain.
When changing colors, begin the final sc with the old color, draw up a loop, and use the new color for the yarn-over that pulls through the two loops. Make the next turning chain with the new color.
Gauge and a Small Practice Piece
The planning gauge is approximately 18 sc and 20 rows per 10 cm / 4 inches, measured after washing and drying. This is a target rather than a measured result from a completed sample.
Make a swatch at least 12 cm square, wash and dry it according to the yarn label, and measure the central area without stretching. Adjust the hook if needed, but also assess the fabric: it should hold a clear outline while remaining flexible enough to form a pocket.
At the target gauge, sixteen stitches give about 8.9 cm of main-body width. The five-stitch thumb extension adds roughly 2.8 cm on one side. Seams and blocking will affect the final dimensions and reduce the usable interior slightly.
Practice one decrease row on the swatch if sc2tog is new to you. Consistent decreases help the lower end shape evenly and make the two panels easier to match.
Crochet the Two Panels
Step 1: Begin With the Cream Cuff
Make the following panel twice. With cream B, ch 17.
Row 1: Sc in the second chain from the hook and across. Turn. 16 sc.
Rows 2–4: Ch 1, sc in each stitch across. Turn. 16 sc per row. Change to red A in the final pull-through of the last stitch of Row 4.
The foundation edge is the top of the finished pocket. Keep it relaxed so the cuff can open comfortably. If the chain pulls tighter than the fabric, remake it with a looser tension or a slightly larger hook for the chain only.
Step 2: Work the Upper Body
Rows 5–14: Ch 1, sc in all 16 stitches. Turn. 16 sc per row. There are ten red rows in this section.
After Row 14, keep the work turned and ready for the next row. Do not make the usual ch 1: Row 15 begins with the longer chain that creates the thumb extension.

Step 3: Add the Short Thumb Extension
Row 15: Ch 6. Sc in the second chain from the hook and in the remaining four chains, making 5 new sc. Then sc in each of the 16 stitches of Row 14. Turn. 21 sc.
The five new stitches sit at one end of the row. Mark them as the thumb section. The other sixteen stitches continue the main body.
Rows 16–18: Ch 1, sc in all 21 stitches. Turn. 21 sc per row. Fasten off after Row 18.
The thumb is a short flat projection at this stage. The seam will soften its corners slightly. Keep it unstuffed and do not fold it into a separate tube.
Step 4: Resume the Sixteen-Stitch Body
Orient the panel with its cuff at the top and the thumb projection on the side you prefer. On Row 18, identify the five stitches belonging to the thumb extension and the sixteen stitches belonging to the main body.
Row 19: With a fresh strand of red A, join in the first main-body stitch immediately beside the thumb section. Ch 1, sc in that joining stitch and the next 15 body stitches. Turn. 16 sc. Leave the five thumb stitches unworked.
Row 20: Ch 1, sc across. Turn. 16 sc.
Do not bridge the thumb stitches with a chain or sew them closed yet. They form part of the outer outline that will be matched to the second panel during assembly.
Shape the Lower Finger End
Continue in A, following the table. The faster decreases near the final rows soften the lower outline when the panels are sewn together.
| Row | Instructions after ch 1 | Total sc |
|---|---|---|
| 21 | Sc2tog, 12 sc, sc2tog; turn | 14 |
| 22 | Sc across; turn | 14 |
| 23 | Sc2tog, 10 sc, sc2tog; turn | 12 |
| 24 | Sc2tog twice, 4 sc, sc2tog twice; turn | 8 |
| 25 | Sc2tog 4 times; turn | 4 |
| 26 | Sc2tog twice | 2 |
Fasten off and weave the end into the reverse. Make the second panel with the same hook, row counts, and tension.
Because single crochet in turned rows has a usable appearance on both faces, choose the outward face of the back panel only after alignment. Lay the two pieces together with their thumbs pointing the same way and select the faces that allow their outlines to match. Do not force two outward-facing panels together if their thumb projections point in opposite directions.
Block and Decorate the Front
Wash and block the panels using the method permitted by the yarn label. Smooth the cuff, thumb projection, and lower curve gently, then let both pieces dry completely. They should match without one being stretched sharply to meet the other.
Choose one panel as the front. With green C, embroider three small plus-shaped crosses across the red main body. Keep them away from the future side seams and the thumb valley.
Each cross uses one short vertical stitch crossed by one short horizontal stitch. Vary their positions slightly instead of placing them in a strict column. Keep the stitches relaxed so they lie on the surface rather than pulling the panel into dimples.
Secure the tails on the reverse by weaving through nearby stitch bases and changing direction. Avoid long loose floats inside the gift pocket, where small contents could catch them.
Sew the Mitten Pocket
Place the two panels together with the chosen outward faces visible and their inner faces touching. Align the cuff corners, thumb projection, thumb valley, and lower tip with removable markers.
Start at one cuff corner with matching cream yarn. Whipstitch the corresponding side edges together through the four cream cuff rows. Change to red for the red body, leaving the actual top opening unsewn.
Continue around the main body and shaped lower end. When you reach the thumb side, follow the entire outer thumb outline: sew its lower edge, outside end, and upper edge to the matching parts of the other panel. Do not take a shortcut across the thumb valley or stitch through the middle of the projection.
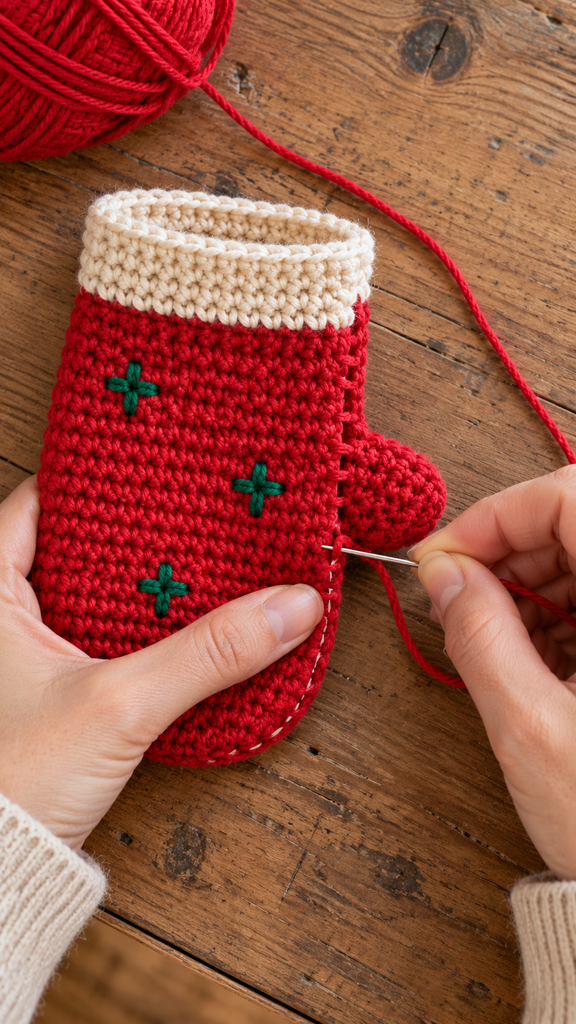
Keep the seam relaxed so it does not gather the fabric. Use small extra securing stitches at the thumb valley if needed, without creating a large knot. Finish at the other cuff corner and fasten off.
Remove the markers and check that both cuff edges remain separate. Gently open the pocket and run a finger along the interior seams to locate any loose loops. Weave in the final sewing tails before adding the hanger.
Add the Green Hanging Loop
With green C, make a loose chain measuring approximately 8 cm / 3¼ inches without stretching. Sl st in the second chain from the hook and each remaining chain back to the beginning. Fasten off, leaving long sewing tails.
The finished strip may be shorter than its foundation chain. Aim for a relaxed strip roughly 7–8 cm long, then fold it in half to form the loop. Check that it fits the intended peg or hook before sewing.
Attach both ends together at one back cuff corner, near the side seam. Spread the attachment over several secure stitch bases and catch the back panel rather than sewing the opening shut. Add a second line of small securing stitches, then weave in the tails.
Hang the empty pocket briefly and check the balance. Add the intended lightweight wrapped gift and check again. If the cuff stretches or the loop pulls sharply to one side, reduce the contents and reassess the attachment before display.
More Information: Filling, Display, and Care
Choose a gift that slides in easily without forcing the cream opening. A tiny wrapped keepsake, a narrow gift box, or a small note can work depending on the actual interior. Use tissue sparingly so the pocket’s outline remains visible.
For a row of pockets, vary the body colors while keeping the cuffs and loops coordinated. Measure the spacing on the display cord or pegs using completed pieces, since the thumb projections take up more space than the main bodies.
Resizing this shape requires changes to the body, thumb, and lower decrease sequence together. Adding stitches only to the cuff will not preserve the mitten proportions. Make a complete trial before committing to a larger version.
Follow the yarn label for washing. Test the red and green yarns for color transfer before washing them with the cream cuff. Reshape the empty pocket gently and dry it fully before storing it between seasons.
Frequently Asked Questions
Is this an easy crochet project?
It suits someone comfortable with single crochet, counting rows, and basic decreases. The thumb extension and fresh join at Row 19 require more attention than the straight upper body.
Why do the thumbs not line up?
Place both shapes in the same orientation before choosing the outward face of the back panel. Turned single crochet allows either face to be used. Check the marked five-stitch thumb sections if the outlines still differ.
Is the top supposed to stay open?
Yes. Sew the side edges of the cuff but leave the foundation edges separate. These two short upper edges form the gift opening.
Can I stuff it as an ornament?
That would change the finishing. This draft keeps the cuff open and the body unstuffed. A padded ornament would need a revised closure and a fresh balance check.
Can it be worn as a mitten?
This design is a decorative gift pocket. It has not been drafted or fit-tested for a hand, and the thumb section is shaped for the ornament’s outline.
Are the photographs exact technical demonstrations?
They show the intended style and general working stages. They are AI-generated concepts and may not reproduce exact counts or needle placement. Use the written pattern and the actual matching panel edges.
Has this pattern been physically tested?
No. The arithmetic has been reviewed, but a complete crochet sample is still needed to confirm the outline, dimensions, yarn use, seams, and hanging behavior.