Snow-Trimmed Crochet Tabletop Tree
A small handmade tree can bring a festive touch to a shelf without taking up much space. This Snow-Trimmed Crochet Tabletop Tree pairs a sage cone with three cream scalloped bands, tiny red embroidered accents, and a little mustard bow. A separate crocheted base closes the lightly filled body.
The supplied Knit Tree Ornaments PDF suggested the broad evergreen theme. This project changes the technique, construction, scale, and display method: a three-dimensional crochet tabletop tree replaces the small knitted hanging ornaments. The new design uses single-crochet rounds, reserved front loops for decorative trims, and a separate base disc. The reference’s knitting instructions, bobbles, trunk shaping, embroidery layouts, and photographs are not reproduced.
Pattern status: Cone increases, reserved-loop counts, shell repeats, and base totals have been reviewed mathematically. This newly drafted pattern has not been physically crocheted or sample-tested. Dimensions, yarn use, filling amount, and standing stability are provisional. All three photographs are AI-generated concept illustrations; follow the written instructions for technical placement.

A Simple Cone With Three Decorative Layers
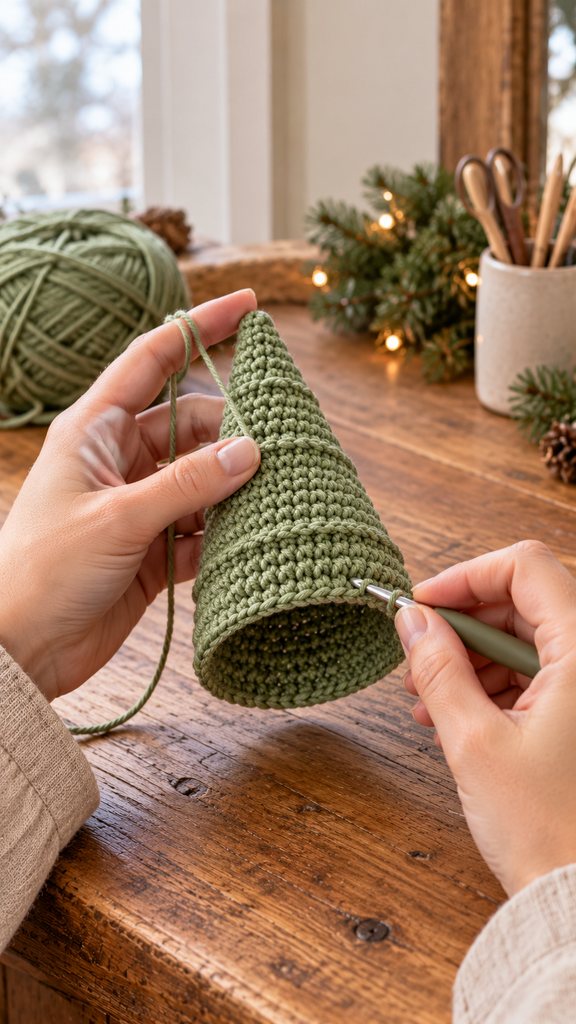
The cone begins at the top and widens gradually. Six stitches are added on every third round, with plain rounds between increases. Three back-loop rounds leave accessible front loops on the preceding rounds for the cream trims.
The scallops are added after the cone is complete but before filling. This keeps the inside easy to reach for weaving in ends and embroidering the little red crosses. The base disc is sewn on last, with filling added through a small remaining opening.
This is a soft decorative piece. Place it on a level surface and test its balance before choosing its final display spot. Keep the filling evenly distributed rather than packing the tip or rounding the base into a ball.
Project Details
| Feature | Planned specification |
|---|---|
| Project | Small stuffed tabletop Christmas tree |
| Skill level | Confident beginner familiar with double crochet |
| Terms | US crochet terminology |
| Cone | 30 rounds, ending with 60 sc |
| Base | 10 rounds, ending with 60 sc |
| Cream trims | 4 upper shells, 7 middle shells, 10 lower shells |
| Approximate size | 15 cm / 6 inches tall before the bow; about 10–11 cm / 4–4¼ inches across the base |
| Finishing | Red embroidery and one small crocheted bow |
Materials and Color Planning
- Smooth DK cotton yarn in sage A, cream B, mustard C, and a small amount of red D.
- A provisional allowance of 100–140 m / 110–153 yd sage, 35–50 m / 38–55 yd cream, 5–8 m / 5½–9 yd mustard, and 2–3 m / 2–3¼ yd red.
- A 3.5 mm crochet hook as a starting point, with nearby sizes available for adjusting the fabric.
- Approximately 25–45 g polyester fiberfill as an initial allowance; actual use depends on size and desired firmness.
- A blunt tapestry needle, scissors, tape measure, and several removable stitch markers.
Choose compatible yarn weights for the cone and trims. A much heavier cream yarn can make the shells bulky and pull the cone out of shape. Smooth yarn also makes it easier to identify the reserved loops.
The listed quantities are estimates rather than measured sample consumption. Set aside extra sage for sewing the base and securing the bow. If you use a different yarn weight, reassess the dimensions and filling amount rather than assuming the same results.
For another palette, use forest green, warm ivory, and burgundy. You can also omit the red stitches for a quieter tree with just the contrast trims and bow.
Abbreviations and Stitch Notes
- ch: chain.
- sc: single crochet.
- dc: double crochet.
- inc: work 2 sc in the same stitch.
- BLO: back loop only.
- sl st: slip stitch.
- st / sts: stitch / stitches.
- RS / WS: right side / wrong side.
The cone and base use continuous rounds. Do not join or turn after each round. Move a marker into the first sc of every new round so the increase schedule stays easy to follow.
Work through both top loops except on the three specified BLO rounds. For BLO, insert beneath only the farther strand of the V at the stitch top as the work faces you. The unused nearer strand becomes the reserved front loop.
The cream trims use joined rounds. Their starting ch 1 does not count as a stitch. A shell is five dc worked into a single reserved loop. Skipped loops are left unworked; do not fill them with extra stitches.
Gauge and a Practice Sample
The planning gauge is approximately 18 sc and 20 rows per 10 cm / 4 inches in washed, dry single crochet. This is a target rather than a measured sample result. The fabric should conceal the filling while remaining workable.
Make a swatch at least 12 cm square and wash it according to the yarn label. Measure the central area without stretching. If the stitches show large gaps, try a smaller hook or another yarn. If they feel rigid or difficult to work into, reassess the hook size and tension.
Practice one BLO row on the swatch. Work a few ordinary rows afterward, then locate the unused front loops below them. This small exercise helps distinguish the reserved loops from lower strands that should not be used for the trim.
A 60-stitch edge at the target stitch gauge has roughly 33 cm of circumference, corresponding to a diameter near 10.6 cm. The actual cone height and base shape depend on your tension and filling. Compare the completed pieces before sewing them together.
Crochet the Sage Cone
Step 1: Begin at the Top
With sage A, make an adjustable ring.
Round 1: Work 6 sc into the ring. Pull it closed. 6 sc. Mark the first stitch and secure the starting tail on the inside after a few rounds.
Rounds 2–3: Sc in each stitch around. 6 sc per round.
This narrow section forms a softly rounded top. The bow will be attached here later. Do not add extra stitches to make the beginning lie flat; the cone is deliberately three-dimensional.
Step 2: Follow the Increase Schedule
Work the following table. Each listed increase repeat is worked six times. Plain rounds retain the previous total.
| Rounds | Instructions | Total sc |
|---|---|---|
| 4 | Inc in every stitch | 12 |
| 5–6 | Sc around | 12 |
| 7 | (1 sc, inc) 6 times | 18 |
| 8–9 | Sc around | 18 |
| 10 | (2 sc, inc) 6 times | 24 |
| 11 | Sc around | 24 |
| 12 | Sc BLO around | 24 |
| 13 | (3 sc, inc) 6 times | 30 |
| 14–15 | Sc around | 30 |
| 16 | (4 sc, inc) 6 times | 36 |
| 17–18 | Sc around | 36 |
| 19 | (5 sc, inc) 6 times | 42 |
| 20 | Sc around | 42 |
| 21 | Sc BLO around | 42 |
| 22 | (6 sc, inc) 6 times | 48 |
| 23–24 | Sc around | 48 |
| 25 | (7 sc, inc) 6 times | 54 |
| 26–27 | Sc around | 54 |
| 28 | (8 sc, inc) 6 times | 60 |
| 29 | Sc around | 60 |
| 30 | Sc BLO around | 60 |
After Round 30, sl st in the next stitch and fasten off. Mark that finishing slip stitch so it is not mistaken for an additional sc during assembly. Leave the bottom open.
Step 3: Locate the Reserved Loops
Round 12 was worked into the back loops of Round 11, leaving 24 front loops on Round 11. Round 21 left 42 front loops on Round 20. Round 30 left 60 front loops on Round 29.
Place a marker in the first available loop of each set. The trims belong in these unused loops, not in the stitch tops of the later rounds. Count each set before starting so the six-loop shell repeat fits evenly.
Keep the cone’s RS facing outward. The upper trim uses the 24-loop set, the middle trim uses 42, and the lower trim uses 60. These different circumferences create more shells toward the wider bottom.
Add the Three Cream Scalloped Trims
For each trim, join cream B in a reserved loop with the cone upright and its outside facing you. Ch 1, then work the following six-loop sequence around:
Sc in the next reserved loop, skip 2 reserved loops, work 5 dc in the next reserved loop, skip 2 reserved loops.
Repeat to the starting point and sl st to the first sc. Fasten off. The starting sc is part of the first repeat; do not add another anchor before it.
On the upper set, repeat 4 times for four shells and four sc anchors. On the middle set, repeat 7 times for seven shells and seven anchors. On the lower set, repeat 10 times for ten shells and ten anchors.
Each repeat uses six reserved loops and produces five dc plus one sc. If the repeat does not finish evenly, recount the reserved loops and check for a missed skip. Avoid adding an extra shell to close a gap.
Let the shells settle outward and slightly downward. Keep the join relaxed so the trim does not cinch the cone. Weave the cream tails into the inside while the bottom is still open.
Add the Red Embroidered Accents
With red D, embroider approximately 8–12 tiny crosses in the visible green spaces between the cream bands. Each cross can be two short straight stitches crossing at their middles.
Keep the stitches small and relaxed. They should sit on the surface rather than pulling the cone into dimples. Distribute them loosely instead of making strict vertical columns.
Weave the yarn through nearby stitch bases on the inside when traveling between accents, avoiding long loose floats. Secure the ends by changing direction before trimming. Finish all embroidery before inserting the filling.
Crochet the Flat Base
With A, make an adjustable ring. Work continuously and mark the first stitch of each round.
Round 1: 6 sc in the ring. 6 sc.
Round 2: Inc in every stitch. 12 sc.
Rounds 3–10: On Round R, work (sc in the next R minus 2 stitches, inc) 6 times. The totals are 18, 24, 30, 36, 42, 48, 54, and 60 sc, respectively.
For example, Round 3 is (1 sc, inc) six times. Round 10 is (8 sc, inc) six times. After Round 10, sl st in the next stitch and fasten off, leaving a long sewing tail. The finishing slip stitch does not count as a base stitch.
Secure the starting tail on the reverse. Lay the base flat and compare its edge with the cone’s 60-stitch opening. A softly angular outline from the increases is acceptable, but pronounced ruffling or cupping should be corrected before assembly.
Fill and Close the Tree
Place the base beneath the cone with the RS of the disc facing outward. Align the 60 actual edge stitches of each piece, ignoring their finishing slip stitches. Mark four matching points, fifteen stitches apart.
With the sewing tail, whipstitch through corresponding edge stitches. Keep the stitches even and relaxed. Leave approximately 5 cm open for filling.
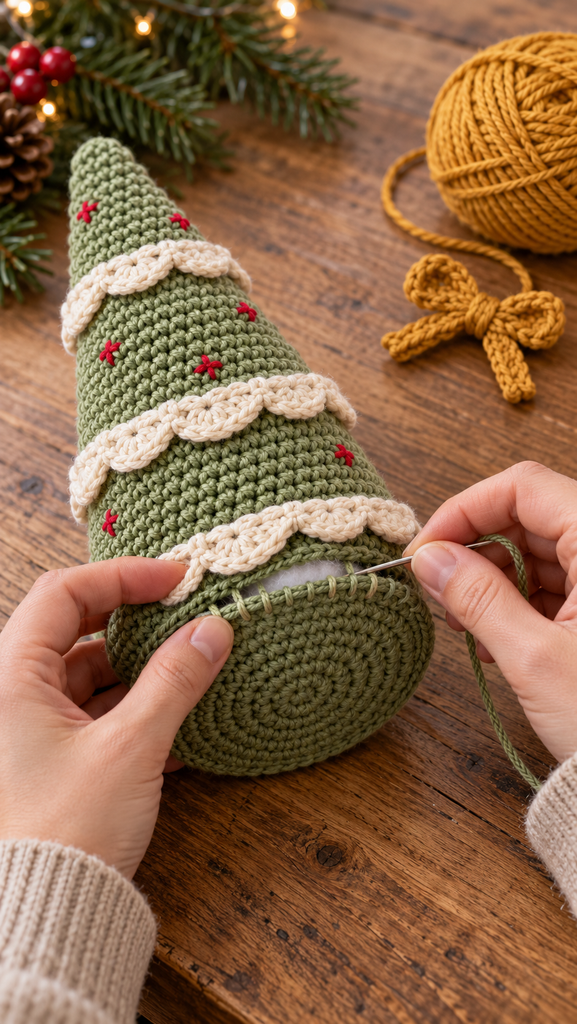
Insert small tufts of fiberfill, beginning at the top and spreading them evenly through the cone. Fill enough to support the shape without stretching the stitches or forcing the base into a dome. Add the final tufts near the opening and finish sewing the seam.
Bury the sewing tail and gently reshape the tree. Set it on a level table. If it leans, redistribute the filling before deciding whether to reopen a small section of the base seam. Standing stability must be assessed on the actual finished sample.
Make the Little Mustard Bow
With mustard C, ch 7.
Row 1: Sc in the second chain from the hook and across. Turn. 6 sc.
Rows 2–3: Ch 1, sc in each stitch across. Turn after Row 2. 6 sc per row. Fasten off, leaving a long tail.
Pinch the middle of the small rectangle and wrap the tail around it several times. Secure the wrapping on the reverse with small stitches through the bow fabric.
For optional short bow tails, make two separate ch-5 lengths and sl st in the second chain from the hook and the remaining three chains. Fasten off, then sew one end of each tiny strip behind the wrapped center.
Sew the wrapped center to the tree’s top, spreading the attachment across several secure stitches. Keep the bow light and centered so it does not pull the tip sideways. Weave in the remaining tail.
More Information: Display, Care, and Variations
Display the tree on a level shelf, tray, or side table where it will not be knocked easily. Its soft base and fiberfill behave differently from a rigid ornament. Test the final position with the actual piece rather than assuming it will stand on every surface.
For a simpler version, omit the red accents and keep the three cream trims. Changing yarn weight will change the dimensions and the required filling. Make a sample and reassess the proportions instead of relying on the listed measurements.
If you change the cone’s stitch counts, recalculate both the base and the trim repeats. Each cream shell repeat needs six reserved loops, and the base edge must match the final cone circumference. Changing only one component can create a gathered or stretched seam.
Follow the most restrictive care instructions among the yarn and filling. Support the whole tree during washing, reshape gently, and allow the filling to dry completely. Store without crushing the bow or folding the cream shells tightly against the cone.
Frequently Asked Questions
Is this suitable for a beginner?
It suits someone comfortable with single crochet and counting increases. Practice the back-loop technique and one cream shell on a swatch before starting the full cone.
Why is my cone becoming a bowl?
Check the increase schedule. The cone adds six stitches every third round after the opening section. Increasing on every round would produce a much flatter shape.
Which loops hold the cream trims?
Use the unused front loops of Rounds 11, 20, and 29. They were left behind when Rounds 12, 21, and 30 were worked BLO. Their counts are 24, 42, and 60.
Why is a cream band pulling the tree inward?
The anchors or joining tension may be too tight, or a repeat may have skipped the wrong number of loops. Remove the affected trim, recount its loop set, and rework it with relaxed tension.
Can I add a hanging loop?
This draft is planned as a tabletop piece. A hanging version would need its attachment and balance assessed separately, especially after filling. Do not assume the small bow can carry the tree’s weight.
Are the photographs exact stitch tutorials?
They show the intended style and general working stages. They are AI-generated concepts and may not reproduce exact shell counts or hook placement. Use the written instructions and your marked loop sets.
Has the pattern been physically tested?
No. The arithmetic has been reviewed, but a complete crochet sample is still needed to confirm shape, gauge, yarn use, filling amount, and standing balance.