Berry Sweet Crochet Gift Pouch
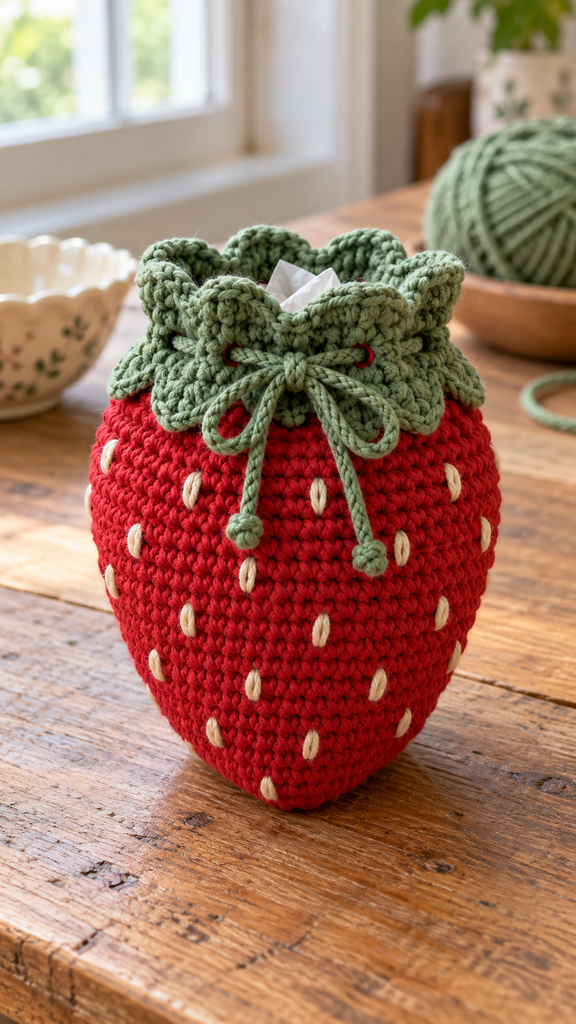
A handmade gift pouch can become part of the present itself. This Berry Sweet Crochet Gift Pouch combines a red berry-shaped body, tiny cream embroidered seeds, a green scalloped collar, and a simple drawstring. It is intended for small wrapped gifts, jewelry boxes, or lightweight craft treasures.
The supplied Berry Best Crochet Baby Hat pattern, identified inside the PDF as BRC0216-032858M, suggested the broad strawberry theme. A small bottom-up gift bag replaces the wearable hat, with different shaping, single-crochet fabric, eyelets, and a newly drafted closure. The hat instructions, leaf clusters, stem, and source photograph are not reproduced.
Pattern status: Round totals, the eyelet repeat, and the scalloped collar have been checked mathematically. This newly drafted pattern has not been physically crocheted or sample-tested. Dimensions, yarn use, and drawstring behavior remain provisional. All three images are AI-generated concept illustrations; follow the written instructions for technical details.
A Small Berry With a Useful Opening
The pouch begins at a narrow base and widens gradually, adding six stitches on alternate shaping rounds. Straight rounds form the upper body. A green eyelet round holds the cord, and a small scalloped edge finishes the opening.
The seeds are embroidered before the cord is threaded, while the inside remains easy to reach. Each seed is a short straight stitch rather than a bead. The green collar is made from crochet shells, giving a leafy impression without separate pieces to attach.
Choose contents that sit comfortably below the eyelets. The opening needs enough room to gather when the cord is pulled. A tightly packed pouch may look appealing while open but be difficult to close without stretching the stitches.
Project Details
| Feature | Planned specification |
|---|---|
| Project | Small strawberry-shaped drawstring gift pouch |
| Skill level | Confident beginner |
| Terms | US crochet terminology |
| Red body | 26 rounds, ending at 48 sc |
| Green top | Eyelets, one reinforcing round, and eight shell scallops |
| Approximate finished size | 12–14 cm tall and 8–9 cm wide, depending on tension and gathering |
| Decoration | Cream embroidered seeds |
| Construction | Continuous red rounds, followed by joined green rounds |
Materials and Color Planning
- Smooth DK cotton yarn in strawberry red A and leaf green B.
- A small amount of cream cotton yarn or suitable embroidery cotton C for the seeds.
- A provisional allowance of 60–80 m / 66–88 yd red, 25–35 m / 27–38 yd green, and 3–5 m / 3–5½ yd cream.
- A 3.5 mm crochet hook as a starting point, with nearby sizes for adjusting the fabric.
- A blunt tapestry needle, scissors, tape measure, and removable stitch markers.
Use compatible yarn weights for the body and collar. A much thicker green yarn can make the top heavy and difficult to gather. Smooth cotton shows the seeds clearly and makes the eyelets easier to identify.
The yarn quantities are planning allowances rather than measured sample usage. Set aside enough green yarn to remake the cord if its first length is unsuitable. A tightly slip-stitched cord may finish shorter than the original foundation chain.
For another palette, use dusty rose for the berry, sage for the collar, and ivory for the seeds. The same construction can suggest a softer decorative strawberry without changing the counts.
Abbreviations and Working Notes
- ch: chain.
- sc: single crochet.
- dc: double crochet.
- inc: work 2 sc in the same stitch.
- sl st: slip stitch.
- st / sts: stitch / stitches.
- rnd: round.
- RS / WS: right side / wrong side.
Work through both top loops unless instructed otherwise. The red body uses continuous rounds: do not join or turn after each round. Put a marker in the first sc and move it into the first stitch of every new round.
The green rounds are joined. Their starting ch 1 does not count as a stitch, and the joining slip stitch is not an extra stitch. Chain spaces in the eyelet round are counted separately from sc stitches.
To change color, begin the final sc with the old color, draw up a loop, then use the new color for the yarn-over that pulls through the two loops. Continue the following instructions with the new strand.
Gauge and a Fabric Check
The planning gauge is approximately 18 sc and 22 rows per 10 cm / 4 inches, measured after washing and drying. This is a target rather than a measured result from a completed sample. Choose fabric that holds small contents without becoming stiff.
Make a single-crochet swatch at least 12 cm square, wash and dry it according to the yarn label, and measure the central area. Try a different hook if needed. If the stitches have large gaps, a smaller hook or more suitable yarn may give a better fabric.
A 48-stitch circumference at the target stitch gauge is roughly 27 cm, corresponding to about 8.5 cm across before gathering. Actual width depends on shaping and how the empty pouch settles. Measure your completed upper body before deciding what will fit inside.
The gradually widened lower section should look rounded and tapered rather than flat like a coaster. That shaping is intentional here. Do not add unlisted increases to flatten it.
Crochet the Red Berry Body
Step 1: Start the Narrow Bottom
With red A, make an adjustable ring.
Round 1: Work 6 sc into the ring. Pull the ring closed. 6 sc. Mark the first stitch. After a few rounds, secure the starting tail through several stitch bases on the inside so the bottom cannot loosen easily.
Round 2: Inc in each stitch around. 12 sc.
Round 3: Sc in each stitch around. 12 sc.
The alternating shaping and plain rounds create a softer taper than increasing on every round. Count at the marker rather than adding a slip stitch to close each round.
Step 2: Widen the Berry Gradually
Work the following schedule. Every increase round adds six stitches; the following plain round keeps that total unchanged.
| Round | Instructions | Total sc |
|---|---|---|
| 4 | (1 sc, inc) 6 times | 18 |
| 5 | Sc around | 18 |
| 6 | (2 sc, inc) 6 times | 24 |
| 7 | Sc around | 24 |
| 8 | (3 sc, inc) 6 times | 30 |
| 9 | Sc around | 30 |
| 10 | (4 sc, inc) 6 times | 36 |
| 11 | Sc around | 36 |
| 12 | (5 sc, inc) 6 times | 42 |
| 13 | Sc around | 42 |
| 14 | (6 sc, inc) 6 times | 48 |
Step 3: Build the Upper Body
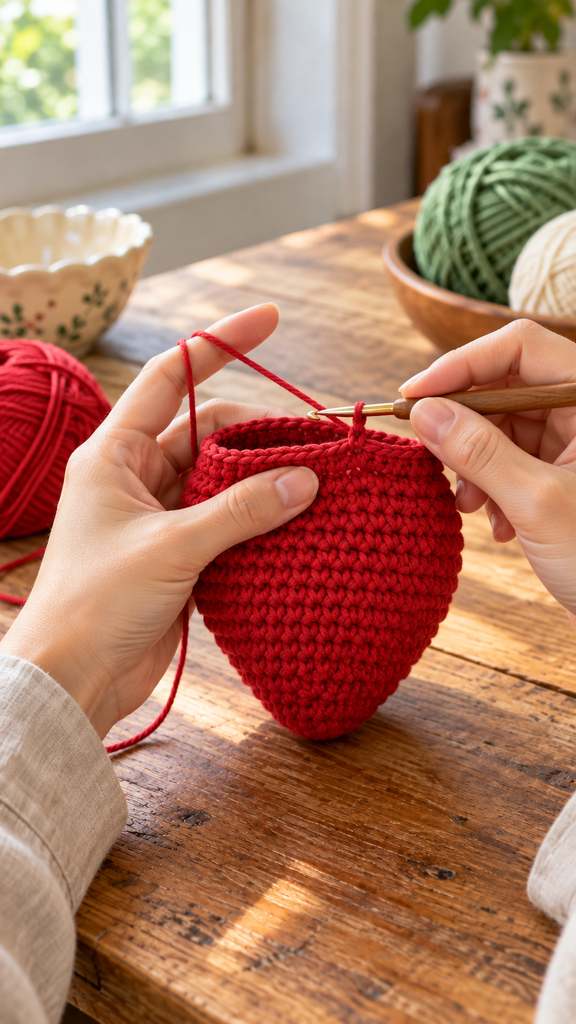
Rounds 15–26: Sc in every stitch around. 48 sc per round. There are twelve straight rounds in this section.
Keep the intended RS facing outward as the piece grows. Check the count every few rounds, especially near the marker. The upper opening should remain the same width through this section.
In the final pull-through of the last sc of Round 26, change to green B. Sl st to the first stitch of Round 26 to level the transition. Do not count that joining slip stitch as an extra body stitch.
Add the Green Eyelets and Collar
Round 27: Make Eight Cord Openings
Ch 1. Work (sc in the next 4 stitches, ch 2, skip the next 2 stitches) 8 times. Sl st to the first sc.
The round contains 32 sc and eight ch-2 spaces. Each repeat uses six stitches of the previous round, so eight repeats use all 48 body stitches. Do not work another sc into the joining slip stitch.
Round 28: Reinforce the Top
Ch 1. Work (sc in the next 4 sc, work 2 sc into the next ch-2 space) 8 times. Sl st to the first sc. 48 sc.
Keep the stitches over the eyelet spaces relaxed enough that the holes remain accessible. This round restores a complete 48-stitch edge above the cord openings.
Round 29: Make the Scalloped Leafy Edge
Ch 1. Work (sc in the next stitch, skip the next 2 stitches, 5 dc in the next stitch, skip the next 2 stitches) 8 times. Sl st to the first sc and fasten off.
The edge contains eight shells, made from 40 dc, and eight sc anchors. Each repeat uses six stitches of Round 28. The last two skipped stitches lead back to the first anchor when you join.
Weave in the green and red tails on the inside. Gently spread the eight scallops with your fingers. The edge should remain flexible enough to gather with the drawstring rather than standing as a rigid crown.
Embroider the Cream Seeds
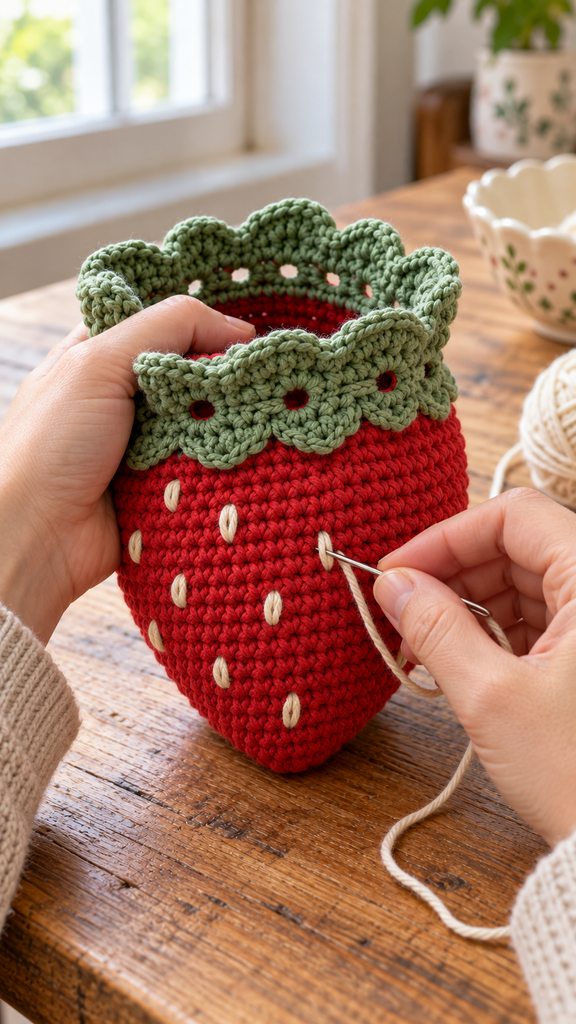
Embroider before threading the cord so the inside stays easy to reach. Lightly shape the empty pouch by hand and mark several seed positions with removable markers if that helps you keep the spacing balanced.
Place approximately 18–24 small seed stitches around the red body, leaving the bottom few rounds and the area immediately beneath the green band relatively clear. Stagger their positions instead of arranging them in strict vertical columns.
With C and a blunt needle, make each seed as one short straight stitch spanning roughly one or two red rows. Keep the strand resting on the surface without pulling the fabric inward. Tiny diagonal variations give the embroidery a natural handmade appearance.
On the inside, weave through nearby stitch bases between seeds rather than leaving long loose floats. Secure the ends by changing direction through several stitches before trimming. Check that no loop is large enough to catch the intended contents.
Make and Thread the Drawstring
With green B, crochet a loose foundation chain measuring approximately 70 cm / 27½ inches without stretching. Sl st into the second chain from the hook and into each remaining chain back to the beginning. Fasten off and weave in the ends.
Measure the finished cord. Aim initially for approximately 55–65 cm / 22–25½ inches, but test it through the actual pouch. A longer or shorter cord may suit your yarn and desired bow better. If it is too short after slip-stitching, remake it with a longer chain rather than stretching it forcefully.
Choose an eyelet near the front. With a blunt needle, take one cord end through the openings of Round 27, alternating from outside to inside and back again as you pass around the pouch. Thread all eight eyelets in order. With an even number of holes, the two ends can emerge together near the starting opening.
Pull the ends evenly to gather the top, then tie a loose bow. Reopen the pouch and check that the cord slides without snagging. The scallops should bunch gently above the eyelet line. If the cord is too thick to move easily, try a looser chain-only cord or a compatible thinner yarn and test again.
More Information: Filling, Care, and Variations
Use the pouch for a small wrapped gift or a lightweight item that fits below the cord line. Wrap items with sharp edges separately so they do not catch on the crochet or embroidery. If using it for sweets, keep the sweets individually wrapped or in a suitable inner bag.
For a taller pouch with the same opening width, add plain red rounds after Round 26 and before the green eyelets. Renumber the later rounds in your notes. This changes the proportions and yarn requirement but preserves the 48-stitch closure repeats.
Changing the width requires more planning. Both the eyelet and shell repeats use six underlying stitches, so the final body count must remain divisible by six if you want to reuse those repeats. A wider pouch also needs a longer cord and a fresh yarn estimate.
Wash according to the yarn label and test the red yarn for color transfer before washing it with cream embroidery. Dry fully, gently reshaping the collar while damp if the fiber permits. Store with the cord loosened so the gathered top does not develop a persistent crease.
Frequently Asked Questions
Is this suitable for a beginner?
It suits someone comfortable with single crochet and counting increases. The collar introduces double-crochet shells, while the eyelets use chains and skipped stitches. Practice one shell on a swatch if the technique is new.
Why does the bottom look pointed?
The lower body is deliberately tapered by placing plain rounds between increase rounds. It should not lie flat like a coaster. Check your stitch counts if it becomes unusually narrow or twists sharply.
Why do my eyelets not line up evenly?
Check that Round 26 has 48 sc. Each eyelet repeat uses four sc and two skipped stitches. Eight equal repeats should complete the round without an extra partial section.
Can I make a chain-only cord?
Yes. It will be thinner and may slide through the eyelets more easily. Measure it without stretching, test the gathered closure, and secure its ends so they cannot unravel.
Can I use this as a baby accessory?
This draft is a decorative gift pouch, not a hat, toy, or wearable baby item. Its size, closure, and cord have been planned for holding small gifts rather than for use on a person.
Are the photographs exact stitch tutorials?
They show the intended style and general working stages. They are AI-generated concepts and may not reproduce exact counts or needle placement. Use the written pattern and test the cord on the actual pouch.
Has this pattern been physically tested?
No. The arithmetic has been reviewed, but a full crochet sample is still needed to confirm proportions, yarn use, collar behavior, and drawstring fit.