Meadow Flower Crochet Headband
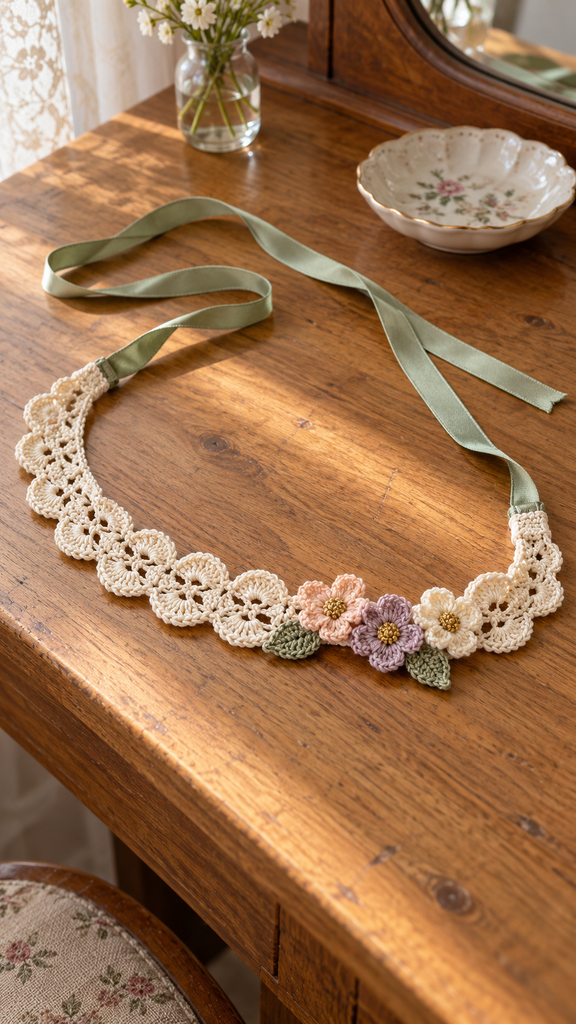
A little crochet lace can turn an everyday hair accessory into something special. This Meadow Flower Crochet Headband combines a narrow ivory band with a scalloped edge, three small flowers, two sage leaves, and soft ribbon ties. The result is intended to feel light and handmade, with enough floral detail to stand out without covering the entire band.
The supplied Masquerade Fancy Mask PDF by Kathryn A. White suggested the broad combination of lace and floral embellishment. This project changes the accessory and its construction: a simple flat hairband replaces the shaped eye mask, satin ties replace the mask strap, and newly drafted six-petal flowers decorate a short section of the band. The reference’s eye pieces, bridge, nose shaping, stiffening, and embellishment instructions are not used.
Pattern status: The foundation, lace repeats, flower placement sequence, and leaf shaping have been checked mathematically. The design has not been physically crocheted or fit-tested. Dimensions and yarn quantities are planning estimates. All three images are AI-generated concept illustrations; use the written instructions for stitch placement and counts.
A Small Lace Project With a Gentle Floral Finish
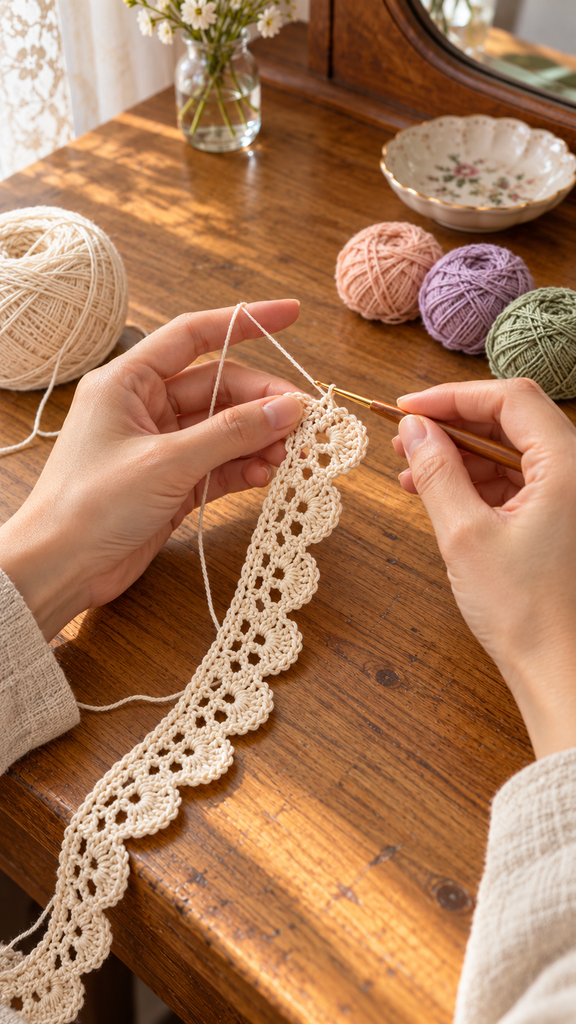
The headband is a flat strip rather than a closed elastic loop. A single-crochet foundation supports a row of chain arches, and five-double-crochet shells fill those arches to make a scalloped edge. One side remains comparatively straight, while the other has a decorative wave.
Three separate flowers sit near one side of the center, with two small leaves peeking from underneath. Tiny embroidered centers add color without beads or other hard decorations. Narrow satin ribbons let the wearer tie the accessory to a comfortable tension.
This draft is intended as an adult decorative hair accessory. Measure the intended wearer and test the band position before sewing on the ribbons. A ribbon closure allows adjustment, but it does not replace an actual fit check.
Project Details
| Feature | Planned specification |
|---|---|
| Project | Floral crochet headband with ribbon ties |
| Skill level | Confident beginner familiar with double crochet |
| Terms | US crochet terminology |
| Foundation | 81 single crochet stitches |
| Lace repeat | 20 chain arches and 20 shell groups |
| Crochet band length | Approximately 40–44 cm / 16–17¼ inches after blocking |
| Band width | Approximately 2–3 cm / ¾–1¼ inches |
| Decorations | Three six-petal flowers and two small leaves |
| Closure | Two satin ribbon ties, initially cut 30 cm / 12 inches each |
Materials and Color Planning
- Smooth light DK cotton yarn in ivory A, pale peach B, dusty lavender C, and sage D.
- A provisional budget of 50–70 m / 55–77 yd ivory and 10–15 m / 11–16 yd of each accent color. Actual consumption needs confirmation from a sample.
- A small amount of warm gold embroidery cotton for the flower centers.
- A 3.5 mm crochet hook as a starting point, plus nearby sizes for adjusting the fabric.
- Two lengths of narrow sage satin ribbon, each 30 cm long and approximately 6–10 mm wide.
- Matching sewing thread, a sewing needle, blunt yarn needle, scissors, tape measure, and removable markers.
Use compatible yarns for all the crochet pieces. A very thick accent yarn can make the flowers feel heavy relative to the narrow band. Smooth cotton helps the lace arches remain visible and makes sewing the pieces easier.
Cut the ribbons generously at first if you are unsure of the fit. You can shorten them after trying the finished accessory, but a short tie is difficult to extend neatly. Use a ribbon with a soft reverse so the tied ends feel comfortable near the hairline.
For a more neutral version, make all three flowers ivory and keep the sage leaves. For a warmer palette, replace lavender with muted rose. Keep the same construction and let the color changes do the styling work.
Abbreviations and Stitch Notes
- ch: chain.
- sc: single crochet.
- dc: double crochet.
- sl st: slip stitch.
- inc: work 2 sc in the same stitch.
- sc2tog: single crochet two stitches together.
- sc3tog: single crochet three stitches together.
- st / sts: stitch / stitches.
- RS / WS: right side / wrong side.
The turning ch 1 never counts as a stitch. A chain arch is a space made by three chains spanning three skipped stitches. In the final lace row, work the five dc of each shell into the arch itself rather than into individual chains.
To make sc2tog, draw up a loop in each of the next two stitches, yarn over, and pull through all three loops. For sc3tog, draw up a loop in each of the next three stitches, yarn over, and pull through all four loops.
The flowers use joined rounds. The starting ch 1 and the joining slip stitch do not count as additional center stitches. Mark the first sc of the flower center if it is difficult to distinguish from the join.
Gauge and Length Check
The planning gauge is approximately 20 sc and 24 rows per 10 cm / 4 inches in a washed, dry single-crochet swatch. This is a target rather than a measured result from a sample. The lace can relax differently from solid single crochet, so measure the actual blocked band as well.
For a practice swatch, ch 25 and work 24 sc across. On following rows, ch 1, turn, and sc in every stitch. Wash and dry according to the yarn label, then measure the central area without stretching it.
For a more useful lace trial, ch 22 and follow the band instructions using 21 foundation sc. You will have five arches and five shells instead of twenty. Block this short strip and assess its length, softness, and tendency to curl before committing to the full accessory.
The finished band should rest on the chosen part of the head without needing to be pulled taut. The ribbons cover the remaining distance and form the bow. Decide on the intended placement first, since a band worn over the crown follows a different path from one worn closer to the forehead.
Crochet the Lace Band
Step 1: Make the Foundation
With ivory A, ch 82 loosely.
Row 1: Sc in the second chain from the hook and in every chain across. Turn. 81 sc.
Count before continuing. A tight foundation can pull the straight edge into a curve, so remake it with a looser tension or a slightly larger hook if needed. Return to your selected working hook for the remaining rows.
Step 2: Form the Chain Arches
Row 2: Ch 1, sc in the first stitch. Work (ch 3, skip the next 3 stitches, sc in the next stitch) 20 times. Turn.
You now have 20 ch-3 arches and 21 sc anchors. The last anchor is worked into the final stitch of Row 1. Each repeat spans four foundation stitches, so the row uses one starting stitch plus twenty groups of four: 81 stitches altogether.
Keep the chains relaxed but consistent. If an arch feels much shorter than its neighbors, correct it before working the shells. Uneven arches will affect the shape of the scalloped edge.
Step 3: Fill the Arches With Shells
Row 3: Ch 1, sc in the first sc anchor. Work (5 dc in the next ch-3 arch, sc in the next sc anchor) 20 times.
Fasten off and weave in both ends on the reverse of the solid foundation edge. The completed row contains 20 shells, comprising 100 dc, separated and framed by 21 sc anchors. Do not work an extra shell into the turning chain at either end.
Lay the band flat and check that every arch contains one shell. A little natural movement is expected in lace, but pronounced twisting or gathering should be investigated before decorating it. Recheck your chain tension and shell placement.
Make Three Six-Petal Flowers
Make one flower in peach B, one in lavender C, and one in ivory A. Each uses the same two-round construction.
Round 1: Make an adjustable ring. Ch 1, work 12 sc into the ring. Pull the ring closed and sl st to the first actual sc. 12 sc. Secure the starting tail on the reverse after completing the flower.
Round 2: Begin in the first sc of Round 1, even though the joining slip stitch is already there. Work the following sequence six times: sl st in the next unworked sc, ch 2, work 2 dc in the following sc, ch 2, sl st in that same stitch that holds the 2 dc.
Each petal uses a pair of center stitches: one for its starting anchor and one for its two dc and closing slip stitch. After finishing a petal, move to the next unused center stitch to begin the next petal. Do not begin again in the stitch that already holds the previous petal.
The twelve center stitches support six petals. After the sixth petal, fasten off, leaving a long tail for attaching the flower. No additional petal or joining round is needed. Gently separate the petals with your fingers and check the count before weaving in the starting tail.
With warm gold embroidery cotton, add three or four short stitches across the center of each flower. Secure the embroidery on the reverse without cinching the center into a tight knot. These stitched accents replace the need for beads.
Make Two Sage Leaves
These tiny leaves are flat diamonds worked from one point to the other. Make two in D.
Row 1: Ch 2, sc in the second chain from the hook. Turn. 1 sc.
Row 2: Ch 1, work 3 sc into the single stitch. Turn. 3 sc.
Row 3: Ch 1, inc in the first stitch, sc in the next stitch, inc in the last stitch. Turn. 5 sc.
Row 4: Ch 1, sc2tog, sc in the next stitch, sc2tog. Turn. 3 sc.
Row 5: Ch 1, sc3tog. 1 sc. Fasten off, leaving a sewing tail. Smooth the leaf gently without stretching its points.
These leaves are intentionally small. They should peek from beneath the flowers rather than cover a large area of the lace. Their final size will vary with the accent yarn and your tension.
Block and Arrange the Floral Cluster
Block all the crochet pieces using the method allowed by the yarn label. Pin the band with its foundation edge relatively straight and the shells evenly spread. Shape the flowers and leaves gently, then let everything dry fully.
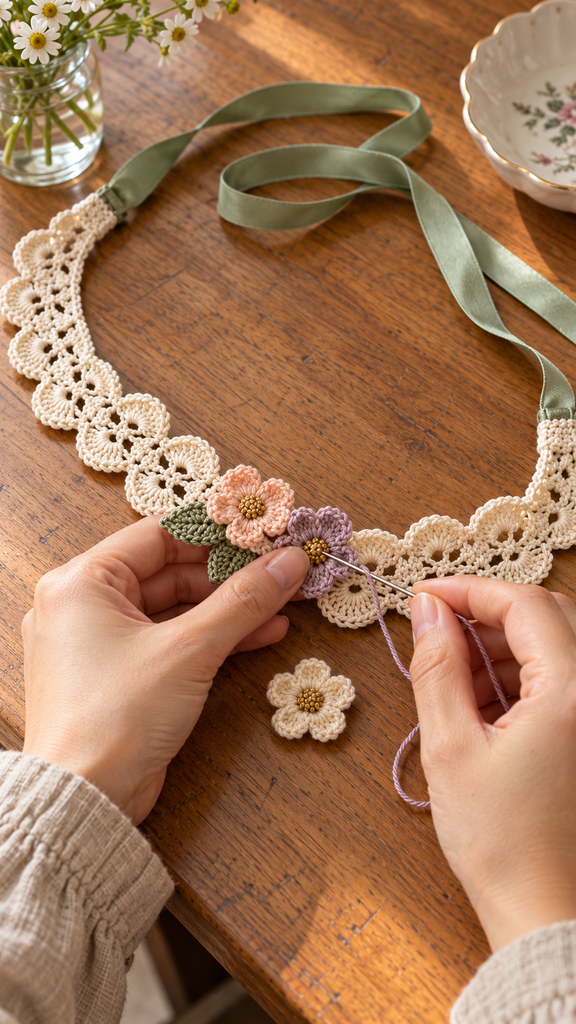
Find the middle of the band and mark a cluster area approximately 8–10 cm long, slightly to one side of that midpoint. Arrange the three flowers in a loose row with a little overlap. Place the two leaves underneath, pointing outward in different directions.
Keep the flowers clear of the band ends so the ribbon joins remain accessible. Try the arrangement against the intended wearing position before sewing. This is the best stage to adjust the cluster so it sits where you want it.
With matching yarn, sew the leaf bases to the stronger foundation edge or sc anchors. Then attach the flowers through their center rounds, catching secure stitches in the band. Add a small hidden stitch under a petal if a flower swivels, while leaving the outer petal edges free.
Attach the Satin Ribbon Ties
At each end of the band, fold approximately 1 cm of ribbon onto its reverse. Place that folded section against the WS of the band end, behind the solid foundation edge. Sew through the ribbon and several secure crochet stitches using matching sewing thread.
Use a few small rows of stitches to spread the load rather than relying on one knot through one crochet loop. Keep the seam flat and check from the front that the ribbon extends in line with the band.
Try the headband on and tie a relaxed bow. Check the flower placement and ribbon length before trimming any excess. If you shorten the ends, use a clean diagonal or V-shaped cut and follow the ribbon manufacturer’s guidance for preventing fraying. Do not apply heat to an unknown ribbon fiber.
More Information: Adjustments and Care
To change the band length while preserving the lace repeat, use 4N + 1 foundation sc, where N is the number of arches and shells. Chain 4N + 2 to begin. For example, 18 repeats require ch 74 and give 73 sc; 22 repeats require ch 90 and give 89 sc.
Each added repeat changes the length by the width of one four-stitch section. Estimate that change from your blocked lace trial rather than from the solid-stitch gauge alone. Ribbon lengths can also be adjusted independently after checking the intended fit.
Wash according to the most restrictive instructions among the yarn, embroidery cotton, and ribbon. Support the accessory during washing, reshape the lace gently, and dry it flat. Store it with the ribbons loosely laid beside the band rather than tied tightly around the flowers.
Frequently Asked Questions
Is this suitable for a beginner?
It suits someone comfortable with chains, single crochet, and double crochet. Make the five-repeat lace trial first. The small flower petals require careful stitch tracking, so take them one pair of center stitches at a time.
Why does my band curl?
The foundation may be too tight, the arches too short, or the shell tension uneven. Check those areas before blocking. Gentle blocking can settle lace, but it should not be used to force a strongly gathered strip into shape.
Can I use crochet thread instead of DK cotton?
Yes, but the accessory will be much smaller and finer unless you recalculate the repeat count and hook size. Make a lace trial and measure it. The listed dimensions and yarn budget will not apply directly.
Why does my flower have more than six petals?
Each petal must use two previously unused center stitches. Beginning a new petal in the stitch that closed the previous one creates an extra repeat. Mark the twelve center stitches in six pairs if needed.
Does this headband need stiffener?
This draft is intended to remain soft and flexible. The fit and appearance depend on the yarn and blocking. Stiffening would change the feel and care requirements and is not part of these instructions.
Are the images exact stitch tutorials?
They illustrate the intended appearance and general working stages. They are AI-generated concepts and may not reproduce exact stitch counts or needle placement. Use the written pattern and your lace trial for technical decisions.
Has the pattern been physically tested?
No. The arithmetic has been reviewed, but a complete crochet sample and an actual fit check are still needed to confirm length, drape, flower proportions, and yarn consumption.