Little Ghost Crochet Garland
A few little ghosts can bring Halloween character to a room without making it feel dark or crowded. This Little Ghost Crochet Garland combines five flat cotton motifs with tiny embroidered faces and a simple crocheted cord. Cream, sage, lavender, and peach give the familiar ghost shape a softer, handmade look.
The supplied Dancin’ Skeleton Appliqué PDF by Nancy Anderson suggested the broad idea of a crocheted Halloween decoration. This project changes the subject, construction, and use: small bell-shaped ghosts replace the skeleton pieces, and a hanging garland replaces the garment appliqué. The skeleton’s head, bones, limbs, and button eyes are not used. These instructions are newly drafted for the different project.
Pattern status: The shaping and scallop arithmetic have been checked, but no physical sample has been crocheted from this draft. Measurements and yarn quantities are provisional. All three images are AI-generated concept illustrations. Follow the written counts rather than trying to count stitches in the pictures.
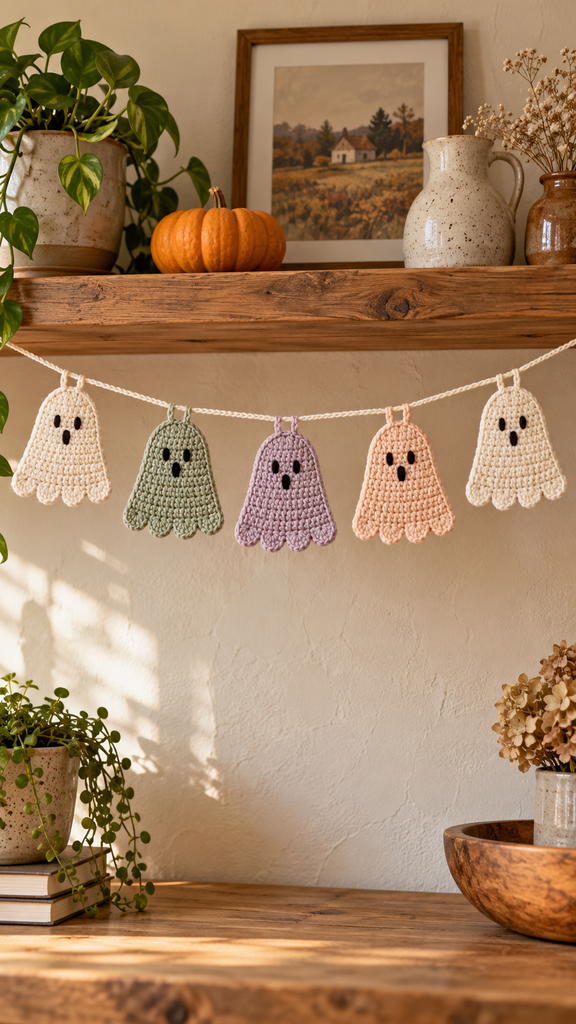
A Small Project With Plenty of Personality
Each ghost is worked from its narrow top downward in single-crochet rows. Five increase rows widen the piece, followed by straight rows that form the body. Four small double-crochet shells finish the lower edge, suggesting a floating hem without separate legs or dangling pieces.
The faces are embroidered after the motifs are complete. Two eyes and a tiny mouth are enough to give each ghost an expression. Keeping the decoration flat makes it easy to store between seasons, and there is no filling or three-dimensional assembly to manage.
The garland works well along a shelf, picture ledge, or craft-room wall. Use it as decorative bunting rather than a toy, and display the cord away from places where a child or pet could become tangled in it.
Project Overview
| Detail | Planned specification |
|---|---|
| Project | Five-ghost decorative crochet garland |
| Skill level | Confident beginner |
| Terms | US crochet terminology |
| Motif construction | Single crochet rows with a four-shell lower edge |
| Body count | 7 stitches at the top; 17 at the widest part |
| Approximate motif size | 9–10 cm wide and 10–12 cm tall |
| Cord | Approximately 100–120 cm after finishing; measure your own |
| Face | Embroidered eyes and mouth; no buttons |
Materials and Color Choices
- Smooth DK cotton yarn in cream A, muted sage B, dusty lavender C, and pale peach D.
- A provisional total of 120–160 m / 130–175 yd for the motifs and cord: allow about 60–80 m cream and 20–27 m of each accent color. Actual use needs to be measured from a sample.
- A small amount of dark charcoal yarn or suitable embroidery cotton for the faces.
- A 3.5 mm crochet hook as a starting point, plus nearby sizes for adjusting the fabric.
- A blunt tapestry needle, scissors, tape measure, and removable stitch markers.
- Two display hooks or another suitable removable hanging method for your surface.
Make two ghosts in cream and one each in sage, lavender, and peach. Use cream for the cord so the different colors feel connected. If you prefer classic Halloween colors, make all five motifs cream and replace the cord with charcoal.
Choose colors from the same yarn range where possible. Different fibers can react differently to washing and blocking, even when their labels describe a similar weight. A smooth yarn also makes it easier to see where the shell stitches belong.
Abbreviations and Working Notes
- ch: chain.
- sc: single crochet.
- dc: double crochet.
- sl st: slip stitch.
- inc: work 2 sc in the same stitch.
- st / sts: stitch / stitches.
- RS / WS: right side / wrong side.
The ch 1 used to turn a row does not count as a stitch. Work into the first actual stitch beneath the turning chain and into the last actual stitch at the far edge. Turn after every body row as instructed.
Work through both top loops throughout the motif. The only skipped stitches occur in the final scalloped row. Each shell consists of five dc worked into one stitch, not into five separate stitches.
To make a dc, yarn over, insert the hook, yarn over and draw up a loop, yarn over and pull through two loops, then yarn over and pull through the remaining two. If double crochet is new to you, practice a shell on a spare swatch before adding the hem.
Gauge and a Useful Practice Swatch
The planning gauge is 18 sc and 20 rows per 10 cm / 4 inches, measured after washing and drying. This is a target rather than a measured sample result. Exact gauge is less important than making five motifs that have a similar size and drape.
For a swatch, ch 23. Sc in the second chain from the hook and across for 22 sc. On subsequent rows, ch 1, turn, and sc in every stitch. Make enough rows to measure an interior area away from the edges, then wash and dry as intended for the finished garland.
The fabric should hold a clear outline while remaining flexible. If it is very loose, try a smaller hook. If the hook is difficult to insert, try a slightly larger size. Recheck the swatch after any adjustment.
At the target stitch gauge, a 17-stitch body is about 9.4 cm wide. The 18 single-crochet rows provide roughly 9 cm of body height, with additional height from the shells. Your final dimensions will depend on the yarn, tension, and blocking.
Crochet the Ghost Motifs
Step 1: Start the Narrow Head
Use the selected motif color and leave a starting tail about 20 cm long for attaching the top later.
Row 1: Ch 8. Sc in the second chain from the hook and in each remaining chain. Turn. 7 sc.
Row 2: Ch 1, inc in the first stitch, sc in the next 5 sts, inc in the last stitch. Turn. 9 sc.
Row 3: Ch 1, inc, sc in the next 7 sts, inc. Turn. 11 sc.
Row 4: Ch 1, inc, sc in the next 9 sts, inc. Turn. 13 sc.
Row 5: Ch 1, inc, sc in the next 11 sts, inc. Turn. 15 sc.
Row 6: Ch 1, inc, sc in the next 13 sts, inc. Turn. 17 sc.
Each increase row adds one stitch at each edge. Count after every row so an accidental turning-chain stitch does not make one side grow faster than the other.
Step 2: Work the Straight Body
Rows 7–18: Ch 1, sc in each of the 17 stitches across. Turn. 17 sc per row.
These are twelve straight rows after the six shaping rows. Move markers into the first and last stitches if you find the edges difficult to identify. The lower body should stay the same width throughout this section.
After Row 18, the body should have a narrow top, gently sloped shoulders, and straight lower sides. Do not fasten off yet: the scalloped hem is worked directly into the 17 stitches of the last body row.
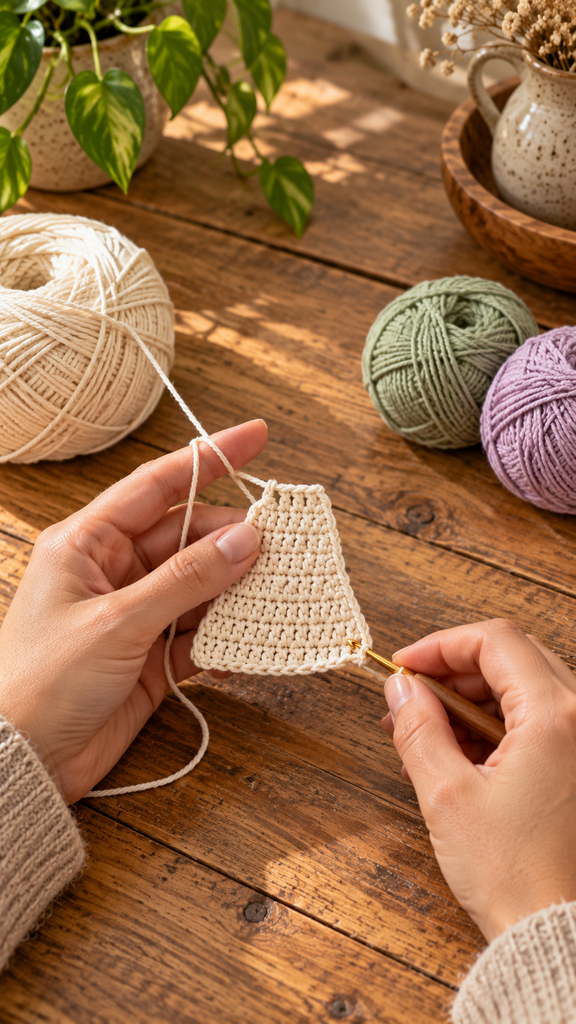
Step 3: Add the Four Floating Scallops
Row 19: Ch 1, sl st in the first stitch. Then work (skip 1 stitch, 5 dc in the next stitch, skip 1 stitch, sl st in the next stitch) 4 times.
This uses all 17 stitches of Row 18: one starting stitch plus four groups of four stitches. You will have four five-dc shells and five anchoring slip stitches. Fasten off and weave the lower tail into the WS.
For a placement check, number the previous row’s stitches from 1 to 17 in your working direction. The shells go into stitches 3, 7, 11, and 15. The slip-stitch anchors go into 1, 5, 9, 13, and 17. All intervening stitches are skipped.
Keep the anchors relaxed so they do not gather the hem. Do not add extra shells to fill an apparent gap: recount the previous row first. The outline should read as a softly waving lower edge rather than separate long legs.
Step 4: Make Five Matching Pieces
Repeat Rows 1–19 to make two cream ghosts and one in each accent color. Keep the same hook and tension throughout. Compare the pieces before embroidering; a markedly smaller ghost may indicate a different yarn thickness or tighter tension.
The five pieces use the same pattern. Their character comes from color and the small variations of hand embroidery. You do not need to change the stitch count to create different expressions.
Block and Embroider the Faces
Lightly block the motifs using the method permitted by the yarn label. Smooth the shoulder slopes and separate the four scallops with your fingers. Do not stretch the body hard to force a particular measurement. Allow every piece to dry completely before sewing on the faces.
Choose a preferred face as the RS. With removable markers, place two eye positions around Rows 7–8, approximately four or five stitches apart. Position a small mouth centrally about two rows below the eyes. Check the arrangement visually rather than relying only on row numbers.
Using dark yarn and a blunt needle, make each eye with two or three small vertical stitches spanning roughly one row. For the mouth, make a short oval using a few close stitches around a tiny opening or a small filled vertical shape. Keep every stitch relaxed enough that the crochet stays flat.
Secure the ends on the WS by weaving through nearby stitch bases, changing direction before trimming. Avoid a long loose strand across the reverse between the eyes. If you travel between features, weave the yarn through the back of the fabric as you go.
Make the Crocheted Hanging Cord
With cream A, crochet a foundation chain until it measures approximately 120 cm / 47 inches without stretching. Do not use a fixed chain count: chain size varies considerably with tension and yarn.
Sl st in the second chain from the hook and in each chain back to the beginning. Keep these slip stitches loose. Fasten off, weave in the ends, and measure the finished cord again. Slip-stitching may shorten the original chain, so use the completed length for positioning the ghosts.
If the cord is too short for your intended display, remake it with a longer foundation chain. Do not stretch it aggressively to recover the lost length. A slightly thicker cord made with relaxed stitches is easier to sew to than a tightly compressed one.
Space and Attach the Ghosts
Lay the cord flat. Reserve 15 cm at each end for hanging, then divide the remaining length into four equal spaces. Place the centers of the five ghosts at the two outer marks and the three equally spaced points between them.
For a finished cord measuring 100 cm, the ghost centers are at 15, 32.5, 50, 67.5, and 85 cm from one end. If your cord is 120 cm, the centers are at 15, 37.5, 60, 82.5, and 105 cm. Keep the scallops pointing downward and the faces forward.
Arrange the colors cream, sage, lavender, peach, cream. Sew the first and last stitches of each seven-stitch top edge to the cord using the reserved tail and an additional matching strand if needed. These two attachment points help keep the flat motif from swiveling around a single central stitch.
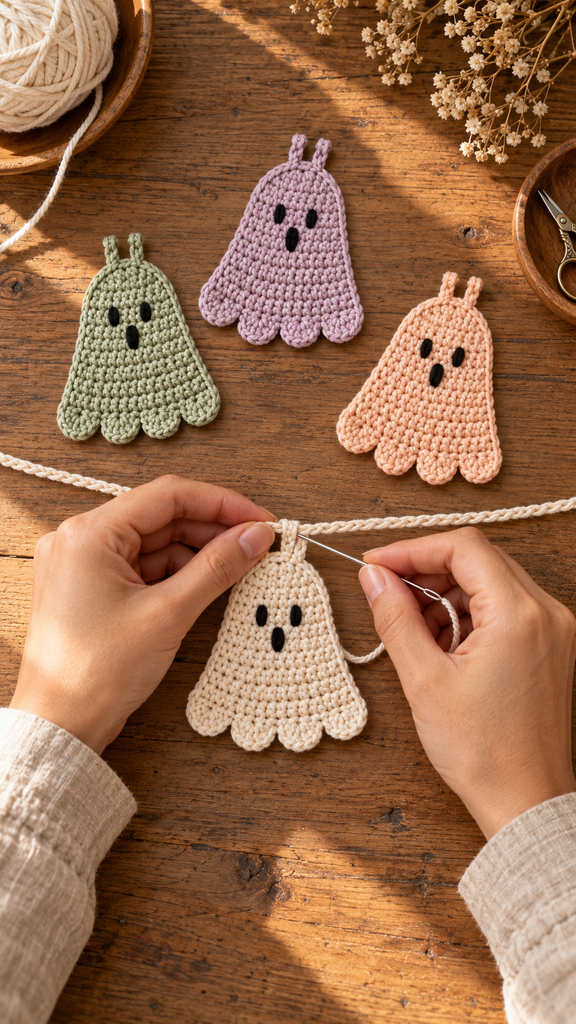
Pass the needle through the cord and secure stitch bases on the motif several times without bunching the head. Weave in all ends and remove the placement markers. Lift the garland gently to check the spacing before placing it on its display hooks.
More Information: Display, Care, and Variations
Let the cord hang in a shallow curve so each ghost remains visible. A deep curve can bring neighboring motifs together. Choose a wall or shelf position where the decoration will not be rubbed constantly by a door, curtain, or passing hands.
For a shorter garland, make three motifs and adjust the spacing. For a longer one, add more ghosts and extend the cord before attaching them. Adding motifs increases the weight, so use a suitable hanging method and reassess how much the cord sags.
Wash according to the yarn label, then dry flat with the ghosts separated. Reshape the scallops gently while damp if the fiber permits. Store the fully dry garland flat or loosely folded around tissue so the cord does not become tangled around the motifs.
Frequently Asked Questions
Is this an easy crochet project?
It suits someone who knows chains and single crochet and is ready to practice increases and double-crochet shells. One completed ghost makes a useful practice piece before starting the remaining four.
Why does my ghost have fewer than four scallops?
Check that Row 18 has 17 stitches. The scalloped row starts with a slip stitch, then repeats a four-stitch placement sequence four times. The shell placement numbers above can help identify a missed anchor or skipped stitch.
Can I use thicker yarn?
Yes, but the ghosts will be larger and heavier. Swatch first, choose an appropriate hook, and make a stronger or longer cord as needed. The listed dimensions and yarn allowance will no longer apply directly.
Why are the faces puckering?
The embroidery is probably too tight. Remove the affected stitches and rework them while the ghost rests flat. The facial yarn should lie on the surface without pulling neighboring crochet stitches together.
Can I use the ghosts as appliqués?
The flat motifs can be sewn to a suitable fabric or crochet background. Test the care compatibility first and use relaxed sewing stitches. That variation omits the cord and requires a different attachment layout.
Are the pictures exact stitch tutorials?
They show the intended appearance and general working stages. They are AI-generated concepts and may not reproduce the exact shell counts or needle placement. Use the written instructions for technical details.
Has this pattern been physically tested?
No. The stitch arithmetic and spacing examples have been reviewed, but a full crochet test is still needed to confirm the drape, outline, yarn use, and finished dimensions.