Earth Stripe Crochet Throw
A handmade throw can change the feeling of a room without adding a complicated pattern to your project basket. This Earth Stripe Crochet Throw combines broad bands of warm cream, muted sage, and soft terracotta with a gently ridged surface. It is designed for a reading chair, the foot of a bed, or a comfortable corner of the sofa.
The inspiration was the idea of a large crocheted blanket in the supplied Watch Me Grow Crochet Blanket PDF. This version takes a different direction: a rectangular home accessory, back-loop half double crochet, seven broad color bands, and a simple three-round border. The numbered milestone layout, embroidery, and pom-pom marker are omitted. The instructions below are newly drafted rather than transcribed from the reference.
Pattern status: Stitch totals and the stripe schedule have been checked mathematically. The pattern has not been physically crocheted or sample-tested. Measurements and yarn quantities are planning estimates, and the photographs are AI-generated concept illustrations. Use the written instructions for stitch placement and make a gauge swatch before committing to the full blanket.
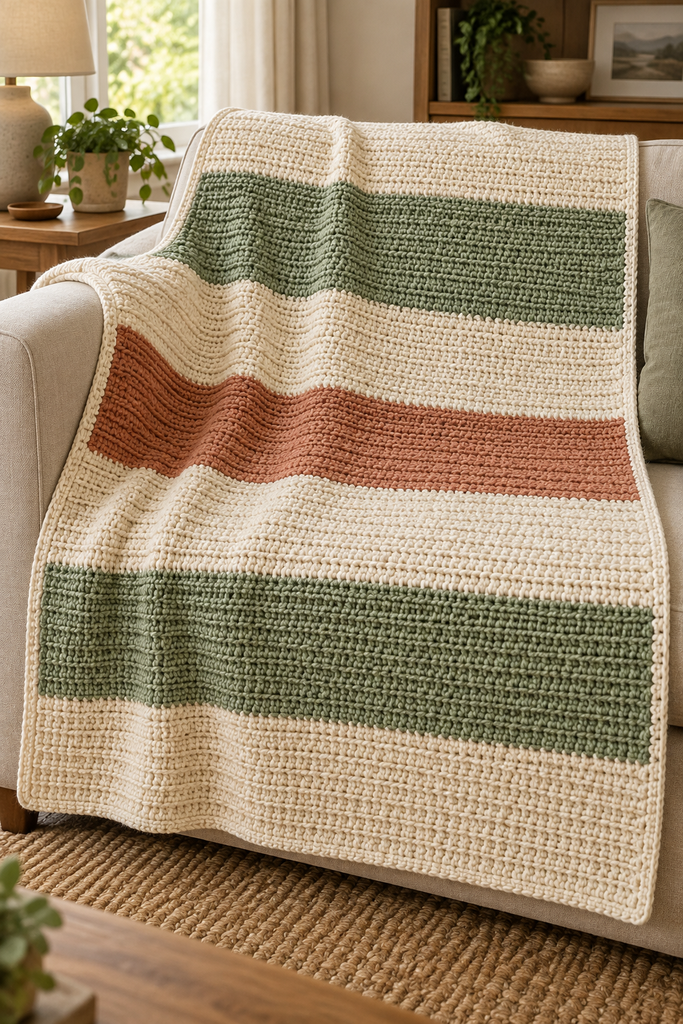
A Simple Throw With Plenty of Texture
The body is one rectangle worked back and forth. After the foundation row, every half double crochet goes through the back loop of the stitch below. This leaves a small ridge across the fabric while keeping the repeat easy to remember. Turning after each row gives the surface a softly corrugated appearance.
The seven bands are equal in row count. Four cream bands separate two sage bands and a single central clay band, creating a balanced arrangement. A narrow cream border ties the colors together and frames the exposed row ends. There are no separate motifs to assemble and no fringe to attach.
Choose this project when you want a repetitive stitch with occasional color changes. The main challenge is keeping the first and last stitches visible and maintaining relaxed tension across a wide row. Stitch markers and a simple row tally make both tasks easier.
Project Details
| Feature | Planned specification |
|---|---|
| Project | Rectangular decorative lap throw |
| Skill level | Confident beginner familiar with half double crochet |
| Terminology | US crochet terms |
| Body | 144 stitches across; 168 rows |
| Body size at gauge | About 90 × 120 cm / 35½ × 47¼ inches |
| Finished size | Approximately 94 × 124 cm / 37 × 49 inches, depending on border gauge |
| Construction | Seven horizontal bands, followed by three border rounds |
| Main stitch | Half double crochet through the back loop only |
Materials and Yarn Choices
- Smooth worsted-weight yarn in three colors: cream A, sage B, and terracotta C.
- A provisional yarn budget of about 1,600 m / 1,750 yd total: 900 m cream, 450 m sage, and 250 m terracotta. This includes a working allowance; actual use must be established from a swatch.
- A 5 mm crochet hook as a starting point, plus nearby hook sizes for adjusting gauge.
- Four removable corner markers and two additional markers for the body edges.
- A tapestry needle, scissors, tape measure, and row counter or notebook.
A smooth plied acrylic, wool blend, or another washable yarn can show the ridges clearly. Select the same yarn range and weight for all three colors so the bands respond similarly to washing. Very fuzzy or chenille yarn can make it harder to identify the back loops and judge the border spacing.
Buy by length rather than assuming equal ball sizes. A 100 g ball can contain very different yardage from one yarn to another. The listed budget is deliberately provisional: fiber, stitch density, and personal tension all affect consumption. Keep the ball bands so the finished throw can be cared for correctly.
Abbreviations and Stitch Notes
- ch: chain.
- sc: single crochet.
- hdc: half double crochet.
- BLO: back loop only.
- sl st: slip stitch.
- st / sts: stitch / stitches.
- RS: the side you choose as the right side.
To make a half double crochet, yarn over, insert the hook, yarn over and draw up a loop, then yarn over and pull through all three loops. For BLO, insert under only the farther strand of the V at the top of the stitch as the work faces you. Do not use the lower horizontal strand sometimes called the third loop.
The ch 2 at the beginning of each body row does not count as a stitch. Work into the first actual stitch immediately beneath that turning chain, and into the last actual stitch at the far end. Do not crochet into the turning chain on the following row. Every body row contains exactly 144 hdc.
For the border, the starting ch 1 also does not count. Join each round to the first actual sc, and do not turn between border rounds. Corner ch-2 spaces are counted separately from single crochet stitches.
Make and Measure a Gauge Swatch
The target body gauge is 16 hdc stitches and 14 rows per 10 cm / 4 inches, measured in the established back-loop pattern after washing and drying as intended for the throw. This is a target rather than a measured sample result.
Chain 26. Work 24 hdc across the foundation row using the same method as Row 1 below, then work at least 20 rows with the back-loop repeat. Wash according to the yarn label, allow it to dry fully, and measure a central area away from the edges without stretching it.
If too many stitches fit into 10 cm, try a larger hook. If too few fit, try a smaller one. Adjust for a fabric you like as well as for dimensions: a stiff swatch will make a stiff throw. Row gauge controls the overall length and the depth of each color band.
For a better yarn estimate, weigh the dry swatch and calculate its yarn consumption per square centimeter. Multiply by the planned body area of 10,800 square centimeters, then add an allowance for the border, ends, and variation. Use your yarn label’s meters per gram to convert the result into length. This remains an estimate, but it is more useful than relying on a generic blanket quantity.
The Crochet Pattern
Step 1: Work the Foundation Row
With cream A, ch 146 loosely. A slightly larger hook can help if your chains tend to tighten; return to your selected working hook for the stitches.
Row 1: Hdc in the third chain from the hook and in every remaining chain. Turn. 144 hdc. The two skipped chains do not count as a stitch.
Count the row before continuing. Place a marker in the first and last actual hdc. The foundation should lie comfortably under the fabric rather than pulling it into a curve. If it feels noticeably tight, remake it now instead of hoping the border will correct it later.
Step 2: Establish the Back-Loop Texture
Row 2: Ch 2, hdc BLO in the first stitch and in each stitch across. Turn. 144 hdc.
Rows 3–24: Repeat Row 2 in cream A. Move the edge markers into the first and last stitch of each new row. At the end of Row 24, change to sage B in the final pull-through of the last hdc.
To change color, begin that last hdc with the old color and draw up a loop. When three loops remain on the hook, use the new color for the yarn-over that pulls through all three. Turn, then make the next row’s ch 2 with the new color. Leave tails of about 15–20 cm for weaving in.
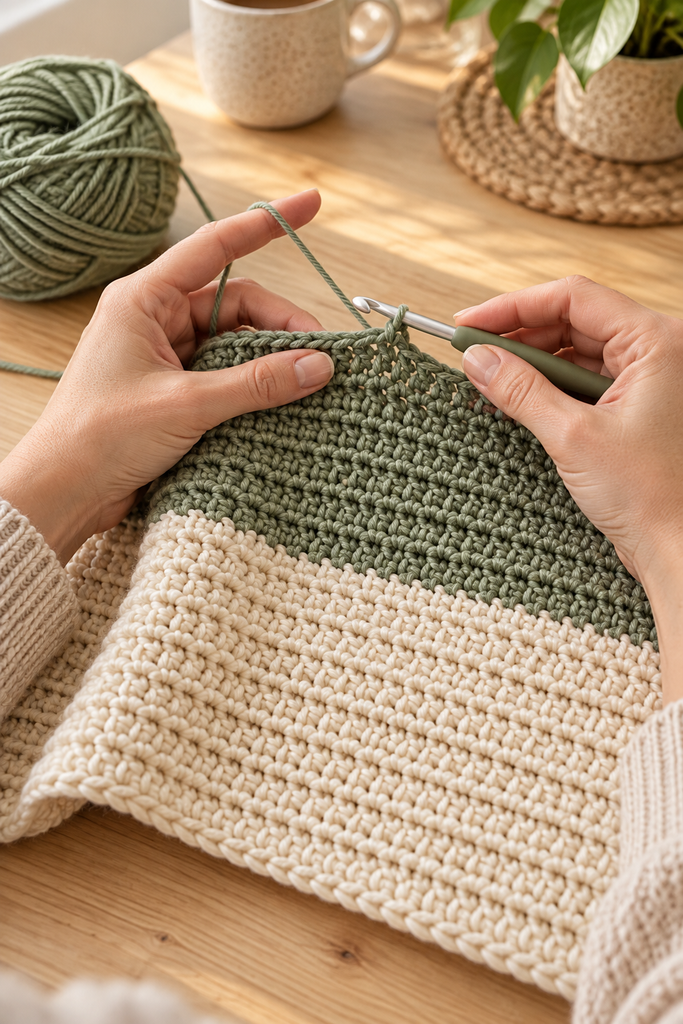
Step 3: Follow the Seven-Band Schedule
Continue the Row 2 repeat through Row 168, changing colors according to this table. Each band is 24 rows deep. The foundation row is included in the first cream band; it is not an extra row.
| Rows | Color | Rows in band |
|---|---|---|
| 1–24 | Cream A | 24 |
| 25–48 | Sage B | 24 |
| 49–72 | Cream A | 24 |
| 73–96 | Terracotta C | 24 |
| 97–120 | Cream A | 24 |
| 121–144 | Sage B | 24 |
| 145–168 | Cream A | 24 |
Change color in the last stitch of Rows 24, 48, 72, 96, 120, and 144. Cut the unused color after each change instead of carrying it along the side through an entire band. Those long carries would be difficult to conceal neatly under a narrow border.
Check the stitch count at each color change. Set the work on a flat surface occasionally to check that both edges remain parallel. At the target gauge, the completed body should be approximately 90 cm wide and 120 cm long. Fasten off after Row 168 and choose which face you prefer as the RS.
Step 4: Prepare the Border Placement
Lay the rectangle flat with the RS facing up. The border needs to follow the height of the half double crochet rows without compressing them. For that reason, the starting plan places 8 sc into every group of 7 row ends along each long side.
Within each group of seven row ends, work one sc into each of the first three row ends, two sc into the fourth row end, and one sc into each of the remaining three row ends. This makes eight stitches. There are 24 groups along a 168-row side, giving 192 sc per long side.
This is a gauge-based starting distribution. Because the pattern has not been sample-tested, check the fabric after the first border round. If the edge puckers or waves, revise the side spacing evenly before adding more rounds. An adjusted count is acceptable when it produces a flatter edge; write it down so both long sides match.
Step 5: Crochet the Cream Border
Join cream A at the top-right corner with the RS facing. Keep all border stitches through both loops where stitch tops or foundation loops are available. On the row ends, insert into a secure strand of the fabric rather than a large loose gap.
Round 1: Ch 1. Sc across the 144 stitches of the top edge. Ch 2 for the corner. Work 192 sc evenly down the first long side using the placement above. Ch 2. Work 144 sc along the unused foundation loops of the bottom edge. Ch 2. Work 192 sc up the remaining long side. Ch 2, then sl st to the first sc. 672 sc and four ch-2 corner spaces.
The corner spaces sit between the four edge sections. Do not add an unlisted extra sc at the starting corner. Mark all four ch-2 spaces so they are easy to recognize in the next rounds.
Round 2: Ch 1. Sc in every sc around, working (sc, ch 2, sc) in each corner space. Join with a sl st to the first sc. 680 sc and four ch-2 spaces.
Round 3: Repeat Round 2. 688 sc and four ch-2 spaces. Fasten off and leave a tail for weaving in. These totals assume the initial 192 stitches on each long side. If you adjusted that spacing, each later border round still adds eight sc to your own previous total.
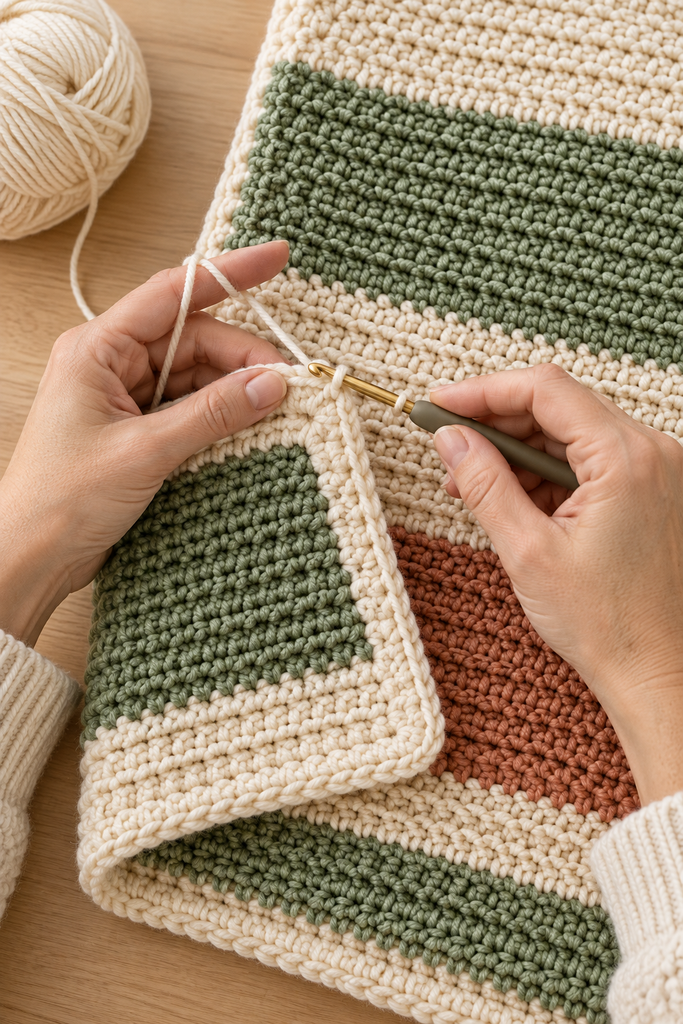
Finishing and Caring for the Throw
Weave each tail into the corresponding color on the reverse side, changing direction through nearby stitch bases to help secure it. Keep the tension relaxed so the woven ends do not gather the fabric. Trim only after checking the ends from both faces.
Wash and dry as directed on the yarn labels. If the fiber permits wet blocking, gently shape the damp blanket into a rectangle and support its weight while it dries flat. Keep the ribbed texture relaxed. Avoid pulling aggressively on the corners or applying direct iron heat without explicit permission from the yarn manufacturer.
Store the throw clean and fully dry. For everyday care, follow the most restrictive care instructions among the three colors. Washing a small colorwork swatch first can also reveal whether the terracotta dye transfers onto the cream.
Ways to Personalize the Design
For a quieter palette, replace terracotta with oatmeal and sage with dusty blue. Keep the four cream bands if you want the same framed appearance. For stronger contrast, choose a darker center band while preserving the same stitch and row counts.
To change the width, choose a new number of body stitches N and chain N + 2. Row 1 still begins in the third chain from the hook. Estimate body width by dividing N by your measured stitches per centimeter. Each top and bottom border edge will then have N stitches.
To change the length while preserving equal bands, choose a new number of rows per band and multiply by seven. Recalculate the side-border distribution from the actual fabric rather than reusing 192 stitches automatically. A substantially larger throw also requires a fresh yarn estimate.
Frequently Asked Questions
Is this a suitable first blanket?
It can suit someone who already knows chains and half double crochet. The repeat is simple, but the wide rows require consistent counting. Practice the back-loop stitch and color change on a small swatch first.
Why are the edges getting wider or narrower?
The usual cause is an added turning-chain stitch or a missed end stitch. The ch 2 never counts here. Mark the first and last hdc and count 144 actual stitches before starting another band.
Can I use chunky yarn?
Yes, but it becomes a different-size project unless you recalculate. Make a swatch, choose stitch and row counts for your intended dimensions, and reassess the border spacing and yarn budget. Do not assume the listed hook or quantities will apply.
Does the blanket have a wrong side?
Both faces have texture, and either can be displayed. Choose one as the RS before adding the border, then keep it facing you throughout all three border rounds for a consistent finish.
Why is my border rippling?
There may be too many stitches along the row ends, or your border tension may be looser than your body tension. Remove the affected round and adjust the placement evenly. A border that pulls inward may need more stitches or a larger hook.
Are the pictures exact stitch tutorials?
They illustrate the intended appearance and general working stages. They are AI-generated and may not show exact stitch counts or hook placement. Follow the written pattern and your gauge swatch for the technical details.
Has this pattern been tested?
The counts and schedule have been reviewed, but no physical sample has been made from these instructions. A full crochet test is still needed to confirm drape, dimensions, border behavior, and actual yarn consumption before describing it as a tested pattern.