Crochet a Cozy Dinosaur Tail Pillow
A little dinosaur detail can bring a playful touch to a reading chair or craft shelf. This crochet tail pillow pairs deep teal stitches with four mustard triangles, creating a soft tapered shape that looks charming beside a favorite blanket. It is small enough to move between a decorative basket and a cozy corner without taking over the room.
The tail is crocheted from its narrow tip toward a wider base, using single crochet in continuous rounds. A separate circle closes the broad end after stuffing. The four spikes are made from pairs of flat triangles and sewn along the upper side, becoming smaller toward the tip.
The supplied PDF inspired the dinosaur-tail theme. This newly drafted project changes the function, scale, yarn, stitch pattern, shaping, closure, and spikes: it creates a small closed decorative cushion rather than the reference’s large snuggle sack. The counts have been checked mathematically, but the design has not been physically crocheted or tested. All photographs are AI-generated concept illustrations; follow the written directions for exact counts and construction.
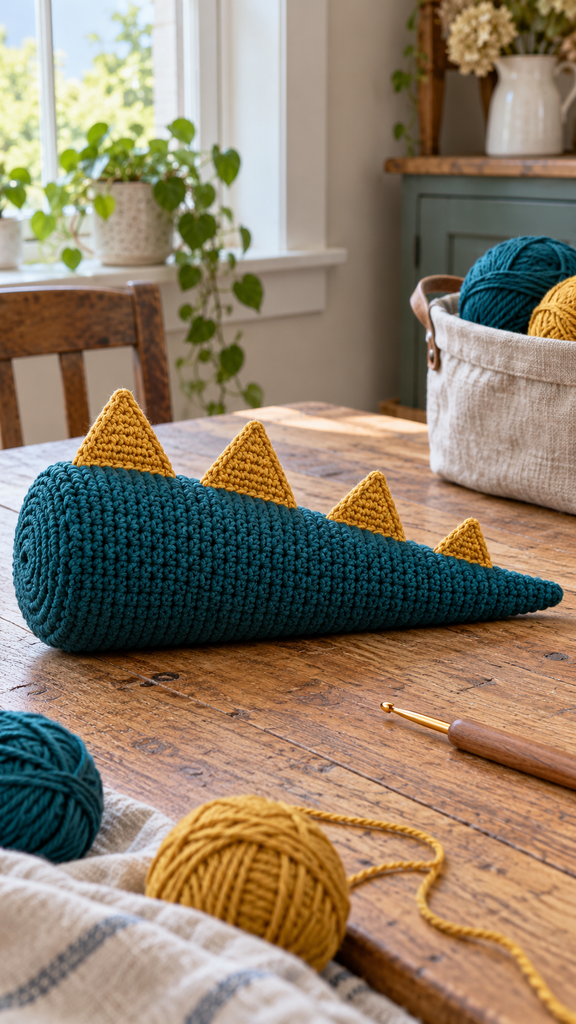
A Small Tail Cushion With a Different Construction
The main shape grows gradually, with three increases every fourth round. Plain rounds between the increases create a long taper. The broad end remains open while you add the filling, then closes with a matching 48-stitch circle.
Two large spikes, one medium spike, and one small spike sit along the top. Each is made from two flat triangular pieces sewn together without stuffing. This keeps the decoration soft while giving it more substance than a single layer.
The finished piece is intended as a decorative mini cushion. Its length and proportions depend on your yarn and tension, and the exact contour may differ from the concept photograph.
Project Details and Size
| Detail | Guide |
|---|---|
| Skill level | Confident beginner to intermediate, with small seams and stuffing |
| Terminology | US crochet terms |
| Construction | Tapered spiral tube, circular end cap, four double-layer spikes |
| Body rounds | 60 |
| Final body opening | 48 sc |
| End cap perimeter | 48 sc |
| Size target | Approximately 32–36 cm long and 9–10 cm across the broad end |
| Working gauge target | Approximately 17 sc and 18 rounds per 10 cm / 4 inches |
| Hook starting point | 4.5 mm with smooth medium-weight yarn |
| Pattern status | Newly drafted; count-checked, not physically tested |
At the target round gauge, sixty rounds give a nominal length around 33 cm. Forty-eight stitches at the stated stitch gauge give a perimeter near 28.2 cm, corresponding to a circle about 9 cm across. Stuffing and the small tip affect those estimates, so use the dimensions as a planning guide rather than a guaranteed finished result.
Materials and Supplies
- Muted teal medium-weight yarn: allow approximately 200–260 metres for the tail, end cap, and sewing.
- Mustard yarn of similar thickness: approximately 40–60 metres for the spike panels.
- A 4.5 mm crochet hook, adjusted for a firm but workable fabric.
- Polyester craft stuffing, a blunt yarn needle, scissors, and a measuring tape.
- Removable stitch markers and optional contrasting basting thread for positioning the spikes.
Yarn quantities are estimates rather than measured consumption. Choose smooth yarn if you want the individual stitches to show clearly. A very fluffy yarn can hide the shaping and change the appearance of the triangles.
Check the Fabric Before Making the Full Tail
Make a single-crochet sample and check that it contains the filling without needing excessive tension. A small tubular swatch can help compare your stitch and round gauge with the targets. Measure it relaxed and follow the yarn’s care instructions before remeasuring if washing changes its size.
If the stitches are too open, try a slightly smaller hook. If they are painfully tight to work, try a larger hook and reassess the fabric. Avoid adding extra stuffing simply to force a particular dimension.
Abbreviations and Helpful Techniques
| Abbreviation | Meaning |
|---|---|
| MR | Magic ring |
| ch | Chain |
| sc | Single crochet |
| sl st | Slip stitch |
| inc | Work 2 sc in the same stitch |
| rnd | Round |
| st / sts | Stitch / stitches |
Continuous Rounds for the Tail
Work the tail and end cap in spirals without joining each round. Place a marker in the first stitch and move it at the beginning of every new round. A phrase such as “(4 sc, inc) × 3” means repeat four single crochets followed by an increase three times.
Do not add a chain at the start of a spiral round. Each increase consumes one stitch and produces two. The shaping rounds add three stitches, while the plain rounds keep the same count.
Flat Rows for the Spikes
The triangular panels are worked in rows. Chain one and turn before every row after Row 1. The turning chain does not count as a stitch. Increasing in the first stitch only produces a simple slanted triangle; the second panel provides a matching layer during assembly.
Crochet the Teal Tail
Start at the Narrow Tip
With teal, work 6 sc in an MR for Round 1. Pull the ring closed and secure its starting tail. Continue in a spiral, checking the count after each increase round.
The table groups each shaping round with its following plain rounds. Read each row in order rather than working only the increase rounds.
| Round(s) | Instruction | Count at end of each round |
|---|---|---|
| 1 | 6 sc in an MR | 6 |
| 2–4 | Sc in every stitch | 6 |
| 5 | (1 sc, inc) × 3 | 9 |
| 6–8 | Sc in every stitch | 9 |
| 9 | (2 sc, inc) × 3 | 12 |
| 10–12 | Sc in every stitch | 12 |
| 13 | (3 sc, inc) × 3 | 15 |
| 14–16 | Sc in every stitch | 15 |
| 17 | (4 sc, inc) × 3 | 18 |
| 18–20 | Sc in every stitch | 18 |
| 21 | (5 sc, inc) × 3 | 21 |
| 22–24 | Sc in every stitch | 21 |
| 25 | (6 sc, inc) × 3 | 24 |
| 26–28 | Sc in every stitch | 24 |
| 29 | (7 sc, inc) × 3 | 27 |
| 30–32 | Sc in every stitch | 27 |
| 33 | (8 sc, inc) × 3 | 30 |
| 34–36 | Sc in every stitch | 30 |
| 37 | (9 sc, inc) × 3 | 33 |
| 38–40 | Sc in every stitch | 33 |
| 41 | (10 sc, inc) × 3 | 36 |
| 42–44 | Sc in every stitch | 36 |
| 45 | (11 sc, inc) × 3 | 39 |
| 46–48 | Sc in every stitch | 39 |
| 49 | (12 sc, inc) × 3 | 42 |
| 50–52 | Sc in every stitch | 42 |
| 53 | (13 sc, inc) × 3 | 45 |
| 54–56 | Sc in every stitch | 45 |
| 57 | (14 sc, inc) × 3 | 48 |
| 58–60 | Sc in every stitch | 48 |
Add Filling Gradually
Begin adding small pieces of stuffing once the opening is wide enough to reach the tip comfortably. Use the blunt end of your yarn needle or your fingers to guide a little filling toward the narrow end without piercing the crochet fabric.
Continue filling in small amounts as the tail grows. Keep the taper even rather than creating one tightly packed section followed by a hollow area. Leave the broad end accessible for final adjustments.
After Round 60, fasten off. Preserve a marker in one edge stitch so you can identify the start of the 48-stitch opening when adding the cap.
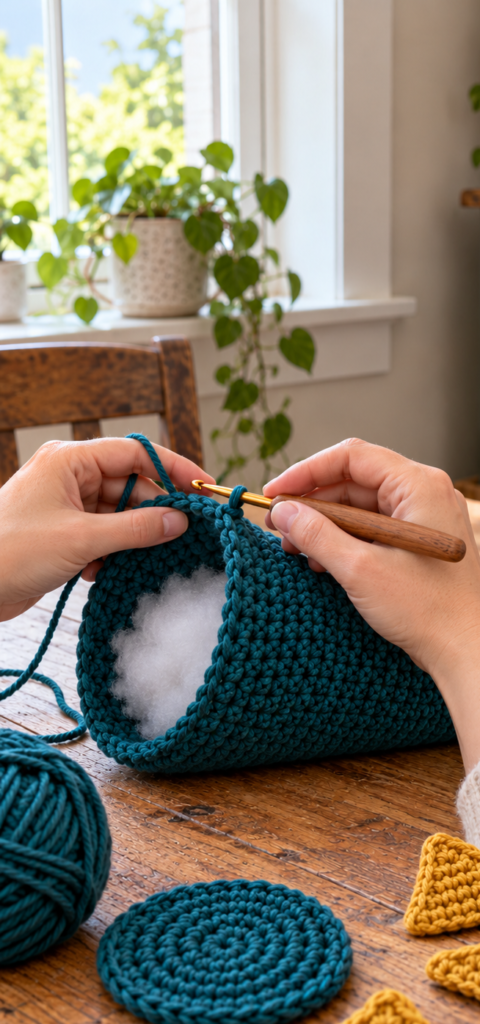
Crochet the Circular End Cap
A Matching 48-Stitch Circle
With teal:
- Rnd 1: 6 sc in an MR. 6 sts.
- Rnd 2: Inc in every stitch. 12 sts.
- Rnd 3: (1 sc, inc) × 6. 18 sts.
- Rnd 4: (2 sc, inc) × 6. 24 sts.
- Rnd 5: (3 sc, inc) × 6. 30 sts.
- Rnd 6: (4 sc, inc) × 6. 36 sts.
- Rnd 7: (5 sc, inc) × 6. 42 sts.
- Rnd 8: (6 sc, inc) × 6. 48 sts.
Fasten off with an approximately 60 cm sewing tail. Secure the starting tail on the inside. Compare the circle with the tail opening before sewing; both edges should contain forty-eight stitches and be reasonably compatible in size.
If their diameters differ noticeably, check the yarn, hook, and tension. Do not force a large mismatch into a puckered seam.
Crochet the Four Mustard Spikes
Large Triangle Panels: Make Four
Each large spike uses two panels. With mustard, chain 2.
Row 1: Sc in the second chain from the hook. 1 sc.
Row 2: Ch 1, turn. Inc in the stitch. 2 sc.
Rows 3–9: Ch 1, turn. Inc in the first stitch, then sc in every remaining stitch. Each row adds one stitch, ending with 9 sc at Row 9. Fasten off with a sewing tail.
Make four panels for two large spikes. At the target gauge, their base width is roughly 5 cm and height roughly 5 cm, though edging and assembly can change the outline.
Medium Triangle Panels: Make Two
Follow the same instructions through Row 7, ending with 7 sc. Fasten off. Make two matching panels for one medium spike.
Small Triangle Panels: Make Two
Follow the same instructions through Row 5, ending with 5 sc. Fasten off. Make two matching panels for one small spike.
You now have eight triangular panels: four large, two medium, and two small. Pair them by size before joining.
Join the Spike Layers
Stack each matching pair with its outlines aligned and the chosen visible faces outward. Whipstitch around all three edges using mustard yarn. Keep the layers flat and unstuffed, and leave a sewing tail at the wide last-row edge for attaching the spike.
That last-row edge becomes the base. The opposite narrow point faces away from the tail. Match the large pair’s angles when positioning them so their tips lean in a similar direction rather than appearing accidentally reversed.
Close the Broad End
Check the filling before adding the cap. The cushion should feel softly supported, with no obvious hollow pockets or stretched gaps between stitches.
Align the cap’s 48 edge stitches with the tail opening’s 48 stitches. Use markers at four equal sections of twelve stitches if it helps. Whipstitch through matching edge positions with the long teal tail.
After sewing about three quarters of the seam, add or redistribute a little more stuffing if necessary. Complete all forty-eight matching positions, secure the yarn, and bury the end inside the cushion. Smooth the circular base gently with your hands.
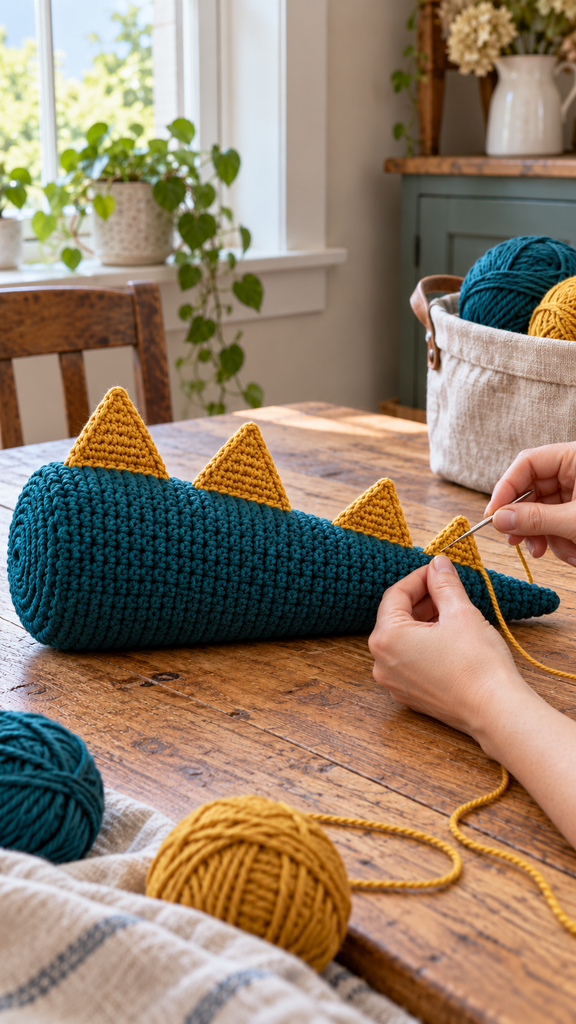
Sew on the Spikes
Mark a Gentle Centerline
Lay the tail on a flat surface and choose the upper side. Mark a line from the broad base toward the tip using removable markers or loose basting thread. The three increase sections may leave subtle shaping lines; use the orientation you like best.
Place the two large spikes nearest the broad end, then the medium spike, then the small spike toward the tip. Leave the narrow final section of the tail undecorated.
Approximate center positions are Body Rounds 52, 40, 28, and 16, counting from the initial tip. These are assembly guides, not mandatory attachment rounds. Check that neighboring bases have enough space before sewing.
Attach the Wide Bases
Position each spike’s wide edge along the marked line, with the triangle standing away from the tail. Sew both sides of the double-layer base to nearby sturdy body stitches. Keep the attachment firm without pulling the tail into a ridge.
The bases run along the length of the tail, rather than around its circumference. Recheck the spacing and angle from the side before securing the last tails. The unstuffed spikes may lean gently; this is a soft decorative cushion, so a rigid upright stance is not guaranteed.
Remove all temporary markers and basting thread, inspect the cap and spike seams, and bury remaining ends.
Color Ideas and Display Tips
Try dusty blue with oatmeal spikes, forest green with rust triangles, or one tonal combination throughout. Changing only colors keeps the stitch calculations intact when the yarn thickness stays similar.
Place the little tail on a reading chair, beside a folded throw, or partly inside a decorative basket with its spikes visible. For a longer or wider version, recalculate the taper and end cap together rather than changing only one component.
Care and Common Problems
Follow the yarn and stuffing care instructions. Support the cushion’s shape while drying and let its interior dry completely. Inspect sewn attachments after handling or cleaning.
If the tip has a hard lump, redistribute the filling before closing the base. If the tail has large gaps, check hook size and avoid overstuffing. If a spike twists, compare its two panel shapes and loosen any seam that pulls one layer shorter than the other.
Frequently Asked Questions
Is this the same snuggle sack as the supplied PDF?
No. The reference is a large dinosaur-tail sack. This newly drafted project is a small stuffed decorative cushion with a closed circular base and four flat triangular spikes.
Can a beginner make it?
It suits someone comfortable with magic rings, continuous rounds, and counting increases. The repeated plain rounds make the taper predictable, while the cap and spike seams need some patient hand sewing.
Are the mustard spikes stuffed?
No. Each uses two flat triangle panels sewn together. The doubled fabric adds substance without creating padded plates.
Why do the cap and tail both end with 48 stitches?
Their matching counts let you pair every cap-edge stitch with one opening stitch. Altering the final tail circumference requires a cap with a compatible perimeter and diameter.
Can I use thick blanket yarn?
You can experiment, but it will change the size, texture, yarn consumption, and filling requirements. Test the fabric and proportions first. The stated dimensions apply only as targets for this medium-weight draft.
Has the new pattern been physically tested?
No. The round counts, increases, triangle totals, and matching closure counts have been checked mathematically. The design still needs physical crocheting and finishing before it can be described as a tested pattern.