Crochet a Little Woodland Dragon
A sleepy little dragon, a basket of soft cotton yarn, and a quiet afternoon of crochet make a lovely combination. This woodland dragon has a round head, a small pear-shaped body, and leaf-inspired wings that give it a gentle storybook personality. Sage green, warm cream, olive, and terracotta bring together a natural palette that looks beautiful on a craft shelf.
Instead of a long flying dragon, this project creates a compact seated character. Its eyes are embroidered as soft curves, its muzzle is a small cream cup, and its short tail helps complete the silhouette. The pieces are made separately, allowing you to focus on one manageable shape at a time before bringing everything together.
The supplied PDF inspired the dragon theme. This newly drafted version changes the proportions, construction, wings, face, limbs, tail, and color palette. Its stitch counts have been checked mathematically, but the project has not been physically crocheted or tested. All photographs are AI-generated concept illustrations; use the written instructions for counts and assembly rather than treating the pictures as stitch charts.
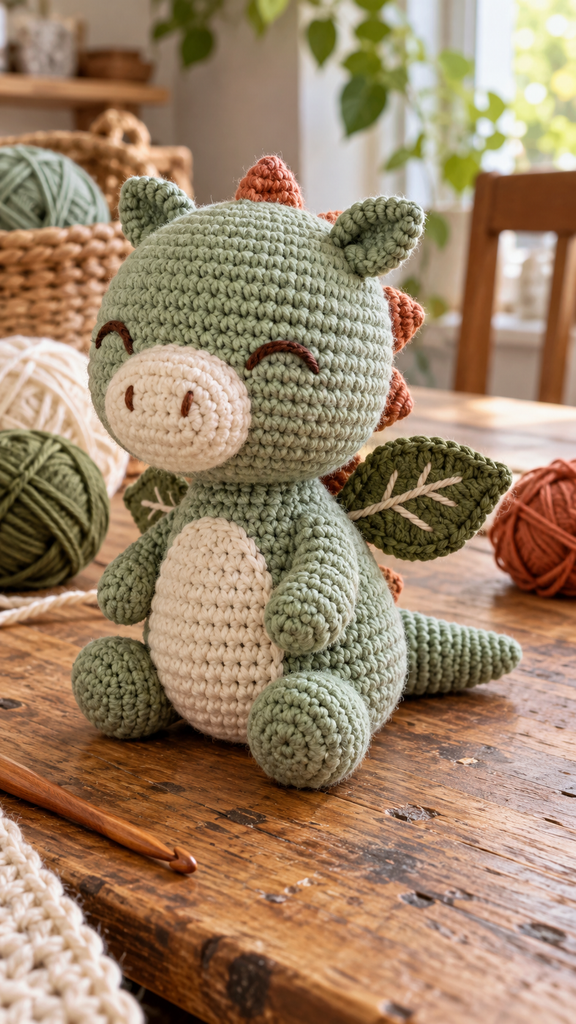
Meet Your Little Woodland Dragon
The character is designed to sit upright, with two rounded feet in front and a short tapered tail behind. A separate head sits above a softly stuffed body. Small olive wings are shaped like leaves and decorated with a single embroidered vein.
There are no broad bat-wing panels, long serpentine body, or pointed horns. Two little sage ears and five tiny terracotta back cones provide the dragon details. A cream belly patch and sleepy embroidered eyes keep the expression gentle.
This project is a good next step for someone who has made a basic amigurumi sphere and wants to practice sewing pieces together. Most of the crochet uses single crochet, increases, and decreases. The wings introduce half double and double crochet in a small flat piece.
Project Details
| Detail | Guide |
|---|---|
| Skill level | Intermediate, mainly because of shaping and assembly |
| Terminology | US crochet terms |
| Construction | Separate head, body, muzzle, belly, limbs, tail, wings, ears, and cones |
| Main stitch | Single crochet in continuous rounds |
| Size target | Approximately 17–20 cm / 6¾–8 inches tall; actual size depends on tension |
| Hook starting point | 3.25 mm with smooth medium-weight cotton |
| Fabric goal | Firm, flexible stitches that contain the stuffing |
| Pattern status | Newly drafted and count-checked; not physically tested |
The size is a planning target, not a measured result from a completed sample. A working gauge around 22 sc and 24 rounds per 10 cm can guide your yarn choice, but small stuffed pieces are difficult to measure like a flat garment swatch. Check the fabric first and measure your assembled project afterward.
Materials and Supplies
- Sage cotton yarn: allow approximately 120–160 metres.
- Cream cotton yarn: approximately 25–40 metres for the muzzle, belly, and wing veins.
- Olive cotton yarn: approximately 15–25 metres for the wings.
- Terracotta cotton yarn: approximately 5–10 metres for five small cones.
- A small amount of smooth dark-brown yarn for embroidered eyes and nostrils.
- A 3.25 mm hook, adjusted if necessary to make a firm fabric.
- Polyester craft stuffing, a blunt yarn needle, scissors, and removable markers.
- Optional removable pins or a contrasting basting thread for assembly.
These amounts are estimates rather than tested yarn consumption. Use similar yarn thicknesses for the crocheted pieces so the proportions stay balanced. Keep stuffing light in the limbs and tail and slightly firmer in the head and body.
Choose the Hook by Looking at the Fabric
Make a small single-crochet sample before beginning. Bend it gently and check whether large gaps appear. A slightly smaller hook can help if stuffing shows through; a larger hook may help if the stitches are so tight that inserting the hook becomes difficult.
Avoid forcing a hook size simply to match the suggested measurement. Your comfort and the quality of the fabric matter more for this decorative amigurumi than an exact finished height.
Abbreviations and Pattern Notes
| Abbreviation | Meaning |
|---|---|
| MR | Magic ring |
| ch | Chain |
| sc | Single crochet |
| hdc | Half double crochet |
| dc | Double crochet |
| sl st | Slip stitch |
| inc | Work 2 sc in the same stitch |
| dec | Decrease 2 stitches into 1 sc |
| rnd | Round |
| st / sts | Stitch / stitches |
Working in Continuous Rounds
Do not join the rounds of the stuffed pieces unless instructed. Place a marker in the first stitch and move it at the start of each new round. A phrase such as “(2 sc, inc) × 6” means repeat two single crochets followed by an increase six times.
Use an invisible decrease if you know it: insert the hook under the front loop of each of the next two stitches, pull yarn through both front loops, then complete a single crochet. A regular sc2tog also works, though it may leave a more noticeable texture.
For a magic ring, place the stated stitches in the ring and pull the starting tail to close the center. Secure the tail inside the piece before adding stuffing. Leave approximately 25–35 cm sewing tails on pieces that will be attached later.
Crochet the Head
A Rounded Sage Head
With sage:
- Rnd 1: 6 sc in an MR. 6 sts.
- Rnd 2: Inc in every stitch. 12 sts.
- Rnd 3: (1 sc, inc) × 6. 18 sts.
- Rnd 4: (2 sc, inc) × 6. 24 sts.
- Rnd 5: (3 sc, inc) × 6. 30 sts.
- Rnd 6: (4 sc, inc) × 6. 36 sts.
- Rnds 7–12: Sc in every stitch. 36 sts per round.
- Rnd 13: (4 sc, dec) × 6. 30 sts.
- Rnd 14: (3 sc, dec) × 6. 24 sts.
- Rnd 15: (2 sc, dec) × 6. 18 sts.
Fasten off with a sewing tail, leaving the 18-stitch neck opening unclosed. Add stuffing in small pieces. Keep the sphere rounded without stretching the fabric. You can embroider the eyes now, while the inside remains accessible, or after temporarily positioning the muzzle.
Crochet the Body
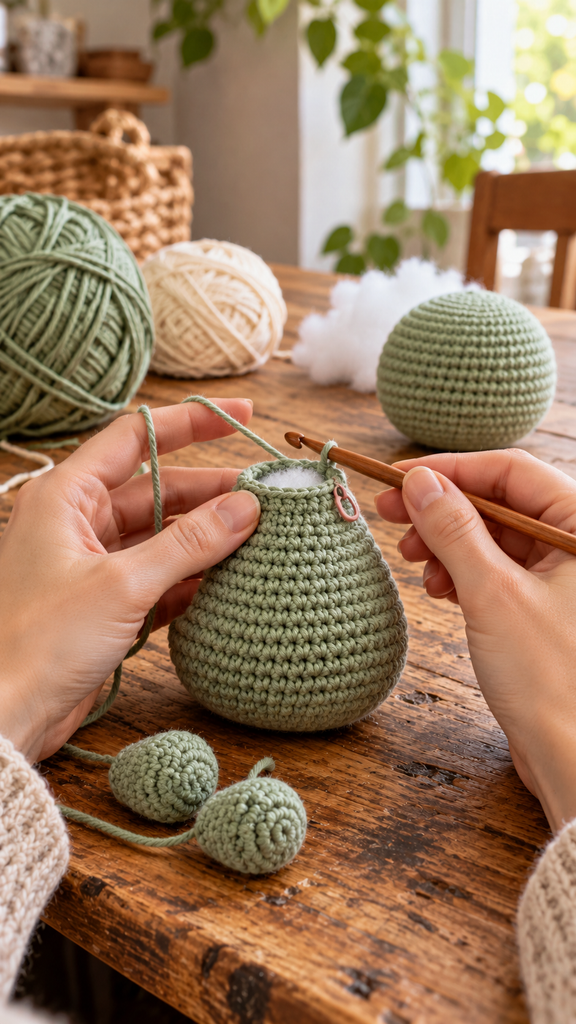
A Small Pear-Shaped Base
With sage:
- Rnd 1: 6 sc in an MR. 6 sts.
- Rnd 2: Inc in every stitch. 12 sts.
- Rnd 3: (1 sc, inc) × 6. 18 sts.
- Rnd 4: (2 sc, inc) × 6. 24 sts.
- Rnd 5: (3 sc, inc) × 6. 30 sts.
- Rnds 6–13: Sc in every stitch. 30 sts per round.
- Rnd 14: (3 sc, dec) × 6. 24 sts.
- Rnds 15–16: Sc in every stitch. 24 sts per round.
- Rnd 17: (2 sc, dec) × 6. 18 sts.
- Rnd 18: Sc in every stitch. 18 sts.
Fasten off, leaving the top opening unclosed. Stuff the lower body enough to hold its shape, then add smaller amounts near the neck. The initial magic-ring center becomes the bottom; the 18-stitch opening becomes the top.
Make the Cream Face and Belly Pieces
Small Round Muzzle
With cream:
- Rnd 1: 6 sc in an MR. 6 sts.
- Rnd 2: Inc in every stitch. 12 sts.
- Rnd 3: (1 sc, inc) × 6. 18 sts.
- Rnd 4: Sc in every stitch. 18 sts.
Fasten off with a sewing tail. This shallow cup forms a little rounded muzzle. Add only a pinch of stuffing when sewing it to the head so it projects gently rather than becoming a large snout.
Oval Belly Patch
With cream, chain 7. Work around both sides of the foundation chain.
Rnd 1: Sc in the second chain from the hook, sc in each of the next four chains, then 3 sc in the final chain. Working along the other side, sc in the next four chain positions and 2 sc in the final position, which shares the first worked chain. 14 sts.
Rnd 2: Inc in the first stitch, sc in the next four stitches, inc in each of the next three stitches, sc in the next four stitches, and inc in each of the last two stitches. 20 sts.
Rnd 3: (4 sc, inc) × 4. 24 sts.
Rnd 4: (5 sc, inc) × 4. 28 sts.
Fasten off with a sewing tail. Leave the patch unstuffed. Orient its longer axis vertically on the front of the body. Its four-round construction makes a soft oval accent; fit it to the torso without stretching.
Crochet the Feet and Arms
Rounded Feet: Make Two
With sage:
- Rnd 1: 6 sc in an MR. 6 sts.
- Rnd 2: Inc in every stitch. 12 sts.
- Rnds 3–5: Sc in every stitch. 12 sts per round.
- Rnd 6: (2 sc, dec) × 3. 9 sts.
Fasten off with a sewing tail. Lightly stuff the rounded end and leave the opening for attachment. Both feet will sit at the lower front of the body, pointing forward.
Short Arms: Make Two
With sage:
- Rnd 1: 6 sc in an MR. 6 sts.
- Rnd 2: (1 sc, inc) × 3. 9 sts.
- Rnds 3–6: Sc in every stitch. 9 sts per round.
- Rnd 7: (1 sc, dec) × 3. 6 sts.
Add a tiny amount of stuffing to the hand end only. Flatten the six-stitch opening into two facing layers of three stitches. Work 3 sc through both layers to close it. Fasten off with a sewing tail. This closing line is separate from the numbered spiral rounds.
Crochet the Tail, Ears, and Back Cones
A Short Tapered Tail
Begin at the tip with sage:
- Rnd 1: 6 sc in an MR. 6 sts.
- Rnd 2: Sc in every stitch. 6 sts.
- Rnd 3: (1 sc, inc) × 3. 9 sts.
- Rnd 4: Sc in every stitch. 9 sts.
- Rnd 5: (2 sc, inc) × 3. 12 sts.
- Rnd 6: Sc in every stitch. 12 sts.
- Rnd 7: (3 sc, inc) × 3. 15 sts.
- Rnds 8–10: Sc in every stitch. 15 sts per round.
Fasten off with a sewing tail. Stuff lightly, leaving the broad attachment end flexible. This is a short cone, not a curling tail. Attach its broad end low on the back so it can rest against the display surface.
Small Ears: Make Two
With sage, work 6 sc in an MR for Rnd 1. Work 6 sc in Rnd 2. For Rnd 3, work (1 sc, inc) three times: 9 sts. Work 9 sc in Rnd 4. Fasten off with a sewing tail.
Leave the ears unstuffed. Flatten each little piece, pinch its open base gently, and sew it above the outer side of an eye. The rounded closed end points upward. They are soft ears rather than pointed horns.
Tiny Terracotta Back Cones: Make Five
With terracotta, work 4 sc in an MR for Rnd 1. In Rnd 2, work (1 sc, inc) twice: 6 sts. In Rnd 3, work (2 sc, inc) twice: 8 sts. Fasten off with a sewing tail.
Leave these tiny cones unstuffed and keep their openings available for sewing. Place one near the rear crown of the head and the other four along the rear head and upper back. Their final spacing should suit the pieces you actually crochet.
Make the Leaf-Inspired Wings
Two Flat Olive Wings
With olive, chain 11. This piece is worked once around the chain and then joined.
Sc in the second chain from the hook and in the next chain. Hdc in each of the next two chains, dc in each of the next five chains, and work 5 dc in the final chain.
Working along the opposite side of the foundation chain, dc in the next five chain positions, hdc in the next two, and sc in the last two. Join with a sl st to the first sc. 23 stitches, excluding the joining slip stitch. Fasten off with a sewing tail.
The narrow end is where the first single crochets sit; the broader rounded end contains the five double crochets. Make a second wing the same way. With cream yarn, embroider a loose central vein along each leaf, keeping the piece flat. Add two or three short branching stitches on either side if you want a more botanical look. Do not stuff the wings or add wire.
Assemble Your Woodland Dragon
Join the Head and Body
Match the head’s 18-stitch opening with the body’s 18-stitch opening. Temporarily baste a few points around the neck to check the face direction. Sew through the matching stitch positions around the circumference, adding a little stuffing to the neck before closing the final section.
Keep the seam snug without pulling the head into a narrow puckered ring. Secure the sewing tail and bury it inside the body. The head should sit above the torso rather than projecting far forward.
Position the Muzzle and Embroider the Face
Place the cream muzzle on the lower front of the head, approximately over Rounds 9–13. Adjust it to the actual sphere instead of forcing a fixed placement. Sew around its 18-stitch rim and add a pinch of stuffing before closing.
Embroider two closed crescent eyes just above and to either side of the muzzle. Use several small stitches to form each smooth downward curve. Add two short dark-brown nostril dashes on the cream muzzle. Keep the reverse threads short and bury the ends inside the head.
Attach the Belly, Limbs, and Tail
Sew the belly patch flat to the center front, roughly over Body Rounds 4–12, adjusting its position if your row height differs. Attach the arm closing edges near Rounds 14–16, one on each side, letting the hands rest beside the belly.
Attach the feet near Body Rounds 2–5, using their open rims as attachment edges and keeping them balanced. Sew the tail to the lower back, approximately over Rounds 3–7. Before securing the last tails, rest the dragon on the table and adjust the feet and tail to improve its seated balance. Self-standing stability is not guaranteed by this untested draft.
Add the Ears, Wings, and Cones
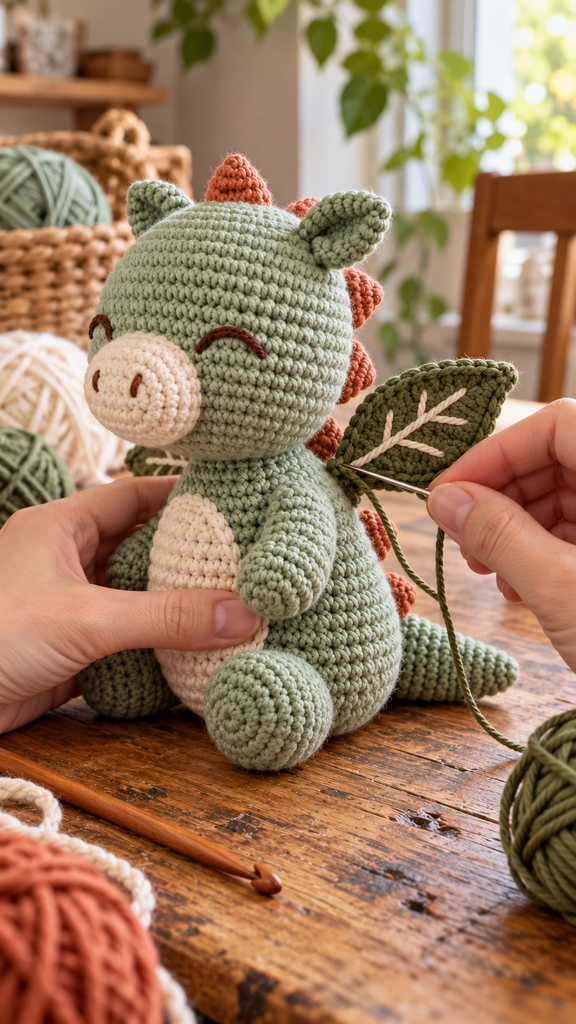
Sew the ears to the upper sides of the head, around Rounds 5–7. Attach the narrow ends of the leaf wings behind the shoulders, leaving their rounded ends free. Mirror their placement by turning one piece over if needed.
Position the five terracotta cones along the rear centerline of the head and upper back. Stitch around each eight-stitch base. Remove every temporary pin or basting thread, check the seams, and bury any remaining yarn ends.
Personalize the Colors and Expression
Try dusty blue with cream and warm mustard cones, or muted lavender with pale-gray details. Keep the same yarn thickness and stitch counts when changing only the palette. A small difference in eye curves can make the dragon look sleepier or more cheerful.
For a simpler version, omit the belly applique or the cream wing veins. Changing the height, head size, or neck circumference needs a new calculation: the 18-to-18 neck join applies specifically to the head and body in this draft.
Finishing, Care, and Troubleshooting
Follow the yarn and stuffing care instructions. Let the piece dry completely after cleaning, and support its shape while drying. Inspect sewn attachments periodically, especially after handling or washing. This decorative pattern is not presented as a certified or age-tested toy design.
If stuffing shows through, check hook size and avoid overfilling. If a sphere has a flat spot, redistribute the stuffing before adding more. If one foot sits higher, reposition its seam rather than trying to pull the body into balance. Count every round after an increase or decrease section to catch errors early.
Frequently Asked Questions
Can a beginner make this dragon?
An adventurous beginner who already understands magic rings, increases, decreases, and round markers can try it. The many attachment seams make it more involved than a basic sphere. Make the head and body first, then complete the small pieces in batches.
Can I use plush yarn?
You can experiment, but it changes the size, stitch visibility, and proportions. Tiny cones and embroidered details can be harder to manage. Swatch and treat that version as a separate variation rather than expecting the stated size.
Why do the head and body stay open?
Their matching 18-stitch openings create a neck seam. Closing each piece first would change the attachment method and can create an awkward joint. Stuff the pieces before sewing them together, then fill the neck lightly during the final seam.
Are the wings supposed to be stuffed?
No. They are flat leaf-inspired pieces worked around a foundation chain. Their center veins are embroidered loosely. If they twist, check the stitch sequence and relax the embroidery tension.
Will the dragon stand by itself?
It is intended to sit, using its body, feet, and tail for balance. The finished result depends on stuffing and assembly. Reposition those pieces before fastening off if it tips, or display it with support.
Is this the same dragon as the supplied PDF?
No. The reference is a long dragon with large structured wings. This version is a small seated woodland character with separate rounded head and body, leaf wings, short limbs, embroidered eyes, and a short tail. It is a new draft that still needs physical testing.