Crochet Bunny Hat and Booties Pattern
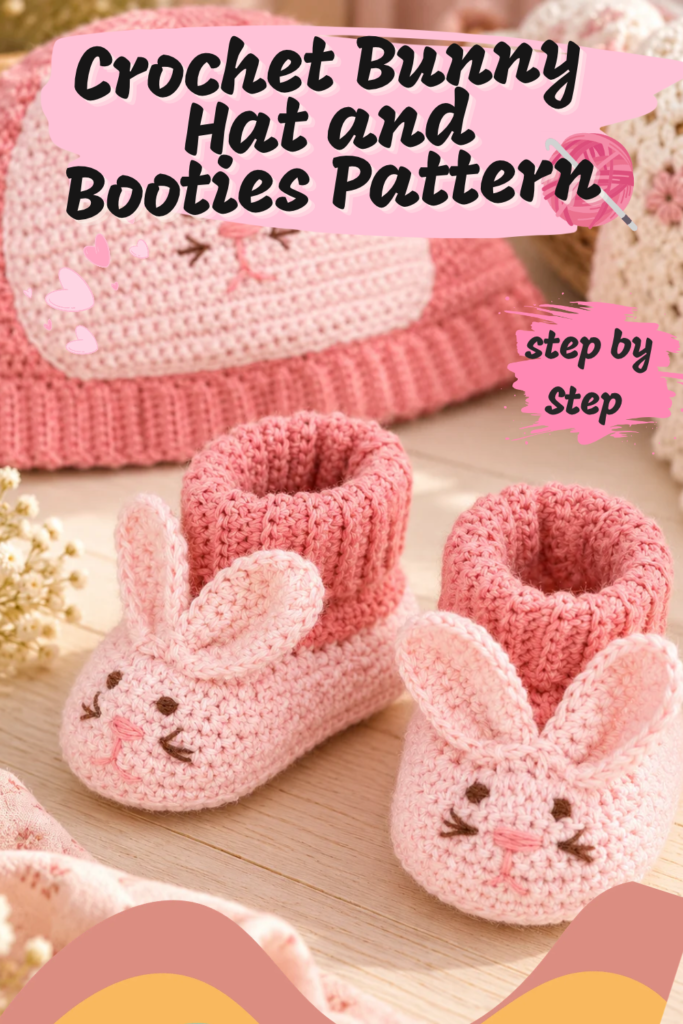
There is something especially sweet about handmade crochet projects for babies, but add tiny bunny ears, embroidered whiskers, and a fluffy little tail, and the cuteness reaches an entirely different level.
This Crochet Bunny Hat and Booties Set is one of those projects that immediately makes me want to reach for my hook.
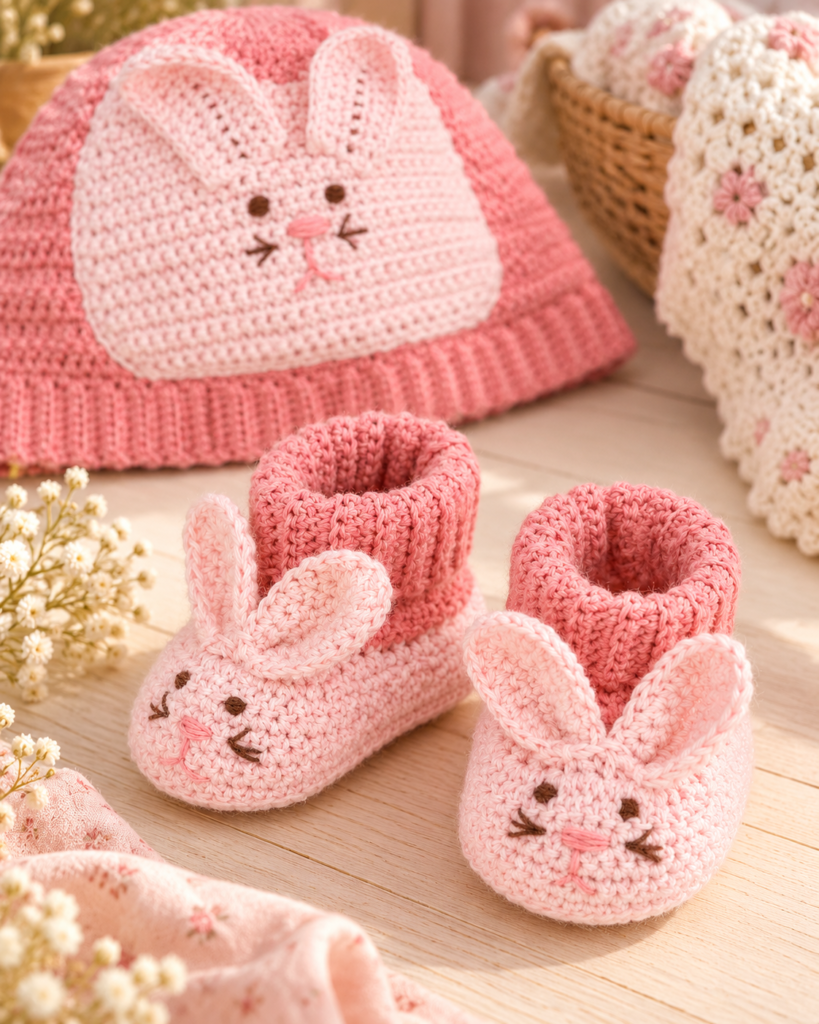
The set includes a cozy ribbed baby hat decorated with a large bunny face appliqué and dimensional ears, plus a matching pair of bunny booties with their own little faces and ears. The original version uses shades of coral, soft pink, and brown, giving the entire set a warm and playful look.
And although the finished pieces look detailed, the pattern itself is rated easy.
The hat and booties are designed to fit a baby around 12 months old. The finished hat has a circumference of approximately 17½ inches, while each bootie measures approximately 4½ inches long. ALC0238-025266M
One of the things I especially love about this pattern is that the same basic bunny theme is carried through both pieces without making them identical. The hat gets a large bunny appliqué, separate ears, embroidered facial features, and a curly tail, while the booties use smaller bunny ears and embroidered faces.
The photograph on page 1 shows how adorable the complete matching set looks when worn together, while page 2 provides a closer look at the finished hat and booties.
So gather your crochet thread, find a comfortable place to work, and let’s turn this original pattern into a complete handmade bunny set.
About the Crochet Bunny Hat and Booties
This pattern was designed by Michele Wilcox and uses Size 10 bamboo crochet thread.
But there is an important detail:
The thread is held double throughout the entire project.
That means you will crochet using two strands together as though they were one thicker strand.
The hat begins with a long strip of back-loop single crochet that creates the stretchy ribbed lower band.
Once the band is finished, you pivot and crochet across its long edge to form the upper portion of the hat.
The crown is gradually decreased until only a small opening remains.
The booties use a similar idea.
They begin with back-loop single crochet ribbing before the foot is shaped through a combination of single crochet, half double crochet, double crochet, increases, and decreases.
Separate bunny ears and embroidered faces transform the basic pieces into the adorable set shown in the photographs.
Pattern at a Glance
Project: Crochet bunny hat and matching booties
Skill Level: Easy
Size: 12 months
Hat Circumference: Approximately 17½”
Bootie Length: Approximately 4½”
Crochet Hook: 3.25 mm / U.S. D-3
Thread: Size 10 bamboo crochet thread held double
Main Techniques: Single crochet, back-loop crochet, half double crochet, double crochet, increases, decreases, embroidery and simple assembly
Why I Love This Crochet Baby Set
There are plenty of baby hat patterns and plenty of crochet bootie patterns, but making them as a coordinated set makes the finished project feel much more special.
The ribbing gives both pieces a soft, stretchy handmade texture.
Then the bunny details completely change their personality.
On the hat, the large contrasting appliqué creates the bunny’s head and body shape. Two dimensional ears extend upward, embroidered eyes and whiskers create the face, and a curly little tail finishes the design.
The booties repeat those recognizable details on a much smaller scale.
The original pattern uses a very sweet pink palette, but the designer also notes that the set would work beautifully in blue or another baby-friendly color. ALC0238-025266M
Materials You’ll Need
The original pattern uses Aunt Lydia’s Bamboo Crochet Thread, Size 10.
You will need:
Color A – Coral (275): 2 balls
Color B – Pure Pink (705): 1 ball
Color C – Twig (365): 1 ball
You will also need:
- 3.25 mm / U.S. D-3 crochet hook
- Yarn needle
- Stitch marker
- Scissors
Remember that the crochet thread is held double throughout.
The original thread is made from 100% viscose from bamboo.
Crochet Gauge
Because this is a fitted baby set, gauge matters.
Using a double strand of thread:
12 stitches = 2 inches
and
6 rows = 2 inches
in double crochet.
For single crochet:
14 stitches = 2 inches
and
12 rows = 2 inches
The source specifically recommends changing your hook size if necessary to achieve these measurements. ALC0238-025266M
Crochet Abbreviations
A, B, C – Yarn colors A, B and C
Ch – Chain
Dc – Double crochet
Hdc – Half double crochet
Sc – Single crochet
St/Sts – Stitch/Stitches
Tog – Together
Yo – Yarn over
Special Crochet Decreases
Two decreases are used repeatedly throughout the project.
Double Crochet Two Together – dc2tog
This decrease is worked across two stitches.
Yarn over and draw up a loop in the next stitch.
Yarn over and draw through two loops.
Repeat that sequence in the following stitch.
Yarn over and draw through all three remaining loops.
Two stitches have now been decreased into one.
Single Crochet Two Together – sc2tog
Draw up a loop in the next stitch.
Draw up another loop in the following stitch.
Yarn over and draw through all three loops on your hook.
How to Crochet the Bunny Hat
We will begin at the bottom edge of the hat using Color A.
Chain:
9
Hat Ribbing – Row 1
Beginning in the second chain from your hook:
Work 1 sc into each chain across.
Turn.
You should have:
8 sc
Hat Ribbing – Rows 2–106
Chain 1.
Work:
1 sc into the back loop of every sc across.
Turn.
Continue this same row until you have completed:
106 rows
Back-loop-only crochet creates the raised horizontal ribbing visible around the lower portion of the finished hat.
Once Row 106 is complete, don’t fasten off.
Instead, pivot your work so that you can crochet across the long edge of the ribbed strip.
Crochet the Top of the Bunny Hat
Top Row 1
Chain 1.
Work:
1 sc into the side of every ribbing row across.
Turn.
You should have:
106 sc
Top Row 2
Chain 2.
Skip the first sc.
Work 1 dc in the next sc and in every remaining sc across.
Turn.
You should have:
106 stitches
Top Rows 3, 5 and 7
Chain 2.
Skip the first dc.
Work 1 dc into each dc across.
Finish by working into the top of the chain 2.
Turn.
Top Row 4
Chain 2.
Skip the first dc.
Work:
dc in next 7 dc
dc2tog
Then repeat:
dc in next 8 dc, dc2tog
9 times.
Finish with:
dc in next 5 dc and in top of ch-2
Turn.
You should have:
96 stitches
Top Row 6
Chain 2.
Skip the first dc.
Work:
dc in next 13 dc, dc2tog
Then repeat:
dc in next 14 dc, dc2tog
5 times.
Turn.
You should have:
90 stitches
Top Row 8
Chain 2.
Skip the first dc.
Work:
dc in next 12 dc, dc2tog
Then repeat:
dc in next 13 dc, dc2tog
5 times.
Turn.
You should have:
84 stitches
Top Row 9
Chain 2.
Skip the first dc.
Work:
dc in next 11 dc, dc2tog
Then repeat:
dc in next 12 dc, dc2tog
5 times.
Turn.
You should have:
78 stitches
Hat Rows 10–18
Continue following the same decrease progression.
Decrease:
6 stitches on every row
while working one fewer stitch between each decrease on every successive row.
At the end of Row 18, you should have:
24 stitches
Hat Row 19
Chain 1.
Work:
sc2tog 12 times
Fasten off, but leave a long yarn tail for finishing.
Thread the tail through the remaining stitches.
Pull firmly to close the crown.
Fasten securely.
Finally, sew the back seam of the hat.
The source uses this gradual sequence to reduce the top from 106 stitches down to the closed crown. ALC0238-025266M
Crochet the Large Bunny Appliqué
Now we can create the bunny decoration that appears on the front of the hat.
Use Color B.
Chain:
25
Appliqué Row 1
Beginning in the second chain from your hook:
Work 1 sc in each chain across.
Turn.
You should have:
24 sc
Rows 2 and 3
Chain 1.
Work:
2 sc in first stitch
Single crochet across until the final stitch.
Work:
2 sc in last stitch
Turn.
After completing Row 3, you should have:
28 sc
Appliqué Rows 4–17
Chain 1.
Work 1 sc into every stitch across.
Turn.
Keep the stitch count even through these rows.
Appliqué Row 18
Chain 1.
Work:
1 sc in first stitch
sc2tog
Single crochet across until the final three stitches.
Work:
sc2tog
Then:
1 sc in final stitch
Turn.
You should have:
26 stitches
Row 19
Chain 1.
Single crochet across.
Turn.
Row 20
Repeat Row 18.
You should now have:
24 stitches
Rows 21–30
Continue alternating Rows 19 and 20.
This gradually narrows the bunny appliqué.
At the end of Row 30, you should have:
14 stitches
Rows 31 and 32
Repeat the decrease instructions from Row 18.
At the end, you should have:
10 stitches
Add the Appliqué Edging
With the right side facing you:
Chain 1.
Work single crochet evenly around the entire bunny appliqué.
Join with a slip stitch into the first sc.
Fasten off.
This edging creates a cleaner, more defined shape for the appliqué before it is attached to the hat.
Crochet the Large Bunny Ears
Make:
2 ears
using Color B.
Chain:
10
Ear Row 1
Beginning in the second chain from your hook:
Sc in the next 8 chains.
Work:
3 sc into the last chain
Now rotate the foundation chain.
Working along the opposite side:
Work 8 sc.
Turn.
You should have:
19 sc
Ear Row 2
Chain 1.
Work:
sc in first 8 stitches
Then:
2 sc in each of the next 3 stitches
Finish with:
sc in final 8 stitches
Turn.
You should have:
22 stitches
Ear Row 3
Chain 1.
Work:
sc in first 4 stitches
hdc in next 5 stitches
2 dc in each of next 4 stitches
hdc in next 5 stitches
sc in final 4 stitches
Fasten off.
Make the second ear exactly the same way.
Crochet the Bunny Tail
The little dimensional tail is one of my favorite details in this pattern.
Using Color B:
Repeat the following sequence 10 times:
Chain 8.
Beginning in the second chain from your hook:
Work:
3 sc into every chain across
These tightly packed stitches cause each chain to curl naturally.
Once you have made all ten curls, fasten off.
Gather the bottoms of all the curls together and pull them tightly into a compact bunny tail.
The page 2 instructions specifically describe drawing the bottoms of all ten curls together to form the tail. ALC0238-025266M
Embroider the Bunny Face
Using Color C, embroider:
- Satin-stitch eyes
- Straight-stitch whiskers
Using Color A, embroider:
- Satin-stitch nose
- Straight-stitch mouth
Arrange the ears, face details, and tail before permanently sewing everything in place.
Then sew all the bunny pieces securely onto the front of the hat.
How to Crochet the Bunny Booties
Now we can make the matching booties.
You will need to make:
2 booties
Begin with Color A.
Crochet the Bootie Ribbing
Chain:
19
Ribbing Row 1
Beginning in the second chain from your hook:
Work 1 sc into every chain across.
Turn.
You should have:
18 sc
Ribbing Rows 2–36
Chain 1.
Work:
1 sc into the back loop of every stitch across.
Turn.
Repeat through Row 36.
Just like the hat band, working in the back loops creates stretchy ribbing.
At the end of the final row, pivot so that you can work along the long edge.
Crochet the Foot
Foot Row 1
Chain 1.
Work:
1 sc into the side of each ribbing row across.
Turn.
You should have:
36 sc
Foot Row 2
Chain 2.
This beginning chain counts as a double crochet.
Skip the first sc.
Work:
dc in next 14 stitches
Then:
2 dc in each of the next 6 stitches
Finish with:
dc in next 15 stitches
You should have:
42 stitches
Fasten off.
Foot Row 3
Join Color B with a single crochet in the first dc.
Then work:
sc in next 15 dc
hdc in next 2 dc
2 dc in each of next 6 dc
hdc in next 2 dc
sc in next 15 dc
Finish with:
sc in top of ch-2
Turn.
You should have:
48 stitches
Foot Row 4
Chain 1.
Work:
sc in first stitch
2 sc in next stitch
sc in next 15 stitches
2 hdc in next stitch
2 dc in next stitch
Then repeat:
2 dc in next stitch, dc in next stitch
5 times.
Continue with:
2 dc in next stitch
2 hdc in next stitch
sc in next 15 stitches
2 sc in next stitch
sc in final stitch
Turn.
You should have:
59 stitches
Foot Rows 5–11
Chain 1.
Work 1 sc in every stitch across.
Turn.
Continue through Row 11.
At the end of Row 11, join the last row to the first sc with a slip stitch.
You are now ready to work in rounds.
Crochet and Shape the Sole
From this point forward, the rounds are worked continuously without joining.
Place a stitch marker in the first stitch of every round.
Move the marker upward as you work.
Round 12
Work:
sc in the back loop of every stitch around
This creates the turning ridge between the upper and the sole.
Round 13
Return to working through both loops.
Work:
sc2tog 3 times
sc in next 17 stitches
sc2tog 3 times
sc in next stitch
sc2tog 3 times
sc in next 17 stitches
sc2tog 3 times
You should have:
47 sc
Round 14
Single crochet around.
47 stitches
Round 15
Work:
sc2tog 3 times
sc in next 11 stitches
sc2tog 3 times
sc in next stitch
sc2tog 3 times
sc in next 11 stitches
sc2tog 3 times
You should have:
35 sc
Round 16
Single crochet around.
35 stitches
Round 17
Work:
sc2tog 3 times
sc in next 5 stitches
sc2tog 3 times
sc in next stitch
sc2tog 3 times
sc in next 5 stitches
sc2tog 3 times
You should have:
23 stitches
Round 18
Single crochet around.
Fasten off, leaving a long yarn tail.
Use this tail to:
Sew the sole seam lengthwise.
Then:
Sew the back seam.
The pattern’s sole section deliberately alternates decrease rounds with plain single-crochet rounds to bring the 59-stitch foot down to its final shape. ALC0238-025266M
Add the Decorative Bootie Edge
Look back at Row 11.
You should see the unused loops created by working Round 12 through the back loops.
Join Color B into any of these free loops.
Chain 1.
Work:
1 sc into every free loop around
Join.
Fasten off.
This produces the neat contrasting edge visible around the finished booties in the photograph on page 2.
Crochet the Small Bunny Ears for the Booties
The bootie ears are smaller than the hat ears.
Make 2 for each bootie.
Use Color B.
Chain:
7
Small Ear Row 1
Beginning in the second chain from your hook:
Sc in the next 5 chains.
Work:
3 sc into the final chain
Rotate the foundation chain.
Work:
5 sc along the opposite side
Turn.
You should have:
13 sc
Small Ear Row 2
Chain 1.
Work:
sc in first 5 stitches
2 sc in each of next 3 stitches
sc in final 5 stitches
Turn.
You should have:
16 stitches
Small Ear Row 3
Chain 1.
Work:
sc in first 3 stitches
hdc in next 3 stitches
2 dc in each of next 4 stitches
hdc in next 3 stitches
sc in final 3 stitches
You should have:
20 stitches
Fasten off.
Sew the ears onto the front of the bootie.
The complete small-ear shaping and placement are given near the end of page 2. ALC0238-025266M
Embroider the Bunny Faces on the Booties
Using Color C:
Embroider the eyes with satin stitch.
Add the whiskers using straight stitches.
Using Color A:
Create the nose with satin stitch.
Add the mouth with straight stitches.
Repeat the same details on the second bootie.
How to Assemble the Complete Bunny Set
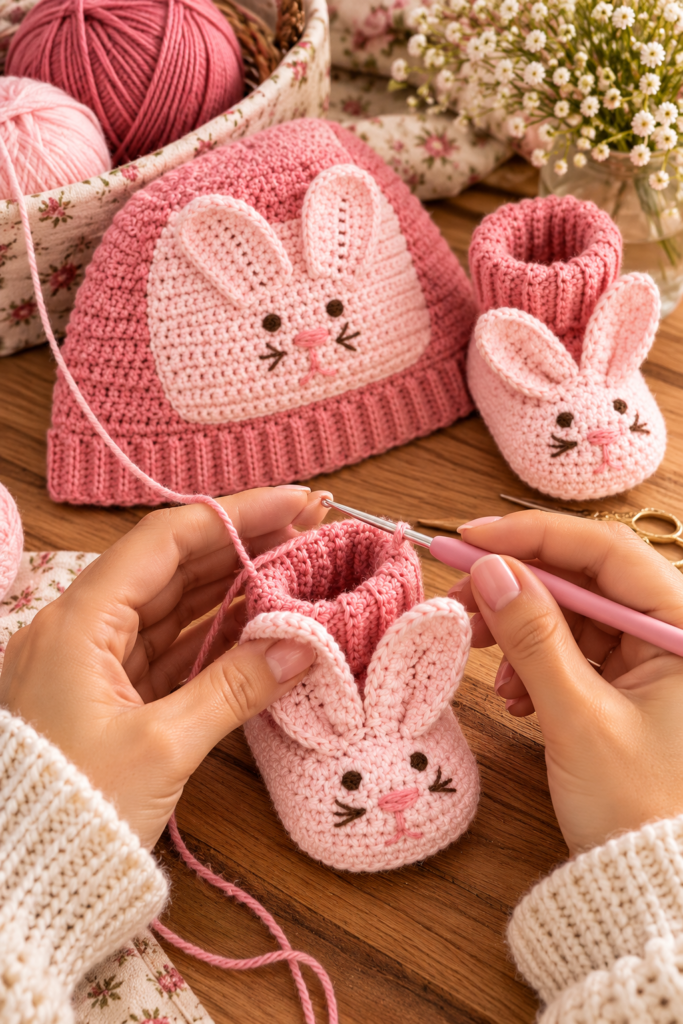
Once all the individual pieces are finished, take a little time with placement.
For the hat, position the large bunny appliqué centrally on the front.
Place the ears at the top of the bunny shape and arrange the curly tail as shown in the source photograph.
The face should sit comfortably within the upper section of the appliqué.
For each bootie, arrange the two smaller ears near the front before embroidering or finalizing the facial placement.
Look at the pieces from several angles.
Once everything looks balanced, sew the crochet pieces securely into place and weave in all loose ends.
Tips for a Beautiful Finished Bunny Set
Remember to Hold the Thread Double
This is probably the most important preparation detail in the entire pattern.
The original design uses two strands together throughout.
Using only one strand will significantly change the gauge and finished dimensions.
Check Your Gauge
Because the set is designed for a 12-month size, incorrect gauge can noticeably affect the fit.
Keep Your Ribbing Consistent
Both the hat and booties use back-loop single crochet.
Try to maintain the same tension throughout these long ribbed sections.
Use Stitch Markers on the Booties
Once you begin working the sole continuously, mark the first stitch.
Without a marker, it can become difficult to identify where one round ends and the next begins.
Don’t Stuff the Bunny Tail
The hat’s tail gets its dimension from the ten tightly crocheted curls gathered together.
No stuffing is required.
Embroider Before Securing Everything Permanently
Experiment with eye, nose, mouth, and whisker placement.
Tiny changes can give the bunny a noticeably different expression.
Frequently Asked Questions
What age does this crochet bunny set fit?
The pattern is designed for approximately:
12 months.
What is the finished hat circumference?
Approximately:
17½ inches.
How long are the finished booties?
Approximately:
4½ inches.
Is this crochet pattern beginner-friendly?
The original pattern is rated easy.
However, it helps to already understand single crochet, half double crochet, double crochet, increases, decreases, back-loop crochet, and basic sewing.
What crochet hook do I need?
Use:
3.25 mm / U.S. D-3
or another hook size needed to achieve gauge.
What thread is used?
The original pattern uses Aunt Lydia’s Bamboo Crochet Thread, Size 10.
Most importantly, it is held double throughout the project.
How many colors do I need?
The original design uses three:
A – Coral
B – Pure Pink
C – Twig
Can I use another color palette?
Yes.
The original pattern itself notes that while the sample is shown in pink, another color such as blue can also work beautifully.
How is the hat constructed?
The hat begins with a long ribbed strip worked in back-loop single crochet.
You then pivot and crochet along its long edge before decreasing the upper portion to create the crown.
Finally, the back seam is sewn closed.
How are the booties constructed?
Each bootie begins with a ribbed strip.
The foot is built from its long edge, and the piece eventually transitions from rows to continuous rounds.
Decreases shape the sole before the sole and back seams are sewn.
Are the hat and bootie ears the same size?
No.
The hat uses larger ears beginning with a chain of 10.
The booties use smaller ears beginning with a chain of 7.
How is the bunny tail made?
Make ten curly sections by chaining 8 and working 3 sc into each chain.
Gather all ten curls tightly at their bases to form the dimensional tail.
Final Thoughts
This is exactly the kind of crochet project where the personality seems to appear right at the end.
For quite a while, you’re simply making ribbing.
Row after row of back-loop single crochet slowly becomes the foundation of a hat or bootie.
Then the shaping begins.
The hat narrows toward the crown. The booties start curling into recognizable little shoes. The contrasting pink sections appear.
But then come the bunny details.
Two little ears.
A tiny embroidered nose.
A pair of eyes.
A few whiskers.
And on the hat, that wonderfully curly little tail.
Suddenly, what started as crochet thread and simple stitches has become an entire matching baby bunny outfit.
The original coral, pink, and brown palette is adorable, but I also love how easy it would be to give this pattern a completely different personality. Soft blue and cream could create a classic nursery look, while beige and white would make a beautifully neutral version.
Whichever colors you choose, keep your double strands together, pay attention to gauge, and take your time with the little embroidered details.
Those tiny finishing touches are what bring these bunnies to life.
Happy crocheting!