Spheal Amigurumi Crochet Pattern

Some crochet projects make me smile before I have even finished the first ball of yarn, and this little Spheal is definitely one of them.
There is just something irresistible about its perfectly round body, tiny ears, little feet, sweet face, and soft blue-and-cream coloring. It is one of those amigurumi projects that looks wonderfully detailed when finished but is actually created from a collection of fairly simple crochet shapes.
And that is one of the things I love most about amigurumi.
You begin with nothing more than yarn and a crochet hook. Then you make a circle. The circle grows into a ball. A few tiny pieces appear on your craft table, and suddenly, after some stuffing, sewing, and careful positioning, there is an adorable little character looking back at you.
This Spheal-inspired crochet project is especially fun because the main head and body are made as one large rounded piece. After that, you will crochet the mouth pieces, ears, feet, and three-part tail before adding the felt markings and embroidered nostrils.
The finished amigurumi is approximately 7.5 cm tall, or around 8 cm when the ears are included, although your exact size can vary depending on your yarn, hook, tension, and stuffing.
If you love small character-inspired crochet projects, grab your hook and your favorite blue yarn. We are going to make this little round friend one stitch at a time.
About This Spheal Amigurumi
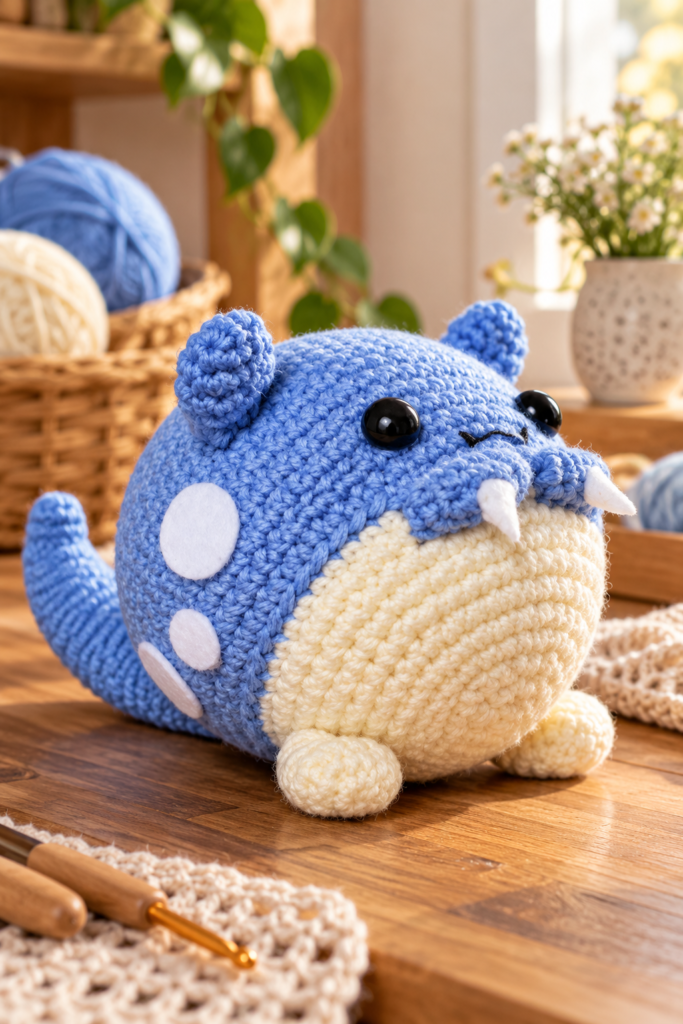
This project creates a small stuffed Spheal with a blue upper body, cream lower section, black safety eyes, white felt markings, little teeth, and embroidered facial details.
Unlike amigurumi patterns where the head and body are crocheted separately, the central shape of this project is made as one continuous piece.
This gives Spheal its wonderfully round silhouette while reducing the amount of sewing required.
The smaller pieces are made separately and attached afterward.
You will crochet:
- One main head and body
- Two mouth pieces
- Two ears
- Two feet
- Three tail sections
- White felt body markings
- Two small felt teeth
The final details are added with felt, fabric glue, and black embroidery floss.
Skill Level
I would describe this project as suitable for an advanced beginner or intermediate crocheter.
You should already be reasonably comfortable with:
- Magic rings
- Working in continuous rounds
- Crochet increases
- Crochet decreases
- Working in back loops only
- Crocheting around a foundation chain
- Changing yarn colors
- Stuffing amigurumi
- Sewing crochet pieces together
- Basic embroidery
None of these techniques is particularly complicated on its own.
The most important skills are careful counting and patient assembly.
What Size Will My Spheal Be?
The original project produces a Spheal approximately 7.5 cm tall, or roughly 8 cm including the ears.
The completed toy weighs approximately 40 grams when all of the materials are included.
Remember that amigurumi size is never completely fixed.
Using thicker yarn and a larger hook will generally produce a larger toy, while thinner yarn and a smaller hook will create a smaller version.
Your personal crochet tension can also make a noticeable difference.
Materials You Will Need
Before beginning, gather all your supplies.
Having everything beside you makes amigurumi projects much more relaxing because you can move from crocheting to stuffing and assembly without searching for supplies halfway through.
Yarn and Crochet Supplies
You will need:
- 2 mm crochet hook
- DK yarn in Bluebell or a similar soft blue
- DK yarn in Cream
- 9 mm black safety eyes
- White felt
- Fabric glue
- Black embroidery floss
- Polyester toy stuffing
- Pins
- Darning or tapestry needle
- Stitch markers
Scrap yarn can also be used as a simple stitch marker.
Choosing Your Yarn Colors
The main upper section of Spheal is crocheted in blue, while the lower section is cream.
If you cannot find the exact yarn shades, don’t worry.
Look for a cheerful medium or soft blue combined with a warm cream or off-white.
The contrast between these two colors is more important than matching an exact shade.
Crochet Abbreviations
This project uses UK crochet terminology.
ch – chain
dc – double crochet
st/sts – stitch/stitches
inc – work 2 dc into one stitch
dec – decrease
When decreasing, work through the front loops of the next two stitches, yarn over and pull through, then complete the stitch so that two stitches become one.
Before You Begin
Use a stitch marker to identify the first stitch of each round.
This is particularly important for the main body because you will be working through many continuous rounds.
Count your stitches regularly.
It is much easier to correct one missing increase after completing a single round than to discover the mistake ten rounds later.
How to Crochet the Spheal Head and Body
The main head and body create Spheal’s large rounded shape.
You will use both Bluebell and Cream yarn, beginning with Bluebell.
Start With Bluebell Yarn
Round 1
Work 6 dc into a magic ring.
6 stitches
Round 2
Increase in every stitch around.
12 stitches
Round 3
Repeat:
(dc, inc) × 6.
18 stitches
Round 4
Repeat:
(dc, inc, dc) × 6.
24 stitches
Round 5
Repeat:
(3 dc, inc) × 6.
30 stitches
Round 6
Repeat:
(dc, inc, 3 dc) × 6.
36 stitches
Round 7
Repeat:
(4 dc, inc, dc) × 6.
42 stitches
Round 8
Dc around.
42 stitches
Round 9
Repeat:
(6 dc, inc) × 6.
48 stitches
Round 10
Dc around.
48 stitches
Round 11
Repeat:
(7 dc, inc) × 6.
54 stitches
Round 12
Dc around.
54 stitches
Round 13
Repeat:
(8 dc, inc) × 6.
60 stitches
Rounds 14–20
Dc around each round.
60 stitches per round
At this stage, you should see the large rounded upper section beginning to take shape.
Round 21
Repeat:
(8 dc, dec) × 6.
54 stitches
Now change from Bluebell to Cream yarn.
Begin the Cream Section
Round 22
Work the entire round into the back loops only.
Dc around.
54 stitches
Working in the back loops creates an important structural line between the blue and cream sections.
Do not accidentally crochet through both loops on this round.
Round 23
Repeat:
(7 dc, dec) × 6.
48 stitches
Round 24
Dc around.
48 stitches
Round 25
Repeat:
(6 dc, dec) × 6.
42 stitches
Round 26
Dc around.
42 stitches
Round 27
Repeat:
(dc, dec, 4 dc) × 6.
36 stitches
Round 28
Repeat:
(3 dc, dec, dc) × 6.
30 stitches
Stop here before closing the body.
Add the Safety Eyes
The safety eyes are positioned in Round 19.
Place the two eyes approximately 8–9 stitches apart.
Before attaching the washers permanently, check the placement from the front.
This is one of those small steps that can completely change the personality of an amigurumi.
If the eyes are too close together, the face may look different from what you expected. Too far apart can have the same effect.
Once you are happy with the position, secure the eyes.
Now stuff the main body firmly with polyester toy filling.
Add small pieces of filling at a time and distribute them evenly so the finished shape remains beautifully round.
Close the Main Body
Round 29
Repeat:
(dec, 3 dc) × 6.
24 stitches
Round 30
Repeat:
(dc, dec, dc) × 6.
18 stitches
Round 31
Repeat:
(dec, dc) × 6.
12 stitches
Add any final stuffing needed before closing the opening.
Round 32
Decrease × 6.
Fasten off.
Thread the yarn tail onto your darning needle.
Insert the needle through the front loop of each remaining stitch and gently pull the yarn tight.
This closes the opening neatly.
Secure the yarn and weave in the loose end.
Crochet the Mouth Pieces
Use Bluebell yarn.
Make 2.
Chain 4.
You will crochet around both sides of the chain to create a small oval.
Round 1
Increase in the second chain from your hook.
Dc in the middle chain.
Increase in the final chain.
Continue around the opposite side of the foundation chain.
Increase, dc in the middle chain, and increase in the final chain.
10 stitches
Round 2
Repeat:
(inc, 3 dc, inc) × 2.
14 stitches
Fasten off and leave a long yarn tail for sewing.
Position the Mouth
Remember the unused front loops created when you worked Round 22 of the main body into the back loops only?
Those loops now become useful.
Pin the two crocheted mouth pieces evenly along the unworked front loops of Round 21/22 area, positioning them toward the front of the face beneath the eyes.
Do not sew immediately.
Look at the face from a short distance and make sure both pieces appear balanced.
Once you are happy with their placement, sew them securely into position.
Crochet the Ears
Use Bluebell yarn.
Make 2.
Round 1
Work 5 dc into a magic ring.
5 stitches
Round 2
Increase in every stitch around.
10 stitches
Rounds 3–4
Dc around.
10 stitches
Round 5
Repeat:
(3 dc, dec) × 2.
8 stitches
Fasten off and leave a long yarn tail.
The tail will be used later to sew each ear to the head.
Crochet the Feet
Use Cream yarn.
Make 2.
Round 1
Work 6 dc into a magic ring.
6 stitches
Round 2
Increase in every stitch.
12 stitches
Round 3
Dc around.
12 stitches
Round 4
Repeat:
(2 dc, dec) × 3.
9 stitches
Rounds 5–6
Dc around.
9 stitches
Fasten off and leave a long tail for sewing each foot onto the body.
Crochet the Three-Part Tail
The tail is one of the most interesting parts of this little project because it is made from three separate crochet pieces.
Use Bluebell yarn.
Make 3 identical pieces.
Start Each Tail Piece
Chain 4.
As with the mouth, you will crochet around both sides of the foundation chain to create an oval.
Round 1
Increase in the second chain from the hook.
Dc into the middle chain.
Increase in the final chain.
Continue around the opposite side.
Increase, dc in the middle chain, and increase in the final chain.
10 stitches
Round 2
Repeat:
(inc, 3 dc, inc) × 2.
14 stitches
Rounds 3–4
Dc around.
14 stitches
Round 5
Repeat:
(dec, 5 dc) × 2.
12 stitches
Rounds 6–7
Dc around.
12 stitches
Round 8
Repeat:
(dec, 4 dc) × 2.
10 stitches
Rounds 9–10
Dc around.
10 stitches
Round 11
Repeat:
(dec, 3 dc) × 2.
8 stitches
Rounds 12–13
Dc around.
8 stitches
Fasten off and leave a long yarn tail.
Repeat until you have three matching tail sections.
Assemble the Tail
Lay all three pieces flat next to one another.
Sew the sections together along their sides.
Once they are joined, lightly stuff the tail.
Avoid overstuffing it.
You want the finished tail to maintain its shape without becoming overly stiff or bulky.
Once everything looks right, attach the completed three-piece tail securely to the body.
Add the White Felt Markings
Now we get to one of my favorite stages: adding the small details that make the character instantly recognizable.
Cut six round pieces from white felt.
These should form two matching sets, with each set containing:
- 1 smaller circle
- 2 larger circles
Arrange one set on each side of Spheal’s body.
Before using glue, pin or gently position the felt pieces.
This gives you an opportunity to move them around until both sides look balanced.
Once you are satisfied with the placement, secure the felt pieces using fabric glue.
Make the Little Teeth
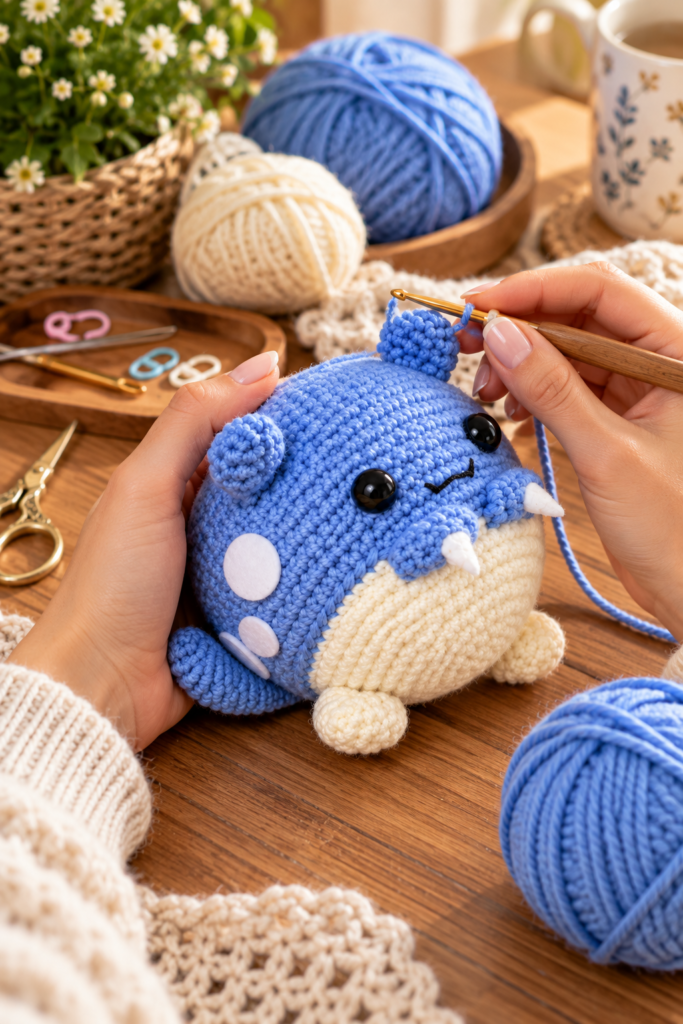
Cut two small triangles from white felt.
Shape each triangle into a tiny cone-like fang or tooth.
Position these around Spheal’s mouth.
Again, check the placement before gluing.
Once you are happy with the expression, attach the teeth securely with fabric glue.
Embroider the Nostrils
Thread a needle with black embroidery floss.
Use small stitches to create Spheal’s nostrils.
Keep the stitches relatively small and symmetrical.
The face already has several adorable features, so the nostrils should remain a subtle finishing detail rather than dominating the expression.
How to Assemble Your Spheal Amigurumi
Assembly can make a huge difference to the finished appearance of an amigurumi project.
Rather than immediately sewing each piece into place, arrange everything first.
Use pins to temporarily position:
- Both ears
- Both feet
- The mouth pieces
- The completed tail
- The white felt markings
- The felt teeth
Look at your Spheal from the front.
Then turn it sideways.
Finally, look at it from the back.
Small adjustments can dramatically improve the balance of the finished toy.
Once you are satisfied, sew all the crocheted pieces securely into position.
After the crocheted pieces are attached, glue the felt pieces in place.
Tips for a Beautiful Finished Spheal
Count Every Round
The main body reaches 60 stitches, so accidentally adding or missing one stitch can be easy.
Use a stitch marker and count frequently.
Stuff Gradually
Do not push one huge piece of polyester filling into the body.
Instead, use smaller pieces and distribute them around the interior.
This helps create the smooth, rounded shape that makes Spheal so cute.
Stuff the Main Body Firmly
The central body should be firm enough to maintain its spherical appearance.
However, stop before the stitches begin stretching apart.
Keep the Tail Lightly Stuffed
The three tail pieces should remain relatively soft.
Too much stuffing may make the finished tail bulky.
Pin Before Sewing
This may be the most useful assembly tip of all.
Pinning everything allows you to experiment with placement without having to undo stitches later.
Check Both Sides
Because Spheal has felt markings on both sides, turn the toy frequently while positioning them.
The two sides do not have to be absolutely mathematically identical, but they should feel visually balanced.
Frequently Asked Questions
Is this Spheal crochet project suitable for beginners?
It is most suitable for an advanced beginner who already understands basic amigurumi techniques.
If you know how to create a magic ring, increase, decrease, crochet continuously in rounds, and sew pieces together, you should be able to work through the project patiently.
What crochet hook size should I use?
The original project uses a 2 mm crochet hook.
A small hook helps create tight stitches that prevent polyester stuffing from showing between them.
What yarn weight should I use?
DK-weight yarn is used for this project.
The main colors are Bluebell and Cream.
How big is the finished Spheal?
The finished project is approximately 7.5 cm tall, or around 8 cm when the ears are included.
Your version may be slightly larger or smaller depending on yarn, hook size, tension, and stuffing.
Where should the eyes go?
Place the safety eyes in Round 19, approximately 8–9 stitches apart.
Always check their position before securing the washers permanently.
Why is Round 22 worked through the back loops?
Working through the back loops leaves the front loops available.
These loops help with the placement and attachment of the mouth pieces later.
Should I stuff the tail?
Yes, but only lightly.
The three tail sections are sewn together first and then lightly stuffed before the finished tail is attached to the body.
Can I make the amigurumi larger?
Yes.
Using thicker yarn with an appropriately larger crochet hook should produce a larger version while maintaining the same general proportions.
Can I embroider the eyes instead?
You can choose embroidered eyes rather than plastic safety eyes if needed.
This may be especially useful when creating toys intended for very young children.
Final Thoughts
And there it is—your own tiny crocheted Spheal.
This is exactly why I enjoy amigurumi so much.
For most of the project, you are concentrating on individual rounds and wondering whether that strange little crochet shape on your hook could possibly become the character you imagined.
Then the eyes go in.
You sew on the little mouth pieces.
The ears find their place.
You attach those tiny cream feet and the three-part tail.
Finally, the white markings, teeth, and embroidered nostrils are added—and suddenly everything comes together.
Don’t worry if your finished Spheal isn’t perfectly symmetrical.
Handmade crochet has its own personality. A slightly different ear angle, tiny variations between the feet, or subtle differences in your felt pieces simply show that your little character was genuinely made by hand.
Take your time during assembly, keep checking your placement before sewing or gluing, and most importantly, enjoy the process.
Sometimes the sweetest crochet projects aren’t the biggest or most complicated ones.
They’re the little round ones that somehow make you smile every time you see them.
Happy crocheting!