Little Witch Amigurumi free Pattern

There’s a particular charm to amigurumi dolls that goes beyond just cute — the tiny freckled face, the perfectly proportioned little hat, the wisps of yarn hair peeking out from underneath. The Little Witch Amigurumi, designed by punkt.rumi, captures all of that in a Halloween-ready package: a small crocheted witch doll with a gorgeous purple dress, a separately made pointed hat, long draping hair, and even a tiny handmade broom to complete the look.
As the pattern’s own introduction puts it, this is “a wonderful doll pattern” that’s “very difficult to make” but has “a very cute design” — even down to the freckles on her face. It’s a project that rewards patience: nothing here is technically advanced on a stitch-by-stitch basis, but the sheer number of small components (body, head, hair, hat, and broom) means this is a project best tackled over several sessions rather than in one sitting.
Below is the complete pattern, reorganized with clear headings for every component, along with the full abbreviations list, finishing details, and a set of tips and frequently asked questions to help you bring this little witch to life.
About This Pattern
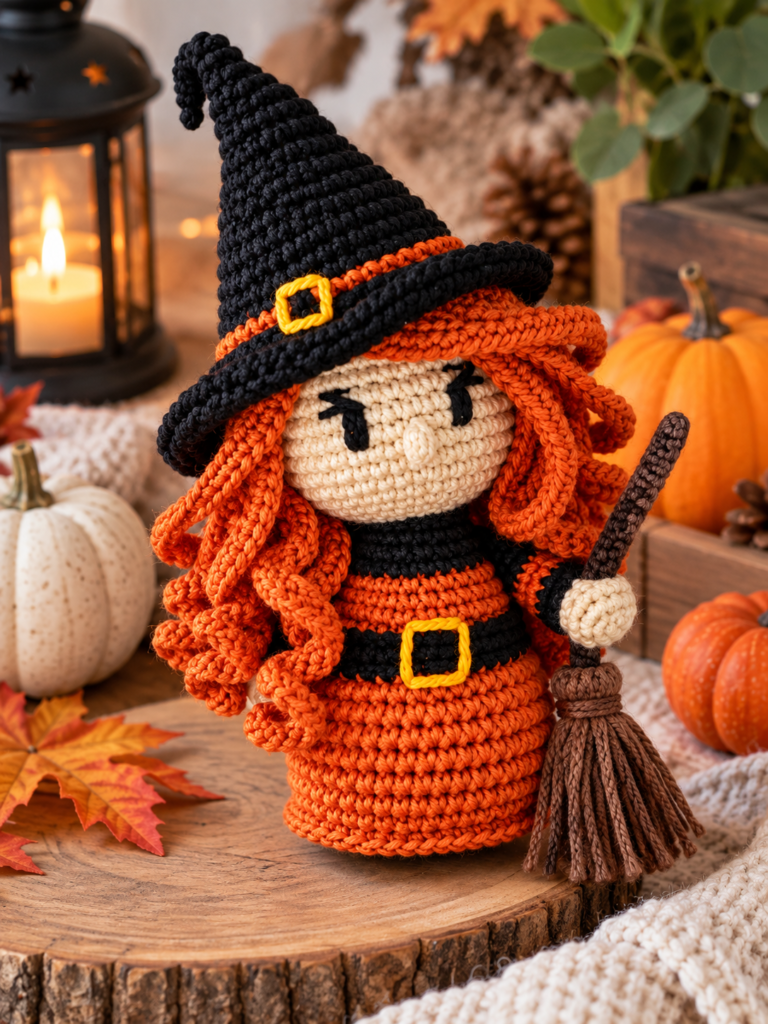
Designer: punkt.rumi
This amigurumi doll is worked using Ussi 100% cotton amigurumi thread in purple, black, gray, and light green for the main body, with a small amount of yellow reserved for the hat buckle and belt detail. The same thread is also used to embroider the doll’s facial features.
Abbreviations
| Abbreviation | Meaning |
|---|---|
| MR | Magic ring |
| sc | Single crochet |
| inc | Increase |
| dec | Decrease |
| BLO | Back loop only |
| FLO | Front loop only |
Crocheting the Body and Head
The body and head are worked as one continuous piece, starting from the bottom of the dress in purple, transitioning through a black belt stripe, back to purple for the skirt, and finally shifting to green and gray for the head and hairline. Because this piece changes color and shape so many times, it’s worth reading through the full round sequence once before you start, so you know roughly where each transition falls.
Purple (Starting at the Bottom)
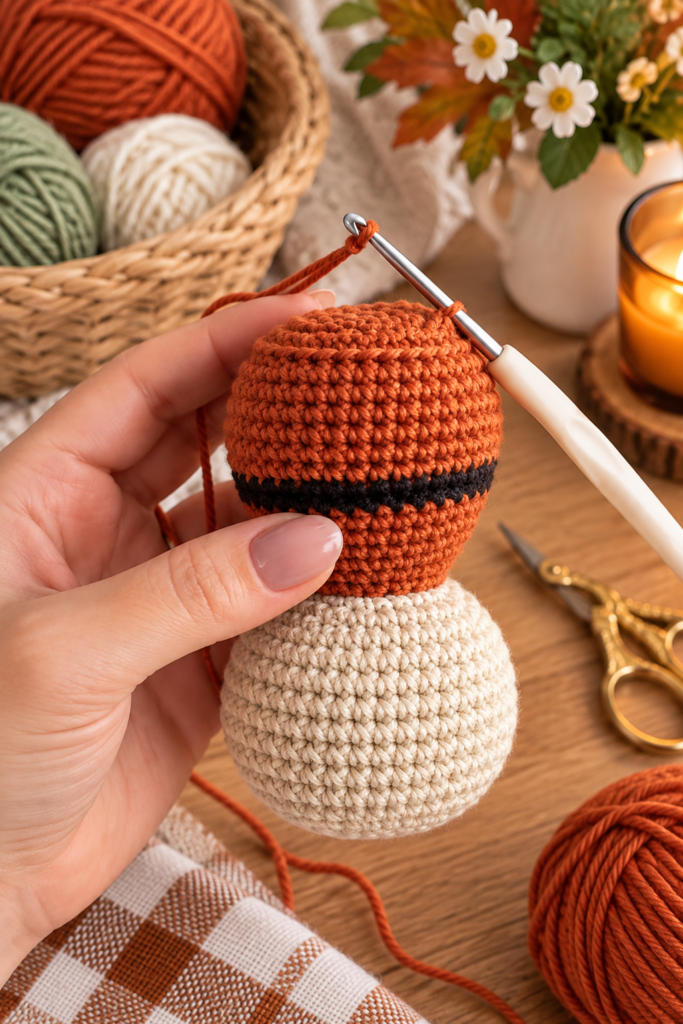
- Rnd 1: 6 sc into the magic ring.
- Rnd 2: 6 inc (12).
- Rnd 3: 1 sc, 1 inc (18).
- Rnd 4: 2 sc, 1 inc (24).
- Rnd 5: 3 sc, 1 inc (30).
- Rnd 6: 4 sc, 1 inc (36).
- Rnd 7: BLO 36 sc (36).
- Rnd 8: 36 sc (36).
- Rnd 9: 5 sc, 1 inc (42).
- Rnd 10–13: 42 sc (42).
Black (The Belt)
- Rnd 14: black 5 sc, 1 dec (36).
- Rnd 15: 36 sc (36).
Back to Purple
- Rnd 16: purple 36 sc (36).
- Rnd 17: 4 sc, 1 dec (30).
- Rnd 18–19: 30 sc (30).
- Rnd 20: 3 sc, 1 dec (24).
- Rnd 21: 24 sc (24).
- Rnd 22: 2 sc, 1 dec (18).
Green — Beginning of the Head
- Rnd 23: BLO 2 sc, 1 inc (24).
- Rnd 24: 3 sc, 1 inc (30).
- Rnd 25: 4 sc, 1 inc (36).
- Rnd 26: 5 sc, 1 inc (42).
- Rnd 27: 6 sc, 1 inc (48).
- Rnd 28–34: 48 sc (48).
- Rnd 35: 6 sc, 1 dec (42).
- Rnd 36: 5 sc, 1 dec (36).
Grey — Shaping the Top of the Head
- Rnd 37: grey 4 sc, 1 dec (30).
- Rnd 38: 3 sc, 1 dec (24).
- Rnd 39: 2 sc, 1 dec (18).
- Rnd 40: 1 sc, 1 dec (12).
- Rnd 41: 3 dec (9).
Fasten off.
Reinforcing the Base
To make the base firmer so the little witch (called “bruninha” by the designer) can stand on her own, take the yarn tails left over from Row 7 of the body and work: 5 sc and 1 inc to the end of the row. This extra reinforcement round at the base gives the doll a sturdier footing so she stands upright rather than tipping over.
Note: Start this reinforcement round upside down, so the stitches end up facing the right way once you flip the piece back over.
Making the Hair
The hair is worked directly onto the head using a chain-and-double-crochet technique, creating long draping strands rather than individual crocheted pieces that need to be sewn on afterward.
Color: Grey
Insert your needle or hook at the end of the green row, right at the beginning of the gray row on the head. Chain 25, then, working back from the second chain, make 1 medium double crochet into each chain. Skip two stitches and secure with a slip stitch. Chain 25 again and repeat this sequence all the way to the end of the row.
Without finishing off, resume a new sequence in the row directly under the head, forming a second row of hair. Continue this second row all the way to the end, then finish off.
This two-row approach — one row of long chained strands at the hairline, and a second row just beneath it — is what gives the finished doll her layered, draping hair effect rather than a flat single row of fringe.
Adding the Face
Embroider the eyes and nose directly onto the green head, positioning them as shown in the pattern’s reference photos. Simple straight stitches in black thread are used for the closed, slightly mischievous-looking eyes, with the nose worked as a small stitched detail beneath them — these tiny embroidered touches are exactly what the pattern’s introduction means when it praises how “even the freckles on the doll’s face look very pretty.”
Crocheting the Hat
The witch’s pointed hat is made as a completely separate piece, worked from the tip down to a wide brim, then finished with a decorative front strap detail.
Color: Black
- Rnd 1: 6 sc into the magic ring.
- Rnd 2–3: 6 sc (6).
- Rnd 4: 6 inc (12).
- Rnd 5–6: 12 sc (12).
- Rnd 7: 1 sc, 1 inc (18).
- Rnd 8–9: 18 sc (18).
- Rnd 10: 2 sc, 1 inc (24).
- Rnd 11: 24 sc (24).
- Rnd 12: 3 sc, 1 inc (30).
- Rnd 13–14: 30 sc (30).
- Rnd 15: 4 sc, 1 inc (36).
- Rnd 16: 36 sc (36).
- Rnd 17: 5 sc, 1 inc (42).
Switching to Purple for the Brim Trim
- Rnd 18: purple 42 sc (42).
Back to Black for the Wide Brim
- Rnd 19: FLO black 6 sc, 1 inc (48).
- Rnd 20: 7 sc, 1 inc (54).
- Rnd 21: 8 sc, 1 inc (60).
- Rnd 22: 9 sc, 1 inc (66).
- Rnd 23: 10 sc, 1 inc (72).
Fasten off.
Note: Work FLO (front loop only) for the front straps section only — the rest of the round is worked normally. This detail is what creates the small decorative strap sitting just above the hat’s purple trim band.
Making the Broom
No little witch is complete without her broom, and this version is made from a simple wooden toothpick wrapped and tufted with yarn rather than crocheted.
You’ll need a 10cm wooden toothpick.
- Wrap a length of dark brown thread around the toothpick to cover it, adding a few small dots of glue as you go to secure the wrapping in place.
- Once the glue is dry, cut several threads or lengths of acrylic yarn, each approximately 7cm long.
- Glue these strands to the tip of the toothpick, building up a bundle roughly the width of a finger.
- Tie the bundle about an inch from the end, then wait for the glue to fully dry.
- Turn the tied strands upside down and tie again — this second tie is what gives the bristles a more realistic, broom-like flare.
- Trim the strands neatly to finish the shape.
Finishing
Once the body, head, hair, and hat are complete, and the broom is assembled, your little witch amigurumi is finished. As the pattern cheerfully notes: “Congratulations, you have completed the amigurumi pattern.”
Tips for Crocheting the Little Witch Amigurumi
- Keep track of your color transitions. Because the body, head, and hat all shift between multiple colors mid-piece (purple to black to purple to green to grey for the body; black to purple to black for the hat), it helps to read a few rounds ahead before you start so you’re never caught off guard by a color change mid-round.
- Don’t skip the base reinforcement step. The extra round worked into the leftover tails from Row 7 of the body is what keeps the finished doll stable enough to stand upright on her own — it’s an easy detail to overlook since it happens after the main body is already complete.
- Work the hair in one continuous session if possible. Since the two rows of hair are worked without fastening off between them, it’s easier to keep your tension and chain lengths consistent if you complete both rows in one sitting rather than setting the piece down partway through.
- Be precise with the FLO instruction on the hat brim. The note specifying that FLO applies only to the front straps, not the entire round, is an easy detail to misread. Double-check which stitches are front-loop-only before working Round 19 of the hat.
- Let the broom’s glue fully dry between steps. The broom instructions call for at least two separate drying pauses — after wrapping the handle, and after the first tie of the bristle bundle. Rushing this step can cause the wrapped thread or bristles to shift out of place before they set.
Frequently Asked Questions
Who designed this pattern? The Little Witch Amigurumi was designed by punkt.rumi and shared as a free pattern.
What materials do I need? The pattern calls for Ussi 100% cotton amigurumi thread in purple, black, gray, and light green for the main doll, plus a small amount of yellow for the hat buckle and belt detail. The same thread doubles as embroidery thread for the facial features.
Is this pattern beginner-friendly? The pattern’s own introduction describes it as “very difficult to make,” despite using fairly standard amigurumi techniques (magic ring, single crochet, increases, decreases, and front/back loop only stitches). The difficulty comes more from the number of separate pieces and color transitions involved than from any single advanced stitch.
How is the hair made — is it crocheted separately and sewn on? No. The hair is worked directly onto the head itself, using chains and double crochet stitches worked right into the gray hairline round, rather than being crocheted as a separate piece and attached afterward.
What does “FLO only the front straps” mean on the hat? It means that during Round 19 of the hat, only the small strap section at the front should be worked into the front loop only; the rest of that round is worked through both loops as normal. This creates a subtle raised strap detail rather than affecting the whole brim.
How is the broom made — is it crocheted? No, the broom is not crocheted at all. It’s made by wrapping yarn around a wooden toothpick for the handle, then gluing and tying loose lengths of yarn to one end to form the bristles.
Why does the pattern mention making the base “firmer”? Because amigurumi dolls like this one are meant to stand upright on their own, the pattern includes an extra reinforcement round worked into leftover yarn tails from early in the body, which adds structure to the base so the finished doll doesn’t tip over.
Can I substitute a different yarn or thread weight? You can, though keep in mind the pattern was designed using 100% cotton amigurumi thread, which tends to produce a firmer, more defined stitch than a soft acrylic yarn — a substitution may change the finished doll’s size and how well she holds her shape.
A Little Witch Worth the Effort
Between her tiny stitched freckles, the draping two-row hair, and the fully separate hat with its own decorative strap, the Little Witch Amigurumi is a genuine labor of love — the kind of project that rewards careful, patient stitching with a doll full of personality. Add the hand-tied yarn broom, and you’ve got a complete Halloween character small enough to sit on a shelf, hang from a bag, or gift to someone who’ll appreciate just how much detail went into her.
For more free amigurumi and crochet patterns like this one, be sure to check out Lovelycraft.com.