Acorn & Pinecone Knit Ornaments
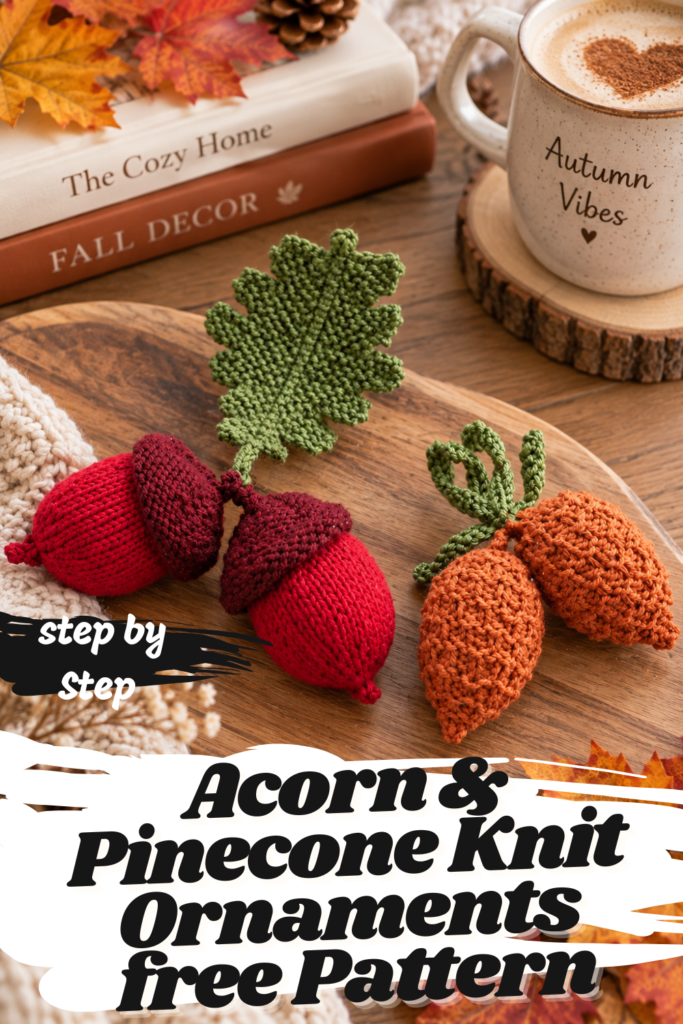
Not every holiday ornament needs to sparkle. Some of the most striking trees lean into a quieter, more natural palette — deep burgundy, rust, and sage green, textured like something gathered on a walk through the woods rather than pulled off a store shelf. The Acorn & Pinecone Knit Ornaments from Red Heart deliver exactly that look, and they do it in miniature: a cluster of plump, stuffed knit acorns with curled caps, a soft oak leaf, a ridged pinecone, and a tuft of coiled pine needles, all small enough to tuck into the branches of a tree or gather into a garland.
Rated Easy, this pattern is a wonderful introduction to knitting in the round on double-pointed needles, along with a handful of small techniques — I-cord, short-row style partial knitting for the leaf, and simple stuffed shaping — that show up constantly in amigurumi-style knitting. Because each individual piece is small, this is also a great “one more before bed” project; you can realistically finish an acorn or a pinecone in a single sitting once you’re familiar with the pattern.
Below is the complete pattern for all four pieces — Acorn Body, Acorn Cap, Oak Leaf, and Pinecone with its Pine Needles — reorganized with clear headings, along with tips for keeping track of the many short rounds and a set of frequently asked questions.
Finished Measurements
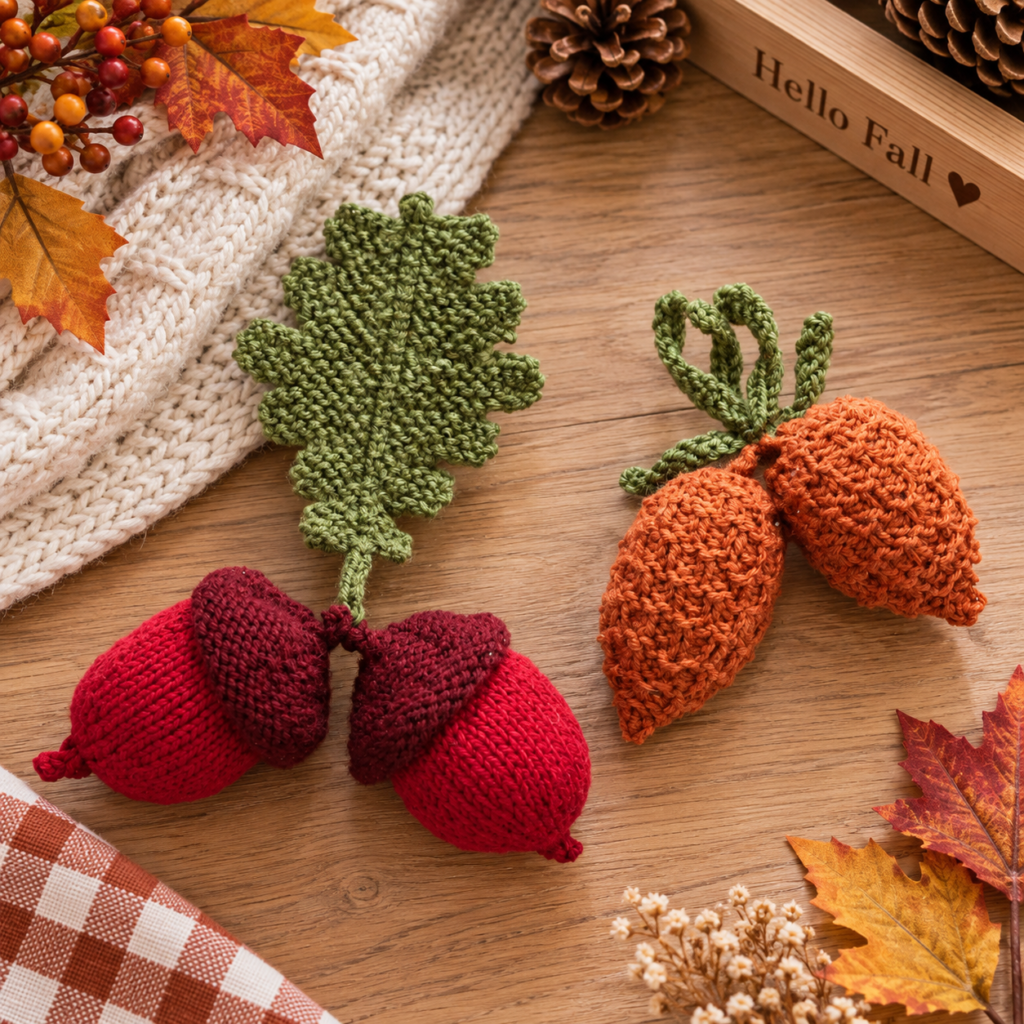
- Acorn: approximately 3″ [7.5 cm] in diameter x 4½” [11.5 cm] tall, including the stem
- Pinecone: approximately 2¾” [7 cm] in diameter x 3½” [9 cm] tall
Gauge
- 20 sts and 26 rows = 4″ [10 cm] in stocking stitch
Because these pieces are so small, gauge affects finished size more than fit — but matching it will help each ornament come out proportionate to its companions, especially if you’re making a full cluster for one tree.
What You’ll Need
Yarn: Red Heart® Super Saver® (7 oz/198 g; 364 yds/333 m)
| Color | Use | Amount |
|---|---|---|
| Contrast A — Claret (0378) | 1 ball | 15 yds/14 m per Acorn |
| Contrast B — Burgundy (0376) | 1 ball | 13 yds/12 m per Acorn |
| Contrast C — Sienna (0364) | 1 ball | 15 yds/14 m per Pinecone |
| Contrast D — Med Thyme (0406) | 1 ball | 30 yds/28 m per Oak Leaf; 10 yds/9 m per Pine Needles |
Note: One ball each of Colors A, B, and D will make 24 Acorns with 12 Oak Leaves. One ball each of Colors C and D will make 24 Pinecones with 12 Pine Needles — in other words, a single set of yarn goes a very long way if you’re making a whole tree’s worth of ornaments.
Needles and notions:
- Set of 4, size U.S. 6 (4mm) Susan Bates® Silvalume® double-pointed knitting needles, or the size needed to obtain gauge
- Susan Bates® stitch marker
- Susan Bates® yarn needle
- Fiberfill stuffing
Abbreviations Reference
| Abbreviation | Meaning |
|---|---|
| Alt | Alternate(ing) |
| Approx | Approximately |
| Beg | Beginning |
| K | Knit |
| K2tog | Knit next 2 stitches together |
| Kfb | Increase 1 stitch by knitting into the front and back of the next stitch |
| M1 | Make 1 stitch by picking up the horizontal loop lying before the next stitch and knitting into the back of the loop |
| M1P | Make 1 stitch by picking up the horizontal loop lying before the next stitch and purling into the back of the loop |
| P | Purl |
| P2tog | Purl next 2 stitches together |
| PM | Place marker |
| Psso | Pass the slipped stitch over |
| Rem | Remaining(s) |
| Rep | Repeat |
| Rnd(s) | Round(s) |
| RS | Right side |
| Sl1 | Slip next stitch knitwise |
| Sl1Pwyif | Slip next stitch purlwise with yarn in front of work |
| St(s) | Stitch(es) |
| Tog | Together |
Knitting the Acorn
Each acorn is made from two separate pieces — a stuffed body and a curled cap — that are worked independently and then sewn together.
Acorn Body
Begin at the bottom point of the acorn. With a pair of double-pointed needles and Color B, cast on 3 sts.
I-cord: *K3. Do not turn. Slide the stitches back to the opposite end of the needle. Bring the yarn behind the work to the first stitch, pulling the yarn tightly at the first stitch. Repeat from * once more. This short I-cord forms the pointed tip at the base of the acorn.
- 1st rnd: (Kfb) 3 times — 6 sts. Divide the stitches onto 3 needles (2 sts on each needle). Place a marker and join in the round.
- 2nd to 4th rnds: Knit.
- 5th rnd: (K1, M1) 6 times — 12 sts.
- 6th and alternate rnds: Knit.
- 7th rnd: (K2, M1) 6 times — 18 sts.
- 9th rnd: (K3, M1) 6 times — 24 sts.
- 11th rnd: (K4, M1) 6 times — 30 sts.
- 12th to 14th rnds: Knit.
- 15th rnd: (K10, M1) 3 times — 33 sts.
- 16th to 21st rnds: Knit.
- 22nd rnd: (K9, K2tog) 3 times — 30 sts.
- 23rd and alternate rnds: Knit.
At this point, stuff the acorn.
- 24th rnd: (K3, K2tog) 6 times — 24 sts.
- 26th rnd: (K2, K2tog) 6 times — 18 sts.
- 28th rnd: (K1, K2tog) 6 times — 12 sts.
Finish stuffing at this point, adding any additional fill needed before the opening closes further.
- 29th rnd: (K2tog) 6 times — 6 sts. Break the yarn, leaving a long end. Thread the end through the remaining stitches, pull tightly, and fasten securely.
Acorn Cap
Begin at the top of the cap. With a pair of double-pointed needles and Color A, cast on 3 sts.
I-cord: *K3. Do not turn. Slide the stitches to the opposite end of the needle. Bring the yarn behind the work to the first stitch, pulling the yarn tightly at the first stitch. Repeat from * twice more.
- 1st rnd: (Kfb) 3 times — 6 sts. Divide the stitches onto 3 needles (2 sts on each needle). Place a marker and join in the round.
- 2nd rnd: Knit.
- 3rd rnd: (K1, M1) 6 times — 12 sts.
- 4th and alternate rnds: Knit.
- 5th rnd: (K2, M1) 6 times — 18 sts.
- 7th rnd: (K3, M1) 6 times — 24 sts.
- 9th rnd: (K4, M1) 6 times — 30 sts.
- 11th rnd: (K5, M1) 6 times — 36 sts.
- 12th to 16th rnds: Knit. Cast off, leaving a long tail.
Turn the cap inside out so the reverse stocking stitch becomes the right side — this is what gives the cap its textured, bark-like appearance.
Finishing the Acorn
Sew the Acorn Cap to the Acorn Body using a running stitch, working in a loose spiral. Leave the 12th to 16th rounds of the Acorn Cap unsewn at the bottom edge so that section can curl under naturally, giving the cap its realistic, slightly ruffled edge.
Making an Acorn Cluster
To join two acorns into a cluster (as shown in the photo), simply sew the I-cord tips of two Acorn Caps together at their base.
Knitting the Oak Leaf
The oak leaf is worked as a single flat piece using a combination of partial rows, casting on and off along the edges to create its distinctive lobed silhouette. It begins with a short I-cord stem before the leaf shaping starts.
The Stem
Begin at the stem. With a pair of double-pointed needles and Color D, cast on 3 sts.
I-cord: *K3. Do not turn. Slide the stitches to the opposite end of the needle. Bring the yarn behind the work to the first stitch, pulling the yarn tightly at the first stitch. Repeat from * 7 times more.
The Leaf
- 1st row (RS): Cast on 3 sts. K4 (including the cast-on sts). P1, K1 — 6 sts.
- 2nd row: Cast on 3 sts. K4 (including the cast-on sts). Sl1Pwyif, K4 — 9 sts.
- 3rd row: K4, P1, K4.
- 4th row: K4, Sl1Pwyif, K4.
- 5th row: Cast off 2 sts. K2 (including the st on the needle after the cast-off). P1, K4 — 7 sts.
- 6th row: Cast off 2 sts. K2 (including the st on the needle after the cast-off). Sl1Pwyif, K2 — 5 sts.
- 7th row: Cast on 3 sts. K5 (including the cast-on sts). P1, K2 — 8 sts.
- 8th row: Cast on 3 sts. K5 (including the cast-on sts). Sl1Pwyif, K5 — 11 sts.
- 9th row: K5, P1, K5.
- 10th row: K5, Sl1Pwyif, K5.
- 11th row: Cast off 2 sts. K3 (including the st on the needle after the cast-off). P1, K5 — 9 sts.
- 12th row: Cast off 2 sts. K3 (including the st on the needle after the cast-off). Sl1Pwyif, K3 — 7 sts.
- 13th row: Cast on 4 sts. K7 (including the cast-on sts). P1, K3 — 11 sts.
- 14th row: Cast on 4 sts. K7 (including the cast-on sts). Sl1Pwyif, K7 — 15 sts.
- 15th row: K7, P1, K7.
- 16th row: K7, Sl1Pwyif, K7.
- 17th row: Cast off 2 sts. K5 (including the st on the needle after the cast-off). P1, K7 — 13 sts.
- 18th row: Cast off 2 sts. K5 (including the st on the needle after the cast-off). Sl1Pwyif, K5 — 11 sts.
- 19th row: Cast on 4 sts. K9 (including the cast-on sts). P1, K5 — 15 sts.
- 20th row: Cast on 4 sts. K9 (including the cast-on sts). Sl1Pwyif, K9 — 19 sts.
- 21st row: K9, P1, K9.
- 22nd row: K9, Sl1Pwyif, K9.
- 23rd row: Cast off 4 sts. K5 (including the st on the needle after the cast-off). P1, K9 — 15 sts.
- 24th row: Cast off 4 sts. K5 (including the st on the needle after the cast-off). Sl1Pwyif, K5 — 11 sts.
- 25th row: Cast on 2 sts. K7 (including the cast-on sts). P1, K5 — 13 sts.
- 26th row: Cast on 2 sts. K7 (including the cast-on sts). Sl1Pwyif, K7 — 15 sts.
- 27th and 28th rows: Work as the 15th and 16th rows.
- 29th row: Cast off 4 sts. K3 (including the st on the needle after the cast-off). P1, K7 — 11 sts.
- 30th row: Cast off 4 sts. K3 (including the st on the needle after the cast-off). Sl1Pwyif, K3 — 7 sts.
- 31st row: Cast on 2 sts. K5 (including the cast-on sts). P1, K3 — 9 sts.
- 32nd row: Cast on 2 sts. K5 (including the cast-on sts). Sl1Pwyif, K5 — 11 sts.
- 33rd and 34th rows: Work as the 9th and 10th rows.
- 35th row: Cast off 4 sts. K1 (including the st on the needle after the cast-off). P1, K5 — 7 sts.
- 36th row: Cast off 4 sts. K1 (including the st on the needle after the cast-off). Sl1Pwyif, K1 — 3 sts.
- 37th row: Sl1, K2tog, psso. Fasten off.
This long sequence of casting stitches on and off along alternating edges is what creates the leaf’s characteristic scalloped, lobed edges — each cast-on/cast-off pair forms one rounded lobe of the oak leaf shape.
Knitting the Pinecone
The pinecone body is worked in the round on double-pointed needles, using an alternating knit-purl texture to create its distinctive ridged, scaled surface.
With a pair of double-pointed needles and Color C, cast on 3 sts.
- 1st rnd: (Kfb) 3 times — 6 sts. Divide the stitches onto 3 needles (2 sts on each needle). Join in the round.
- 2nd and 3rd rnds: (K1, P1) 3 times.
- 4th rnd: (P1, M1P) 6 times — 12 sts.
- 5th and 6th rnds: (K1, P1) 6 times.
- 7th rnd: (P2, M1P) 6 times — 18 sts.
- 8th and 9th rnds: (K1, P1) 9 times.
- 11th rnd: (P3, M1P) 6 times — 24 sts.
- 12th and 13th rnds: (K1, P1) 12 times.
- 14th rnd: Purl.
- 15th and 16th rnds: (P1, K1) 12 times.
- 17th rnd: Purl.
Repeat the 12th to 17th rounds once more, then work the 12th to 16th rounds once.
At this point, stuff the pinecone.
- Next rnd: (P2, P2tog) 6 times — 18 sts.
- Next 2 rnds: (K1, P1) 9 times.
- Next rnd: (P1, P2tog) 6 times — 12 sts.
- Next 2 rnds: (K1, P1) 6 times.
Finish stuffing at this point.
- Next rnd: (P2tog) 6 times — 6 sts.
- Next 2 rnds: (K1, P1) 3 times. Break the yarn, leaving a long end. Thread the end through the remaining 6 sts, pull tightly, and fasten securely.
Making the Pine Needles
With Color D and a pair of needles, using the 2-needle cast-on method: *cast on 10 sts, then cast off 10 sts; repeat from * 5 times more. Fasten off.
Coil the resulting strip into a small cluster and fasten it securely to a pair of pinecones, positioned as shown in the reference photo — the repeated cast-on/cast-off sequence creates a set of thin, needle-like loops that bundle together into a realistic tuft.
Tips for Knitting the Acorn & Pinecone Ornaments
- Use a removable stitch marker for the round divisions. Since both the acorn body and cap divide stitches across 3 double-pointed needles right from the start, marking the true beginning of the round clearly will help you keep the increase and decrease rounds lined up correctly as the stitch count climbs.
- Don’t skip the “finish stuffing” step. Several pieces call for an initial round of stuffing followed by additional stuffing a few rounds later, right before the opening closes further. Adding fill at both points, rather than trying to stuff everything at once through a small opening, gives a firmer, more evenly rounded shape.
- Take the Oak Leaf instructions one row at a time. With 37 rows of alternating cast-ons and cast-offs, it’s easy to lose your place. Working with a row counter, and double-checking your stitch count against the number given at the end of each row, will help you catch a missed cast-on or cast-off before it compounds over several rows.
- Turn the Acorn Cap inside out deliberately. The pattern specifically calls for turning the cap inside out after casting off, so the reverse stocking stitch becomes the visible right side — this textured surface is what gives the finished cap its bark-like appearance, so don’t skip this step even though it feels counterintuitive.
- Leave the bottom edge of the cap unsewn as instructed. When attaching the Acorn Cap to the Acorn Body, the 12th to 16th rounds of the cap are deliberately left unsewn at the bottom edge so they can curl under naturally. Sewing this section down flat will flatten out a detail the designer built in on purpose.
Frequently Asked Questions
What skill level is required for this pattern? This pattern is rated Easy, though it does assume comfort with knitting in the round on double-pointed needles, along with basic increases (Kfb, M1, M1P) and decreases (K2tog, P2tog). The Oak Leaf’s repeated casting on and off is the most involved technique in the set, but it follows a clear, repeating logic once you get a few rows in.
How much yarn do I actually need? Because the yardage requirements are so small per piece, a single ball of each contrast color goes remarkably far: one ball each of Colors A, B, and D makes 24 acorns with 12 oak leaves, and one ball each of Colors C and D makes 24 pinecones with 12 sets of pine needles.
Why does the acorn get stuffed in two stages? Stuffing partway through (once the body has narrowed a bit) and then again near the very end helps you get fill into the shape evenly, since trying to push stuffing through a nearly closed opening at the end alone tends to leave gaps or an unevenly rounded shape.
What is I-cord, and why does this pattern use it so often? I-cord is a small, self-contained knitted tube made by knitting a few stitches, then sliding them back to the other end of the double-pointed needle and pulling the yarn tightly behind the work before knitting again. This pattern uses short I-cord sections to form the tapered stems and tips on the acorn body, acorn cap, and oak leaf.
Can I make just acorns, or just pinecones, without making the full set? Yes. Each ornament type — Acorn Body and Cap, Oak Leaf, and Pinecone with Pine Needles — is written as its own self-contained section, so you can make any combination you like depending on how many of each you want for your tree.
How are the pine needles attached to the pinecone? The pine needle piece is a long strip of repeated 10-stitch cast-on/cast-off loops, which gets coiled into a small cluster by hand and then stitched securely to a pair of finished pinecones, positioned as shown in the pattern’s photo.
Do I need a full set of 4 double-pointed needles for such small pieces? Yes — the pattern specifically calls for a set of 4 U.S. size 6 (4mm) double-pointed needles, since both the acorn and pinecone divide their stitches across 3 needles while the 4th is used to knit each round, which is standard practice for small tube- and dome-shaped knits.
What’s the difference between the Acorn Cap and the Oak Leaf’s use of Color D? Color D (Med Thyme) is shared between both the Oak Leaf and the Pine Needles, but not the Acorn Cap, which uses Color A instead. Only 30 yds of Color D are needed per Oak Leaf, and just 10 yds per set of Pine Needles, which is part of why a single ball stretches across so many finished pieces.
Ornaments Worth Keeping Season After Season
There’s something satisfying about a holiday decoration that doesn’t rely on glitter or glass to catch the eye — just texture, shape, and a warm, earthy color palette. Between the tapered acorn caps, the lobed oak leaf, and the ridged, gently rounded pinecone, this set captures the quiet detail of a woodland floor in knit form, small enough to make in an evening and sturdy enough to bring out year after year.
Whether you knit a single cluster to hang near the front door or a whole tree’s worth using just a few balls of yarn, the Acorn & Pinecone Knit Ornaments prove that the smallest projects can carry some of the biggest handmade charm.