Let’s Talk Turkey Silverware Holder
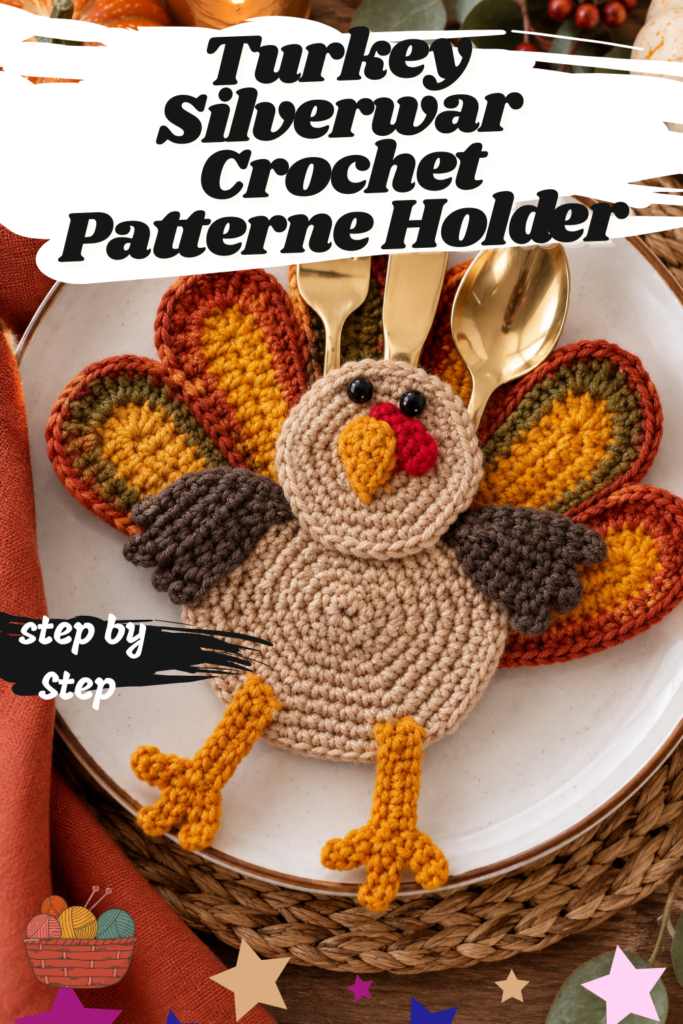
There’s a particular kind of hosting detail that makes guests actually stop and comment before they even sit down. This is one of them. The Let’s Talk Turkey Silverware Holder is exactly what it sounds like — a plump little crocheted turkey with a fanned tail of layered gold, carrot, and purple feathers, charcoal wings, a bright orange beak with a red wattle, and two skinny legs dangling below. But here’s the clever part: the body is worked as two pieces sewn together with an opening left at the top, creating a pocket you slip the silverware right into. Set one at each place setting, and your Thanksgiving table instantly has personality.
Designed by Michele Wilcox, this project is rated easy, and it genuinely is — everything here is built from basic single crochet, half double crochet, and double crochet, with the visual impact coming entirely from the layered color changes in the tail feathers and the thoughtful assembly rather than from any difficult technique.
Let’s talk turkey.
Why This Project Is Worth Making
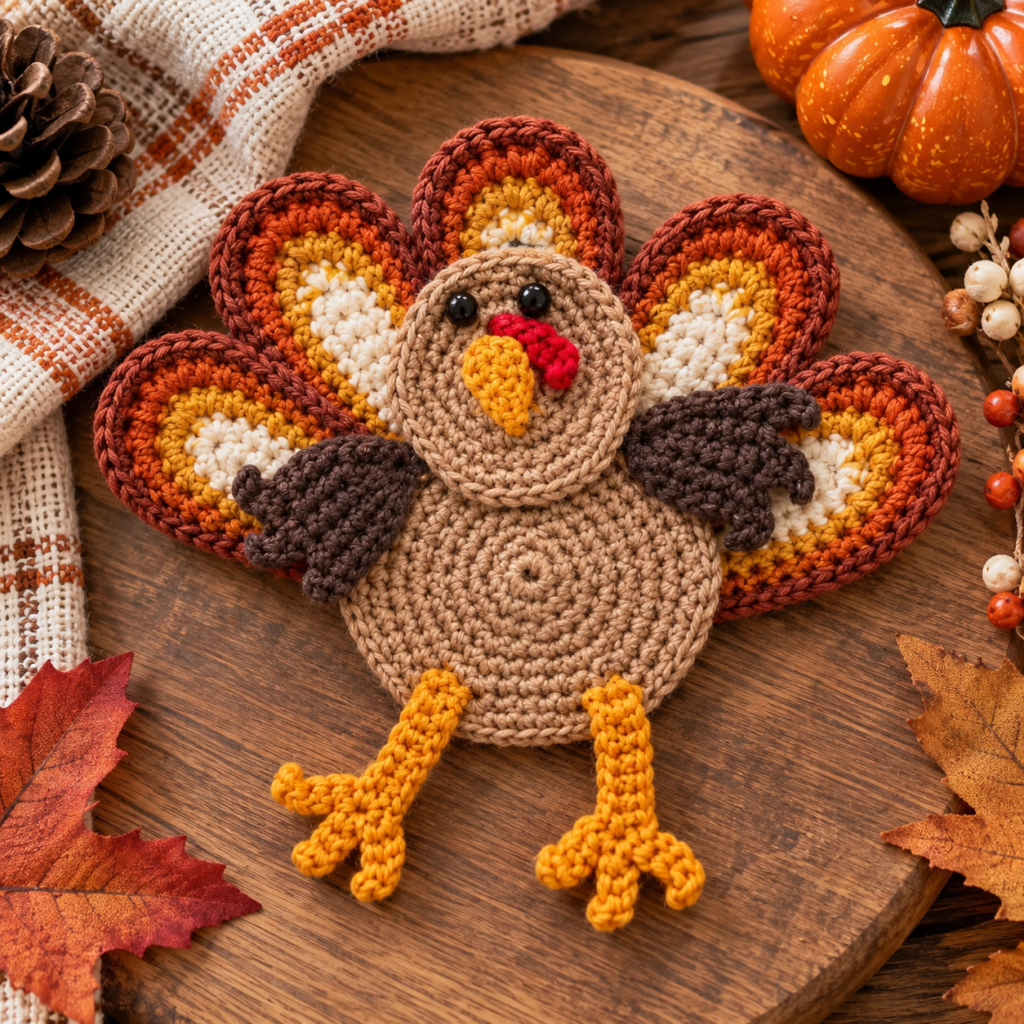
What makes this so satisfying is how much character comes from stacking simple shapes. Each tail feather is worked as a flat oval that grows outward through three rows, changing color at each row — gold at the center, carrot in the middle, medium purple on the outer edge. Fan five of those out behind a round buff-colored body, and the effect is genuinely striking, like a proper turkey displaying its plumage.
It’s also a wonderfully practical hosting piece. At 7¾” from the top of the center feather to the bottom of the body, each holder is substantial enough to look intentional on a plate but small enough that a full table’s worth doesn’t overwhelm the setting. And because they’re made from washable acrylic yarn, they can be stored and reused Thanksgiving after Thanksgiving rather than tossed like paper napkin rings.
Gathering Your Supplies
Yarn
Red Heart® Super Saver® — 1 skein each of:
- 334 Buff (Color A)
- 321 Gold (Color B)
- 319 Cherry Red (Color C)
- 3950 Charcoal (Color D)
- 256 Carrot (Color E)
- 528 Medium Purple (Color F)
Hook
- 4mm (US G-7) Susan Bates® Crochet Hook
Additional Supplies
- Yarn needle
- Stitch marker
- Two ⅜” (9.5mm) round buttons, for the eyes
Measurement and Gauge
Each finished silverware holder measures 7¾” (19.5 cm) from the top of the center feather down to the bottom of the body. Gauge is 6 single crochets = 1½” (4 cm) and 6 rounds = 1½” (4 cm). Take a moment to check your gauge before starting, especially if you’re making a full table’s worth and want them all to match in size.
Two Notes Before You Begin
- Both the head and the body are worked in continuous spiral rounds — do not join at the end of a round unless the pattern specifically says to. Place a stitch marker at the beginning of your round and move it up as each round completes.
- When changing colors, work the last stitch of your old color up until the final yarn over, then yarn over with the new color and draw it through all the loops on your hook to complete the stitch. Continue on in the new color, cutting the old one.
Crocheting the Head
With Color A (Buff), chain 2.
Round 1: Work 6 single crochets into the second chain from the hook — 6 sc. Place your marker on the first stitch.
Round 2: Work 2 single crochets into each stitch around — 12 sc.
Round 3: *Single crochet in the next stitch, 2 single crochets in the next stitch; repeat from * around — 18 sc.
Round 4: *Single crochet in each of the next 2 stitches, 2 single crochets in the next stitch; repeat from * around — 24 sc.
Round 5: *Single crochet in each of the next 3 stitches, 2 single crochets in the next stitch; repeat from * around — 30 sc.
Round 6: *Single crochet in each of the next 4 stitches, 2 single crochets in the next stitch; repeat from * around, then join with a slip stitch to your first single crochet — 36 sc. Fasten off, leaving a long tail for sewing.
Crocheting the Body (Make 2)
Rounds 1–6: Work exactly the same as Rounds 1 through 6 of the head. Do not join or fasten off at the end of that last round — you’ll keep going.
Round 7: *Single crochet in each of the next 5 stitches, 2 single crochets in the next stitch; repeat from * around — 42 sc.
Round 8: *Single crochet in each of the next 6 stitches, 2 single crochets in the next stitch; repeat from * around — 48 sc.
Round 9: *Single crochet in each of the next 7 stitches, 2 single crochets in the next stitch; repeat from * around, then join with a slip stitch to your first single crochet — 54 sc. Fasten off, leaving a long tail for sewing.
Make a second identical body piece — these two flat circles get sewn together during assembly to form the silverware pocket.
Crocheting the Beak
With Color B (Gold), chain 5. Slip stitch into the second chain from the hook, single crochet in the next chain, half double crochet in the next chain, then work 5 half double crochets into the last chain. Now, working into the opposite side of your foundation chain, work a half double crochet in the next chain, a single crochet in the next chain, and a slip stitch in the last chain. Fasten off, leaving a long tail for sewing.
That cluster of 5 half double crochets worked into the end chain is what turns a straight strip into a pointed, rounded beak shape as you pivot and work back along the other side.
Crocheting the Wattle
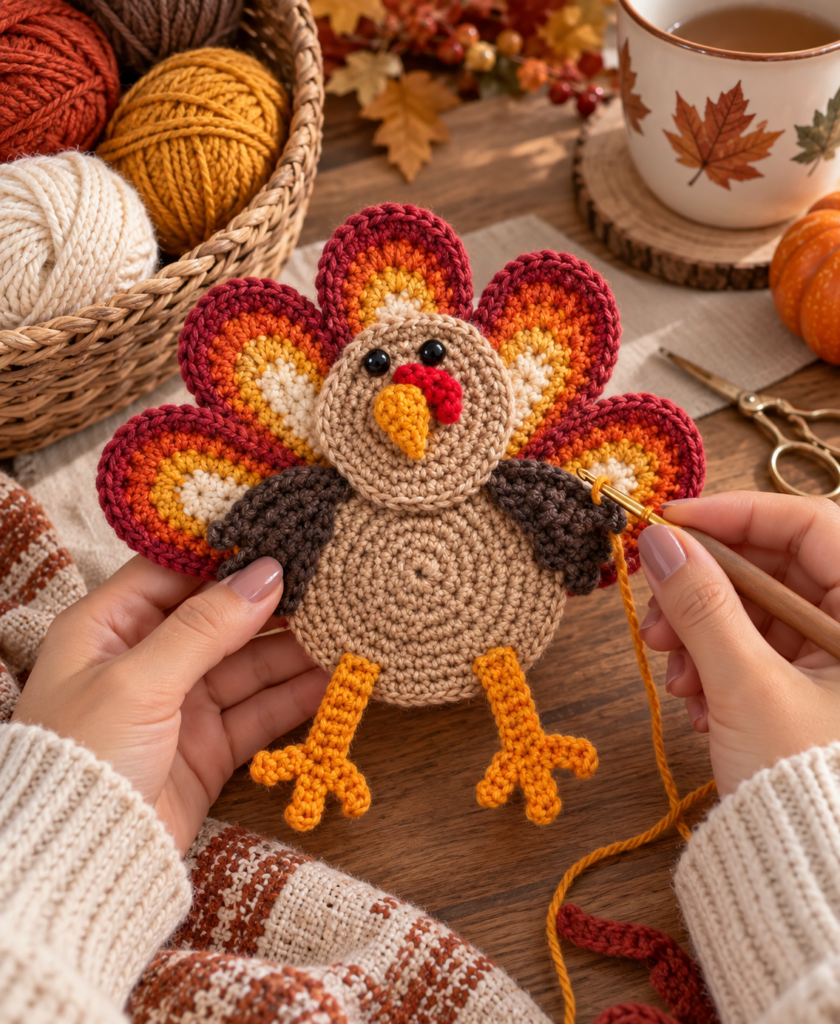
With Color C (Cherry Red), chain 6, then single crochet into the third chain from the hook, then slip stitch into each remaining chain. Fasten off, leaving a long tail for sewing. This tiny piece becomes the little red wattle hanging over the beak.
Crocheting the Wings (Make 2)
With Color D (Charcoal), chain 9.
Row 1: Single crochet in the second chain from the hook and in each remaining chain across. Turn — 8 sc.
Row 2: Chain 1, single crochet in the first 6 stitches, leaving the remaining stitches unworked. Turn — 6 sc.
Row 3: Chain 3, single crochet in the second chain from the hook and in the next chain, then single crochet in each stitch across. Turn — 8 sc.
Rows 4–7: Repeat Rows 2 and 3 twice more.
Fasten off, leaving a long tail. Weave that tail through the ends of the rows and pull tightly to gather, which curves the flat strip into a rounded, slightly cupped wing shape.
This alternating short-row technique (stopping early on one row, then chaining back out on the next) is what gives the wing its stepped, feathered edge along one side.
Crocheting the Legs (Make 2)
With Color B (Gold), chain 9.
Row 1: Single crochet in the second chain from the hook and in each remaining chain across. Turn — 8 sc.
Row 2: *Chain 5, single crochet into the second chain from the hook and in the next 3 chains, then slip stitch into the end of Row 1; repeat from * twice more. Now, working into the opposite side of your foundation chain, slip stitch in each chain. Fasten off, leaving a long tail for sewing.
Those three chain-5 spurs worked off the end of the leg are the turkey’s toes — a simple technique that produces a surprisingly convincing three-toed foot.
Crocheting the Tail Feathers (Make 5)
This is where the color magic happens. Each feather grows outward through three rows, changing color each time.
With Color B (Gold), chain 12.
Row 1 (Right Side): Single crochet in the second chain from the hook and in the next 3 chains, half double crochet in the next 5 chains, double crochet in the next chain, then work 6 double crochets into the last chain. Working into the opposite side of your foundation chain, work a double crochet in the next chain, half double crochet in the next 5 chains, and single crochet in the last 4 chains. Change to Color E (Carrot). Turn — 26 sts.
Row 2: Chain 1, single crochet in the first 6 stitches, half double crochet in the next 5 stitches, 2 double crochets in each of the next 4 stitches, half double crochet in the next 5 stitches, single crochet in the last 6 stitches. Change to Color F (Medium Purple). Turn — 30 sts.
Row 3: Chain 1, single crochet in the first 12 stitches, 2 double crochets in each of the next 6 stitches, then single crochet in the last 12 stitches — 36 sts. Fasten off.
Notice the pattern at work here: the increases are always concentrated at the rounded top end of the feather (those clusters of 6 double crochets and doubled stitches), while the sides stay mostly even. That’s what makes each feather grow outward as a teardrop rather than a widening rectangle, and it’s what lets each color ring nest neatly inside the next.
Make 5 feathers total.
Assembling Your Turkey
Refer to your photograph throughout for placement of all the pieces.
Building the face: Arrange the beak slightly above the center of the head and sew it in place. Sew the wattle on top of the beak. Sew the two buttons on as eyes, positioned above the beak and wattle.
Joining head to body: Overlap the head onto the first 4 rounds of one body piece and sew it securely in place.
Adding the wings: Sew the wings to the head and body, positioning them where they’ll look like they’re tucked at the turkey’s sides.
Fanning the feathers: Position your 5 tail feathers to form a fan shape, slightly overlapping their first 6 rows where they meet at the base, and sew them together using a strand of Color E. With the right side facing you, pin this completed feather fan to the back side of the body.
Creating the pocket: With wrong sides together, sew the two body pieces together around their edges, leaving an opening between the 3 center feathers unsewn. That opening is what turns the two flat circles into a pocket where the silverware slides in.
Finishing: Sew the legs in place, then weave in all your ends.
Frequently Asked Questions
How does this actually hold silverware — where does it go? The two body circles are sewn together back-to-back with a gap intentionally left unsewn at the top, between the three center tail feathers. That gap forms a pocket opening, and a fork, knife, and spoon slide right down into the space between the two body pieces.
How many of these would I need for a full Thanksgiving table? One per guest, since each holder accommodates a single place setting’s silverware. If you’re hosting eight, plan on eight turkeys — which is worth knowing early, since they’re quick individually but add up over a full table.
Can I make these in different colors than the ones specified? Absolutely. The gold-carrot-purple feather gradient is striking, but any warm autumn palette would work beautifully — think deep burgundy, burnt orange, and mustard, or even a more muted neutral scheme if your table setting calls for something subtler.
Why are the head and body worked in spiral rounds instead of joined rounds? Working in a continuous spiral avoids the visible seam line that joined rounds create running up the side of a circular piece. Since both the head and body are flat discs that will be seen from the front, a smooth, seamless surface looks noticeably better.
What creates the teardrop shape of the tail feathers? Each row concentrates its increases at the rounded end of the feather (those clusters of 6 double crochets in Row 1, and the doubled double crochets in Rows 2 and 3) while keeping the sides relatively even. That uneven distribution forces the feather to grow outward and round at one end while staying narrow at the base.
Can I use safety eyes instead of buttons? You could, though since the body pieces are sewn together as flat discs rather than stuffed, there’s no interior cavity to secure safety eye backings into. Sewn-on buttons (or embroidered eyes, if these will be handled by small children) are generally the more practical choice for this particular construction.
Are these washable, given they’ll be sitting on a dinner table? Red Heart Super Saver is a durable acrylic yarn that generally handles machine washing well, though it’s always worth checking your specific yarn label. Given that these sit on plates rather than under food, a gentle wash between seasons should be plenty of care.
Ready to Set Your Table
There’s something genuinely warm about a table setting that someone clearly made by hand. These little turkeys do exactly that — they’re playful without being childish, practical without being plain, and they’ll be the detail your guests remember long after the pie is gone.
Grab your hook, and let’s get your Thanksgiving table talking turkey.